

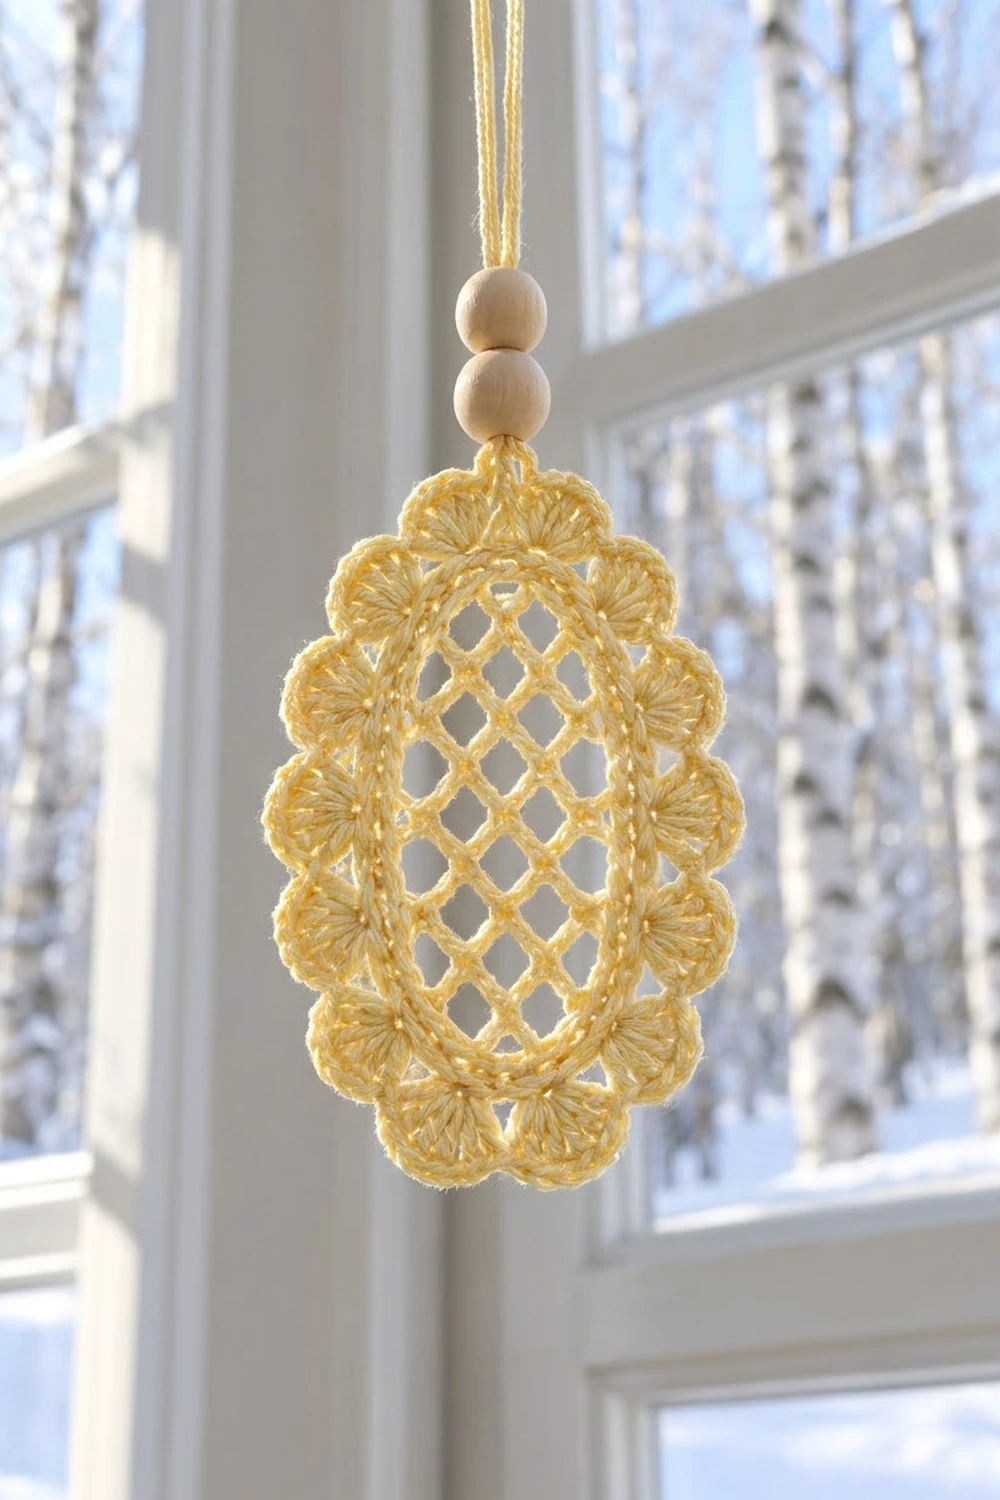
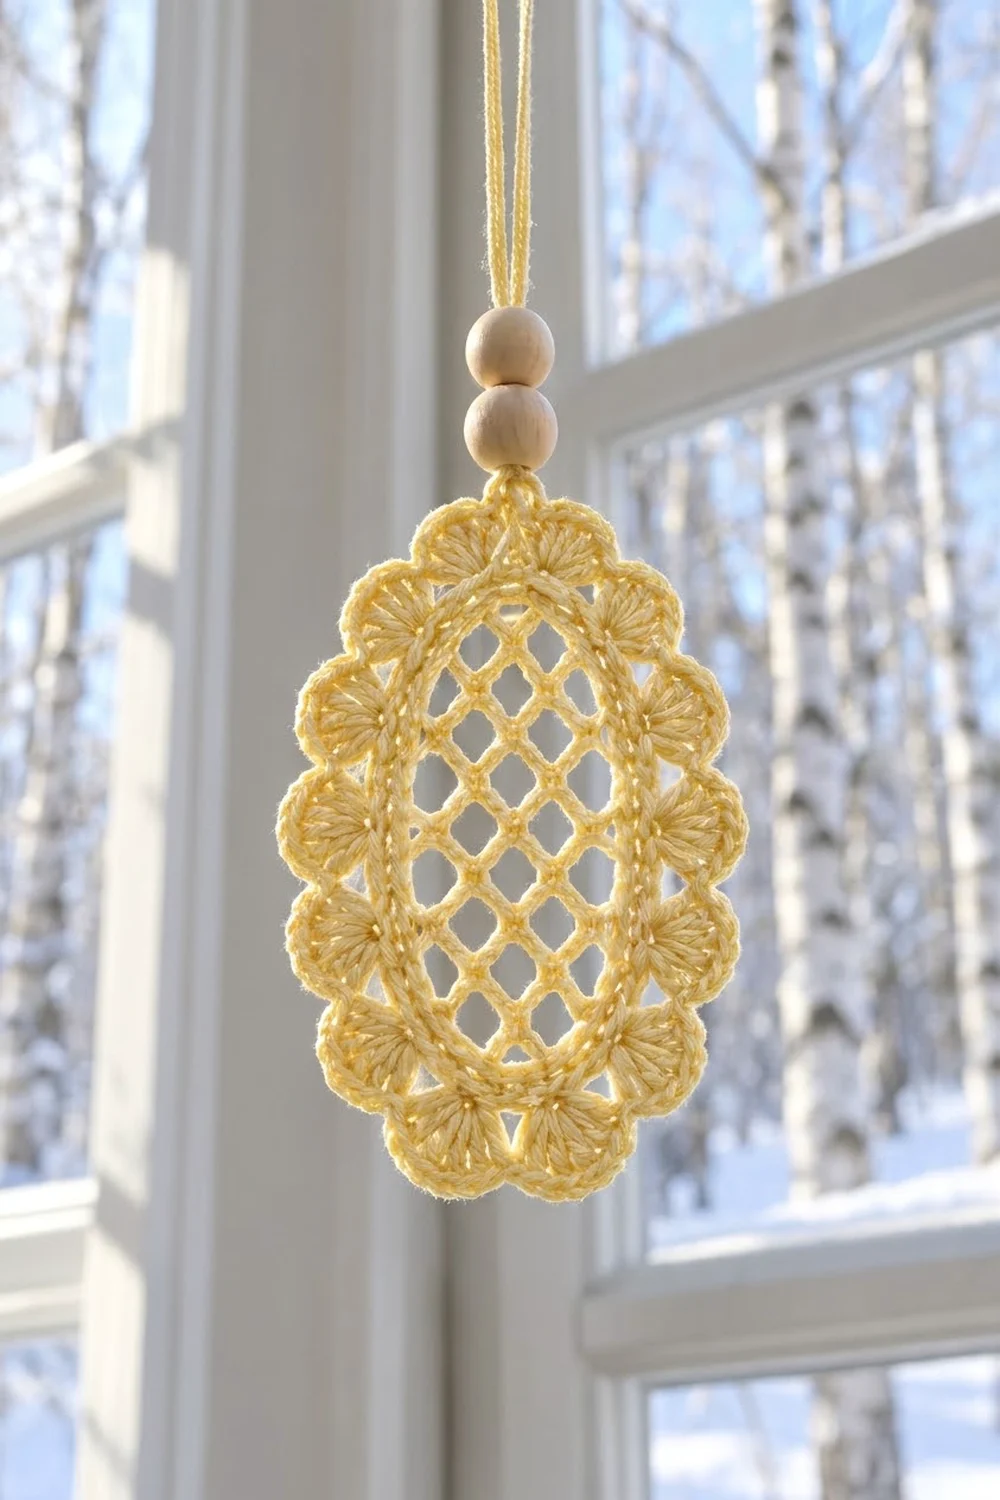
This small oval ornament is all about light. An open diamond lattice fills the center, a neat raised frame outlines it, and a ring of soft fan shells finishes the edge. When it hangs in a window, the lattice casts a small checked shadow and the shells look like lace.
The sample is made in one color, a pale butter-yellow mercerized cotton thread. It hangs from a doubled cord with two natural wooden beads. The style is calm and Scandinavian: one soft color, round wooden beads, and lots of open space.
This pattern uses US crochet terms. The finished ornament measures 4.25 x 6.5 in (10.8 x 16.5 cm) after blocking, not counting the hanging cord.
The construction is simple. You chain a short foundation and work three rounds of chain-loop mesh around both sides of it. Then you cover the loops with a solid single crochet frame, add one round of double crochet, and finish with a shell edge. The ornament is one piece with no sewing. The hanger goes on last.
Finished Size and Construction
- Finished size: 4.25 x 6.5 in (10.8 x 16.5 cm), blocked, without the hanger
- Skill level: Easy-intermediate (you should be comfortable working in rounds and into chain loops)
- Terminology: US crochet terms
- Yarn weight: Size 3 mercerized cotton crochet thread (Lace / 0)
- Hook: 2.5 mm
- Number of pieces: 1 oval motif
- Layout: One upright oval, hung from its narrow end
- Piece size: 4.25 x 6.5 in (10.8 x 16.5 cm)
- Size before border: 3.25 x 5.5 in (8.3 x 14.0 cm) after Round 5
- Border depth: 0.5 in (1.3 cm) shell edge on all sides
Materials
Yarn advice: Choose a smooth, tightly twisted size 3 mercerized cotton thread. Mercerized cotton gives crisp stitches, takes starch well, and keeps the lattice open. Avoid fuzzy or very soft yarns. With those, the mesh collapses and the shells lose their shape.
Yarn quantity:
- Butter yellow: 10 g, about 40 m (44 yd), for one ornament
One ornament uses about 8 g. The amount above includes a margin for a possible restart and for the hanging cord.
Tools:
- 2.5 mm crochet hook
- 2 natural wooden beads, 12 mm (0.47 in / 1.2 cm), with holes at least 3 mm wide
- 4 locking stitch markers
- Tapestry needle with an eye large enough for doubled thread
- Small scissors
- Ruler or tape measure
- Foam blocking board and rust-proof pins
- Fabric stiffener or starch spray (optional but recommended)
Abbreviations (US Terms)
- ch – chain
- sl st – slip stitch
- sc – single crochet
- dc – double crochet
- st(s) – stitch(es)
- ch-5 loop – a loop made of 5 chains
- Rnd – round
- [ ] x times – repeat the steps in brackets the stated number of times
Special stitches:
- Shell: 9 dc in the same stitch.
- Closing loop: ch 2, dc in the first sc of the round. This replaces the last ch-5 loop, counts as one ch-5 loop, and leaves your hook in the middle of that loop, ready for the next round.
Gauge and Checkpoints
Gauge: 32 sc = 4 in (10.2 cm), or 8 sc per 1 in (2.5 cm), with a 2.5 mm hook.
This is one small piece, so the first ornament is your test. Make it once and measure at each checkpoint below. Adjust before you make a set.
Checkpoints:
- Foundation of 18 ch: about 2.25 in (5.7 cm) long
- After Rnd 3 (mesh): about 2.25 x 4.5 in (5.7 x 11.4 cm), loops gently stretched
- After Rnd 4 (sc frame): about 2.75 x 5 in (7.0 x 12.7 cm)
- After Rnd 5 (dc round): about 3.25 x 5.5 in (8.3 x 14.0 cm)
- After Rnd 6 (shells), blocked: 4.25 x 6.5 in (10.8 x 16.5 cm)
If your piece is too big: switch to a 2.25 mm hook, or chain more tightly so each ch-5 loop is shorter.
If your piece is too small: switch to a 2.75 mm hook.
If only the mesh is off: the ch-5 loops control the lattice. Loose chains make a floppy mesh that buckles inside the frame. Tight chains make the frame ruffle. Fix your chain tension before you change hooks.
Pattern
Work in joined rounds without turning, with the right side facing you the whole time. Each round starts at one narrow end, called end A. The other narrow end is end B.
Foundation and Mesh Center
Foundation: Ch 18.
Rnd 1 (mesh, 12 loops): Sc in 2nd ch from hook (end A). [Ch 5, skip 3 ch, sc in next ch] 4 times. The last sc lands in the first chain you made (end B). [Ch 5, sc in same ch] 2 times. Now work along the other side of the foundation chain: [ch 5, skip 3 ch, sc in next ch] 4 times. The last sc lands at the base of the first sc (end A). Ch 5, sc in same ch. Work a closing loop.
Count: 12 loops (4 along each side + 2 at each end).
Rnd 2 (mesh, 16 loops): Ch 1. Work (sc, ch 5, sc) in the closing loop. [Ch 5, sc in next loop] 4 times. [Ch 5, (sc, ch 5, sc) in next loop] 2 times. [Ch 5, sc in next loop] 4 times. Ch 5, (sc, ch 5, sc) in next loop. Work a closing loop.
Put a marker in each of the 4 ch-5 loops made inside a (sc, ch 5, sc) group. These 4 loops sit at the tips of the two ends.
Count: 16 loops. That is 12 anchor points plus 4 extra in the 4 end loops.
Rnd 3 (mesh, 20 loops): Ch 1, sc in the closing loop. [Ch 5, sc in next loop] around, but in each of the 4 marked loops work (sc, ch 5, sc) instead of a single sc. After the last anchor sc, ch 5 and sl st in the first sc. Do not use a closing loop on this round. Remove the markers.
Count: 20 full ch-5 loops (16 + 4 increases).
Checkpoint: gently stretch the piece into an oval. It should be about 2.25 x 4.5 in (5.7 x 11.4 cm), with diamond-shaped openings in neat diagonal lines.
Solid Frame
Rnd 4 (conversion round, 100 sc): Sl st into the first ch-5 loop. Ch 1, work 5 sc in each ch-5 loop around. Join with sl st to the first sc.
Count: 20 loops x 5 sc = 100 sc.
This round fills every loop and forms the raised outline around the lattice. Spread the sc evenly along each loop so they don’t bunch at one end. Checkpoint: about 2.75 x 5 in (7.0 x 12.7 cm).
Rnd 5 (growth round, 104 dc): Ch 3 (counts as the first dc). Dc in each of the next 10 sc, 2 dc in the next sc. [Dc in each of the next 24 sc, 2 dc in the next sc] 3 times. Dc in each of the last 13 sc. Join with sl st to the top of the ch 3.
Count: 104 dc. Check: 11 + 2 + (3 x 26) + 13 = 104. Stitches used from Rnd 4: 12 + 75 + 13 = 100, so every sc gets worked.
The 4 increases go into stitches 12, 37, 62, and 87 of Rnd 4. These are the 4 curves of the oval, where the outline needs a little more length. Checkpoint: about 3.25 x 5.5 in (8.3 x 14.0 cm). The piece should lie flat, without cupping or rippling.
Border
The shell round is the border. You work it straight into Rnd 5, so its math depends only on the 104 dc from that round.
Border gauge: Each shell repeat (1 sc + 1 shell) uses 8 sts of Rnd 5. That is 1 in (2.5 cm) of edge at 8 sts per inch. Each shell stands about 0.5 in (1.3 cm) tall.
Rnd 6 (shells, 13 shells): Ch 1, sc in the same st as the join. [Skip 3 dc, shell in next dc, skip 3 dc, sc in next dc] 12 times. Skip 3 dc, shell in next dc, skip 3 dc. Join with sl st to the first sc. Fasten off.
Count: 13 sc + 13 shells (13 x 9 = 117 dc) = 130 sts.
Counts per side: Each long side has 6 full sc-and-shell repeats, which use 48 sts of Rnd 5. The 7th shell sits in st 53, right at end B, exactly opposite the starting sc. It is shared by both sides: 6 + 6 + 1 = 13 shells.
Why the math works: 104 / 8 = 13 with nothing left over, so every repeat fits and no shell gets squeezed. Because 13 is odd, there is an sc at end A and a full shell directly opposite at end B. That gives a flatter hanging point at the top and a full fan at the bottom, which is exactly how the ornament hangs.
Hanger
Cut a 20 in (50.8 cm) length of thread and fold it in half. Push the fold through the first sc of Rnd 6 (end A) from front to back. Pull the tails through the fold and tighten it into a lark’s head knot.
Thread both tails through the 2 wooden beads together. Slide the beads down until the lower bead sits about 0.25 in (0.6 cm) above the ornament. Tie the tails in an overhand knot about 4 in (10.2 cm) above the top bead to make a hanging loop. Trim the ends to 0.25 in (0.6 cm).
If doubled thread won’t fit through the bead holes, pass a single strand through the beads and knot each tail separately.
Final Blocking
- Weave in all thread ends along the back of the sc or dc stitches. Don’t weave them through the mesh, where they would show.
- Soak the ornament in cool water for 5 minutes. Press out the water in a towel without wringing.
- For a crisp ornament, dip it in fabric stiffener now and blot off the excess.
- Pin the centers of end A and end B first, stretching the piece to 6.5 in (16.5 cm) long.
- Pin the widest point of each side so the width is 4.25 in (10.8 cm).
- Pin the tip of every shell, spacing them evenly. Put one pin in each sc between shells to sharpen the scallops.
- Use a pin or a blunt needle to open each diamond in the lattice so the openings line up in straight diagonals.
- Let the ornament dry completely, at least 12 hours, before you remove the pins. You can attach the hanger after drying if you like.
Final Quality-Control Checklist
- Rnd 1 has 12 loops, Rnd 2 has 16, and Rnd 3 has 20.
- Rnd 4 has 100 sc, Rnd 5 has 104 dc, and Rnd 6 has 13 shells.
- The sc frame is even and fully covers every ch-5 loop.
- The piece lies flat with no cupping or ruffling.
- An sc sits at the top center (end A) and a shell sits at the bottom center (end B).
- The blocked size is 4.25 x 6.5 in (10.8 x 16.5 cm).
- All ends are hidden in solid stitches, not in the mesh.
- Both beads sit snugly above the ornament and the hanging loop is secure.
Troubleshooting
The mesh puckers inside the frame. Your ch-5 loops are too long. Chain more tightly, or use a smaller hook for Rnds 1-3 only.
The frame ruffles. The loops are too short to hold 5 sc each. Loosen your chains, or work Rnd 4 with a slightly larger hook.
The oval looks round instead of long. Check that Rnd 1 has exactly 4 loops along each side of the foundation. A short foundation chain makes a rounder shape.
The ends look pointed. Work the Rnd 2 and Rnd 3 increases only in the tip loops, not along the sides.
Rnd 6 doesn’t end evenly. Recount Rnd 5. You need exactly 104 dc for 13 repeats of 8 sts.
The shells curl forward. Block with stiffener and pin each shell tip flat. If they still curl a lot, your dc are tighter than your sc, so relax your tension on Rnd 6.
The ornament hangs crooked. The hanger isn’t in the center sc of end A. Move the lark’s head to the sc directly opposite the bottom shell.
Care
Hand wash in cool water with mild soap, press dry in a towel, and dry flat in shape. If you used stiffener, block the ornament again after washing to bring back its crisp shape.
Final Notes
The measurements build on each other in a short chain. The gauge is 8 sc per 1 in (2.5 cm). The 18-chain foundation is about 2.25 in (5.7 cm). Three mesh rounds grow from 12 to 16 to 20 loops and reach about 2.25 x 4.5 in (5.7 x 11.4 cm). The frame turns 20 loops into 100 sc at 2.75 x 5 in (7.0 x 12.7 cm). The dc round adds 4 increases at the curves for 104 dc at 3.25 x 5.5 in (8.3 x 14.0 cm). Finally, 104 stitches divide into 13 shell repeats of 8. The shells add 0.5 in (1.3 cm) on every side, for a blocked size of 4.25 x 6.5 in (10.8 x 16.5 cm).
Make one, check each number, and then fill a whole window. Happy crocheting!