

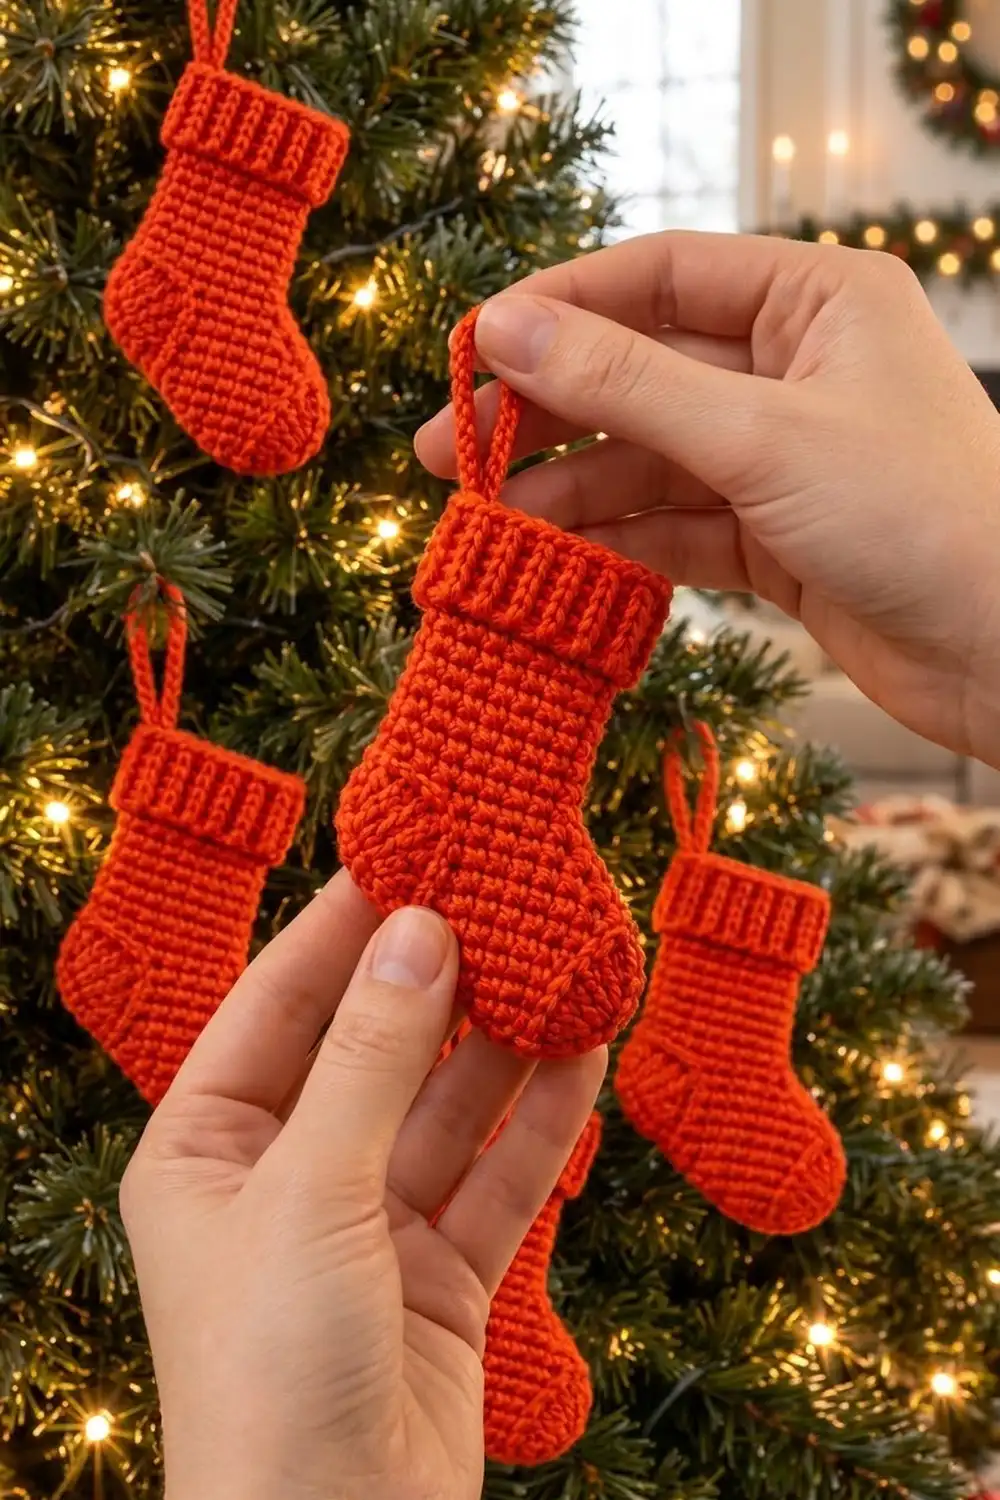
The Hearthside Mini Stocking is a small Christmas ornament with a ribbed cuff. It is made in one cheerful poppy red-orange. The body is firm, even single crochet with a rolled edge, and the cuff has crisp vertical ribs. A sturdy corded loop sits at the top back corner, so it hangs straight on a branch.
The style is classic and cozy, like a full-size knit stocking shrunk down to tree size. One color keeps it simple, and the texture gives it character. Make one as a gift tag, or make a handful to hang on the tree one by one.
This pattern uses US crochet terms. The finished ornament measures 3 in (7.6 cm) wide across the foot and 3.4 in (8.6 cm) tall. The loop adds 1.2 in (3.0 cm), so the total height is 4.6 in (11.7 cm).
Construction is simple. First you work the stocking body flat in rows from the top of the leg down, shaping the heel and toe with increases and decreases. Then you add one round of edging. Next you work the cuff separately as a short ribbed strip and sew it across the top. Last, you crochet the hanging loop directly onto the corner.
Finished Size and Construction
- Finished size: 3 in (7.6 cm) wide × 3.4 in (8.6 cm) tall, plus a 1.2 in (3.0 cm) loop
- Skill level: Easy (advanced beginner)
- Terminology: US crochet terms
- Yarn weight: Worsted (#4)
- Hook: 3.5 mm (E-4)
- Number of pieces: 1 ornament (body plus a separately worked cuff, sewn on)
- Layout: Single standalone piece; no joining of motifs
- Body size before border: 2.6 in (6.6 cm) across the foot × 3 in (7.6 cm) tall
- Leg width before border: 1.8 in (4.6 cm)
- Border depth: 0.2 in (0.5 cm) on every edge
- Cuff size: 2.5 in (6.4 cm) wide × 0.8 in (2.0 cm) tall
Materials
Yarn: Use a smooth worsted-weight yarn with good stitch definition. Acrylic and cotton-acrylic blends are both good choices. Avoid fuzzy or boucle yarns, because they hide the cuff ribs. Pick a saturated red-orange or bright poppy red to match the photographed piece.
- Poppy red-orange: 10 g, about 20 m (22 yd)
This quantity includes a margin for your gauge swatch, sewing tails, and the hanging loop. One ornament uses about 6 g. If you are making several, plan on 10 g per ornament.
Tools:
- 3.5 mm (E-4) crochet hook
- Tapestry needle
- Scissors
- 2 locking stitch markers
- Ruler or measuring tape
- Rust-proof pins and a foam blocking mat
- Spray bottle with clean water
Abbreviations (US Terms)
- ch: chain
- sc: single crochet
- sl st: slip stitch
- st(s): stitch(es)
- sc2tog: single crochet 2 together (decrease)
- BLO: back loop only
- RS / WS: right side / wrong side
Special stitches:
- sc2tog: Insert the hook in the next stitch, yarn over, and pull up a loop. Insert the hook in the following stitch, yarn over, and pull up a loop. Yarn over and pull through all 3 loops on the hook.
- Surface slip stitch: Hold the yarn behind the work. Insert the hook from front to back through the fabric, pull up a loop, and draw it through the loop on the hook.
Gauge and Checkpoints
Gauge: 10 sc and 12 rows = 2 in (5.1 cm) in single crochet worked in rows, with a 3.5 mm hook. That works out to 5 sc and 6 rows per 1 in (2.5 cm).
Work tightly and evenly. This ornament should be firm enough to hold its shape without stuffing.
Test one piece first. Make the stocking body (Rows 1–18) before you commit to a batch. The body is your swatch.
Checkpoints:
- After Row 1: The strip of 9 sc measures 1.8 in (4.6 cm).
- After Row 11: The leg measures 1.8 in (4.6 cm) wide and about 1.8 in (4.6 cm) tall.
- After Row 18: The foot measures 2.6 in (6.6 cm) at its widest (Rows 14–16), and the body is 3 in (7.6 cm) tall.
- After the edging round: The body measures 3 in (7.6 cm) across the foot, 2.2 in (5.6 cm) across the leg, and 3.4 in (8.6 cm) tall.
- Cuff: The cuff measures 2.5 in (6.4 cm) × 0.8 in (2.0 cm).
If your piece is too big: Go down to a 3.25 mm (D-3) hook, or tighten the yarn between your fingers.
If your piece is too small: Go up to a 3.75 mm (F-5) hook.
Don’t change the stitch counts. The shaping and border math depend on them.
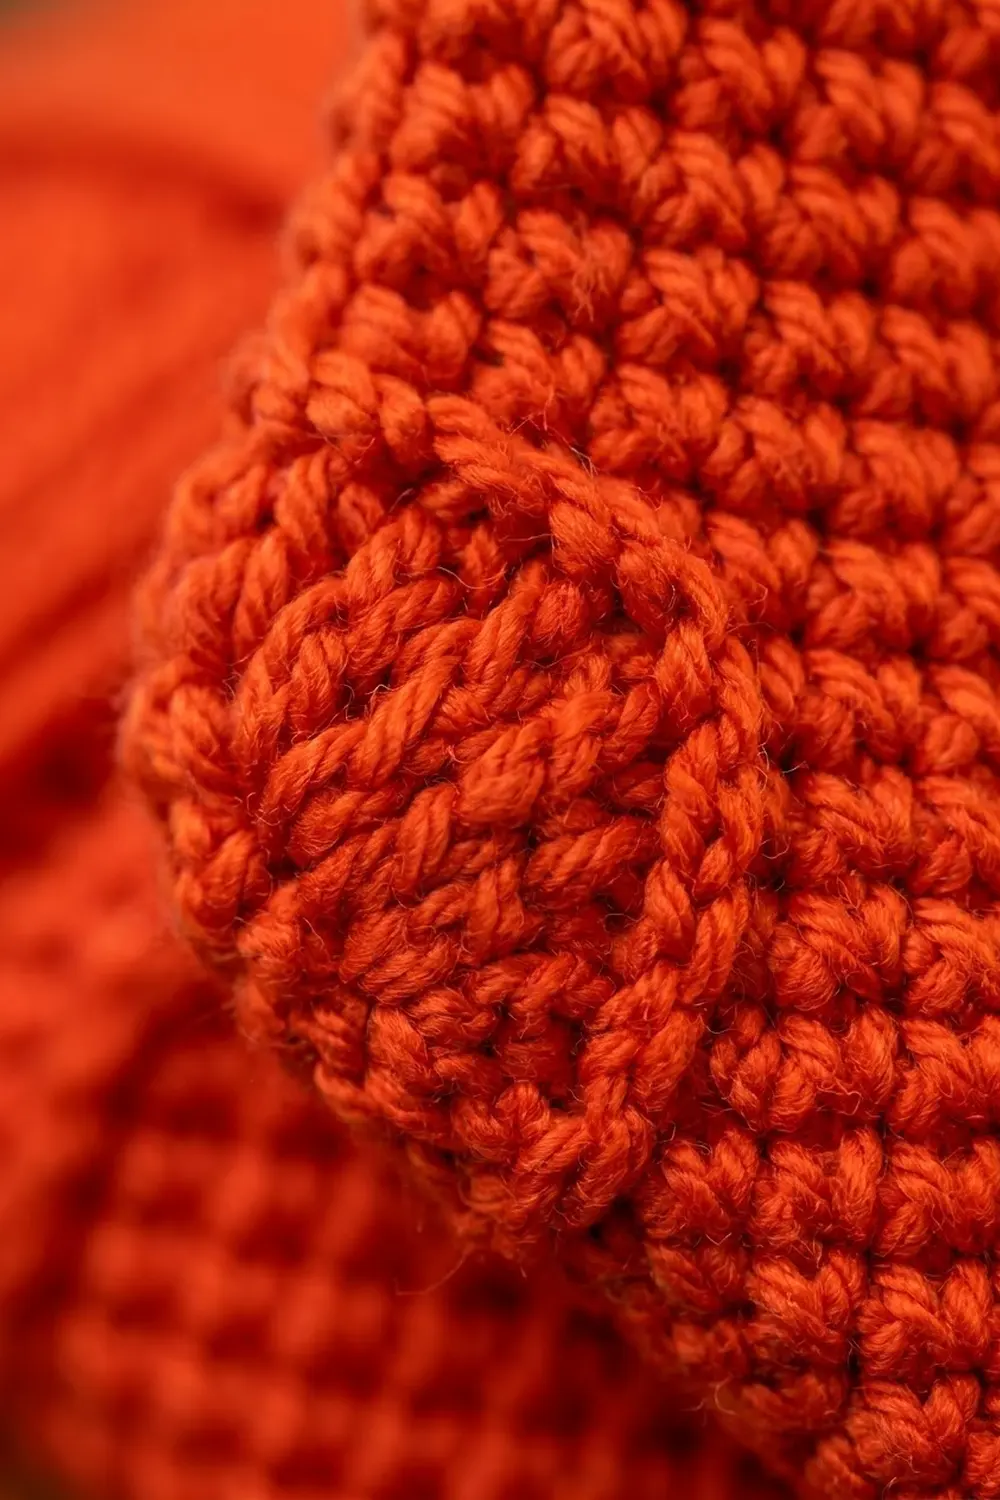
Pattern: Stocking Body
The body is worked flat in rows, from the top of the leg down to the sole. Ch 1 at the start of each row does not count as a stitch.
Ch 10.
Row 1: Sc in 2nd ch from hook and in each ch across, turn. (9 sc)
Place a marker in the last sc of Row 1. That edge is the heel (back) edge, and the opposite edge is the toe (front) edge. From now on:
- Even-numbered rows begin at the heel edge.
- Odd-numbered rows begin at the toe edge.
Rows 2–11: Ch 1, sc in each st across, turn. (9 sc per row)
Checkpoint: the leg measures 1.8 in (4.6 cm) wide.
Heel and Toe Shaping
Row 12 (starts at heel edge): Ch 1, sc in next 8 sts, 2 sc in last st (toe increase), turn. (10 sc)
Row 13 (starts at toe edge): Ch 1, 2 sc in first st (toe increase), sc in next 8 sts, 2 sc in last st (heel increase), turn. (12 sc)
Row 14 (starts at heel edge): Ch 1, sc in next 11 sts, 2 sc in last st (toe increase), turn. (13 sc)
Rows 15–16: Ch 1, sc in each st across, turn. (13 sc per row)
Checkpoint: the foot measures 2.6 in (6.6 cm) across.
Rounding the Sole
Row 17 (starts at toe edge): Ch 1, sc2tog, sc in next 9 sts, sc2tog, turn. (11 sc)
Row 18 (starts at heel edge): Ch 1, sc2tog, sc in next 7 sts, sc2tog. (9 sc)
Don’t fasten off. Go straight to the Border section; the edging is worked from this working loop.
Shape check: The toe edge has 3 increases and 2 decreases, so it extends forward and rounds off. The heel edge has 1 increase and 2 decreases, so it bulges slightly past the leg line and curves back in. That gives the asymmetric stocking shape in the photo, with the toe clearly pointing forward.
Pattern: Ribbed Cuff
The cuff is a short strip worked in BLO rows. The rows run vertically on the finished stocking, so each pair of rows forms one raised rib.
Ch 5.
Row 1: Sc in 2nd ch from hook and in each ch across, turn. (4 sc)
Rows 2–15: Ch 1, sc BLO in each st across, turn. (4 sc per row)
Checkpoint: the strip measures 2.5 in (6.4 cm) long (15 rows ÷ 6 rows per in) and 0.8 in (2.0 cm) high (4 sc ÷ 5 sc per in).
Top edge: Don’t turn. Ch 1, rotate the strip, and sl st loosely in each row end along one long edge. (15 sl st)
This gives the cuff the neat, slightly rolled top edge seen in the photo. Fasten off, leaving a 12 in (30.5 cm) tail for sewing.
Optional Heel Line
The photo shows a faint curved line across the heel. To add it, wait until after the edging round. Then, with RS facing and new yarn held behind the work, start at the heel edge on Row 12. Work 6 surface slip stitches in a gentle curve down to Row 17, ending about 0.8 in (2.0 cm) in from the heel edge. Fasten off and weave in the ends on the WS. Keep these stitches loose so the fabric doesn’t pucker.
Border
Border gauge: 5 sc per 1 in (2.5 cm) along every edge, the same as the body gauge. Along row ends, you work 5 sc for every 6 rows. That matches the 6 rows per inch of the body, so the edges lie flat.
Edging Round (RS facing):
- Corner turn: From the working loop at the end of Row 18 (the toe-side bottom corner), ch 1 and turn the piece so you can work up the toe edge.
- Toe edge: Work 15 sc evenly into the row ends of Rows 17 down to 1, skipping the row ends of Rows 12 and 6. That is 17 row ends minus 2 skipped. (15 sc)
- Top edge: Work into the unused loops of the foundation chain (the 9 ch under the Row 1 sts). Work 3 sc in the first ch (corner), sc in next 7 ch, and 3 sc in the last ch (corner). (13 sc)
- Heel edge: Work 15 sc into the row ends of Rows 1–17, skipping Rows 6 and 12. (15 sc)
- Bottom edge (Row 18 sts): Work 2 sc in the first st, sc in next 7 sts, and 2 sc in the last st. (11 sc)
- Join: Sl st to the first sc of the round. The skipped Row 18 row end on each side is covered by the 2-sc corners.
Round total: 15 + 13 + 15 + 11 = 54 sc. Fasten off and weave in the ends.
Why the math works:
- Side edges: Each one is 18 rows = 3 in (7.6 cm). 15 sc at 5 sc per inch also equals 3 in, so the sides don’t stretch or ruffle.
- Top edge: The 9 base stitches = 1.8 in (4.6 cm). The 3-sc corners add 1 extra stitch on each side of each corner (4 extras in total, 13 sc) to turn the square corners without cupping.
- Bottom edge: The 2-sc stitches at each end add 2 extras (11 sc) to round the sole into the heel and toe curves.
- Size: The border adds 0.2 in (0.5 cm) on every side. So 2.6 in + 0.4 in = 3 in (7.6 cm) across the foot, 1.8 in + 0.4 in = 2.2 in (5.6 cm) across the leg, and 3 in + 0.4 in = 3.4 in (8.6 cm) tall.
Attach the Cuff
- Lay the body RS up. Place the cuff across the top with its sl st edge lined up with the top of the edged body.
- Center the cuff. The 2.5 in (6.4 cm) cuff over the 2.2 in (5.6 cm) leg leaves 0.15 in (0.4 cm) of overhang on each side, just like the photo.
- Pin it in place. The cuff covers the top 0.8 in (2.0 cm) of the body.
- Using the long tail, whipstitch the lower long edge of the cuff to the body, working through the back loops of the cuff stitches so the seam stays hidden.
- Tack the two short ends and the top edge to the body with a few small stitches.
- Weave in the tail on the back.
Hanging Loop
- With RS facing, join the yarn with a sl st at the top heel-side corner, working through both the cuff and the body.
- Ch 14, then sl st in the same corner to form a loop.
- Work 18 sc over the chain loop, packing them tightly so the chain is fully covered.
- Sl st at the base and fasten off.
- Weave the ends down into the cuff seam.
The finished loop stands about 1.2 in (3.0 cm) tall and has the thick, corded look of the original.
Final Blocking
- Lightly mist the ornament with water until it is damp, not soaked.
- Lay it RS up on the blocking mat.
- Pin the foot to 3 in (7.6 cm) across and the body to 3.4 in (8.6 cm) tall.
- Pin the leg straight at 2.2 in (5.6 cm) wide. Check that the cuff overhangs evenly, about 0.15 in (0.4 cm) on each side.
- Ease the heel and toe into smooth curves with your fingertips. Don’t pin points into the curves.
- Pull the hanging loop straight up and pin it at its tip.
- Let it dry completely, usually 4–6 hours, before unpinning.
Final Quality-Control Checklist
- Body stitch counts: 9 sc at Rows 1–11, then 10, 12, 13, 13, 13, 11, and 9 sc for Rows 12–18
- Edging round totals 54 sc (15 + 13 + 15 + 11)
- Cuff is 15 rows of 4 sc, with 15 sl st along the top edge
- Toe points forward and the heel bulges slightly past the leg line
- Cuff ribs run vertically and the cuff overhangs evenly on both sides
- Loop is at the heel-side top corner and the stocking hangs straight
- No visible tails on the RS
- Finished size is 3 in (7.6 cm) × 3.4 in (8.6 cm), plus a 1.2 in (3.0 cm) loop
Troubleshooting
- Edges ruffle: You probably worked into every row end. Skip the row ends of Rows 6 and 12 as written.
- Edges pull in or cup: Your border tension is tighter than your body tension. Loosen up, or use a 3.75 mm (F-5) hook for the edging round only.
- Toe looks blunt: Check that the Row 12 and Row 14 increases are on the toe edge. The marker from Row 1 tells you which side is the heel.
- Ribs are faint: Make sure every cuff row after Row 1 is worked in the back loop only.
- Cuff is too narrow: Add 1 row (2.5 in to about 2.7 in, or 6.4 cm to 6.9 cm). Odd row counts keep both short ends looking the same.
- Ornament hangs crooked: The loop is off-center at the corner. Re-anchor it through both layers right at the corner stitch.
- Fabric is floppy: Your gauge is loose. Drop a hook size and remake the body.
Care
Hand wash in cool water, press out the excess with a towel, and dry flat, reshaping the heel and toe. Store flat or hanging, away from crushing weight.
Final Notes
The measurement chain is short and reliable:
- Gauge of 5 sc and 6 rows per 1 in (2.5 cm) gives a leg of 1.8 in (4.6 cm).
- Shaping widens the foot to 2.6 in (6.6 cm) over a 3 in (7.6 cm) body.
- One 54-sc edging round adds 0.2 in (0.5 cm) on every side, for 3 in × 3.4 in (7.6 cm × 8.6 cm).
- The 2.5 in (6.4 cm) ribbed cuff and the 1.2 in (3.0 cm) loop finish the look.
If you hit gauge at the body checkpoint, every piece after that will fit. Make one, then make a few more to hang across the tree.
Happy crocheting!