

The Ivory Grace Angel is a small lace ornament with an old-fashioned heirloom look. It has a round stuffed head, a slim bodice, a flared bell skirt with a scalloped hem, and two open fan wings that catch the tree lights.
The whole angel uses one color, a soft cream or ivory cotton thread. That keeps the look classic and lets the stitch texture show: tight single crochet on the head and bodice, airy double crochet on the skirt, and lacy shells around the hem.
This pattern uses US crochet terms. The finished angel is 3.6 in (9.1 cm) tall and 3.6 in (9.1 cm) wide at the hem, with a 3.5 in (8.9 cm) wingspan and a 3 in (7.6 cm) hanging loop.
You work the head, bodice and skirt as one continuous piece in joined rounds, from the top of the head down to the hem. Then you make two small wings separately, sew them to the back, and block the skirt over a cone so it holds its bell shape.
Finished Size and Construction
- Finished size: 3.6 in (9.1 cm) tall × 3.6 in (9.1 cm) wide at the hem; wingspan 3.5 in (8.9 cm)
- Skill level: Intermediate
- Terminology: US crochet terms
- Yarn weight: Size 3 cotton crochet thread (Lace / Super Fine)
- Hook: 2.25 mm (US B-1)
- Number of pieces: 1 ornament, made from 1 head-and-body piece + 2 wings + 1 hanging loop
- Layout: One standalone ornament (not joined to anything else)
- Head diameter: 0.8 in (2.0 cm)
- Size before border: 3.1 in (7.9 cm) tall × 3.4 in (8.6 cm) wide at the skirt edge, measured flattened
- Border depth: 0.5 in (1.3 cm), the scalloped hem
- Wing size: 1.5 in (3.8 cm) wide × 1.4 in (3.6 cm) tall each
Materials
Yarn: Use a mercerized size 3 cotton crochet thread. Mercerized cotton has crisp stitch definition and takes stiffener well, so the skirt and wings stay in shape. Avoid fuzzy or acrylic thread, because it softens the lace and won’t hold a starched shape.
- Cream / Ivory: 10 g, about 27 m
This amount includes a margin of about 30% for your gauge swatch and the hanging loop.
Tools:
- 2.25 mm (US B-1) crochet hook
- Tapestry needle
- 1 stitch marker
- A small pinch of polyester fiberfill, for the head
- Fabric stiffener, or a strong starch solution
- A cardstock cone 3.5 in (8.9 cm) tall with a 3.4 in (8.6 cm) base diameter, wrapped in plastic wrap
- Rustproof pins and a foam blocking board
- Scissors
Abbreviations (US Terms)
- ch – chain
- sl st – slip stitch
- sc – single crochet
- dc – double crochet
- tr – treble crochet
- inc – 2 sc in the same stitch
- dec – sc2tog (single crochet 2 together)
- sk – skip
- sp(s) – space(s)
- st(s) – stitch(es)
- rep – repeat
Special stitches:
- Picot: Ch 3, then sl st in the 3rd ch from the hook.
- Shell: 5 dc in the same stitch.
Gauge and Checkpoints
Gauge:
- In sc: 7 sc and 8 rounds = 1 in (2.5 cm)
- In dc: 7 dc and 3.5 rounds = 1 in (2.5 cm)
Make a 2 in (5.1 cm) sc swatch of 14 sc × 16 rows before you start. A single angel works up quickly, so treat your first angel as the real gauge test, and measure at each checkpoint below.
Checkpoints:
- After Round 9 (head): The head is 0.8 in (2.0 cm) across.
- After Round 14 (bodice): The bodice is 0.9 in (2.3 cm) wide when flattened. Head plus bodice is 1.4 in (3.6 cm) tall.
- After Round 20 (skirt): The skirt edge is 3.4 in (8.6 cm) wide when flattened. The total height is 3.1 in (7.9 cm).
- After Round 22 (border): The hem is 3.6 in (9.1 cm) wide and the total height is 3.6 in (9.1 cm).
If your angel comes out too big: go down to a 2.0 mm hook.
If it comes out too small: go up to a 2.5 mm hook.
Don’t add or remove stitches to fix size. The scallop math depends on exactly 48 stitches.
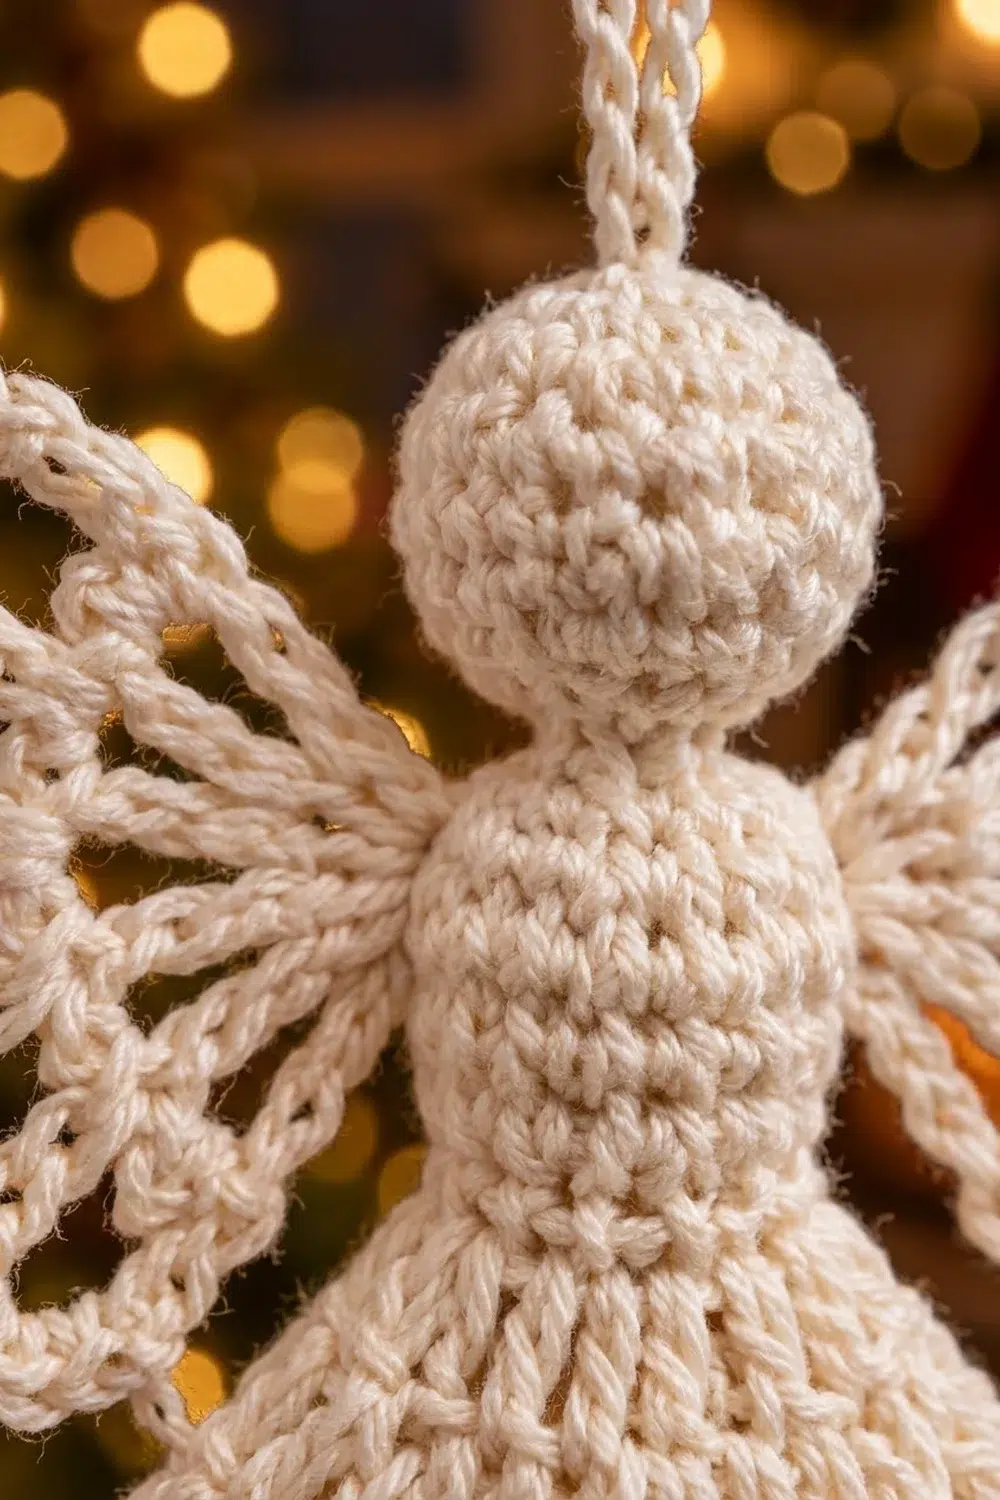
Head and Body Pattern
The rounds are joined and are not turned. Where a round starts with ch 3, that ch 3 counts as the first dc. Put a marker in the first stitch of each sc round.
Head (sc spiral, joined)
- Round 1: Make a magic ring, ch 1, work 6 sc in the ring, sl st to the first sc. (6 sts)
- Round 2: Ch 1, inc in each st around, sl st to join. (12 sts)
- Round 3: Ch 1, (sc in next st, inc) 6 times, sl st to join. (18 sts)
- Rounds 4–7: Ch 1, sc in each st around, sl st to join. (18 sts each round)
- Round 8: Ch 1, (sc in next st, dec) 6 times, sl st to join. (12 sts)
Stuff the head firmly with a small pinch of fiberfill. Shape it into a smooth ball.
- Round 9: Ch 1, dec 6 times, sl st to join. (6 sts)
Checkpoint: The head should be 0.8 in (2.0 cm) across. The 6-stitch round is the neck.
Bodice
- Round 10: Ch 1, inc in each st around, sl st to join. (12 sts)
- Rounds 11–14: Ch 1, sc in each st around, sl st to join. (12 sts each round)
Leave the bodice unstuffed. The narrow neck holds the head stuffing in place.
Checkpoint: The bodice is 0.9 in (2.3 cm) wide flattened and 0.6 in (1.5 cm) tall.
Skirt
- Round 15: Ch 3, dc in the same st, 2 dc in each of the remaining 11 sts, sl st to the top of the ch-3. (24 dc)
- Round 16: Ch 3, 2 dc in next st, dc in next st, 2 dc in next st; rep from * 10 more times, sl st to join. (36 dc)*
- Round 17: Ch 3, dc in next st, 2 dc in next st, dc in next 2 sts, 2 dc in next st; rep from * 10 more times, sl st to join. (48 dc)*
- Round 18: Ch 3, dc in each st around, sl st to join. (48 dc)
- Round 19 (eyelet round): Ch 4 (counts as dc + ch 1), sk next st, dc in next st, ch 1, sk next st; rep from * 22 more times, sl st to the 3rd ch of the ch-4. (24 dc + 24 ch-1 sps)*
- Round 20: Sl st into the first ch-1 sp, ch 3, dc in the same sp, 2 dc in each of the remaining 23 ch-1 sps, sl st to join. (48 dc)
Round 19 makes the ring of small eyelets you can see partway down the skirt. Round 20 fills it back to a solid 48 stitches, ready for the hem.
Checkpoint: The skirt edge is 3.4 in (8.6 cm) wide flattened, and the angel is 3.1 in (7.9 cm) tall from the top of the head. Don’t fasten off. The border continues from here.
Border (Scalloped Hem)
Border gauge: Each finished scallop measures 0.6 in (1.5 cm) along the edge. 12 scallops × 0.6 in = 7.2 in (18.3 cm) around the hem, which is 3.6 in (9.1 cm) across when flattened.
- Round 21 (shells): Ch 1, sc in the same st as the join, *sk 1 st, shell in next st, sk 1 st, sc in next st; rep from * 10 more times, sk 1 st, shell in next st, sk 1 st, sl st to the first sc.
- Each repeat uses 4 stitches. The opening sc (1) + 11 repeats (44) + the final skip-shell-skip (3) = 48 stitches used.
- Result: 12 shells and 12 sc (60 dc + 12 sc).
- Round 22 (openwork scallops): Ch 1, sc in the same sc, *(dc in next dc, ch 1) 4 times, dc in next dc, sc in next sc; rep from * around, but instead of the final sc, sl st to the first sc. Fasten off and weave in the end.
- Per scallop: 5 dc + 4 ch-1 sps.
- Result: 12 scallops: 60 dc + 48 ch-1 sps + 12 sc.
Why the math works: Round 20 has 48 stitches, and each shell repeat uses exactly 4 (sc, skip, shell, skip). 48 ÷ 4 = 12 even scallops, with no partial repeat at the join. Round 22 works into each stitch of Round 21 one-to-one, adding only ch-1 spaces. That opens each shell into a lacy fan without changing the scallop count.
Checkpoint: The border adds 0.5 in (1.3 cm). Total height: 3.1 + 0.5 = 3.6 in (9.1 cm).
Wings (make 2)
The wings are worked flat in rows. Each one fans out from a single base point.
- Row 1: Ch 5, tr in the 5th ch from the hook (the skipped chains count as the first tr). (Ch 3, tr in the same ch) 3 times. (5 tr spokes + 4 ch-3 sps)
- Row 2: Ch 1, turn, sc in the first tr, (ch 5, sc in next tr) 4 times, working the last sc in the top of the beginning chain. (5 sc + 4 ch-5 loops)
- Row 3: Ch 1, turn, sc in the first sc, 7 sc in the next ch-5 loop, sc in the next sc; rep from * 3 more times. (33 sc)*
- Count: 5 sc on top of the spokes + 4 loops × 7 sc = 33.
- Row 4 (picot edge): Ch 1, turn, sc in the first sc, (sc in next 4 sc, picot) 7 times, sc in the last 4 sc. (33 sc + 7 picots)
- Count: 1 + 28 + 4 = 33.
Fasten off, leaving an 8 in (20.3 cm) tail for sewing.
The ch-3 spaces between the spokes make the open windows. The ch-5 arches covered in sc make the scalloped outer rim.
Checkpoint: Each wing is 1.5 in (3.8 cm) wide × 1.4 in (3.6 cm) tall.
Assembly and Hanging Loop
- Place one wing with its base point at the center back of the bodice, level with Rounds 11–13. Angle it up and out.
- Using the tail, whipstitch the base point and the first spoke to the bodice in 4–5 small stitches. Repeat for the second wing, mirror-image, with the base points touching.
- Check the wingspan: it should be 3.5 in (8.9 cm).
- Loop: Join the thread at the magic ring on top of the head and ch 48, about 6 in (15.2 cm). Sl st back into the magic ring to make a doubled loop 3 in (7.6 cm) tall. Fasten off and weave in the ends inside the head.
Final Blocking
- Mix fabric stiffener according to its label, or make a thick starch solution.
- Soak the angel completely, then press out the excess between towels. Don’t wring it.
- Slide the skirt over the plastic-wrapped cone. Pull the hem down evenly so it measures 3.6 in (9.1 cm) across.
- Pin each of the 12 scallops to open its ch-1 spaces, spacing them 0.6 in (1.5 cm) apart.
- Lay the wings flat against a board or a piece of foam propped behind the cone. Pin open each window and each picot.
- Roll the head between your fingers so it’s round and sitting straight on the neck.
- Let it dry completely, for 12–24 hours, before removing the pins and the cone.
Final Quality-Control Checklist
- [ ] The head is 0.8 in (2.0 cm) across, firmly stuffed, and has no visible fiberfill.
- [ ] Round 20 has 48 dc, and the eyelet ring has 24 even spaces.
- [ ] The hem has 12 scallops, each with 5 dc and 4 ch-1 spaces.
- [ ] The angel stands 3.6 in (9.1 cm) tall with a hem 3.6 in (9.1 cm) wide.
- [ ] Each wing has 5 spokes, 4 arches and 7 picots.
- [ ] The wings are mirror-images, sewn securely, with a 3.5 in (8.9 cm) wingspan.
- [ ] The hanging loop is 3 in (7.6 cm) tall and centered on top of the head.
- [ ] All ends are woven in invisibly.
Troubleshooting
The skirt ruffles: Your dc tension is loose. Go down a hook size, or check that Round 17 really has 48 stitches and not more.
The skirt cups inward: Your dc are too tight. Go up a hook size for Rounds 15–22 only.
The shell count doesn’t come out to 12: Recount Round 20. It must be exactly 48 dc. A missed ch-1 space in Round 19 is the usual cause.
The head looks lumpy: Pull the stuffing into smaller tufts and add it a little at a time.
The wings droop: Re-stiffen them and dry them flat. You can also add a tack stitch at the top of each wing’s first spoke.
The joining seam shows: Start each round’s chain in the same position every time, and keep the joins along the center back so the wings hide them.
Care
Dust the angel gently, or spot-clean it with cool water. Re-stiffen and reshape it over the cone if it softens.
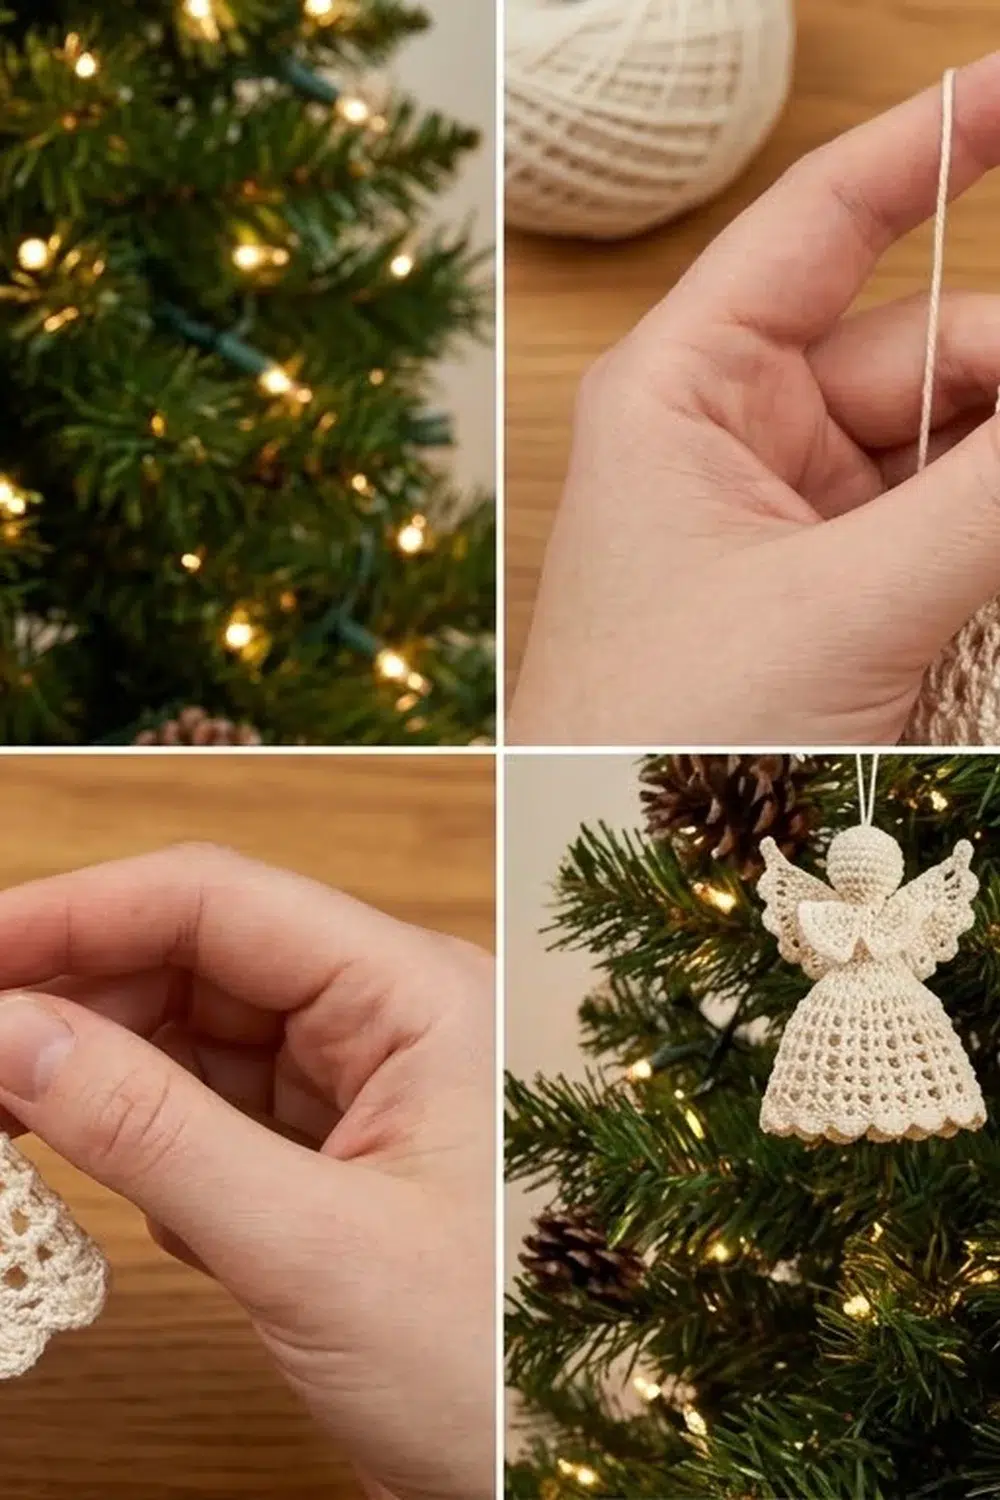
Final Notes
The measurement chain runs like this:
- A 0.8 in (2.0 cm) head
- A 0.9 in (2.3 cm) bodice
- A 48-stitch skirt 3.4 in (8.6 cm) wide at 3.1 in (7.9 cm) tall
- 12 scallops at 0.6 in (1.5 cm), which bring the hem to 3.6 in (9.1 cm) and the total height to 3.6 in (9.1 cm)
- Two 1.5 in (3.8 cm) wings for a 3.5 in (8.9 cm) wingspan
If you hit each checkpoint, your Ivory Grace Angel will match every time.
Happy crocheting!