

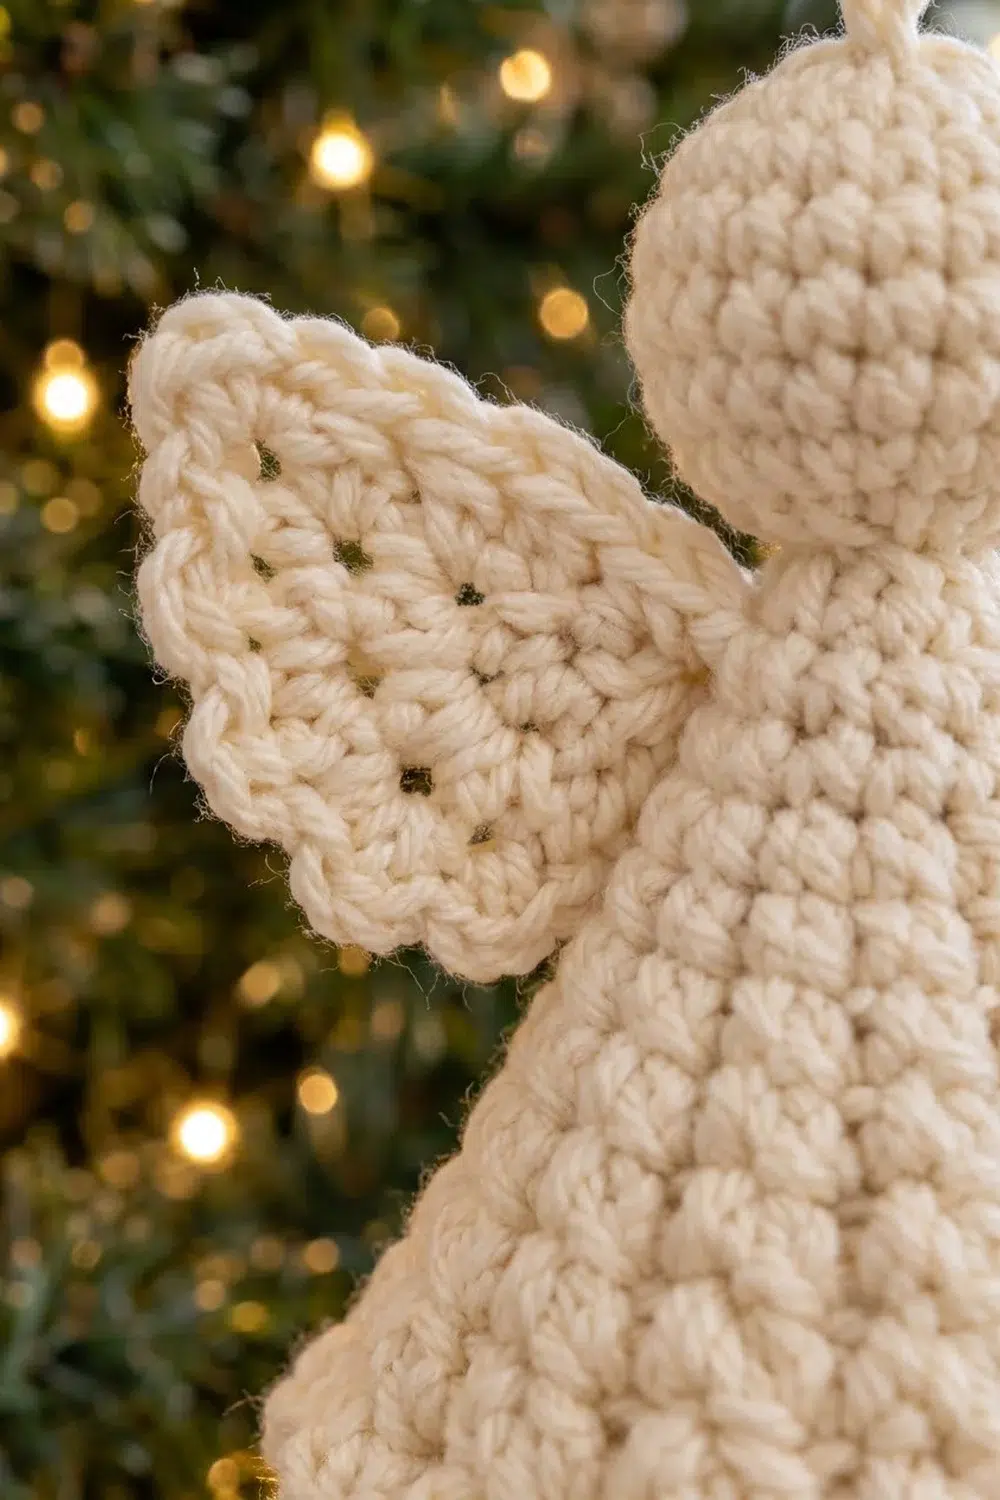
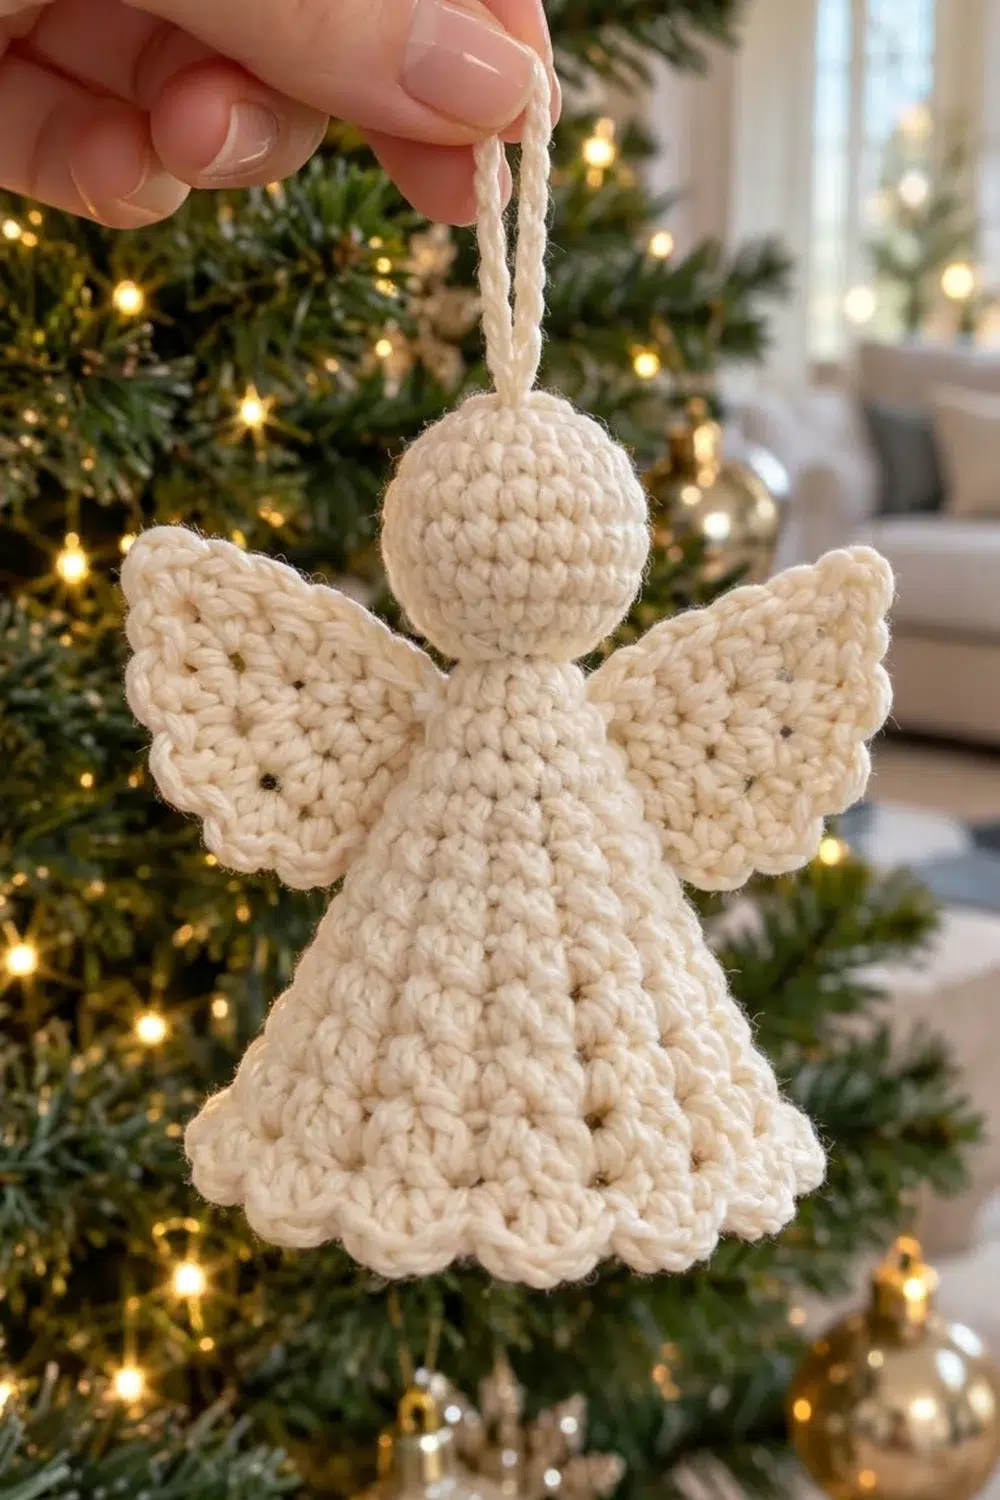
Ivory Grace is a small, softly textured angel ornament made in a single cream yarn. She has a round stuffed head, a cone-shaped body with a bumpy pebble texture, a scalloped hem, two fan-shaped wings with scalloped edges, and a simple chain hanging loop.
The look is calm and classic. Using one neutral color keeps the focus on texture: alternating single and double crochet gives the body its pebbled surface, and small shells finish the hem and wing edges. She looks good on a tree, a gift package, or a window hook.
This pattern uses US crochet terms. The finished angel measures about 5 in (12.7 cm) tall, not counting the loop, and about 4.5 in (11.4 cm) across the wings. The hem is about 4.25 in (10.8 cm) wide when laid flat.
Construction is simple. You crochet four small parts: a head worked in a spiral, a cone body worked top-down in joined rounds, and two matching wings worked flat in rows. Then you sew them together into one ornament and add the loop.
Finished Size and Construction
- Finished size: about 5 in (12.7 cm) tall excluding loop; 4.5 in (11.4 cm) wingspan
- Skill level: Easy / advanced beginner
- Terminology: US crochet terms
- Yarn weight: Worsted weight (#4)
- Hook: 3.5 mm (E-4)
- Number of pieces: 1 finished ornament, made from 4 parts (head, body, 2 wings) plus a chain loop
- Layout: head on top of the body’s cone point; wings sewn to the back, angled up and out
- Part sizes: head 1.5 in (3.8 cm) across when stuffed; body 3.75 in (9.5 cm) tall; each wing about 1.9 in (4.8 cm) long and 2 in (5.1 cm) wide
- Body size before border: 3.5 in (8.9 cm) tall, 3.75 in (9.5 cm) wide laid flat
- Border depth: about 0.25 in (0.6 cm) for the scalloped hem and wing edges
Materials
Choose a smooth worsted weight yarn that shows stitches clearly. Mercerized or matte cotton gives the crisp, firm look shown and helps the cone stand on its own. Acrylic also works but will be slightly softer.
- Cream: 20 g, about 32 m
This amount includes a margin of about 25% for your gauge swatch, sewing tails, and the hanging loop.
Tools:
- 3.5 mm (E-4) crochet hook
- Tapestry needle
- 1 stitch marker
- Polyester fiberfill, about 2 g
- Scissors
- Rust-proof pins
- Optional: fabric stiffener or diluted craft glue for a firmer cone
Abbreviations (US Terms)
- ch – chain
- sl st – slip stitch
- sc – single crochet
- dc – double crochet
- inc – 2 sc in the same stitch
- dec – single crochet 2 together (invisible decrease recommended)
- st(s) – stitch(es)
- MR – magic ring
- Rnd / Row – round / row
Special stitch – Pebble texture (alternating sc/dc): Each round alternates sc and dc. Where possible, work each dc into an sc and each sc into a dc of the round below. The short sc stitches push the taller dc stitches outward, which creates the bumpy texture. Every sc and every dc counts as 1 stitch. The ch 1 at the start of a round never counts.
Gauge and Checkpoints
You need two gauges:
- Single crochet (head and wings): 18 sc and 20 rows = 4 in (10.2 cm)
- Pebble texture (body): 16 sts and 16 rnds = 4 in (10.2 cm)
Test one part first. The wing is the quickest gauge check. Make one wing and measure it before you go on.
Checkpoints:
- Head after Rnd 3: flat circle about 1.2 in (3.0 cm) across
- Wing after Row 8 (before scallops): about 1.6 in (4.1 cm) from point to edge
- Body after Rnd 8: about 1.75 in (4.4 cm) from the top point
- Body after Rnd 14: about 3.25 in (8.3 cm) tall and 3.75 in (9.5 cm) wide laid flat
If your pieces are too big, go down to a 3.25 mm (D-3) hook. If they are too small, go up to a 3.75 mm (F-5) hook. Keep your stitches tight on the head so no stuffing shows through, and tight on the body so the cone holds its shape.
Head
Work in a continuous spiral. Place a marker in the first stitch of each round and move it up as you go.
Rnd 1: 6 sc in MR. (6)
Rnd 2: Inc in each st around. (12)
Rnd 3: Sc in next st, inc in next st 6 times. (18)
Checkpoint: the flat circle measures about 1.2 in (3.0 cm) across.
Rnds 4–7: Sc in each st around. (18 each round)
Rnd 8: Sc in next st, dec 6 times. (12)
Stuff the head firmly and shape it into a smooth ball.
Rnd 9: Dec 6 times. (6)
Fasten off, leaving a 12 in (30.5 cm) tail. Weave the tail through the front loops of the last 6 sts and pull tight to close. Keep the tail for sewing.
The stuffed head should measure about 1.5 in (3.8 cm) across.
Body
The body is a hollow cone worked top-down in joined rounds. Join each round with a sl st in the first st (not in the ch 1). Do not turn.
There are 6 increase lines. They form faint vertical lines down the cone.
Rnd 1: 6 sc in MR, join. (6)
Rnd 2: Ch 1, sc in each st around, join. (6)
These two rounds form the narrow neck point that the head sits on.
Rnd 3 (growth): Ch 1, (sc, dc) in each st around, join. (12)
Rnd 4 (B round): Ch 1, dc in next st, sc in next st 6 times, join. (12)
Rnd 5 (A round): Ch 1, sc in next st, dc in next st 6 times, join. (12)
Rnd 6 (growth): Ch 1, (sc, dc) in next st, sc in next st, (dc, sc) in next st, dc in next st 3 times, join. (18)
Each 4-stitch repeat makes 6 sts, and the stitches alternate sc, dc all the way around.
Rnd 7 (B): Ch 1, dc in next st, sc in next st 9 times, join. (18)
Rnd 8 (A): Ch 1, sc in next st, dc in next st 9 times, join. (18)
Checkpoint: about 1.75 in (4.4 cm) from the top point.
Rnd 9 (growth): Ch 1, (sc, dc) in next st, sc in next st, dc in next st 6 times, join. (24)
Rnd 10 (B): Ch 1, dc in next st, sc in next st 12 times, join. (24)
Rnd 11 (A): Ch 1, sc in next st, dc in next st 12 times, join. (24)
Rnd 12 (growth): Ch 1, (sc, dc) in next st, sc in next st, dc in next st, sc in next st, (dc, sc) in next st, dc in next st, sc in next st, dc in next st 3 times, join. (30)
Each 8-stitch repeat makes 10 sts: 5 from the first half and 5 from the second.
Rnd 13 (B): Ch 1, dc in next st, sc in next st 15 times, join. (30)
Rnd 14 (A): Ch 1, sc in next st, dc in next st 15 times, join. (30)
Checkpoint: the cone measures about 3.25 in (8.3 cm) tall. Laid flat, the bottom edge is about 3.75 in (9.5 cm) wide. That matches 30 sts ÷ 4 sts per in = 7.5 in (19.1 cm) around.
Rnd 15 (edge round): Ch 1, sc in each st around, join. (30)
This firm sc round gives the scallops a stable base. The body now measures about 3.5 in (8.9 cm) tall. Do not fasten off. Go straight on to the hem border below.
Wings (Make 2)
Work flat in rows from the wing point outward. The ch 1 at the start of each row does not count. Turn at the end of every row.
Row 1: 3 sc in MR, turn. (3) Pull the ring closed.
Row 2: Ch 1, inc in each st across, turn. (6)
Row 3: Ch 1, sc in next st, inc in next st 3 times, turn. (9)
Row 4: Ch 1, sc in each st across, turn. (9)
Row 5: Ch 1, sc in next 2 sts, inc in next st 3 times, turn. (12)
Row 6 (eyelet row): Ch 1, sc in next 3 sts, ch 1, sk next st, sc in next 4 sts, ch 1, sk next st, sc in next 3 sts, turn. (12: 10 sc + 2 ch-1 spaces)
The two ch-1 spaces make the small decorative openings in the wing.
Row 7: Ch 1, sc in next 3 sts, inc in next st 3 times, turn. Treat each ch-1 space as a stitch. (15)
Row 8: Ch 1, sc in each st across, turn. (15)
Checkpoint: about 1.6 in (4.1 cm) from point to edge. Go straight on to the wing border.
Border
The hem and the wings use the same small shell scallop. Each scallop is 3 dc in one stitch, with an sc between scallops.
Border gauge: each scallop plus its sc covers 2 base stitches, or about 0.5 in (1.3 cm) of edge. The border adds about 0.25 in (0.6 cm) of depth.
Scalloped Hem (Body Rnd 16)
Rnd 16: Ch 1, sc in next st, 3 dc in next st 15 times, join with sl st in first sc. (15 scallops; 15 sc + 45 dc = 60 sts)
Fasten off and weave in the end.
Why the math works: Rnd 15 has 30 sts, and each repeat uses 2 base sts. 30 ÷ 2 = 15 complete repeats, so the last scallop ends right before the first sc and the join doesn’t show. The 3-dc shells add a gentle flare, which gives the skirt its slightly bell-shaped hem.
The finished body measures about 3.75 in (9.5 cm) tall and about 4.25 in (10.8 cm) wide across the hem.
Scalloped Wing Edge (Wing Row 9)
Row 9: Ch 1, sc in first st, 3 dc in next st, sc in next st 7 times. (7 scallops; 8 sc + 21 dc = 29 sts)
Fasten off, leaving a 10 in (25.4 cm) tail for sewing.
Why the math works: Row 8 has 15 sts. The first sc uses 1 st, and each repeat uses 2. 1 + (7 × 2) = 15, so the row starts and ends with an sc and both corners match.
The finished wing measures about 1.9 in (4.8 cm) from point to scallop tips and about 2 in (5.1 cm) across at its widest.
Assembly
Head: Set the stuffed head on top of the body’s neck point (Rnds 1–2). Using the head tail, sew Rnd 8 of the head to Rnd 3 of the body, all the way around. Use small, tight stitches. The head should sit straight up without wobbling.
Wings: Lay the body face down. Place one wing on each side of the back, with the wing points meeting near the center back at about Rnd 5. Angle the scalloped edges up and out so the top of each wing sits just below the head. Each wing should reach about 0.5 in (1.3 cm) past the side of the body at shoulder level.
Pin both wings, then check from the front. Both wings should show the same amount on each side. Sew each wing to the body along the point and about 0.75 in (1.9 cm) of the inner straight edge. Leave the outer edges unsewn so they stand free.
Checkpoint: the wingspan measures about 4.5 in (11.4 cm).
Hanging loop: Ch 36, about 6 in (15.2 cm). Fasten off. Thread both ends onto a tapestry needle. Pass them down through the top center of the head and out at the neck, then tie a secure knot inside the body. Trim the ends. The loop stands about 3 in (7.6 cm) above the head.
Final Blocking
- Lightly spray the body and wings with water, or hold a steam iron above the fabric. Do not press.
- Stand the body on its hem. Gently push out from inside to round the cone evenly.
- Pin each hem scallop so the shells are evenly spaced.
- With the wings still attached, lay them flat against a blocking board. Pin each wing scallop and shape the outer edge into a smooth curve.
- For a firmer cone, brush a thin coat of fabric stiffener inside the body only.
- Let everything dry completely, about 6–8 hours, before hanging.
Final Quality-Control Checklist
- Head is firmly stuffed, round, and about 1.5 in (3.8 cm) across
- No stuffing shows through the stitches
- Body has 30 sts in the edge round and 15 even scallops
- Pebble texture is visible and the 6 increase lines are evenly spaced
- Both wings have 7 scallops and 2 eyelets, and match each other
- Wings are level and the wingspan is about 4.5 in (11.4 cm)
- Total height is about 5 in (12.7 cm) excluding the loop
- Head sits upright and the loop is centered
- All ends are woven in and hidden
Troubleshooting
The cone curls or ruffles. Your tension is loose, or you added extra stitches. Recount each growth round: 12, 18, 24, 30.
The cone is too narrow and tight. Your pebble gauge is too tight. Go up one hook size for the body only.
The texture looks flat. Make sure each dc goes into an sc and each sc goes into a dc. If you start a plain round with the wrong stitch, the stitches stack and the bumps disappear.
The hem scallops don’t line up at the join. Rnd 15 doesn’t have 30 sts. Rework that round to exactly 30.
One wing is bigger. Check the row counts (3, 6, 9, 9, 12, 12, 15, 15). Remake the wing that doesn’t match, keeping the same tension.
The head leans. On the side opposite the lean, add a second round of sewing stitches between the head’s Rnd 9 and the body’s Rnd 2.
Stuffing shows. Use a smaller hook for the head, or add a little more stuffing to fill the gaps evenly.
Care
Spot clean with mild soap and cool water, then reshape and let dry flat. Store in a box away from heavy items so the cone and wings keep their shape.
Final Notes
Here’s how the measurements build up. The 18-sc head stuffs to 1.5 in (3.8 cm). The body grows from 6 to 30 sts, adding 6 sts in each growth round. It reaches 3.5 in (8.9 cm) before the hem and 3.75 in (9.5 cm) with its 15 scallops. Each 15-st wing finishes at 1.9 in (4.8 cm) with 7 scallops. Assembled, the angel stands about 5 in (12.7 cm) tall with a 4.5 in (11.4 cm) wingspan.
Check gauge on the first wing and count stitches after every growth round. Your angel will then come out the right size.
Happy crocheting!