

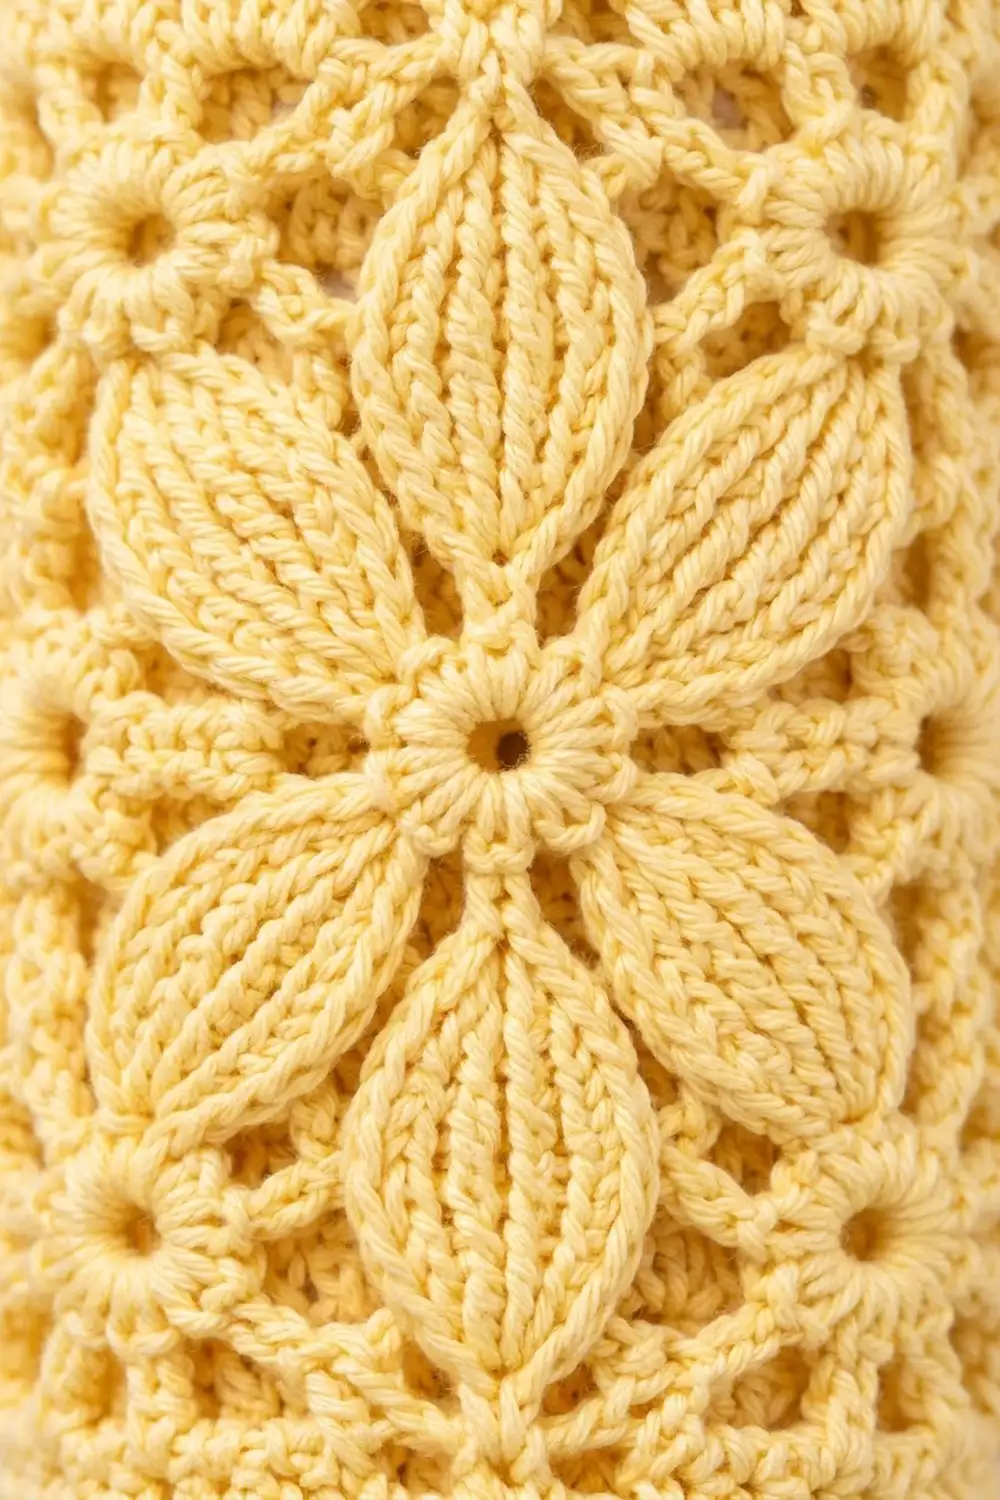
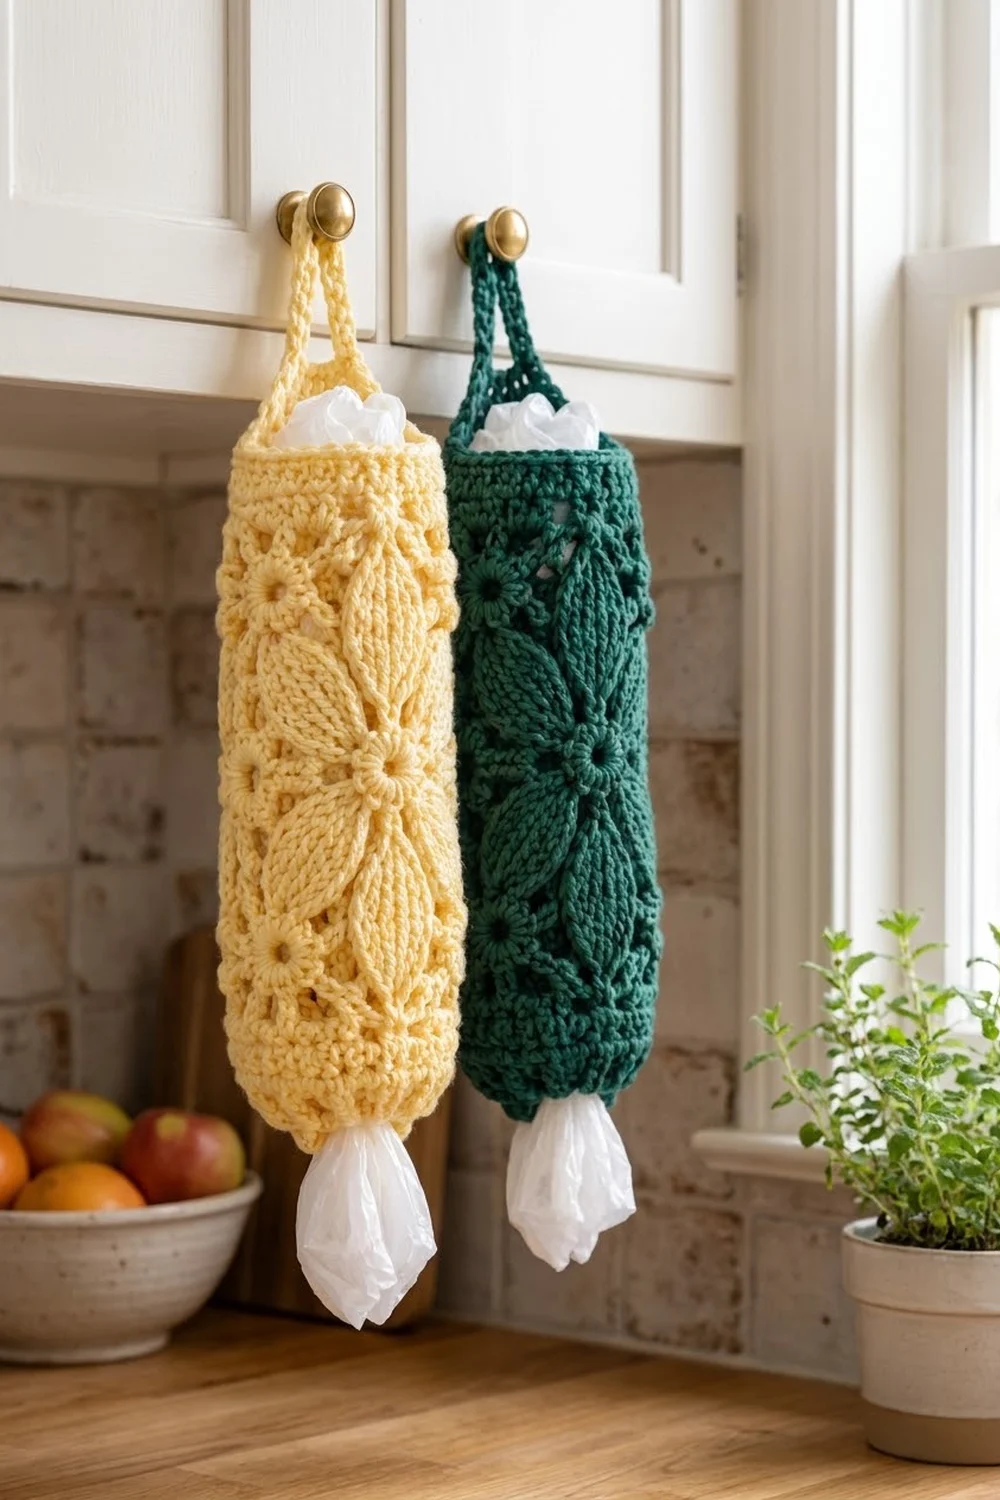
Keep your plastic bags tidy with a holder that also looks good. The Garden Leaf Plastic Bag Holder is a long, textured tube covered in raised leaf petals. Long vertical leaves link stacked flowers, angled side petals reach outward, and each flower has a small eyelet ring at its center. Small side eyelets and a lacy background keep the fabric light.
The sample is shown in butter yellow and deep forest green. Both colors work well: the soft yellow suits a bright kitchen, and the green shows off the ridged petals more strongly. Choose one color per holder.
This pattern uses US crochet terms. The finished holder is 5 in (12.7 cm) wide when flat and 17.25 in (43.8 cm) long from the bottom rib to the top edge. The hanging loop rises about 4.25 in (10.8 cm) above the top, so the total hanging length is about 21.5 in (54.6 cm).
You make the holder in one piece from the bottom up. First you work a small sc base that grows to 40 stitches. Next come two full flower repeats and a short leaf finish, followed by a solid top band. A 5-stitch strap is worked in rows across the top and stitched to the opposite side. Last, you add a ribbed edge around the bottom opening and a simple sc edging around the top.
Finished Size and Construction
- Finished size: 5 in (12.7 cm) wide flat × 17.25 in (43.8 cm) long, plus a 4.25 in (10.8 cm) loop
- Skill level: Intermediate
- Terminology: US
- Yarn weight: Worsted (#4) cotton or cotton blend
- Hook: 5.0 mm (H-8)
- Number of pieces: 1
- Layout: One tube with two identical flower panels, one on the front and one on the back. The side eyelets run along the folds.
- Piece size: 40 stitches around = 10 in (25.4 cm) circumference
- Size before border: 5 in (12.7 cm) × 16.75 in (42.5 cm)
- Border depth: 0.5 in (1.3 cm) ribbed bottom edge plus one sc round at the top
Materials
Yarn: Use a smooth, mercerized or combed worsted cotton. Cotton gives the raised petals crisp definition and holds the tube’s shape when it’s stuffed with bags. Avoid fuzzy or very stretchy acrylic, because the leaves will blur and the tube will sag.
- Main color (choose one): Butter Yellow or Forest Green, 170 g (about 300 m)
Tools:
– 5.0 mm (H-8) crochet hook
– Locking stitch markers (at least 3)
– Tapestry needle
– Scissors
– Measuring tape
– Rust-proof pins and a rolled towel for blocking
The yarn quantity includes a margin of about 15 percent for your gauge swatch and small tension differences.
Abbreviations (US Terms)
- ch: chain
- sl st: slip stitch
- sc: single crochet
- dc: double crochet
- FPdc / BPdc: front post / back post double crochet
- FPtr: front post treble crochet
- st(s): stitch(es)
- sp: space
- rnd(s): round(s)
Special stitches:
- R (raised leaf stitch): FPtr worked around the post of the stitch in the same position 2 rnds below. If that position is already a raised stitch, work around it so the leaf ridge continues. Skip the sc behind the R. Each R counts as 1 st.
- E (eyelet): Ch 2 and skip the next 2 sts. Counts as 2 sts.
Round types:
- A round (sc round): Ch 1. Sc in each st, working 2 sc in each ch-2 sp. Join with sl st to the first sc. (40 sts)
- B round (pattern round): Ch 3 (counts as the first dc). Work the panel sequence given for that round twice, then join with sl st to the top of the ch-3. (40 sts)
Gauge and Checkpoints
Gauge: 16 sts and 8 pattern rnds (4 A + 4 B) = 4 in (10.2 cm) wide × 3 in (7.6 cm) tall. One sc round is about 0.25 in (0.6 cm) tall, and one dc round is about 0.5 in (1.3 cm) tall.
Use the first 5 rounds as your gauge test. Raised stitches pull the fabric in slightly, so measuring the base gives a truer reading than a flat swatch.
Checkpoints:
– After Rnd 1: The ring measures 6 in (15.2 cm) around, an opening about 1.9 in (4.8 cm) across.
– After Rnd 3: The piece measures 10 in (25.4 cm) around, or 5 in (12.7 cm) wide when flat.
– After Rnd 21: The piece is 7.5 in (19.1 cm) from the start.
– After Rnd 37: The piece is 13.5 in (34.3 cm) from the start.
– After Rnd 47: The piece is 16.75 in (42.5 cm) from the start.
If your piece is too big, go down one hook size, to 4.5 mm. If it’s too small, go up one hook size, to 5.5 mm. Don’t change the stitch counts, because the panel math depends on exactly 40 stitches.
Bottom Base
The bottom is worked first from a foundation chain, so the bag opening stays firm.
Rnd 1: Ch 24 and join with sl st to form a ring, taking care not to twist. Ch 1, then sc in each ch. Join. (24 sts)
Rnd 2: Ch 1. Sc in next 2 sts, 2 sc in next st; repeat from * 8 times. Join. (32 sts: 24 + 8 increases)
Rnd 3: Ch 1. Sc in next 3 sts, 2 sc in next st; repeat from * 8 times. Join. (40 sts: 32 + 8 increases)
Rnd 4 (base dc round): Ch 3 (counts as dc), then dc in each st around. Join. (40 sts)
Rnd 5: Work an A round. (40 sts)
Checkpoint: 1.5 in (3.8 cm) tall and 10 in (25.4 cm) around.
Place a marker in the first stitch of Rnd 5. Each panel below is 20 sts wide, and the panel is worked twice in every B round.
Flower Motif (Rnds 6 to 21)
All B rounds below begin with ch 3, which counts as the first dc of the first panel. Every A round is the standard A round and gives 40 sts. The flower centers are at panel sts 10 and 11, and the side eyelets are at panel sts 19 and 20.
Rnd 6 (B1): Dc in next 7 sts, R over next 6 sts, dc in next 5 sts, E; repeat from * once. (7 + 6 + 5 + 2 = 20 per panel; 40 sts)
This is the widest part of the lower vertical leaf, with a side eyelet.
Rnd 7: Work an A round. (40 sts)
Rnd 8 (B2): Dc in next 4 sts, R over next 2 sts, dc in next 2 sts, R over next 4 sts, dc in next 2 sts, R over next 2 sts, dc in next 4 sts; repeat from * once. (4 + 2 + 2 + 4 + 2 + 2 + 4 = 20 per panel; 40 sts)
The vertical leaf narrows here, and the lower side petals begin.
Rnd 9: Work an A round. (40 sts)
Rnd 10 (B3): Dc in next 5 sts, R over next 3 sts, dc in next st, R over next 2 sts, dc in next st, R over next 3 sts, dc in next 5 sts; repeat from * once. (5 + 3 + 1 + 2 + 1 + 3 + 5 = 20 per panel; 40 sts)
The side petals shift toward the center as the leaf tip forms.
Rnd 11: Work an A round. (40 sts)
Rnd 12 (B4, flower center): Dc in next 6 sts, R over next 2 sts, dc in next st, E, dc in next st, R over next 2 sts, dc in next 6 sts; repeat from * once. (6 + 2 + 1 + 2 + 1 + 2 + 6 = 20 per panel; 40 sts)
Rnd 13: Work an A round. Work 2 sc into each center eyelet firmly, which forms the ring. (40 sts)
Rnd 14 (B5): Dc in next 6 sts, R over next 2 sts, dc in next st, R over next 2 sts, dc in next st, R over next 2 sts, dc in next 4 sts, E; repeat from * once. (6 + 2 + 1 + 2 + 1 + 2 + 4 + 2 = 20 per panel; 40 sts)
The upper vertical leaf starts here, and the side petals begin to angle outward.
Rnd 15: Work an A round. (40 sts)
Rnd 16 (B6): Dc in next 4 sts, R over next 3 sts, dc in next st, R over next 4 sts, dc in next st, R over next 3 sts, dc in next 4 sts; repeat from * once. (4 + 3 + 1 + 4 + 1 + 3 + 4 = 20 per panel; 40 sts)
Rnd 17: Work an A round. (40 sts)
Rnd 18 (B7): Dc in next 3 sts, R over next 2 sts, dc in next 2 sts, R over next 6 sts, dc in next 2 sts, R over next 2 sts, dc in next 3 sts; repeat from * once. (3 + 2 + 2 + 6 + 2 + 2 + 3 = 20 per panel; 40 sts)
Rnd 19: Work an A round. (40 sts)
Rnd 20 (B8): Dc in next 7 sts, R over next 6 sts, dc in next 7 sts; repeat from * once. (7 + 6 + 7 = 20 per panel; 40 sts)
Rnd 21: Work an A round. (40 sts)
Checkpoint: 7.5 in (19.1 cm) from the start. The upper leaf is now 6 R wide. In the next repeat it continues straight into B1, so one long leaf links the two flowers.
Second Repeat and Leaf Finish (Rnds 22 to 43)
Rnds 22 to 37: Repeat Rnds 6 to 21 once. (40 sts each round)
Checkpoint: 13.5 in (34.3 cm) from the start.
Rnd 38: Work as B1. Rnd 39: A round.
Rnd 40: Work as B2. Rnd 41: A round.
Rnd 42: Work as B3. Rnd 43: A round.
(40 sts each round)
This closes the top leaf to a point. Checkpoint: 15.75 in (40.0 cm) from the start.
Top Band (Rnds 44 to 47)
Rnds 44 to 47: Ch 1, then sc in each st around. Join. (40 sts each round)
Checkpoint: 16.75 in (42.5 cm) from the start. Fasten off.
Hanging Strap
Flatten the tube so the flowers are centered on the front and back. The side folds now sit between panel st 20 and the next panel’s st 1, and between st 40 and st 1.
Row 1: Join yarn in st 39 of Rnd 47. Ch 1, then sc in sts 39, 40, 1, 2 and 3. (5 sts)
Rows 2 to 40: Ch 1 and turn. Sc in each st across. (5 sts each row)
The strap is now 10 in (25.4 cm) long, at 4 rows per inch.
Attach: Bring the strap over to the opposite fold without twisting it. Sl st Row 40 to sts 19 to 23 of Rnd 47, working through both layers. (5 sl sts) Fasten off.
The strap forms a peak that rises about 4.25 in (10.8 cm) above the top band.
Border
Border gauge: 16 sc = 4 in (10.2 cm), and sc rows are 4 per inch. That means 1 sc per stitch or per row end keeps every edge flat.
Top Edging
After the strap is attached, the top opening is split into two loops.
- Front loop: Join at st 4. Ch 1 and sc in sts 4 to 18 (15 sts). Then sc in the end of each strap row along that edge (40 sts). Join. (15 + 40 = 55 sts)
- Back loop: Join at st 24. Ch 1 and sc in sts 24 to 38 (15 sts). Then sc in each row end along the other strap edge (40 sts). Join. (15 + 40 = 55 sts)
Why the math works: The strap uses 5 sts at each fold, so 10 of the 40 sts are taken up. That leaves 30 free sts, 15 on the front and 15 on the back. Each strap edge has 40 rows, and because the sc row gauge equals the stitch gauge, one sc per row end lies flat. It won’t ruffle or pull.
Bottom Rib
Rnd 1: Turn the piece upside down. Join yarn in any free loop of the foundation chain. Ch 1, then sc in each free loop. Join. (24 sts: 1 per foundation ch)
Rnd 2: Ch 2 (does not count as a st). FPdc around next st, BPdc around next st; repeat from * 12 times. Join. (24 sts: 12 FPdc + 12 BPdc)
Fasten off. The rib adds 0.5 in (1.3 cm), which brings the length to 17.25 in (43.8 cm). The 24-stitch rib keeps the opening about 1.9 in (4.8 cm) across. That’s tight enough to grip one bag at a time.
Final Blocking
- Weave in all ends along the wrong side of the sc rounds, away from the eyelets.
- Soak the holder in cool water for 10 minutes, then gently press the water out. Don’t wring it.
- Roll a towel into a cylinder about 3.2 in (8.1 cm) across and slide it inside the tube.
- Shape the tube to 5 in (12.7 cm) wide flat and 17.25 in (43.8 cm) long.
- Pinch each raised leaf so its ridge stands up, and open each eyelet with a fingertip.
- Lay the strap flat and pin it to 1.25 in (3.2 cm) wide.
- Let it dry completely before removing the towel.
Final Quality-Control Checklist
- Every round has 40 sts, and the bottom rib has 24 sts.
- Each panel’s flower is centered between the side folds.
- The vertical leaves line up in a straight column with no drift.
- The center eyelets are round and evenly filled with 2 sc.
- The side eyelets sit on the folds, two per flower repeat.
- The strap isn’t twisted and is attached at the opposite fold.
- Each top edging loop has exactly 55 sc.
- The holder measures 5 in (12.7 cm) wide and 17.25 in (43.8 cm) long.
Troubleshooting
- Leaves look flat: Make sure you work the FPtr around the post 2 rnds below, not around the sc right below it. Keep the A rounds firm.
- The tube twists in a spiral: Join every round with a sl st and start each B round in the same place. Move the marker up as you go.
- Stitch count is off after a B round: Check that each E counts as 2 sts and each R as 1 st. Also check that you skipped the sc behind each R.
- The fabric puckers around the leaves: Your raised stitches are too short. Pull up a slightly longer loop on each FPtr.
- The bottom opening is too loose: Work Rnd 2 of the rib with a hook one size smaller.
- The strap ruffles: You added extra sc along the row ends. Use exactly 1 per row.
Care
Hand wash in cool water with mild soap and dry flat, reshaping the tube while it’s damp. Cotton can be gently steamed to refresh the raised leaves.
Final Notes
Here is the full measurement chain:
- The 24-stitch ring grows to 40 sts, which gives 10 in (25.4 cm) around and 5 in (12.7 cm) flat.
- The base is 1.5 in (3.8 cm), each flower repeat adds 6 in (15.2 cm), the leaf finish adds 2.25 in (5.7 cm), and the top band adds 1 in (2.5 cm). Together that makes 16.75 in (42.5 cm).
- The 0.5 in (1.3 cm) rib brings the total to 17.25 in (43.8 cm).
- The 10 in (25.4 cm) strap forms a 4.25 in (10.8 cm) loop.
Check your gauge at the base, count your stitches at every B round, and the leaves will stack neatly into a tidy holder for your kitchen.
Happy crocheting!