

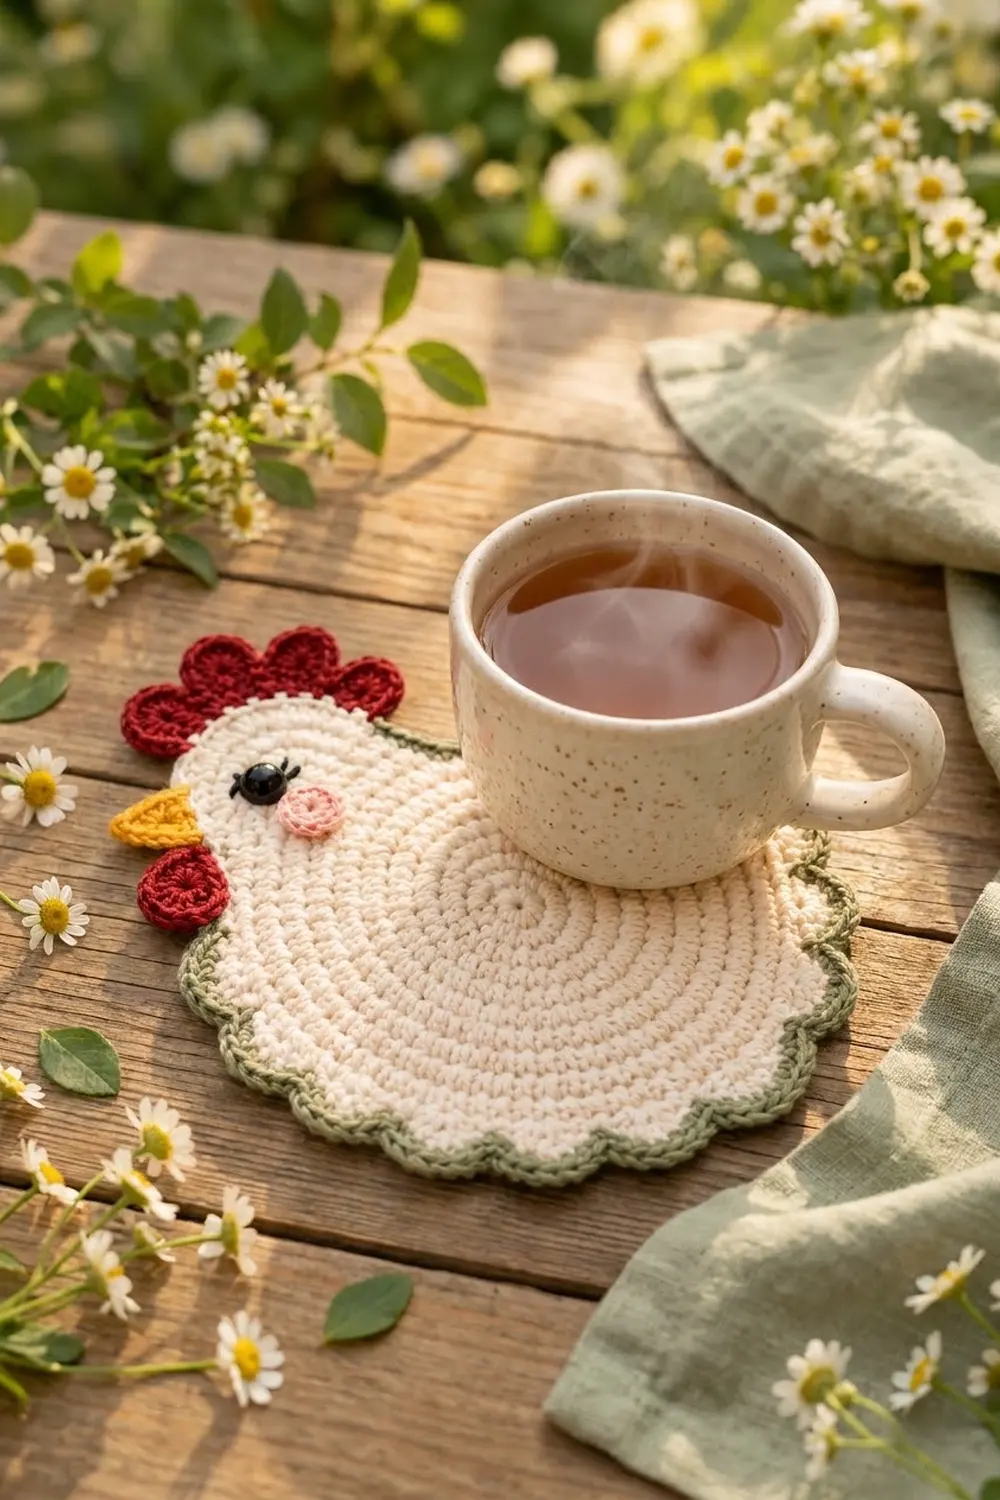
This little hen is one flat coaster. The body is a cream single-crochet circle with a rounded head worked straight off its edge. The tail and lower edge are scalloped, and a slim sage-green outline frames her from the back of the neck around to the chest.
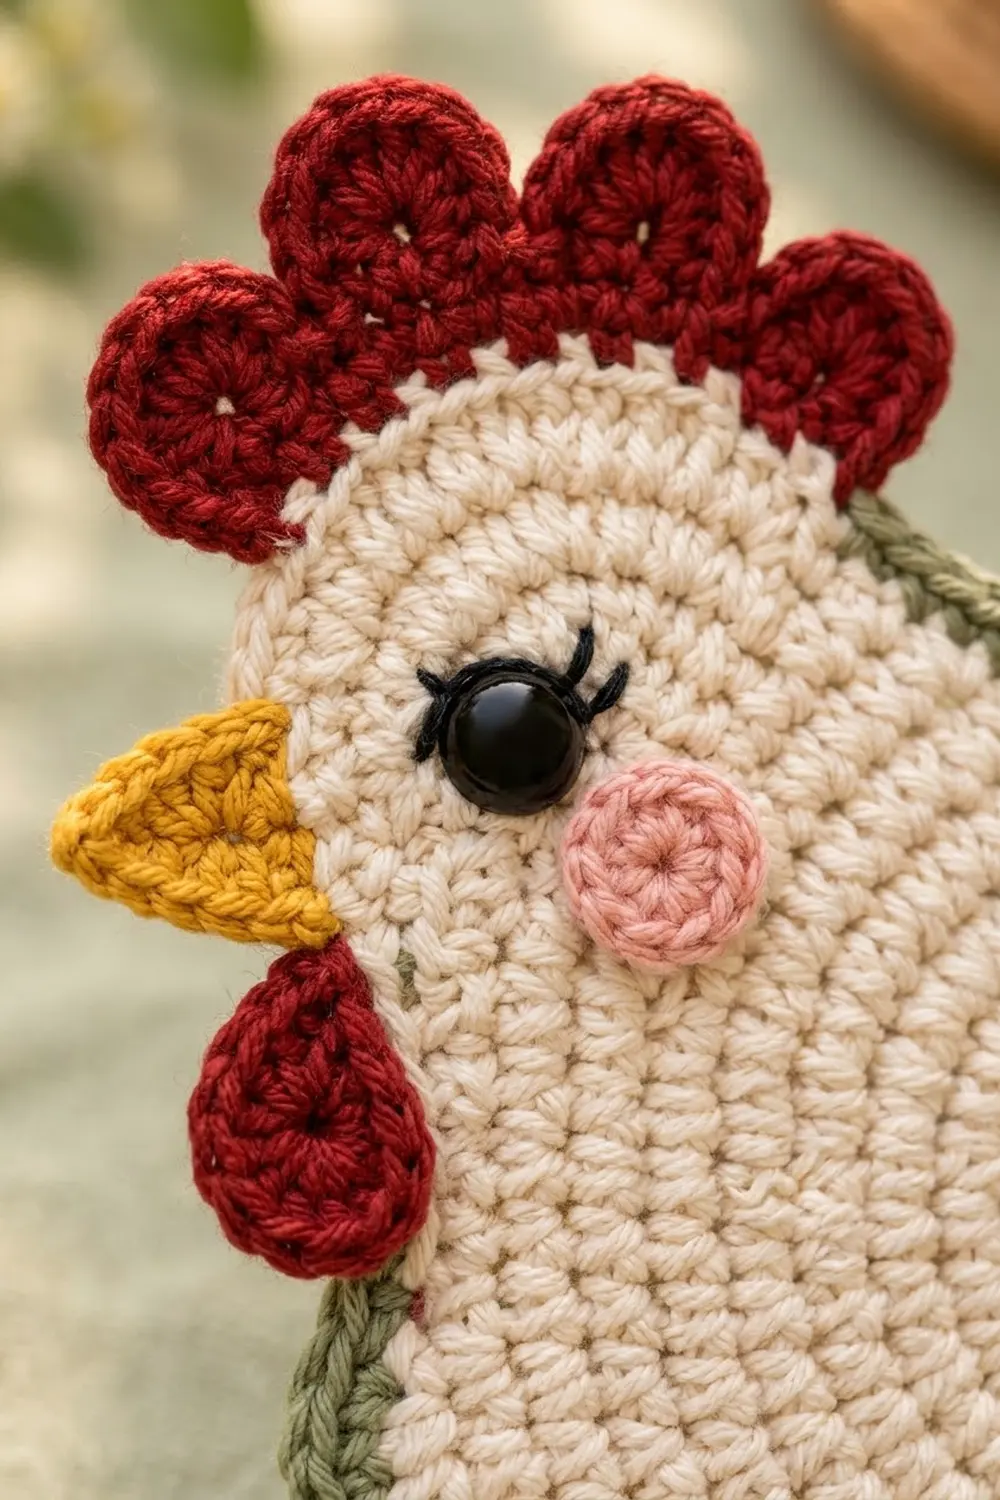
The colors are cream, sage green, deep red, mustard yellow, soft pink and black. Small sewn-on appliqués give her a red five-lobed comb, a teardrop wattle, a triangle beak, a rosy cheek and a lashed black eye. She suits farmhouse, spring and Easter kitchens.
The pattern uses US crochet terms. The finished hen measures about 6.25 in (15.9 cm) wide x 6.5 in (16.5 cm) tall, or about 7.25 in (18.4 cm) tall with the comb.
Construction overview: work a 12-round circle, then 6 short rows for the head without fastening off. Next, one cream shaping round adds the scallops and smooths the head. The sage outline goes on last, then the appliqués are sewn in place.
Finished Size and Construction
- Finished size: 6.25 in (15.9 cm) wide x 6.5 in (16.5 cm) tall; 7.25 in (18.4 cm) tall with the comb
- Skill level: Easy / Advanced Beginner
- Terminology: US
- Yarn weight: Worsted (#4), 100% cotton
- Hook: 4.0 mm (G-6)
- Number of pieces: 1 body plus 4 small appliqués (comb, wattle, beak, cheek) and 1 bead eye
- Layout: a single motif; nothing is joined to other motifs
- Body circle size: 5 in (12.7 cm) across after Round 12
- Size before border: about 5.75 in (14.6 cm) wide x 6 in (15.2 cm) tall
- Border depth: about 0.25 in (0.6 cm) on each edge
Materials
Use a smooth worsted-weight cotton or cotton blend. Cotton holds the scallops crisply and copes with warm mugs. Avoid acrylic if you will put hot drinks on the coaster.
- Cream: 20 g / 38 m
- Sage green: 5 g / 9 m
- Deep red: 5 g / 9 m
- Mustard yellow: 2 g / 4 m
- Soft pink: 2 g / 4 m
- Black: about 1 m of embroidery floss or fingering-weight yarn for the lashes
Tools:
– 4.0 mm (G-6) crochet hook
– One 8 mm flat black bead or shank button for the eye (a flat bead lies better on a coaster than a safety eye)
– Tapestry needle and a sharp sewing needle
– 4 stitch markers
– Scissors, measuring tape, blocking mat and rust-proof pins
The quantities above include about a 20% margin.
Abbreviations (US Terms)
- ch – chain
- sl st – slip stitch
- sc – single crochet
- hdc – half double crochet
- dc – double crochet
- inc – 2 sc in the same stitch
- sc2tog – single crochet 2 together
- MR – magic ring
- st(s) – stitch(es)
- sk – skip
- RS – right side
Special stitch – scallop: several hdc or dc worked into one stitch, so they fan into a rounded arch.
Gauge and Checkpoints
Gauge: 18 sc = 4 in (10.2 cm). Rounds 1–6 of the circle = 2.5 in (6.4 cm) across.
Gauge matters more for size than for shape, so make one body and check it at each stage below before you go on:
- After Round 6: 2.5 in (6.4 cm) across, lying flat
- After Round 12: 5 in (12.7 cm) across, lying flat
- After the head: the head stands about 1.25 in (3.2 cm) above the circle’s edge
- After Round 13: about 5.75 in (14.6 cm) wide x 6 in (15.2 cm) tall
- After the green outline: about 6.25 in (15.9 cm) wide x 6.5 in (16.5 cm) tall
Too big? Go down to a 3.75 mm hook. Too small? Go up to a 4.5 mm hook. Ruffling? You are working too loosely, or you stacked the increases. Cupping? You are working too tightly, so relax your tension or go up a hook size.
Body Circle (Cream)
Work in joined rounds with the RS facing; do not turn. The ch 1 at the start of each round does not count as a stitch. Join every round with a sl st to the first sc.
Round 1: In a MR, ch 1, 6 sc. Join. (6)
Round 2: Inc in each st around. (12)
Round 3: [Sc in next, inc] 6 times. (18)
Round 4: Sc in next, inc, [sc in next 2, inc] 5 times, sc in next. (24)
Round 5: [Sc in next 3, inc] 6 times. (30)
Round 6: Sc in next 2, inc, [sc in next 4, inc] 5 times, sc in next 2. (36)
Checkpoint: 2.5 in (6.4 cm) across.
Round 7: [Sc in next 5, inc] 6 times. (42)
Round 8: Sc in next 3, inc, [sc in next 6, inc] 5 times, sc in next 3. (48)
Round 9: [Sc in next 7, inc] 6 times. (54)
Round 10: Sc in next 4, inc, [sc in next 8, inc] 5 times, sc in next 4. (60)
Round 11: [Sc in next 9, inc] 6 times. (66)
Round 12: Sc in next 5, inc, [sc in next 10, inc] 5 times, sc in next 5. Join. (72)
Checkpoint: 5 in (12.7 cm) across. The staggered increases keep the circle round instead of hexagonal. Do not fasten off.
Number the Round 12 stitches counting in the working direction, with the first sc of the round as st 1. Place markers in:
– st 1 (back of head)
– st 13 (start of chest)
– st 47 (start of tail)
– st 65 (start of back)
The sections are: head base sts 1–12, chest 13–22, bottom 23–46, tail 47–64 and back 65–72.
Head (Cream, Worked in Rows)
Row 1 (RS): Ch 1 (do not turn), sc in the same st as the join (st 1) and in the next 11 sts. (12)
Row 2: Ch 1, turn, sc in each st across. (12)
Row 3: Ch 1, turn, sc2tog, sc in next 8, sc2tog. (10)
Row 4: Ch 1, turn, sc across. (10)
Row 5: Ch 1, turn, sc2tog, sc in next 6, sc2tog. (8)
Row 6: Ch 1, turn, sc2tog, sc in next 4, sc2tog. (6)
Fasten off. Checkpoint: the head rises about 1.25 in (3.2 cm) above the circle, with a top about 1.25 in (3.2 cm) wide. The decreases on both ends round the head.
Round 13: Shaping and Scallops (Cream)
With the RS facing, join cream with a sl st in st 13, the first chest stitch next to the front of the head.
- Chest: Ch 1, sc in sts 13–22. (10 sts made)
- Bottom: [Sc in next st, sk 1, 5 hdc in next st, sk 1] 6 times. This uses sts 23–46 and makes 6 small scallops. (36 sts made)
- Tail: [Sc in next st, sk 2, 7 dc in next st, sk 2] 3 times. This uses sts 47–64 and makes 3 large scallops. (24 sts made)
- Back: Sc in sts 65–72. (8 sts made)
- Head, back side: Work 6 sc evenly up the side of the head, 1 per row end. (6)
- Head top: 2 sc in the first st of Row 6, sc in the next 4, 2 sc in the last st. (8)
- Head, front side: Work 6 sc evenly down the side of the head, 1 per row end. (6)
Join with a sl st to the first chest sc and fasten off.
Round 13 total: 10 + 36 + 24 + 8 + 6 + 8 + 6 = 98 sts.
Checkpoint: about 5.75 in (14.6 cm) wide x 6 in (15.2 cm) tall.
The skipped stitches let each fan lie flat as a curve. The 7-dc fans make the tail scallops taller than the 5-hdc fans on the bottom.
Green Outline (Border)
Border gauge: the same 18 sc = 4 in (10.2 cm). The outline adds about 0.25 in (0.6 cm) on each edge.
With the RS facing, join sage green with a sl st in the first chest sc of Round 13, just below the front of the head.
- Chest: Ch 1, sc in each of the 10 chest sc. (10)
- Bottom (6 scallops): [Sc in sc, sc in next 2 hdc, 3 sc in center hdc, sc in next 2 hdc] 6 times. That is 8 per scallop. (48)
- Tail (3 scallops): [Sc in sc, sc in next 3 dc, 3 sc in center dc, sc in next 3 dc] 3 times. That is 10 per scallop. (30)
- Back: Sc in each of the 8 back sc. (8)
Fasten off at the back of the neck. Outline total: 10 + 48 + 30 + 8 = 96 sc. The head’s 20 cream edge stitches stay unworked.
Why the math works:
– On the straight edges there is 1 sc per stitch, so the edge stays flat.
– At each scallop tip, 3 sc in the center stitch turns the point without pulling it in.
– In each valley, a single sc in the Round 13 sc keeps a crisp dip, because nothing is added there.
– Each scallop uses all of its own fan stitches plus 1 valley sc. On the bottom that is 5 hdc + 1 sc = 6 stitches worked, giving 8 sc. On the tail it is 7 dc + 1 sc = 8 stitches worked, giving 10 sc.
Checkpoint: 6.25 in (15.9 cm) wide x 6.5 in (16.5 cm) tall.
Appliqués
Comb (deep red)
– Row 1: Ch 12, sc in 2nd ch from hook and in each ch across. (11)
– Row 2: Ch 1, turn, sl st in first sc, [5 dc in next sc, sl st in next sc] 5 times. (5 lobes)
Leave a 12 in (30.5 cm) tail. The comb is about 2.5 in (6.4 cm) wide x 0.75 in (1.9 cm) tall.
Wattle (deep red)
– MR, ch 3 (counts as dc), 8 dc in the ring and pull it closed. Ch 2, sl st in the top of the ch-3. (9 dc)
The pulled ring makes the point and the dc fan makes the round end. It is about 0.75 in (1.9 cm) long. Leave a long tail.
Beak (mustard yellow)
– Row 1: Ch 4, sc in 2nd ch from hook and across. (3)
– Row 2: Ch 1, turn, sc2tog, sc in last st. (2)
– Row 3: Ch 1, turn, sc2tog. (1)
You now have a triangle about 0.75 in (1.9 cm) across the base. Leave a long tail.
Cheek (soft pink)
– MR, ch 1, 8 sc in the ring and join. (8)
It is about 0.5 in (1.3 cm) across. Leave a long tail.
Assembly
- Comb: Sew the flat Row 1 edge along the cream crown so the 5 lobes point up and the ends curve slightly down both sides of the head.
- Beak: Sew the base to the front edge of the head, about 0.4 in (1.0 cm) below the crown, with the point facing outward.
- Wattle: Sew it just below the beak with the point up, so the round end hangs over the chest where the green outline begins.
- Eye: Sew the 8 mm bead 0.5 in (1.3 cm) behind the beak, level with it. With black, add 3 short straight stitches angled up and back for the lashes.
- Cheek: Sew it just behind and below the eye.
Weave in all ends on the wrong side.
Final Blocking
- Draw a 6.25 in (15.9 cm) x 6.5 in (16.5 cm) rectangle on paper and lay it under the blocking mat.
- Spray the hen until it is evenly damp, not soaked.
- Lay it face up and pat the circle flat from the center outward.
- Pin the top of the head, the back of the neck and the chest to the guide lines.
- Pin each of the 3 tail tips and each of the 6 bottom tips, then press the valleys gently inward with a fingertip.
- Lift the comb lobes away from the body so they dry separately.
- Leave it to dry completely, at least 12 hours, before unpinning.
Final Quality-Control Checklist
- Round 12 has 72 sts and measures 5 in (12.7 cm) across.
- The head has 6 rows and ends with 6 sts.
- Round 13 has 98 sts: 6 bottom scallops and 3 tail scallops.
- The green outline has 96 sc and runs from the chest to the back of the neck only.
- The hen measures 6.25 in (15.9 cm) x 6.5 in (16.5 cm) and lies fully flat.
- The comb has 5 even lobes and the bead eye is secure.
- No ends show on the right side.
Troubleshooting
- The circle ruffles: your tension is too loose or the increases stacked. Go down a hook size and keep the stagger.
- The circle cups: your tension is too tight. Relax it or go up a hook size.
- The head leans: Rows 3 and 5 need a decrease on both ends. Count again.
- The scallops flip or curl: skip exactly 1 (bottom) or 2 (tail) stitches, then block firmly.
- The green edge puckers: work it a little looser, or use the next hook size up for the outline only.
- The comb flops: sew along the full base and through the first lobe stitches.
Care
Hand wash in cool water, press out the water in a towel, and dry flat, reshaping the scallops. Do not tumble dry.
Final Notes
The measurement chain runs like this:
– Round 6: 2.5 in (6.4 cm) across
– Round 12: 5 in (12.7 cm) across
– After the head: the head stands 1.25 in (3.2 cm) above the circle
– Round 13: about 5.75 in (14.6 cm) x 6 in (15.2 cm)
– Green outline: 6.25 in (15.9 cm) x 6.5 in (16.5 cm)
Check each stage, and the hen will block to size and sit flat under a warm mug.
Happy crocheting!