

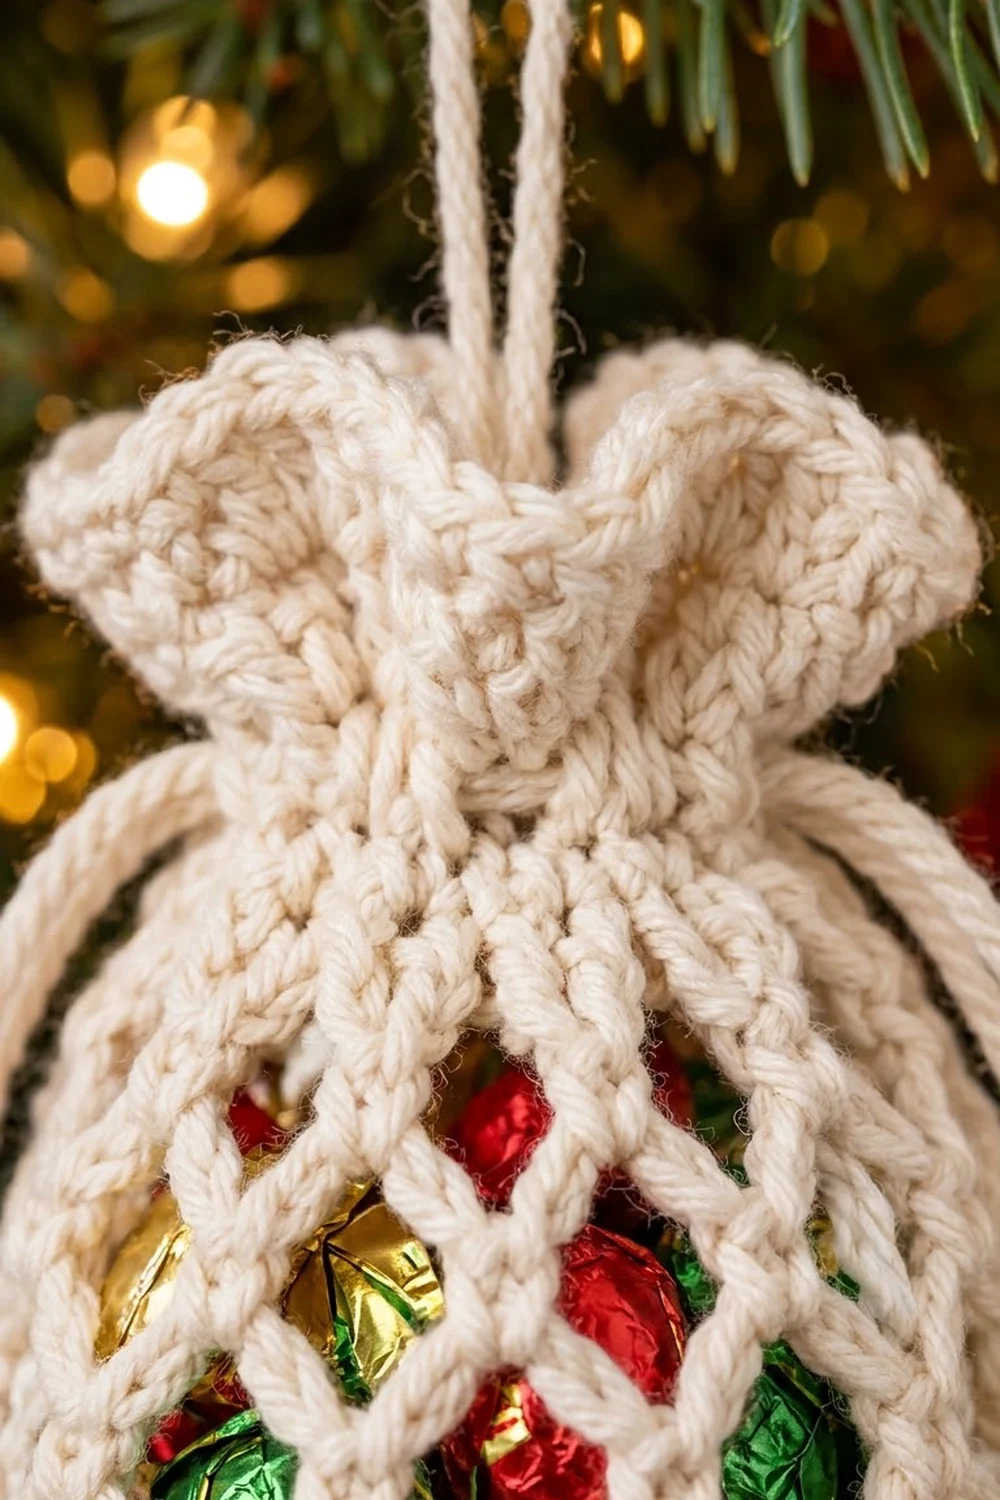
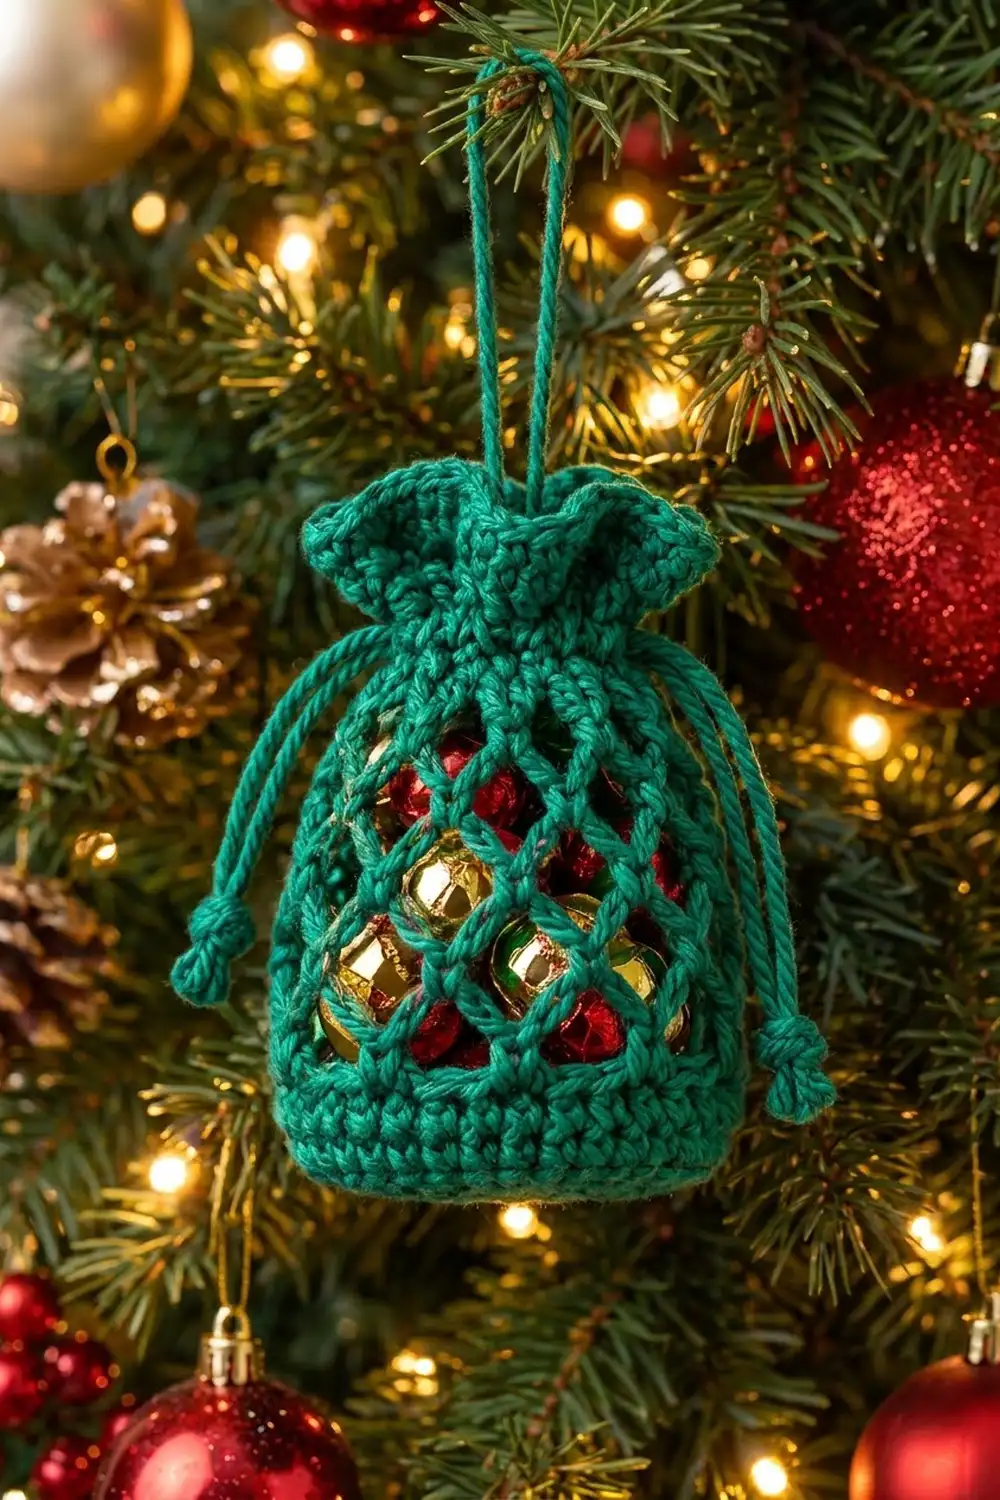
The Evergreen Lattice Treat Bag is a tiny drawstring pouch that hangs on the tree and holds a few foil-wrapped chocolates. A solid oval base and a short solid band hold up an open diamond-mesh body, so the red, gold and green candies show through the lattice. Above the mesh, a firm band carries an eyelet round for the drawstrings. A small shell ruffle flares out over the gathered neck.
The sample bags come in two classic holiday colors: deep emerald green and soft cream. Each bag is one color from base to ruffle. The look is traditional and a little vintage, like a tiny market bag dressed up for Christmas. Green bags show off red and gold candies, and cream bags make green and red wrappers stand out.
This pattern uses US crochet terms. A flattened bag measures about 3 in (7.6 cm) wide and 4.5 in (11.4 cm) tall from base to ruffle tip, not counting the hanging loop.
The bag is seamless and easy to build:
– Start with an oval base worked around a foundation chain.
– Turn the wall upward with a back-loop round.
– Work the chain-loop mesh in joined rounds.
– Close the mesh with a solid band and an eyelet round.
– Finish with a two-round ruffle.
Two slip-stitch cords and a hanging loop complete the ornament.
Finished Size and Construction
- Finished size: 3 in (7.6 cm) wide flat x 4.5 in (11.4 cm) tall
- Skill level: Easy-intermediate
- Terminology: US crochet terms
- Yarn weight: DK / light worsted (CYC 3), mercerized or matte cotton
- Hook: 3.5 mm (E-4)
- Number of pieces: 1 bag, plus 2 drawstring cords and 1 hanging loop
- Layout: One piece worked in joined rounds from the base up; no assembly
- Base size: about 2.4 in x 1.2 in (6.1 cm x 3.0 cm) oval
- Size before top edging: 3 in (7.6 cm) wide x 3.75 in (9.5 cm) tall
- Top edging (ruffle) depth: 0.75 in (1.9 cm)
Materials
Choose a smooth cotton or cotton blend in DK weight. Cotton holds the lattice open and keeps the diamonds crisp. Acrylic works too, but the mesh will be softer and may need firmer blocking. Avoid fuzzy or brushed yarns, because the halo hides the diamond shapes.
Yarn, per bag (choose one color):
- Emerald Green: 20 g, about 48 m (52 yd)
- Cream: 20 g, about 48 m (52 yd)
These amounts include a margin of about 25 percent for test-fitting and cord tails. One 50 g ball makes two bags.
Tools:
- 3.5 mm (E-4) crochet hook
- Stitch marker
- Tapestry needle
- Scissors
- Measuring tape or ruler
- Spray bottle and a small rolled cloth or foam cylinder for blocking
- Optional: wrapped candies for filling
Abbreviations (US Terms)
- ch – chain
- sl st – slip stitch
- sc – single crochet
- dc – double crochet
- BLO – back loop only
- st(s) – stitch(es)
- sp – space
- rnd – round
Special stitch – ch-5 loop: Chain 5. Skip the stated number of stitches, or move to the next loop, and anchor with an sc. In the mesh rounds, each sc sits in the center of a loop from the round below. This shifts every round by half a loop and creates the diamond lattice.
Shell: 7 dc worked into the same stitch.
Gauge and Checkpoints
Gauge: 20 sc and 22 rnds = 4 in (10.2 cm) in sc worked in the round.
Make one bag before you plan a batch. It is small enough to act as its own swatch, and these checkpoints tell you early whether you are on track:
- After Rnd 3 (base): oval about 2.4 in x 1.2 in (6.1 cm x 3.0 cm), 30 sts.
- After Rnd 6: solid wall about 0.5 in (1.3 cm) tall.
- After Rnd 13: bag about 2.75 in (7.0 cm) tall from the base and 3 in (7.6 cm) wide flattened.
- After Rnd 17: bag about 3.75 in (9.5 cm) tall.
- After Rnd 19: bag about 4.5 in (11.4 cm) tall.
If your bag is too big: go down to a 3.25 mm (D-3) hook. Do not remove stitches, because the mesh, eyelet and ruffle math all depend on the 30-stitch count.
If your bag is too small: go up to a 3.75 mm (F-5) hook.
If only the mesh is too tall or too short: add or remove one mesh round. Each mesh round adds about 0.3 in (0.8 cm).
Base
Work in joined rounds and do not turn. The beginning ch 1 never counts as a stitch. Place a marker in the first stitch of each round.
Foundation: Ch 9.
Rnd 1: Sc in 2nd ch from hook and in next 6 ch, 3 sc in last ch. Then, working along the opposite side of the foundation chain, sc in next 6 ch and 2 sc in the same ch as the first sc. Join with sl st to first sc. (18 sts)
Rnd 2: Ch 1, 2 sc in first st, sc in next 6 sts, 2 sc in each of next 3 sts, sc in next 6 sts, 2 sc in each of last 2 sts. Join. (24 sts)
Rnd 3: Ch 1, sc in first st, 2 sc in next st, sc in next 6 sts, (sc in next st, 2 sc in next st) 3 times, sc in next 6 sts, (sc in next st, 2 sc in next st) 2 times. Join. (30 sts)
Rnds 2 and 3 each add 6 stitches, 3 at each curved end, and the two straight sides stay at 6 stitches. The base should now be a flat oval. Check it against the first checkpoint.
Solid Lower Band
Rnd 4: Ch 1, sc in BLO of each st around. Join. (30 sts)
This round leaves a visible ridge on the outside and turns the work upward into a wall.
Rnds 5–6: Ch 1, sc in each st around. Join. (30 sts each round)
The wall should now measure about 0.5 in (1.3 cm) tall.
Diamond Mesh Body
Rnd 7: Ch 1, sc in first st, ch 5, skip 2 sts, sc in next st; repeat from * 8 more times, ch 5, skip last 2 sts. Join with sl st to first sc. (10 ch-5 loops)*
Check the math: 1 sc + 9 repeats of 3 sts + 2 skipped sts = 30 sts used.
Rnd 8: Sl st in each of the first 3 ch of the next loop to reach its center. Ch 1, sc in same loop, ch 5, sc in next ch-5 loop; repeat from * 8 more times, ch 5. Join with sl st to first sc. (10 ch-5 loops)*
Rnds 9–13: Repeat Rnd 8. (10 ch-5 loops each round)
You now have 7 mesh rounds. Every sc anchors at the center of a loop below, so the loops stack into an even diamond lattice. The bag should measure about 2.75 in (7.0 cm) tall from the base.
Tip: keep your chains a little looser than your sc. Tight chains pull the diamonds into narrow slits instead of open, rounded shapes.
Upper Band and Eyelets
Rnd 14 (conversion round): Ch 1, 3 sc in each ch-5 loop around, skipping the sc between loops. Join. (10 loops x 3 sc = 30 sts)
This round closes the mesh and brings you back to the same 30-stitch count as the base wall.
Rnd 15: Ch 1, sc in each st around. Join. (30 sts)
Rnd 16 (eyelet round): Ch 3 (counts as dc), dc in next st, ch 1, skip next st, dc in next 2 sts, ch 1, skip next st; repeat from * 8 more times. Join with sl st to top of beginning ch-3. (20 dc + 10 ch-1 sps = 30 sts)*
The 10 eyelets line up with the 10 mesh columns, 5 on each side of the flattened bag.
Rnd 17: Ch 1, sc in each dc and in each ch-1 sp around. Join. (20 sc in dc + 10 sc in sps = 30 sts)
Checkpoint: the bag measures about 3.75 in (9.5 cm) tall and 3 in (7.6 cm) wide flat. This is the size before the top edging.
Top Edging (Shell Ruffle)
The ruffle is the bag’s border. It sits above the eyelets, so it flares out into a frilly top when you pull the cords.
Border gauge: Rnd 18 doubles the stitch count, so each sc from Rnd 17 holds 2 dc. Rnd 19 uses a 6-stitch repeat. Here, a “side” means one face of the flattened bag, and there are no corners to count. With the bag flattened:
– Rnd 17 has 15 sts per side.
– Rnd 18 has 30 sts per side.
– Rnd 19 has 5 shells per side.
Rnd 18 (growth round): Ch 3 (counts as dc), dc in same st, 2 dc in each remaining st around. Join to top of ch-3. (60 sts; 30 per side)
Rnd 19: Ch 1, sc in first st, skip 2 sts, 7 dc in next st, skip 2 sts, sc in next st; repeat from * 8 more times, skip 2 sts, 7 dc in next st, skip last 2 sts. Join to first sc. (10 shells and 10 sc; 5 shells per side)*
Fasten off and weave in ends.
Why the math works: each repeat in Rnd 19 uses 6 sts: 1 sc, 2 skipped, 1 shell st and 2 skipped. Ten repeats use 6 x 10 = 60 sts, exactly the Rnd 18 count. The 10 shells also match the 10 mesh columns and 10 eyelets, so the design stays balanced all the way up. The ruffle adds about 0.75 in (1.9 cm), bringing the bag to 4.5 in (11.4 cm).
Drawstrings and Hanging Loop
Drawstring cord (make 2): Ch 61. Sl st in the back bump of 2nd ch from hook and in each ch across. (60 sl sts) Each cord measures about 10 in (25.4 cm). Fasten off, leaving short tails.
Weaving: Flatten the bag and mark the left and right folds.
1. Starting at the left fold, weave the first cord over and under through all 10 eyelets of Rnd 16, so both ends come out at the left fold.
2. Starting at the right fold, weave the second cord the same way, so its ends come out at the right fold.
Knotted ends: On each side, tie the two ends together with an overhand knot about 1.6 in (4.1 cm) from the bag. Tie a small overhand knot near each cord tip to make the little knotted drops. Trim tails close to the knots.
Hanging loop: Ch 49. Sl st in the back bump of 2nd ch from hook and in each ch across. (48 sl sts, about 8 in / 20.3 cm) Fold the cord in half and tie the ends around the gathered neck, just below the ruffle, with a square knot. Hide the tails inside the knot.
Final Blocking
- Remove the drawstrings so the top can open fully.
- Slide a rolled cloth or foam cylinder into the bag. It should be about 3 in (7.6 cm) wide when flattened.
- Mist the bag lightly with water until damp, not soaked.
- Gently tug the mesh diagonally so every diamond opens evenly.
- Shape the base into a neat oval and press the BLO ridge into a crisp edge.
- Fan out each shell of the ruffle with your fingers.
- Let the bag dry completely, at least 4 to 6 hours.
- Re-thread the drawstrings, fill the bag and pull the cords to gather the neck.
Final Quality-Control Checklist
- Base is a smooth oval with no cupping or rippling.
- BLO ridge shows all the way around the bottom edge.
- Every mesh round has exactly 10 loops.
- Diamonds are even in size, with no twisted loops.
- Rnds 14, 15, 16 and 17 each count 30 sts.
- All 10 eyelets are open and evenly spaced.
- Ruffle has 10 shells, 5 on each face.
- Bag measures 3 in (7.6 cm) wide and 4.5 in (11.4 cm) tall.
- Each cord is 10 in (25.4 cm) long and neatly knotted.
- All ends are woven in securely.
Troubleshooting
Base curls into a bowl: Your increases are too tight. Use a slightly larger hook for Rnds 1–3 only.
Base ripples: You added extra increases. Recount each round against 18, 24 and 30.
Mesh leans in a spiral: This is normal in joined rounds. Always slip-stitch to the center of the loop the same way, and blocking will straighten most of the lean.
Loops look uneven: Count each ch 5 carefully. One loop with 4 or 6 chains is very noticeable on a piece this small.
Rnd 14 is not 30 sts: You may have worked into an sc between loops. Work only into the ch-5 loops.
Ruffle looks flat: Check that Rnd 18 has 60 sts. Without the doubling, the shells cannot flare.
Cords will not gather the top: Make sure each cord passes through all 10 eyelets and not between the stitches of Rnd 17.
Care
Remove any candy first. Hand wash in cool water with mild soap, roll the bag in a towel to remove moisture, and dry it flat over a small form.
Final Notes
The whole bag is built on one number: 30.
– The base grows from 18 to 24 to 30 sts.
– The solid wall holds 30.
– The mesh divides the 30 into 10 loops.
– Rnd 14 brings the count back to 30.
– The eyelet round splits it into 10 openings.
– The ruffle doubles it to 60 for 10 shells.
The measurement chain runs like this: a 2.4 in x 1.2 in (6.1 cm x 3.0 cm) base, a 0.5 in (1.3 cm) wall, 2.75 in (7.0 cm) after the mesh, 3.75 in (9.5 cm) after the eyelet band and 4.5 in (11.4 cm) after the ruffle. The width stays at 3 in (7.6 cm) throughout. If your checkpoints match, every bag in a batch will come out the same size.
Make one in green and one in cream, fill them with chocolates, and they are ready for the tree or to give as a small gift.
Happy crocheting!