

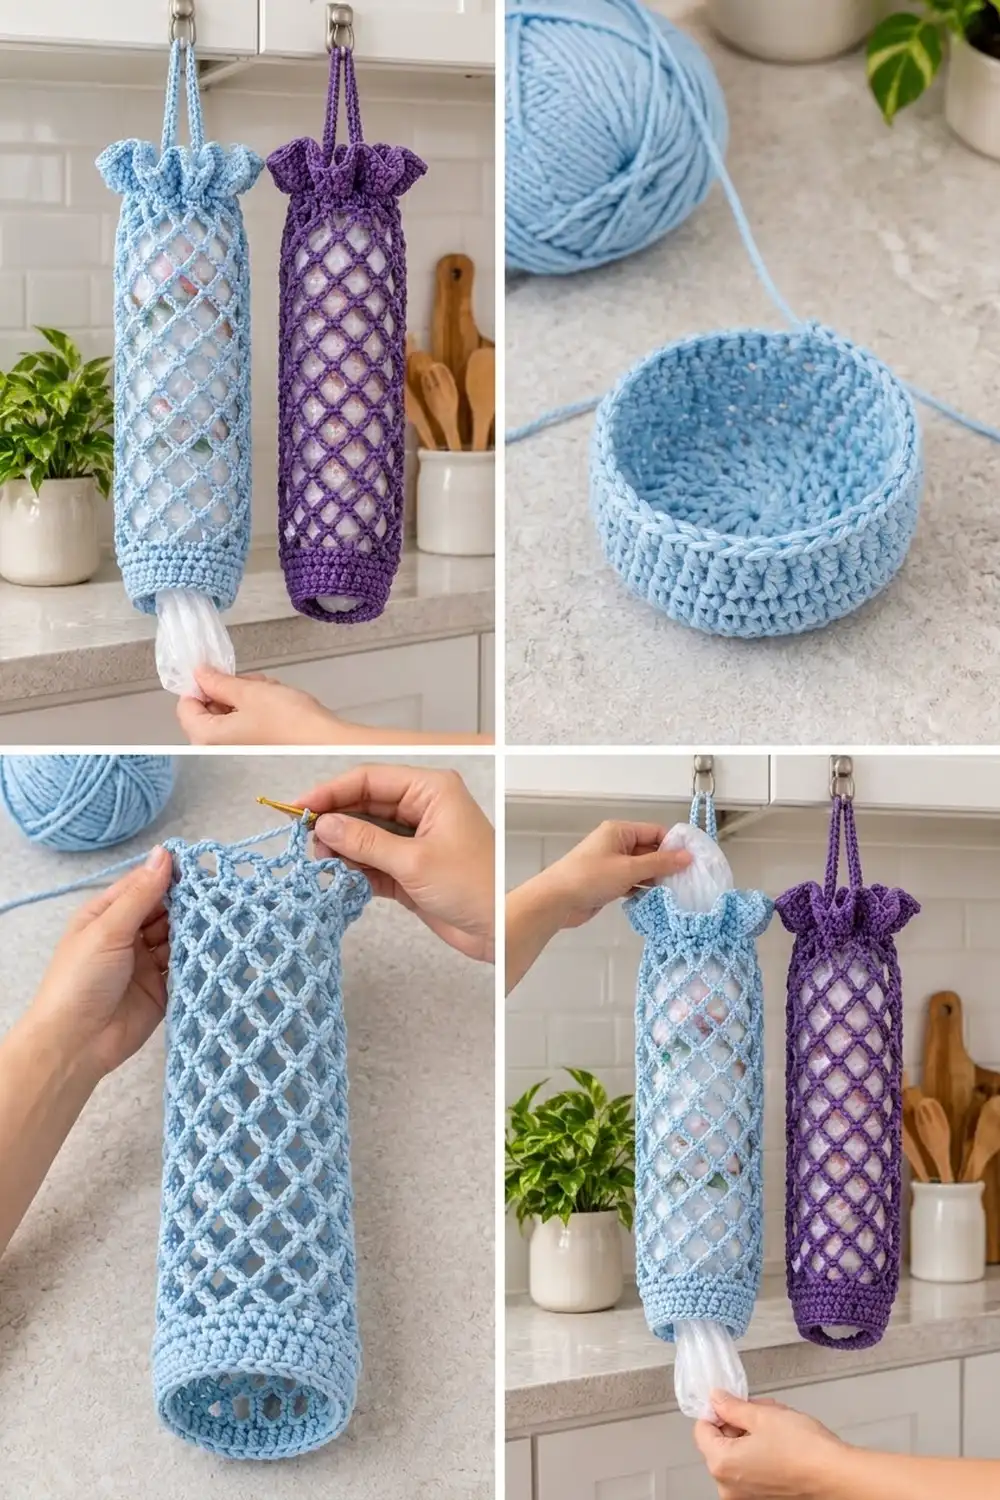
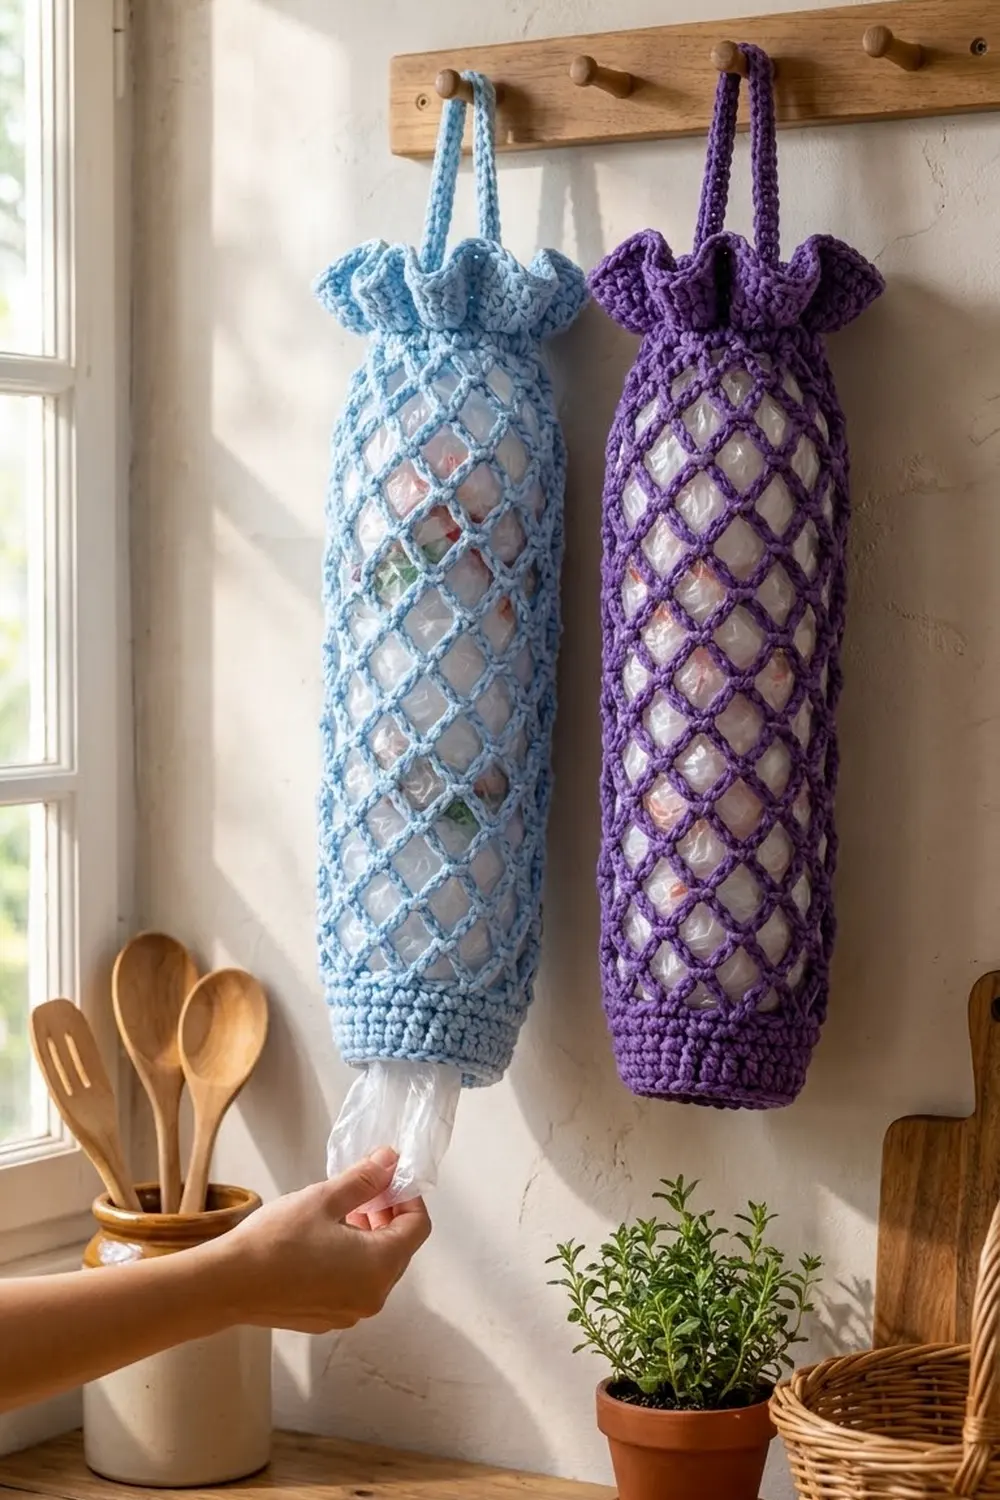
The Lattice Ruffle Plastic Bag Holder is a tall, open-mesh tube that keeps grocery bags tidy and easy to reach. You stuff bags in at the top and pull them out one at a time through the bottom. A solid band at the base keeps the opening firm, and the diamond lattice body lets you see how many bags are left.
The design looks crisp in a single solid color. The photo shows it in soft sky blue and in deep violet purple. Each holder uses only one color, so it’s a good way to use up a single skein of cotton.
The style is practical cottage-kitchen: a clean lattice, a ruffle at the gathered neck, and a chain hanging loop that hooks over a cabinet knob or a peg. All instructions use US crochet terms.
The finished holder measures 6 in (15.2 cm) wide laid flat (12 in / 30.5 cm around) and 17.75 in (45.1 cm) tall, not counting the hanging loop. It’s worked bottom-up in joined rounds as one piece: solid base band, chain-loop mesh body, eyelet neck band, three-round ruffle, then a drawstring that becomes the hanger.
Finished Size and Construction
- Finished size: 6 in (15.2 cm) wide flat, 12 in (30.5 cm) circumference, 17.75 in (45.1 cm) tall
- Hanging loop: hangs about 6 in (15.2 cm) above the ruffle
- Skill level: Easy
- Terminology: US crochet terms
- Yarn weight: #4 worsted, cotton or cotton blend
- Hook: 5.0 mm (H-8)
- Number of pieces: 1 tube plus 1 chain drawstring
- Layout: single tube worked in joined rounds, bottom to top
- Section heights: base band 2 in (5.1 cm), mesh 13.5 in (34.3 cm), neck band 1 in (2.5 cm), ruffle 1.25 in (3.2 cm)
- Size before ruffle: 6 in (15.2 cm) flat × 16.5 in (41.9 cm) tall
- Ruffle depth: 1.25 in (3.2 cm)
Materials
Yarn: Use a smooth worsted cotton or cotton blend. Cotton holds the lattice shape and doesn’t stretch out much under the weight of the bags. Acrylic also works, but the mesh will get longer as it hangs.
- Light Blue (one holder): 100 g, about 180 m
- Violet Purple (optional second holder, as shown in the photo): 100 g, about 180 m
One holder uses roughly 80 g (145 m). The amounts above include a margin for your gauge swatch and the drawstring.
Tools:
- 5.0 mm (H-8) crochet hook
- 1 locking stitch marker
- Tapestry needle
- Scissors
- Tape measure
- Rust-proof pins and a foam board, or a rolled towel
- Spray bottle
Abbreviations (US Terms)
- ch – chain
- sl st – slip stitch
- sc – single crochet
- dc – double crochet
- sk – skip
- st(s) – stitch(es)
- sp – space
- rnd(s) – round(s)
- beg – beginning
Special stitch – Mesh loop: ch 5, sc in the next ch-5 loop. Each mesh loop sits on top of the center of the loop below, which makes the diamond lattice.
Gauge and Checkpoints
Base gauge: 14 sc and 16 rnds = 4 in (10.2 cm) in sc worked in the round.
Mesh gauge: 4 mesh rnds = 3 in (7.6 cm) tall, measured with light stretch. Each mesh round is about 0.75 in (1.9 cm) tall.
Make the base band first and use it as your swatch. It’s only 8 rounds, and it tells you right away if the tube will come out the right size.
Checkpoints:
- After Rnd 8: band is 2 in (5.1 cm) tall and 6 in (15.2 cm) wide laid flat.
- After Rnd 12: first 4 mesh rnds are 3 in (7.6 cm) tall.
- After Rnd 26: piece is 15.5 in (39.4 cm) tall.
- After Rnd 29: piece is 16.5 in (41.9 cm) tall.
- After Rnd 32: piece is 17.75 in (45.1 cm) tall.
If your band is too wide, go down half a hook size, to 4.5 mm (US 7). If it’s too narrow, go up to 5.5 mm (I-9). Don’t change the stitch count. The mesh repeat needs exactly 42 stitches.
If your mesh is too short or too long, keep the hook and adjust the number of mesh rounds. Each round adds or removes about 0.75 in (1.9 cm).
Base Band
Ch 42. Join with a sl st into the first ch to form a ring. Make sure the chain isn’t twisted.
Rnd 1: Ch 1 (doesn’t count as a st), sc in each ch around, sl st in first sc to join. (42 sc)
Place a marker in the first sc of the round and move it up each round.
Rnds 2–8: Ch 1, sc in each sc around, sl st in first sc to join. (42 sc each rnd)
The band is now 2 in (5.1 cm) tall and 6 in (15.2 cm) wide laid flat. This firm ring is the bottom opening that you pull bags through. Keep your tension even here so the band doesn’t flare out.
Mesh Body
The 42 stitches split into 14 repeats of 3 stitches. Each repeat becomes one ch-5 loop.
Rnd 9 (setup): Ch 1, sc in first sc, ch 5, sk 2 sc, sc in next sc, ch 5, sk 2 sc; repeat from * 12 more times. End with ch 2, then dc in the first sc. (14 sc, 14 ch-5 loops)*
The ch 2 plus dc counts as the 14th loop. It ends your hook at the center of that loop, so the next round starts in the right spot.
Rnds 10–25: Ch 1, sc around the post of the joining dc, ch 5, sc in next ch-5 loop; repeat from * 12 more times. End with ch 2, then dc in the first sc. (14 ch-5 loops each rnd)*
Rnd 26 (last mesh rnd): Ch 1, sc around the post of the joining dc, ch 5, sc in next ch-5 loop; repeat from * 12 more times, ch 5, sl st in the first sc. (14 ch-5 loops)*
Closing this last round with a full ch-5 gives you 14 complete loops for the next round.
That’s 18 mesh rounds (Rnds 9–26), 13.5 in (34.3 cm) tall. The piece is now 15.5 in (39.4 cm) tall.
The diamonds come from moving each new sc to the middle of the loop below. If your lattice starts to lean, check that every sc goes into a loop and never into an sc.
Neck Band
Rnd 27 (conversion): Sl st into the first ch-5 loop, ch 1, work 3 sc in each ch-5 loop around, sl st in first sc. (14 loops × 3 sc = 42 sc; 0 extra)
This puts you back to the same 42-stitch count as the base band, so the neck is the same width as the bottom.
Rnd 28 (eyelet rnd): Ch 4 (counts as dc + ch 1), sk next sc, dc in next sc, ch 1, sk next sc; repeat from * 19 more times, sl st in 3rd ch of beg ch-4. (21 dc + 21 ch-1 sps = 42 sts)*
The drawstring goes through these 21 eyelets.
Rnd 29: Ch 1, sc in each dc and each ch-1 sp around, sl st in first sc. (21 + 21 = 42 sc)
The neck band is 1 in (2.5 cm) tall. The piece is now 16.5 in (41.9 cm) tall.
Border: Ruffle and Drawstring
Border gauge: The ruffle uses the same 14 sc = 4 in (10.2 cm) gauge. At that rate, 126 stitches would lie flat at 36 in (91.4 cm). The base of the ruffle is only 12 in (30.5 cm) around, so the extra length has nowhere to go but into waves. Tripling the stitch count is what makes the full, wavy ruffle in the photo.
Rnd 30 (increase): Ch 3 (counts as dc), 2 dc in same st, 3 dc in each sc around, sl st in top of beg ch-3. (42 sts worked once each + 84 extra = 126 dc)
Rnd 31: Ch 3 (counts as dc), dc in each dc around, sl st in top of beg ch-3. (126 dc)
Rnd 32 (trim): Ch 1, sc in each dc around, sl st in first sc. (126 worked once each + 0 extra = 126 sc)
Fasten off and weave in the end.
Per-side check: With the holder laid flat, each side of the band, mesh base, and neck has 21 stitches (42 ÷ 2). Each side of the ruffle has 63 stitches (126 ÷ 2), so three ruffle stitches sit over every neck stitch. The ruffle is 1.25 in (3.2 cm) deep. The finished height is 2 + 13.5 + 1 + 1.25 = 17.75 in (45.1 cm).
Drawstring and hanging loop: Join the yarn with a slip knot and chain until the chain measures 30 in (76.2 cm), about 110 ch. Fasten off and leave a 2 in (5.1 cm) tail at each end.
- Start at one eyelet on the side of the holder that will face the wall. Thread the drawstring through Rnd 28, going over one dc and under the next all the way around. Both ends should come out next to each other.
- Pull both ends evenly until the neck gathers to an opening of about 3 in (7.6 cm) across. That’s small enough to make the ruffle stand up and big enough to push bags in.
- Line up the two strands and tie them together in an overhand knot so the loop hangs 6 in (15.2 cm) above the ruffle.
- Trim the tails to 1 in (2.5 cm) and tuck them into the knot.
Final Blocking
- Lightly mist the whole holder with water until it’s damp but not soaked.
- Roll a towel into a tube about 12 in (30.5 cm) around and slide the holder over it. This sets the round shape and opens up the diamonds.
- Gently pull the mesh lengthwise until the body measures 13.5 in (34.3 cm). Keep the diamonds even all the way around.
- Pinch the ruffle into even waves with your fingers. Don’t flatten it.
- Pat the base band and neck band to 6 in (15.2 cm) wide.
- Let it dry completely, then thread the drawstring if you haven’t already.
Final Quality-Control Checklist
- The base band has 42 sc and measures 6 in (15.2 cm) flat.
- Every mesh round has exactly 14 ch-5 loops.
- The diamonds line up vertically and don’t spiral.
- The neck band counts 42 sts in Rnds 27, 28, and 29.
- The ruffle has 126 sts in Rnds 30, 31, and 32.
- The total height is 17.75 in (45.1 cm).
- The drawstring goes through all 21 eyelets.
- The knot is secure, and the loop hangs 6 in (15.2 cm) above the ruffle.
- All ends are woven in and invisible from the outside.
Troubleshooting
The mesh spirals around the tube. You’re probably starting rounds in the wrong place. End every round with ch 2 + dc into the first sc, and start the next round around that dc’s post.
I have 13 or 15 loops. Count the stitches you skipped in Rnd 9. It should be exactly 2 between each sc. Pull back to the band and work Rnd 9 again.
The ruffle is flat. Check that Rnd 30 has 3 dc in every stitch, for a total of 126.
The ruffle is too floppy. Your tension may be loose. Work Rnds 30–32 with a hook half a size smaller.
The bottom band flares out. Your band tension is loose. Rework it with a 4.5 mm (US 7) hook, or take out one round.
The holder grows when it’s full. Cotton relaxes a little. Pull the drawstring tighter, or add fewer mesh rounds next time.
Bags fall out of the bottom. Stuff the bags in loosely gathered so they don’t drop through. You can also add one more sc round to the band to firm it up.
Care
Hand wash in cool water with mild soap and lay flat to dry. Reshape it over a rolled towel if the mesh gets uneven.
Final Notes
The measurements all build on one gauge. A 42-stitch base band sets the 6 in (15.2 cm) width. Fourteen loops per round give you 18 mesh rounds and 13.5 in (34.3 cm) of lattice. The 3-sc conversion round brings the count back to 42. The eyelet neck band adds 1 in (2.5 cm), and the 126-stitch ruffle adds 1.25 in (3.2 cm), for a total of 17.75 in (45.1 cm). If you check the band against the gauge before you start the mesh, the rest of the holder will come out right.
Happy crocheting!