

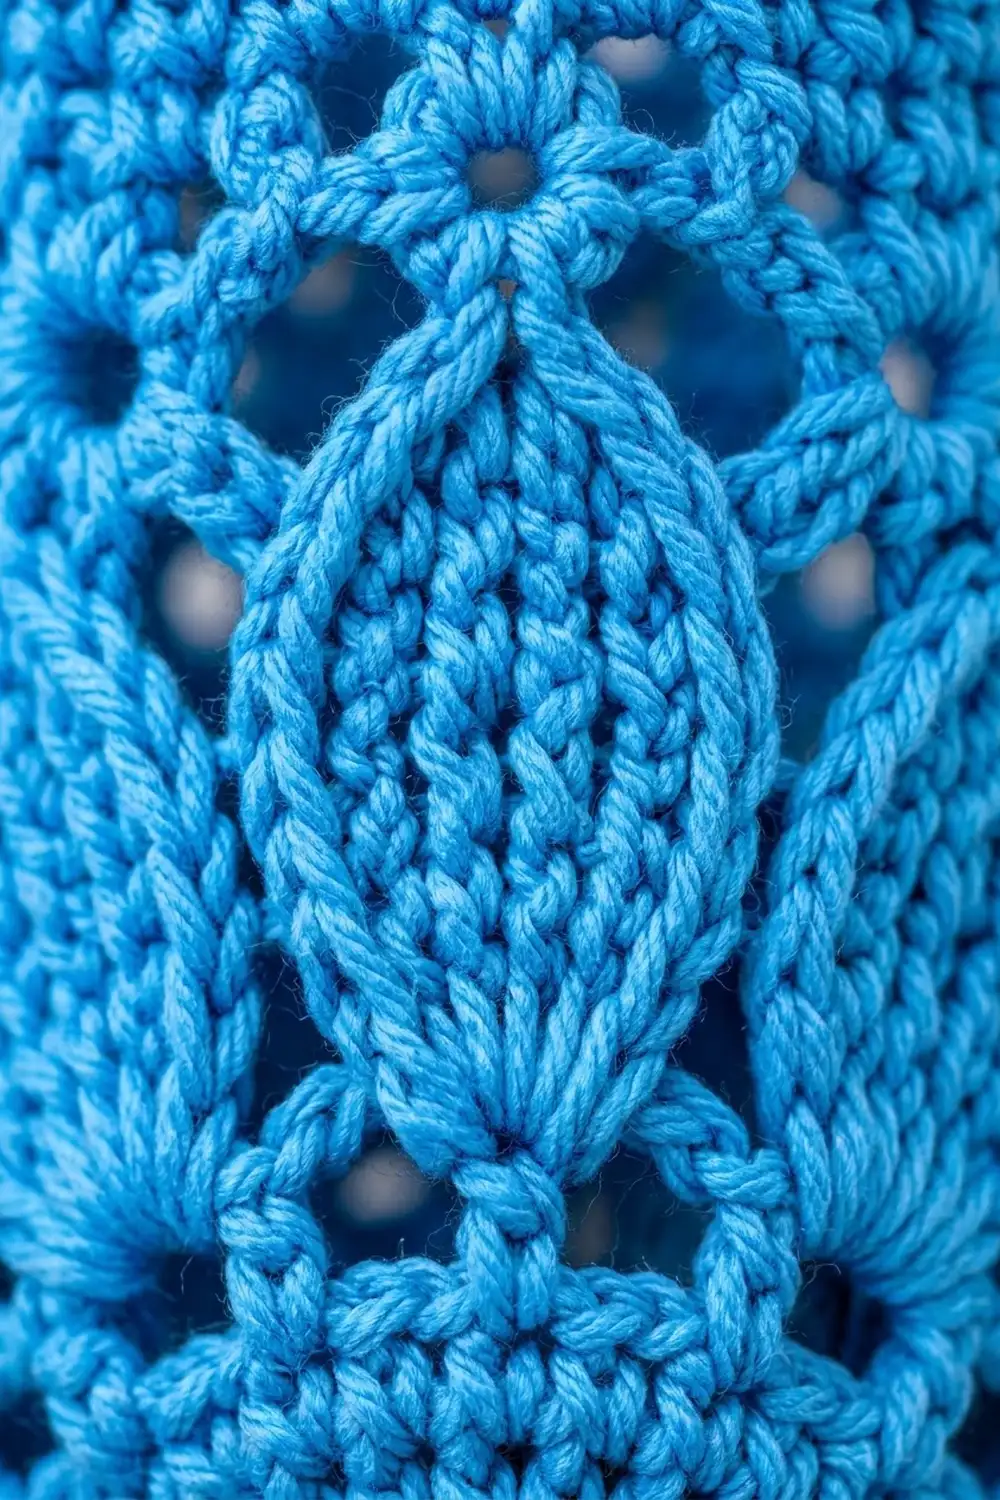
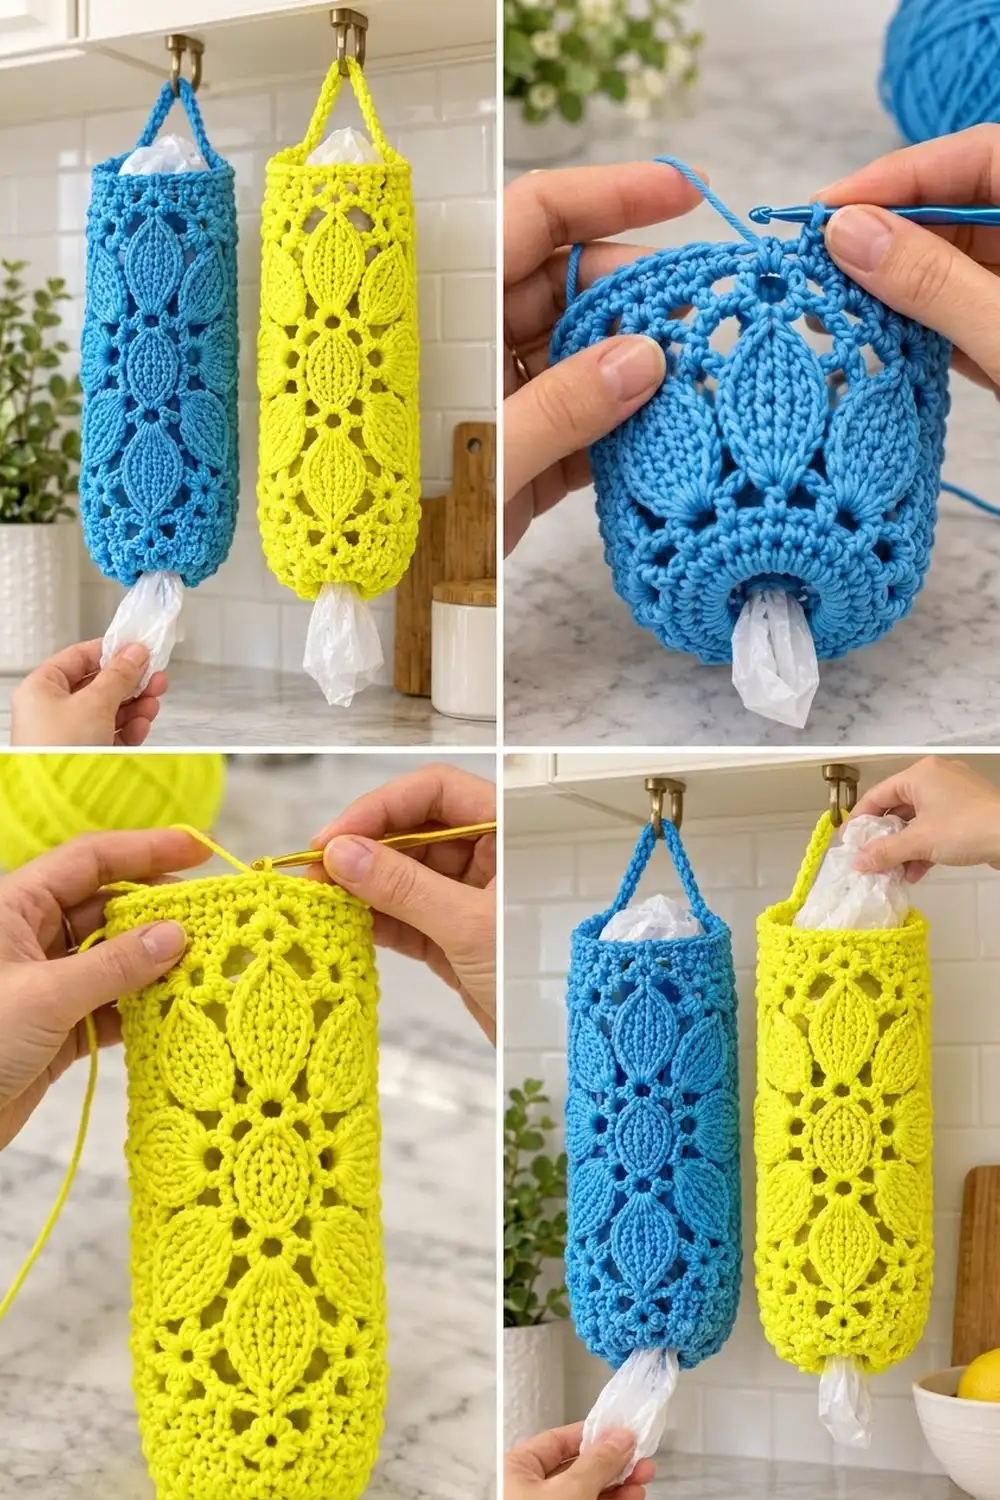
This bag holder turns your pile of grocery bags into something you’ll be happy to leave out. It’s a tall, slim tube covered with pointed, ribbed leaves. Each leaf has a raised center vein, and round eyelets and airy mesh frame the leaves.
The samples are in two cheerful kitchen colors, bright azure blue and lime yellow, and each holder uses one color. Stuff bags in at the top, hang the holder from a hook by its strap, and pull bags out one at a time through the snug opening at the bottom.
The pattern uses US crochet terms. The finished holder is 16 in (40.6 cm) around, about 5.1 in (13.0 cm) across, and 13.75 in (34.9 cm) tall, plus a 10 in (25.4 cm) hanging strap.
Construction is seamless. You work from the bottom opening upward in joined rounds. First you increase to full width, then work three leaf tiers separated by eyelet rounds, then a solid top band. Last, you crochet the strap straight off the top and finish the edges with reverse single crochet.
Finished Size and Construction
- Finished size: 16 in (40.6 cm) circumference; 8 in (20.3 cm) wide laid flat; 13.75 in (34.9 cm) tall
- Skill level: Intermediate
- Terminology: US crochet terms
- Yarn weight: Worsted weight (#4) cotton
- Hook: US H-8 (5 mm)
- Number of pieces: 1 (the tube and strap are worked in one piece)
- Layout: 4 vertical leaf columns around the tube, 3 leaf tiers stacked
- Piece size: 64 stitches around; each leaf about 1.5 in (3.8 cm) wide and 3 in (7.6 cm) tall
- Size before border: 13.5 in (34.3 cm) tall
- Border depth: about 1/8 in (0.3 cm) of reverse single crochet at the top and bottom edges
- Bottom opening: 8 in (20.3 cm) circumference, about 2.5 in (6.4 cm) across
Materials
Use a smooth, firm cotton. It holds the leaf texture well, doesn’t stretch much under the weight of the bags, and washes well. Avoid fuzzy or splitty yarns, because the raised vein needs clean stitch definition.
- Color option A – Bright Azure Blue: 150 g, about 255 m
- Color option B – Lime Yellow: 150 g, about 255 m
- You need only one color per holder.
Tools:
- US H-8 (5 mm) crochet hook
- 4 stitch markers (one for the start of round, three for the strap)
- Tapestry needle
- Scissors
- Measuring tape
- A 5 in (12.7 cm) wide bottle or rolled towel for blocking
Each holder uses about 115 g. The quantities above include a margin for your gauge swatch and small tension differences.
Abbreviations (US Terms)
- ch – chain
- sl st – slip stitch
- sc – single crochet
- dc – double crochet
- sk – skip
- sp – space
- st(s) – stitch(es)
- BLO – back loop only
- fpdc – front post double crochet
- rev sc – reverse single crochet (crab stitch)
- rep – repeat
- RS / WS – right side / wrong side
Special stitch – leaf dc (ldc): Work a dc in the back loop only of the next stitch. If the next position is a ch-1 space, work the dc into the space. Rows of ldc give the leaf its ribbed, knit-look ridges.
Positions: In the leaf tiers, every dc, ldc, fpdc and ch-1 counts as one position. Each round always has 64 positions: 16 per repeat, 4 repeats around.
Gauge and Checkpoints
Gauge: 16 sc and 16 sc rounds = 4 in (10.2 cm). In the leaf tiers, 2 dc rounds = 1 in (2.5 cm).
Make the bottom band (Rounds 1–6) as your gauge test. It’s the real start of the holder, so if it measures correctly, just keep going.
Checkpoints:
- After Round 1: the ring measures 8 in (20.3 cm) around.
- After Round 6: the band is 8 in (20.3 cm) wide laid flat and 1.5 in (3.8 cm) tall.
- After Tier 1: the piece is 5 in (12.7 cm) tall.
- After Tier 2: 8.5 in (21.6 cm) tall.
- After Tier 3: 12 in (30.5 cm) tall.
- After the final eyelet rounds: 12.5 in (31.8 cm) tall.
- After the top band: 13.5 in (34.3 cm) tall.
If your band is too wide, go down one hook size. If it’s too narrow, go up one hook size. If only the height is off, pull each dc up to its full height. Don’t change the stitch counts, because the leaf repeat depends on 64 stitches.
Pattern
Work in joined rounds with the RS always facing. The ch 1 or ch 2 at the start of a round does not count as a stitch. Place a marker in the first stitch of every round.
Bottom Band
Round 1: Ch 32 and join with a sl st to the first ch to form a ring, taking care not to twist. Ch 1, sc in each ch around, then join with a sl st to the first sc. (32 sc)
Round 2: Ch 1, sc in each st around, then join. (32 sc)
Round 3 (growth): Ch 1, *sc in next st, 2 sc in next st; rep from * 16 times total, then join. (48 sc)
Round 4: Ch 1, sc in each st around, then join. (48 sc)
Round 5 (growth): Ch 1, *sc in next 2 sts, 2 sc in next st; rep from * 16 times total, then join. (64 sc)
Round 6: Ch 1, sc in each st around, then join. (64 sc)
The band flares from the narrow opening to full width and gives the bottom its rounded shape.
Eyelet Rounds (E1–E2)
Work these 2 rounds before each tier and once more after Tier 3.
Round E1: Ch 1, *ch 2, sk next 2 sts, sc in next 6 sts; rep from * 8 times total, then join with a sl st to the first ch of the first ch-2. (48 sc + 8 ch-2 sps = 64 positions)
Round E2: Ch 1, *2 sc in next ch-2 sp, sc in next 6 sts; rep from * 8 times total, then join. (64 sc)
This round leaves 8 eyelets around. Four of them line up with the leaf columns and four fall between the columns. The first 2 sc of Round E2 sit right above an eyelet and become the base of the next leaf.
Leaf Tier (Rounds A–F)
You work each 16-position repeat 4 times per round. The leaf widens from 2 to 4 to 6 positions, then narrows back to 2. The mesh beside it shrinks and grows to match, so the total stays at 64.
Round A: Ch 2, *ldc in next 2 sts, (ch 1, sk next st, dc in next st) 7 times; rep from * 3 more times, then join with a sl st to the first ldc. (8 ldc, 28 dc, 28 ch-1 = 64 positions)
Round B: Ch 2, *fpdc around each of the next 2 ldc, ldc in next st or sp, (ch 1, sk next st or sp, dc in next st or sp) 6 times, ldc in next st; rep from * 3 more times, then join. (8 fpdc, 8 ldc, 24 dc, 24 ch-1 = 64 positions)
The last ldc of each repeat sits on the left side of the next leaf, so each leaf is now 4 wide. The fpdc pair starts the raised vein.
Round C: Ch 2, *fpdc around each of next 2 fpdc, ldc in next 2 sts or sps, (ch 1, sk next st or sp, dc in next st or sp) 5 times, ldc in next 2 sts; rep from * 3 more times, then join. (8 fpdc, 16 ldc, 20 dc, 20 ch-1 = 64 positions)
Round D: Ch 2, *fpdc around each of next 2 fpdc, ldc in next 2 sts, (ch 1, sk next ch-1 sp, dc in next dc) 5 times, ldc in next 2 sts; rep from * 3 more times, then join. (8 fpdc, 16 ldc, 20 dc, 20 ch-1 = 64 positions)
The leaf is at its widest here: 6 positions, or about 1.5 in (3.8 cm).
Round E: Ch 2, *fpdc around each of next 2 fpdc, ldc in next st, (ch 1, sk next st or sp, dc in next st or sp) 6 times, ldc in next st; rep from * 3 more times, then join. (8 fpdc, 8 ldc, 24 dc, 24 ch-1 = 64 positions)
Round F: Ch 2, *fpdc around each of next 2 fpdc, (ch 1, sk next st or sp, dc in next st or sp) 7 times; rep from * 3 more times, then join. (8 fpdc, 28 dc, 28 ch-1 = 64 positions)
The leaf closes to a point. Whenever you work a post stitch, skip the stitch behind it.
Body Sequence
- Work Rounds E1–E2, then Rounds A–F (Tier 1). The piece is 5 in (12.7 cm) tall.
- Work Rounds E1–E2, then Rounds A–F (Tier 2). The piece is 8.5 in (21.6 cm) tall.
- Work Rounds E1–E2, then Rounds A–F (Tier 3). The piece is 12 in (30.5 cm) tall.
- Work Rounds E1–E2 once more. The piece is 12.5 in (31.8 cm) tall.
Each tier is 3 in (7.6 cm) tall, and each pair of eyelet rounds adds 0.5 in (1.3 cm).
Top Band
Rounds T1–T4: Ch 1, sc in each st around, then join. (64 sc in each round)
The piece now measures 13.5 in (34.3 cm).
Hanging Strap
Count from the marked first stitch of Round T4. Mark sts 9–11 as strap base A and sts 41–43 as strap base B. The two bases are exactly 32 sts apart, directly opposite each other, and both sit above the gaps between leaf columns. Fasten off the working yarn.
Row 1: With RS facing, join the yarn in st 9. Ch 1, sc in sts 9, 10 and 11, then turn. (3 sc)
Rows 2–40: Ch 1, sc in each st, then turn. (3 sc in each row)
The strap is now 10 in (25.4 cm) long and 0.75 in (1.9 cm) wide.
Row 41 (joining row): Check that the strap isn’t twisted. Hold Row 40 against base B (sts 41–43) on the inside of the tube. Working through both layers, sc 3 times. (3 sc) Fasten off.
Border
The border is one round of rev sc at the top that runs up and over the strap, plus one round of rev sc around the bottom opening.
Border gauge: Work 1 rev sc in each stitch along the top band and 1 rev sc in each row end along the strap. This keeps the edge flat, without ruffling or puckering.
Top border (Round 1): With RS facing, join the yarn in st 12 of Round T4. Ch 1, then working left to right, rev sc around in this order:
- Front top edge: 29 rev sc in sts 12–40
- Strap side 1: 40 rev sc, 1 in each row end
- Back top edge: 29 rev sc in sts 44–64 and 1–8
- Strap side 2: 40 rev sc, 1 in each row end
Join with a sl st to the first rev sc. (138 rev sc) Fasten off.
Why the math works: Round T4 has 64 sts. The two strap bases use 3 sts each, which leaves 58 free sts, or 29 for each half of the top. Each strap side has 40 row ends, one per row from Row 1 to Row 40. Add them up: 29 + 40 + 29 + 40 = 138, so every edge gets exactly one stitch per stitch or row.
Bottom border: With RS facing, join the yarn in the free loop of any foundation ch of Round 1. Ch 1, then rev sc in each free loop around, 16 per half of the opening, and join. (32 rev sc) Fasten off.
The bottom border keeps the original 32 sts, so the opening stays 8 in (20.3 cm) around. The rolled edge makes it firm enough to grip each bag as you pull it out.
Final Blocking
- Weave in all ends on the WS, running each one through at least 2 in (5.1 cm) of stitches.
- Soak the holder in cool water for 10 minutes, then roll it in a towel and press out the water. Don’t wring it.
- Slide the holder over a 5 in (12.7 cm) wide bottle or a tightly rolled towel.
- Ease the tube to 16 in (40.6 cm) around and 13.75 in (34.9 cm) tall.
- Open each eyelet with a fingertip and nudge each leaf so its vein runs straight up the column.
- Lay the strap flat and straighten it to 10 in (25.4 cm).
- Let it dry completely before you hang it.
Final Quality-Control Checklist
- The circumference is 16 in (40.6 cm), and the holder is 8 in (20.3 cm) wide laid flat.
- The height is 13.75 in (34.9 cm), not counting the strap.
- There are 4 leaf columns with 3 leaves each, 12 leaves in total.
- Every leaf has an unbroken fpdc vein from Round B to Round F.
- There are 8 eyelets in each eyelet band and 32 eyelets in total.
- The bottom opening is 8 in (20.3 cm) around, with a smooth rev sc edge.
- The strap isn’t twisted and is joined directly opposite its starting point.
- All ends are woven in securely.
Troubleshooting
The leaves lean to one side. Each round must begin with the fpdc pair (or the first ldc in Round A) directly above the previous round’s leaf center.
My count is off in a mesh round. Count positions, not just stitches. Each ch-1 counts as one position, and each repeat must total 16.
The tube is cone-shaped. Your dc tension is changing as you go. Check the width after each tier, and change your hook if it drifts more than 1/2 in (1.3 cm).
The vein is flat. Work each fpdc firmly around the post, and don’t also work into the top of the stitch behind it.
Bags fall out of the bottom. Work the bottom border more tightly, or use a hook one size smaller for it.
Care
Machine wash cool on a gentle cycle in a laundry bag. Reshape the holder and dry it flat or over a bottle; don’t tumble dry it.
Final Notes
You start with 32 sts for the 8 in (20.3 cm) bottom opening and increase to 64 sts for a 16 in (40.6 cm) circumference. Add up the 1.5 in (3.8 cm) bottom band, three 3.5 in (8.9 cm) tiers with their eyelet rounds, a final 0.5 in (1.3 cm) eyelet band, and the 1 in (2.5 cm) top band, and you get 13.5 in (34.3 cm). The border brings the height to 13.75 in (34.9 cm). Check your gauge on the bottom band and count positions in every leaf round, and the rest will fall into place.
Happy crocheting!