

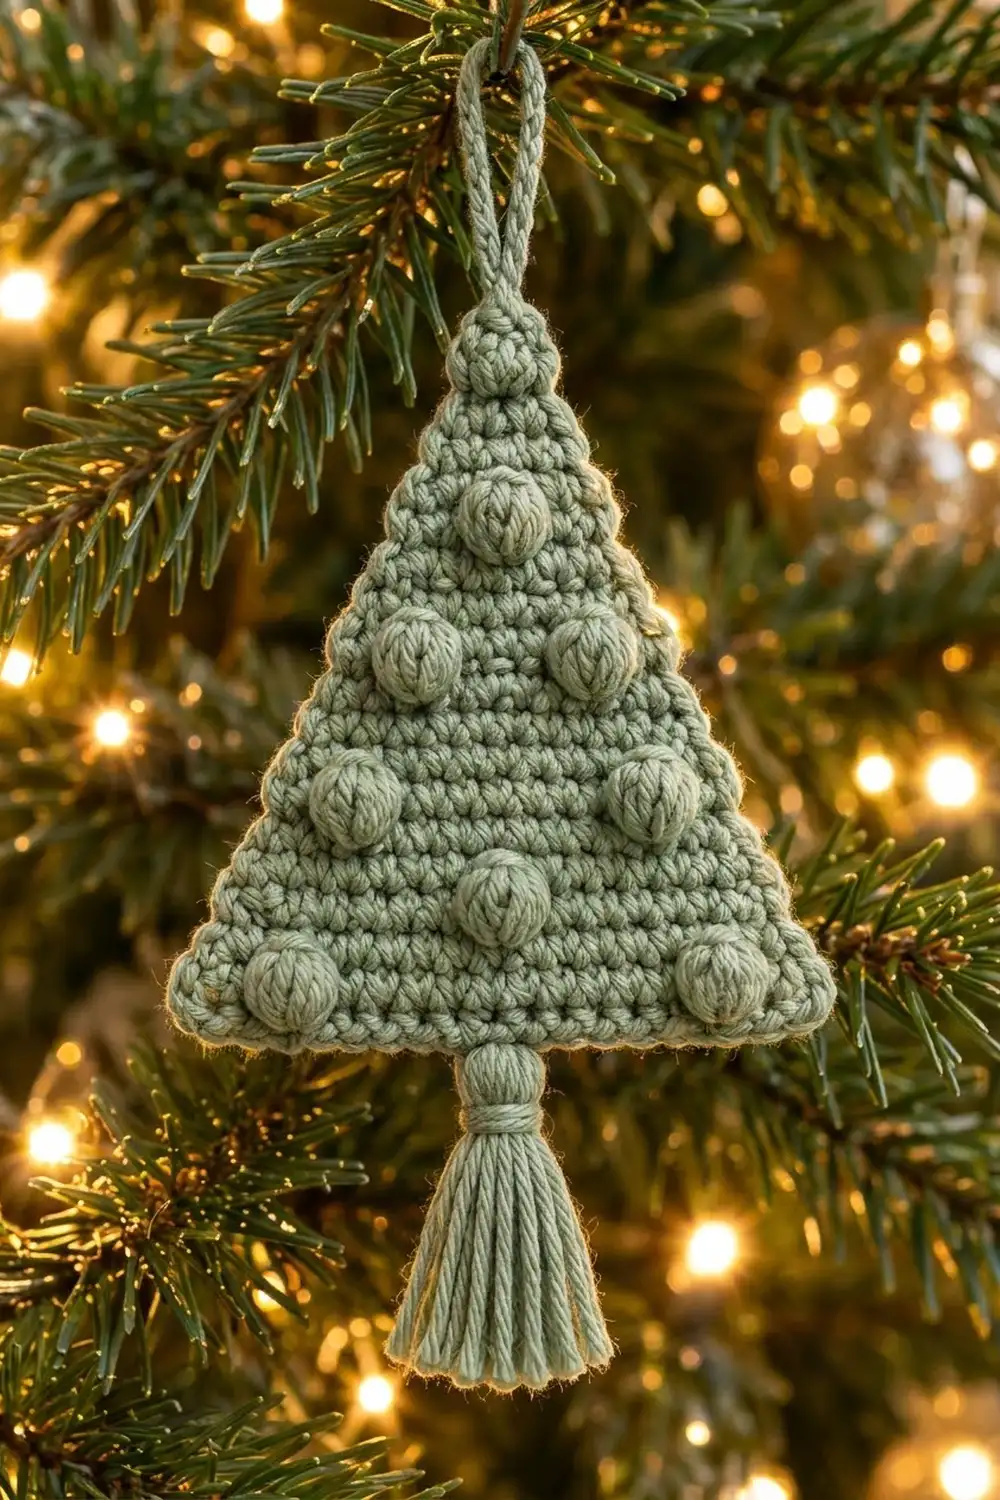
This little tree ornament is a flat sage-green triangle with eight raised bobbles that look like soft baubles. A round knob and a corded hanging loop sit at the top, and a full tassel at the bottom forms the trunk. It is quiet and modern, and it looks lovely among green branches and warm fairy lights.
The whole ornament uses one color: a soft sage-green cotton. Because everything is the same color, the texture does the work. The tight single crochet stays smooth, and the bobbles stand out in clear relief.
This pattern uses US crochet terms. The finished triangle measures 3.65 in (9.3 cm) wide by 4.25 in (10.8 cm) tall. With the loop and tassel, the whole ornament hangs about 8.5 in (21.6 cm) long.
The body is worked flat in rows from the bottom edge up to the point. You decrease at both edges on every third row, and you work the bobbles on wrong-side rows so they pop out to the front. One round of single crochet edging squares everything off. Then you add the knob, the hanging loop and the tassel.
Finished Size and Construction
- Finished size (body): 3.65 in (9.3 cm) wide x 4.25 in (10.8 cm) tall
- Overall length with loop and tassel: about 8.5 in (21.6 cm)
- Skill level: Easy
- Terminology: US crochet terms
- Yarn weight: DK (light worsted, #3), cotton or cotton blend
- Hook: 3.5 mm (US E-4)
- Number of pieces: 1 (plus a tassel)
- Layout: single flat triangle, point up
- Piece size before border: 3.4 in (8.6 cm) wide x 4 in (10.2 cm) tall
- Border depth: 1 round of sc, about 0.125 in (0.3 cm) per edge
Materials
Yarn: Use a smooth, mercerized or matte DK cotton. Cotton keeps the bobbles round and the edges crisp. Acrylic will work too, but the triangle will be softer and may need more blocking.
- Sage green: 12 g, about 30 m (33 yd), based on a yarn with roughly 125 m per 50 g
The body, border and bobbles use about 7 g. The tassel uses about 2 g. The quantity includes a margin for your gauge swatch and for trimming the tassel.
Tools:
- 3.5 mm (US E-4) crochet hook
- Tapestry needle
- Scissors
- Stitch marker (1)
- Stiff card 2.5 in (6.4 cm) wide, for the tassel
- Ruler or tape measure
- Blocking mat and rust-proof pins
- Spray bottle with water
Abbreviations (US Terms)
- ch: chain
- sc: single crochet
- sc2tog: single crochet 2 together (decreases 1 stitch)
- sc3tog: single crochet 3 together (decreases 2 stitches)
- dc: double crochet
- sl st: slip stitch
- st(s): stitch(es)
- yo: yarn over
- RS / WS: right side / wrong side
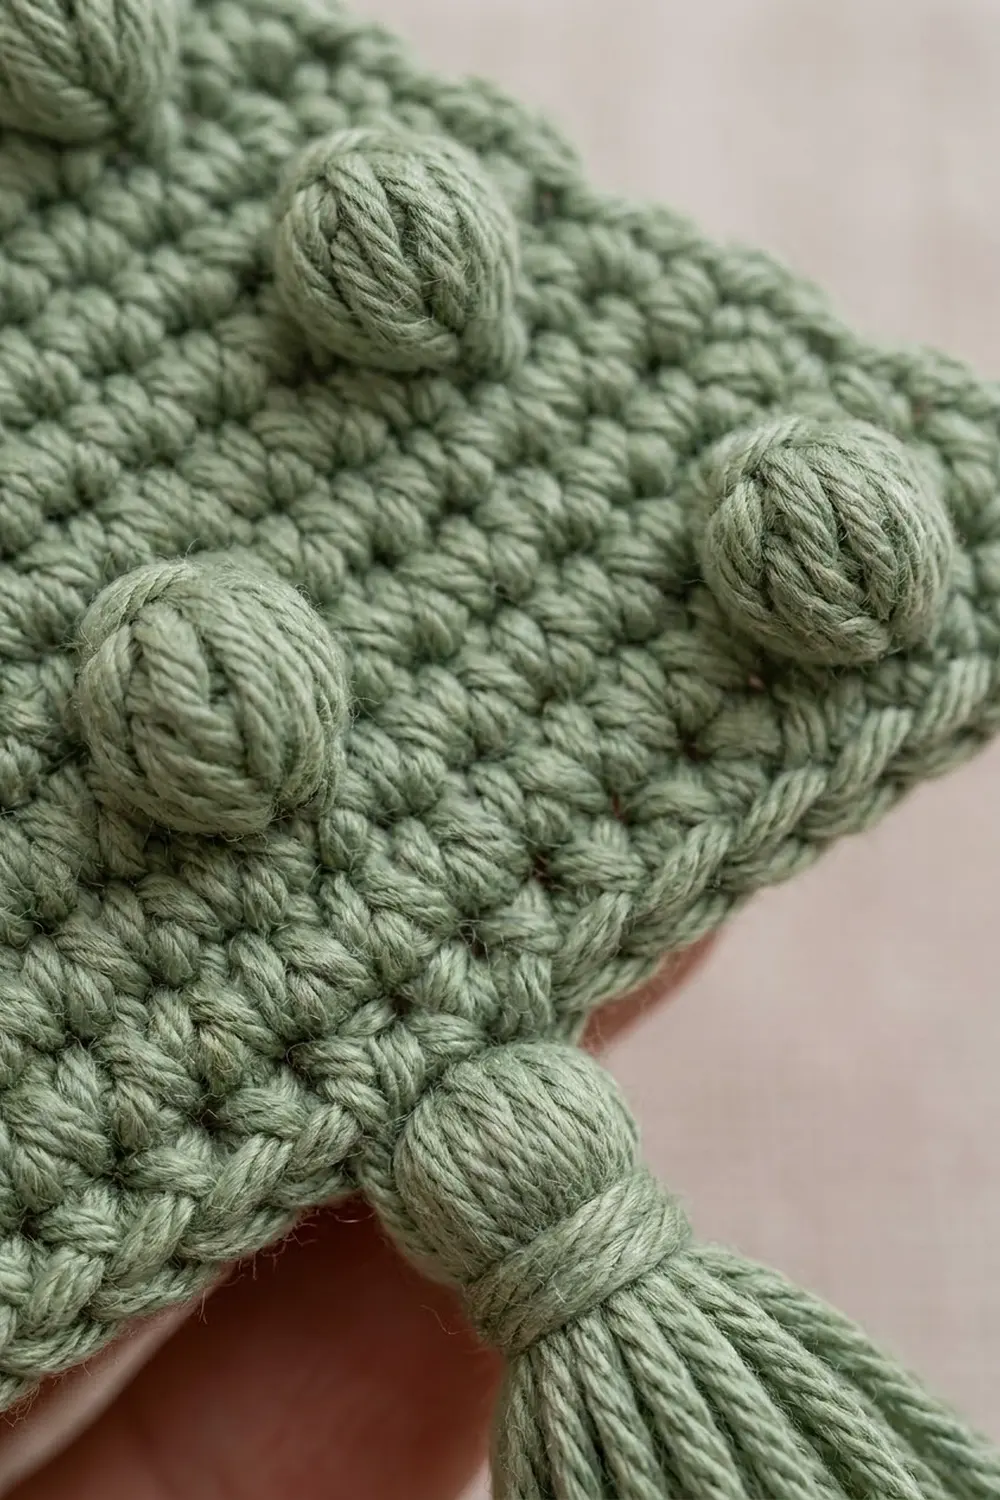
Special stitch: Bobble. (Yo, insert hook in the indicated st, yo and pull up a loop, yo and pull through 2 loops) 5 times in the same st. You now have 6 loops on the hook. Yo and pull through all 6 loops. A bobble counts as 1 stitch.
Because you work bobbles on WS rows, they push out toward the RS. The sc stitches on either side hold them firmly in place.
Gauge and Checkpoints
Gauge: 20 sc and 24 rows = 4 in (10.2 cm) in single crochet. That works out to 5 sc and 6 rows per 1 in (2.5 cm).
Make one full ornament body before you plan a whole set. It is small enough to act as your gauge swatch.
Checkpoints:
- After Row 1: the 17 sts measure 3.4 in (8.6 cm) wide.
- After Row 6: the piece is 1 in (2.5 cm) tall.
- After Row 12: the piece is 2 in (5.1 cm) tall, and Row 12 is 2.2 in (5.6 cm) wide.
- After Row 24: the piece is 4 in (10.2 cm) tall and comes to a single point.
- After the border: 3.65 in (9.3 cm) wide x 4.25 in (10.8 cm) tall.
If your piece is too big, go down to a 3.25 mm hook. If it is too small, go up to a 3.75 mm hook. Rows that are too tall make a skinny tree. In that case, tighten your tension on the yarn-over before you pull through.
Tree Body
Ch 18.
Row 1 (RS): Sc in 2nd ch from hook and in each ch across. (17 sts)
Place a marker on this side to mark the RS.
Row 2 (WS): Ch 1, turn, sc in each st across. (17 sts)
Row 3 (RS): Ch 1, turn, sc in each st across. (17 sts)
Row 4 (WS, decrease and bobbles): Ch 1, turn, sc2tog, sc in next st, bobble in next st, sc in next 9 sts, bobble in next st, sc in next st, sc2tog. (15 sts: 13 sc + 2 bobbles)
This is the bottom pair of bobbles, near the lower corners.
Rows 5–6: Ch 1, turn, sc in each st across. (15 sts)
Row 7 (RS, decrease): Ch 1, turn, sc2tog, sc in next 11 sts, sc2tog. (13 sts)
Row 8 (WS, bobble): Ch 1, turn, sc in next 6 sts, bobble in next st, sc in next 6 sts. (13 sts: 12 sc + 1 bobble)
This is the single center bobble of the second tier from the bottom.
Row 9: Ch 1, turn, sc in each st across. (13 sts)
Row 10 (WS, decrease): Ch 1, turn, sc2tog, sc in next 9 sts, sc2tog. (11 sts)
Row 11: Ch 1, turn, sc in each st across. (11 sts)
Row 12 (WS, bobbles): Ch 1, turn, sc in next 2 sts, bobble in next st, sc in next 5 sts, bobble in next st, sc in next 2 sts. (11 sts: 9 sc + 2 bobbles)
Row 13 (RS, decrease): Ch 1, turn, sc2tog, sc in next 5 sts, sc2tog. (9 sts)
Rows 14–15: Ch 1, turn, sc in each st across. (9 sts)
Row 16 (WS, decrease and bobbles): Ch 1, turn, sc2tog, bobble in next st, sc in next 3 sts, bobble in next st, sc2tog. (7 sts: 5 sc + 2 bobbles)
Rows 17–18: Ch 1, turn, sc in each st across. (7 sts)
Row 19 (RS, decrease): Ch 1, turn, sc2tog, sc in next 3 sts, sc2tog. (5 sts)
Row 20 (WS, bobble): Ch 1, turn, sc in next 2 sts, bobble in next st, sc in next 2 sts. (5 sts: 4 sc + 1 bobble)
This is the top single bobble.
Row 21: Ch 1, turn, sc in each st across. (5 sts)
Row 22 (WS, decrease): Ch 1, turn, sc2tog, sc in next st, sc2tog. (3 sts)
Row 23: Ch 1, turn, sc in each st across. (3 sts)
Row 24 (WS): Ch 1, turn, sc3tog. (1 st)
Do not fasten off. You now have 24 rows and a 4 in (10.2 cm) tall triangle.
Why the shape works: you decrease 2 sts on each of 7 decrease rows (Rows 4, 7, 10, 13, 16, 19 and 22), which takes 17 sts down to 3. Row 24 closes the last 3 into the point. Decreasing on every third row gives a steady, straight slope. The bobble tiers sit on Rows 4, 8, 12, 16 and 20, evenly spaced up the tree in a 2, 1, 2, 2, 1 pattern from the bottom.
Border
Border gauge: the edging keeps the body gauge of 5 sc per 1 in (2.5 cm).
Border Round (RS): Ch 1, turn so the RS faces you. Work down the first diagonal side as follows:
- First side: Work 22 sc evenly into the ends of Rows 23 down to 1. That is 1 sc per row end, skipping only the end of Row 12. (22 sts)
- First bottom corner: 3 sc in the first free loop of the foundation chain.
- Bottom edge: Sc in each of the next 15 free loops.
- Second bottom corner: 3 sc in the last free loop.
- Second side: Work 22 sc evenly up the row ends of Rows 1 to 23, skipping the end of Row 12. (22 sts)
- Apex: 3 sc in the single st of Row 24.
Join with a sl st to the first sc. Do not fasten off.
Counts per side:
- Bottom edge: 3 + 15 + 3 = 21 sts, including both corner groups
- Each diagonal side: 22 sts, not counting the corner groups
- Apex: 3 sts
- Total: 22 + 21 + 22 + 3 = 68 sts
Why the math works: each diagonal side runs 1.7 in (4.3 cm) across and 4 in (10.2 cm) up, so it measures about 4.35 in (11.0 cm). At 5 sc per inch, 22 sc covers 4.4 in (11.2 cm), which is almost an exact match. That is why you skip one row end. If you used all 23 row ends, you would get 4.6 in of stitches on a 4.35 in edge, and the sides would ripple. The bottom edge takes 1 sc per foundation stitch, so it stays flat without any adjustment. The 3-sc corners turn each point cleanly.
Apex Knob and Hanging Loop
Knob: Sl st into the center sc of the 3 apex sts. Ch 2, then work a bobble into that same center sc. The bobble folds up and sits on the point as a small round knob, about 0.4 in (1.0 cm) across.
Loop: Ch 20, then sl st into the top of the knob to close the loop. Sl st into each of the 20 ch all the way around the loop. This makes a firm, corded loop about 1.5 in (3.8 cm) tall. Sl st into the top of the knob again and fasten off. Weave the tail down through the knob and into the border.
Tassel
- Wrap yarn 25 times around the 2.5 in (6.4 cm) card.
- Thread a 6 in (15.2 cm) strand under the wraps at the top edge and tie it tightly. Leave both ends of this tie long.
- Cut through the wraps at the bottom edge.
- Cut a 12 in (30.5 cm) strand. Wrap it tightly around the bundle 0.5 in (1.3 cm) below the top, about 6–8 times. Tie it off and bury the ends inside the tassel.
- Trim the tassel to 2.25 in (5.7 cm) below the neck.
- Find the bottom center of the border, which is the 11th of the 21 bottom-edge sts. Thread the top tie ends through to the WS on either side of that stitch and knot them securely. Weave in the ends.
Final Blocking
- Weave in all remaining tails along the border on the WS.
- Lay the ornament RS up on the blocking mat.
- Pin the three corners first: base 3.65 in (9.3 cm) wide and height 4.25 in (10.8 cm).
- Pin along each side, keeping the diagonals straight.
- Spray lightly with water. Don’t press on the bobbles.
- Gently push each bobble forward from the back with a fingertip so it stays round.
- Comb the tassel strands straight with your fingers and spray them lightly.
- Let everything dry completely before you unpin it.
Final Quality-Control Checklist
- The body measures 3.65 in (9.3 cm) wide x 4.25 in (10.8 cm) tall.
- Both diagonal sides are straight and the same length.
- There are 8 bobbles in a 1, 2, 2, 1, 2 pattern from the top, all on the RS.
- The border has 68 sts, with crisp corners.
- The knob sits centered on the point, and the loop is firm and untwisted.
- The tassel hangs from the bottom center, about 2.5 in (6.4 cm) long overall.
- No tails are visible on the RS.
Troubleshooting
- Bobbles show on the back: You worked them on a RS row. Bobbles belong on even (WS) rows only.
- Bobbles look flat: Pull the 5 dc up evenly and keep the final yo snug. Then work the next sc firmly.
- Sides are crooked: Check that you decrease at both ends on Rows 4, 7, 10, 13, 16, 19 and 22, and nowhere else.
- Border ripples: Make sure you skipped one row end on each side, for 22 sts per side.
- Border pulls in: Your border tension is too tight. Go up 0.25 mm for the border only.
- Tree leans: Block it again, pinning the point directly above the bottom center.
- Tassel splays out: Wrap the neck tighter and trim the ends evenly.
Care
Hand wash in cool water and lay flat to dry, reshaping the bobbles and combing the tassel while damp. Store flat or hang it by the loop so the tree keeps its shape.
Final Notes
Here is how the measurements build on each other. 5 sc and 6 rows per inch give a 17-st, 24-row triangle that is 3.4 in (8.6 cm) wide and 4 in (10.2 cm) tall. One round of 68 border sts brings it to 3.65 in (9.3 cm) by 4.25 in (10.8 cm). The knob, loop and tassel finish the ornament at about 8.5 in (21.6 cm) long. If you check your gauge at Row 6 and Row 12, every ornament in a set will match.
Happy crocheting!