

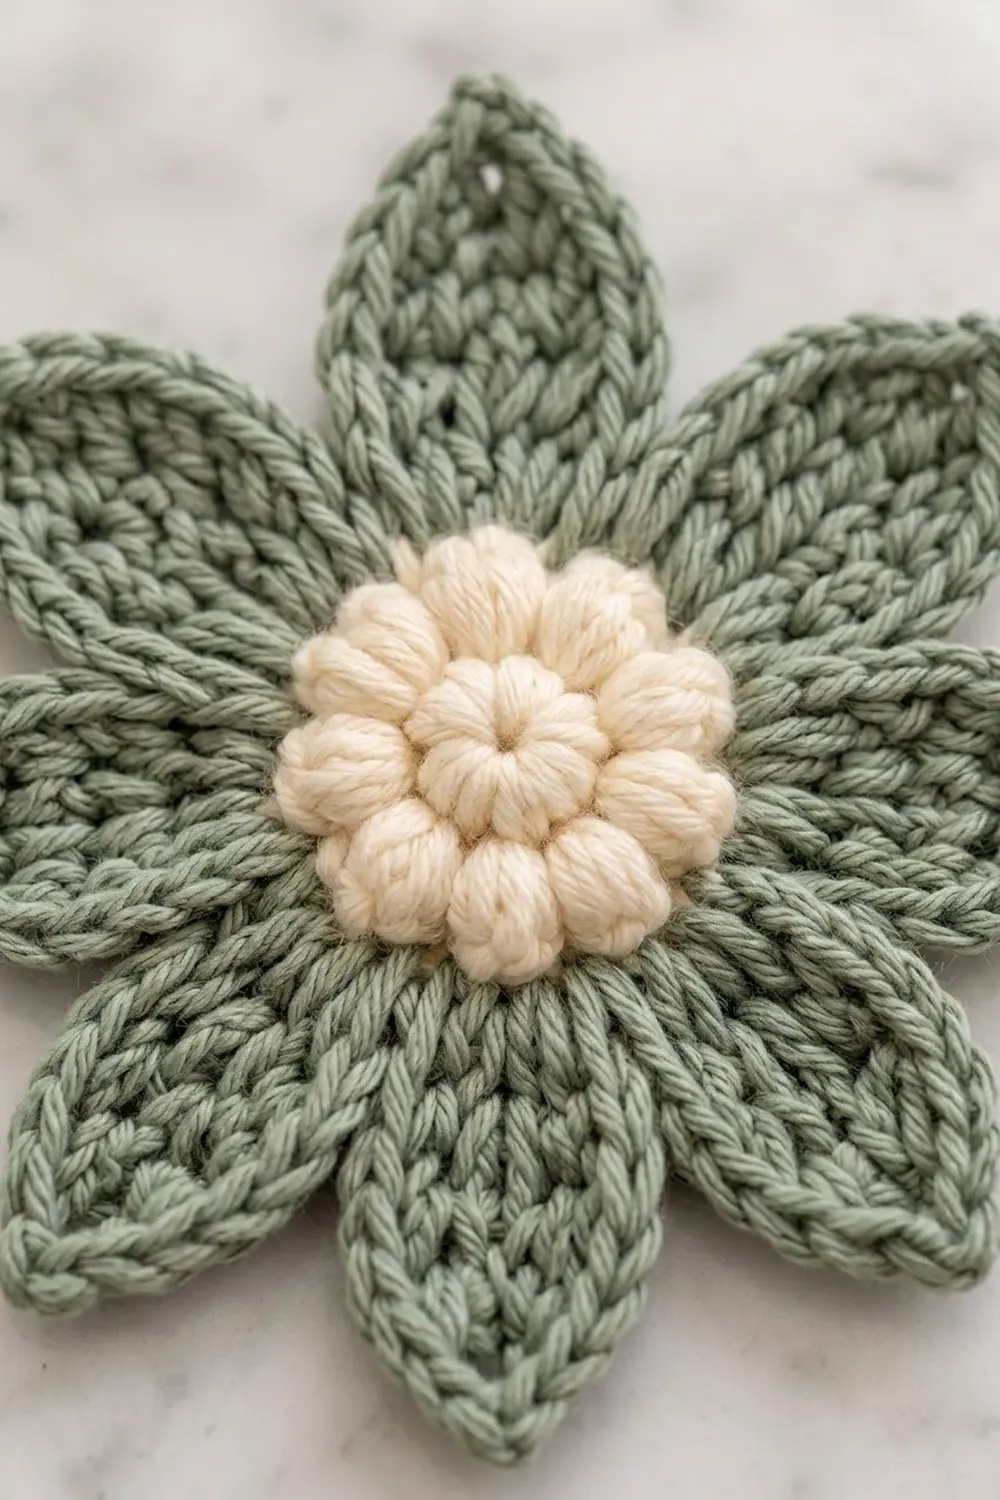
The Sage Daisy is a single flower motif with a plump cream puff-stitch center and eight long, pointed sage green petals. It lies flat, is easy to read from across a room, and has a soft cottage-garden look that suits neutral and green-toned decor.
The motif uses two colors: warm cream for the textured center and muted sage green for the petals and their outline. The finished flower measures 5.5 inches (14.0 cm) from petal tip to opposite petal tip. The pattern uses US crochet terms.
You work it in the round from the center out. First you make the cream puff center in three rounds. Then you switch to green for a solid base ring, add a round of chain arches, work one petal into each arch, and finish with a single crochet outline that sharpens every petal point.
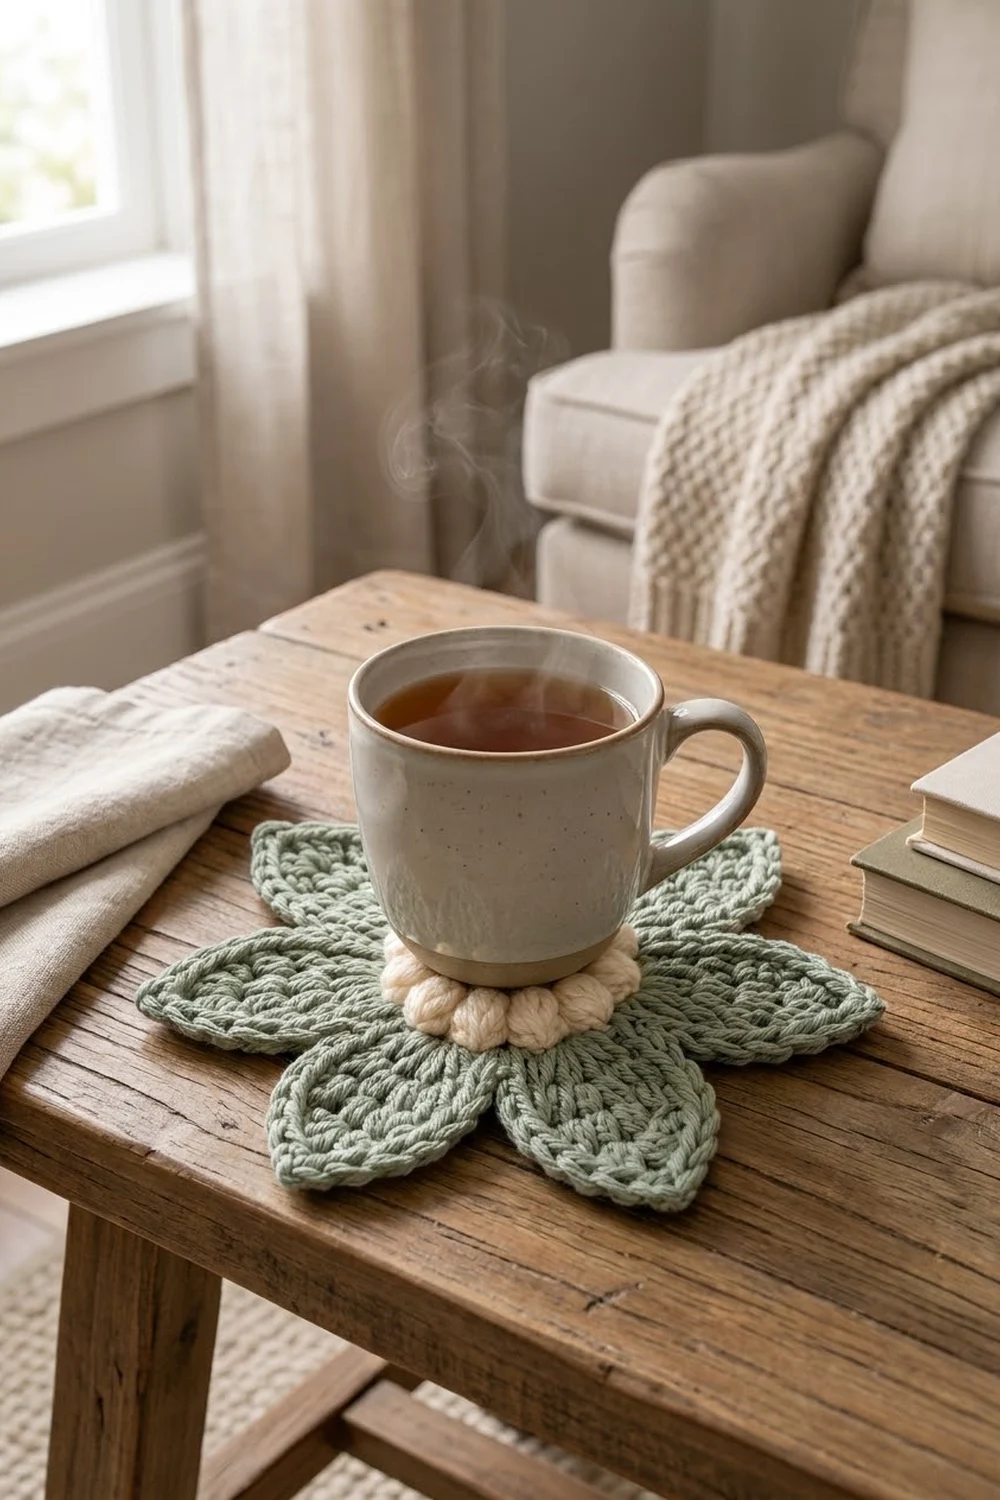
This pattern covers one motif. You can use it as an appliqué, a coaster-style accent, a bag charm backing or a gift-tag flower. All the instructions and measurements below are for one flower.
Finished Size and Construction
- Finished size: 5.5 in (14.0 cm) tip to tip
- Skill level: Easy to intermediate (puff stitches, tall stitches worked into arches)
- Terminology: US crochet terms
- Yarn weight: Worsted weight (#4), cotton or cotton blend
- Hook: 5.0 mm (H-8)
- Number of pieces: 1
- Layout: Single motif, no joining
- Piece size: 5.5 in (14.0 cm) after border
- Size before border: 5 in (12.7 cm) after Round 6
- Border depth: 0.25 in (0.6 cm) on each side
Materials
Choose a smooth worsted weight cotton or cotton blend with good stitch definition. Cotton keeps the puffs round and the petal tips crisp. Fuzzy or loosely plied yarn will blur the puffs and soften the points. If you prefer acrylic, pick a firm, tightly twisted one and check gauge carefully.
- Color A, cream: 6 g / 12 m (about 13 yd)
- Color B, sage green: 12 g / 24 m (about 26 yd)
These amounts include a margin of about 25 percent for your gauge check, a tail at each color change, and any ripping back.
Tools:
- 5.0 mm (H-8) crochet hook, plus 4.5 mm and 5.5 mm hooks for gauge adjustments
- Tapestry needle
- Scissors
- 2 stitch markers
- Ruler or tape measure
- Rust-proof pins and a blocking mat or folded towel
- Spray bottle with water
Abbreviations (US Terms)
- ch: chain
- sl st: slip stitch
- sc: single crochet
- hdc: half double crochet
- dc: double crochet
- tr: treble crochet
- sk: skip
- sp: space
- st(s): stitch(es)
- MR: magic ring
- puff: puff stitch (see below)
Puff stitch: (Yarn over, insert hook in the indicated stitch or space, yarn over and pull up a loop about 0.5 in / 1.3 cm tall) 3 times, then yarn over and draw through all 7 loops on the hook. Don’t work a closing chain. In this pattern, the ch-1 after each puff is written as its own step and counted separately.
Beginning puff: Ch 2 (does not count as a stitch), then work a puff in the same stitch or space.
Gauge and Checkpoints
You measure gauge on the motif itself. Make one complete cream center (Rounds 1 to 3) before you commit to the full flower.
Gauge: Rounds 1 to 3 measure 2 in (5.1 cm) across.
Measure flat, without stretching, at each of these points:
- After Round 1: 0.75 in (1.9 cm)
- After Round 2: 1.25 in (3.2 cm)
- After Round 3: 2 in (5.1 cm)
- After Round 4: 2.25 in (5.7 cm)
- After Round 5: 3 in (7.6 cm) across the arches
- After Round 6: 5 in (12.7 cm) tip to tip
- After Round 7: 5.5 in (14.0 cm) tip to tip
If your center is too big (more than 2.25 in / 5.7 cm after Round 3), go down to a 4.5 mm hook or pull the puff loops up a little shorter.
If your center is too small (less than 1.75 in / 4.4 cm after Round 3), go up to a 5.5 mm hook or pull the puff loops up slightly taller.
If the center is the right size but Round 4 ruffles, you’re crocheting the green more loosely than the cream. Work Round 4 with the 4.5 mm hook and switch back for Round 5.
The Cream Center
Use Color A.
Round 1: Make a MR and ch 1 (does not count as a stitch). Work 8 sc into the ring, pull the ring closed and sl st to the first sc. (8 sts)
Round 2: Beginning puff in the first sc, ch 1. Puff in the next sc, ch 1; repeat from * to * 6 more times. Sl st to the top of the first puff. (8 puffs and 8 ch-1 sps = 16 sts)
This round forms the small inner ring of puffs.
Round 3: Sl st into the next ch-1 sp. Work a beginning puff in that sp, ch 1, then puff in the same sp and ch 1. In the next ch-1 sp work (puff, ch 1, puff, ch 1); repeat from * to * 6 more times. Sl st to the top of the first puff. (16 puffs and 16 ch-1 sps = 32 sts)
This is a growth round. Each ch-1 sp from Round 2 gets 2 puffs, so Round 3 has 32 stitches in total. This round forms the larger outer ring of puffs. Fasten off Color A and weave in the tail on the wrong side.
Checkpoint: 2 in (5.1 cm) across. The puffs should be domed on the right side.
The Green Base Ring
Use Color B.
Round 4: With the right side facing, join Color B with a sl st in any ch-1 sp. Ch 1 (does not count), then sc in the same sp and sc in the top of the next puff. Sc in the next ch-1 sp, sc in the top of the next puff; repeat from * to * 14 more times. Sl st to the first sc. (32 worked 1-per-existing stitch + 0 added = 32 sc)
This is a conversion round. Each puff and each ch-1 sp from Round 3 gets exactly one sc, so the count stays at 32 and the ring lies flat around the domed center. Place a marker in the first sc.
At the join, take a moment to tug the cream tail snug before working over it. This stops a cream gap from showing at the color change.
Checkpoint: 2.25 in (5.7 cm) across.
The Petal Arches
Round 5: Ch 1 (does not count). Sc in the same st as the join, ch 6, then sk the next 3 sc. Sc in the next sc, ch 6, sk the next 3 sc; repeat from * to * 6 more times. Sl st to the first sc. (8 sc and 8 ch-6 arches = 8 + 48 = 56 sts)
The 32 sc of Round 4 divide into 8 groups of 4. In each group, one sc anchors an arch and the other 3 are skipped beneath it. This spaces the eight petals evenly.
Checkpoint: About 3 in (7.6 cm) across the arches. The arches will look floppy at this stage, which is normal.
The Petals
Round 6: Sl st into the first ch-6 arch. In the same arch work (sc, hdc, dc, 2 tr, ch 3, 2 tr, dc, hdc, sc). Sk the anchor sc. In the next ch-6 arch work (sc, hdc, dc, 2 tr, ch 3, 2 tr, dc, hdc, sc); repeat from * to * 6 more times. Sl st to the first sc of the round.
Each petal has 10 stitches (5 on each side) plus one ch-3 tip. (80 sts and 8 ch-3 tips)
The stitch heights step up from sc to hdc to dc to tr. That makes each petal narrow at its base, widest in the middle and pointed at the ch-3 tip. Packing 10 stitches into a ch-6 arch pushes the petal outward, so it grows long instead of round.
Checkpoint: 5 in (12.7 cm) from tip to opposite tip. Each petal should reach about 1.375 in (3.5 cm) beyond the green base ring.
Border: The Petal Outline
This round gives each petal its crisp, raised green rim and sharp point. For counting, treat the flower as having 8 “sides,” one per petal.
Border gauge: Working 1 sc per stitch along the petal sides adds 0.25 in (0.6 cm) of depth on each side. That brings the motif from 5 in (12.7 cm) to 5.5 in (14.0 cm) tip to tip.
Round 7: Ch 1 (does not count). Sc in each of the next 5 sts, (sc, ch 2, sc) in the ch-3 tip, sc in each of the next 5 sts, then sl st in the Round 5 anchor sc between petals, working behind the petal bases; repeat from * to * 7 more times. On the last repeat, sl st in the first sc instead of the anchor sc.
Per petal: 5 sc + (1 sc, ch-2, 1 sc) + 5 sc = 12 sc and 1 ch-2 tip, plus 1 sl st into the valley.
Round total: 96 sc, 8 ch-2 tips and 8 sl sts.
Why the math works: Each of the 10 petal stitches from Round 6 gets exactly one sc, so the petal sides neither ruffle nor pull. The only additions are the 2 sc at each tip, which turn the ch-3 tip into a sharp, reinforced point. The sl st into the Round 5 anchor sc pulls each valley down tight, so the petals separate cleanly instead of blending into a scalloped edge. That gives 10 + 2 = 12 sc per petal, and 12 sc × 8 petals = 96 sc.
Fasten off. Weave in the tail on the wrong side, running it through the backs of the petal stitches so it doesn’t show between petals.
Checkpoint: 5.5 in (14.0 cm) tip to tip.
Final Blocking
- Weave in all remaining ends before blocking.
- Mist the motif lightly with water until it is damp but not dripping.
- Lay it right side up on a blocking mat or folded towel.
- Gently push the cream center up from below with a fingertip so the puffs stay domed.
- Pin each petal tip through its ch-2 space, spacing the tips evenly around a 5.5 in (14.0 cm) circle. Opposite tips should be 5.5 in (14.0 cm) apart.
- Use your fingers to straighten the sides of each petal so they taper evenly to the tip.
- Check that the eight valleys are evenly spaced and pulled in toward the green ring.
- Let the motif dry completely, then remove the pins.
Final Quality-Control Checklist
- Round 1 has 8 sc and the magic ring is pulled fully closed.
- Round 2 has 8 puffs and Round 3 has 16 puffs.
- The cream center is domed and measures 2 in (5.1 cm).
- Round 4 has 32 sc and lies flat.
- Round 5 has 8 evenly spaced ch-6 arches.
- All 8 petals have 10 sts plus a ch-3 tip.
- Each petal outline has 12 sc plus a ch-2 tip.
- The finished motif measures 5.5 in (14.0 cm) tip to tip.
- All ends are woven in on the wrong side and none show from the front.
Troubleshooting
The puffs look flat or messy. Pull each loop up to the same height before the final yarn over, and keep the loops loose on the hook so the final pull-through slides cleanly.
There’s a hole in the very center. Pull the magic ring tail tight, then weave it around the ring once more before trimming.
Round 4 ripples. You’re crocheting the green more loosely than the cream. Work this round with a 4.5 mm hook.
Round 4 cups upward. You may have missed a ch-1 sp. Recount to 32 sc.
The petals are uneven. Count the skipped sc in Round 5. Each arch must skip exactly 3 sc.
The petals look round instead of pointed. Make sure the ch-3 tip sits between the two tr pairs, and that Round 7 places (sc, ch 2, sc) in that tip.
The outline ruffles. You probably worked 2 sc into one petal stitch. Each petal side takes exactly 5 sc.
The petals flip forward. Check that the Round 7 slip stitches go behind the petal bases into the anchor sc, not into the front of the petal.
The whole motif is too large. Check your center gauge first. If the center is 0.25 in (0.6 cm) too big, the finished flower will be about 0.5 in (1.3 cm) too big across.
Care
Hand wash in cool water with a mild soap, press the water out in a towel, and dry flat while reshaping the petal tips. Don’t wring the motif, because wringing can flatten the puffs.
Final Notes
The Sage Daisy follows a simple measurement chain. The center measures 0.75 in (1.9 cm) after Round 1, 1.25 in (3.2 cm) after Round 2 and 2 in (5.1 cm) after Round 3. The green base ring brings it to 2.25 in (5.7 cm), the arches to about 3 in (7.6 cm) and the petals to 5 in (12.7 cm). The outline border adds 0.25 in (0.6 cm) on each side, for a finished flower of 5.5 in (14.0 cm).
The stitch counts follow the same logic:
– Center: 8, then 16, then 32 stitches.
– Base ring: 32 sc.
– Arches: 8, each over a group of 4 sc.
– Petals: 10 stitches each.
– Outline: 12 sc per petal, 96 sc in total.
If your center matches gauge, everything after it will fall into place. Measure at each checkpoint and you’ll finish with eight even, crisply pointed petals around a domed cream center.
Happy crocheting!