

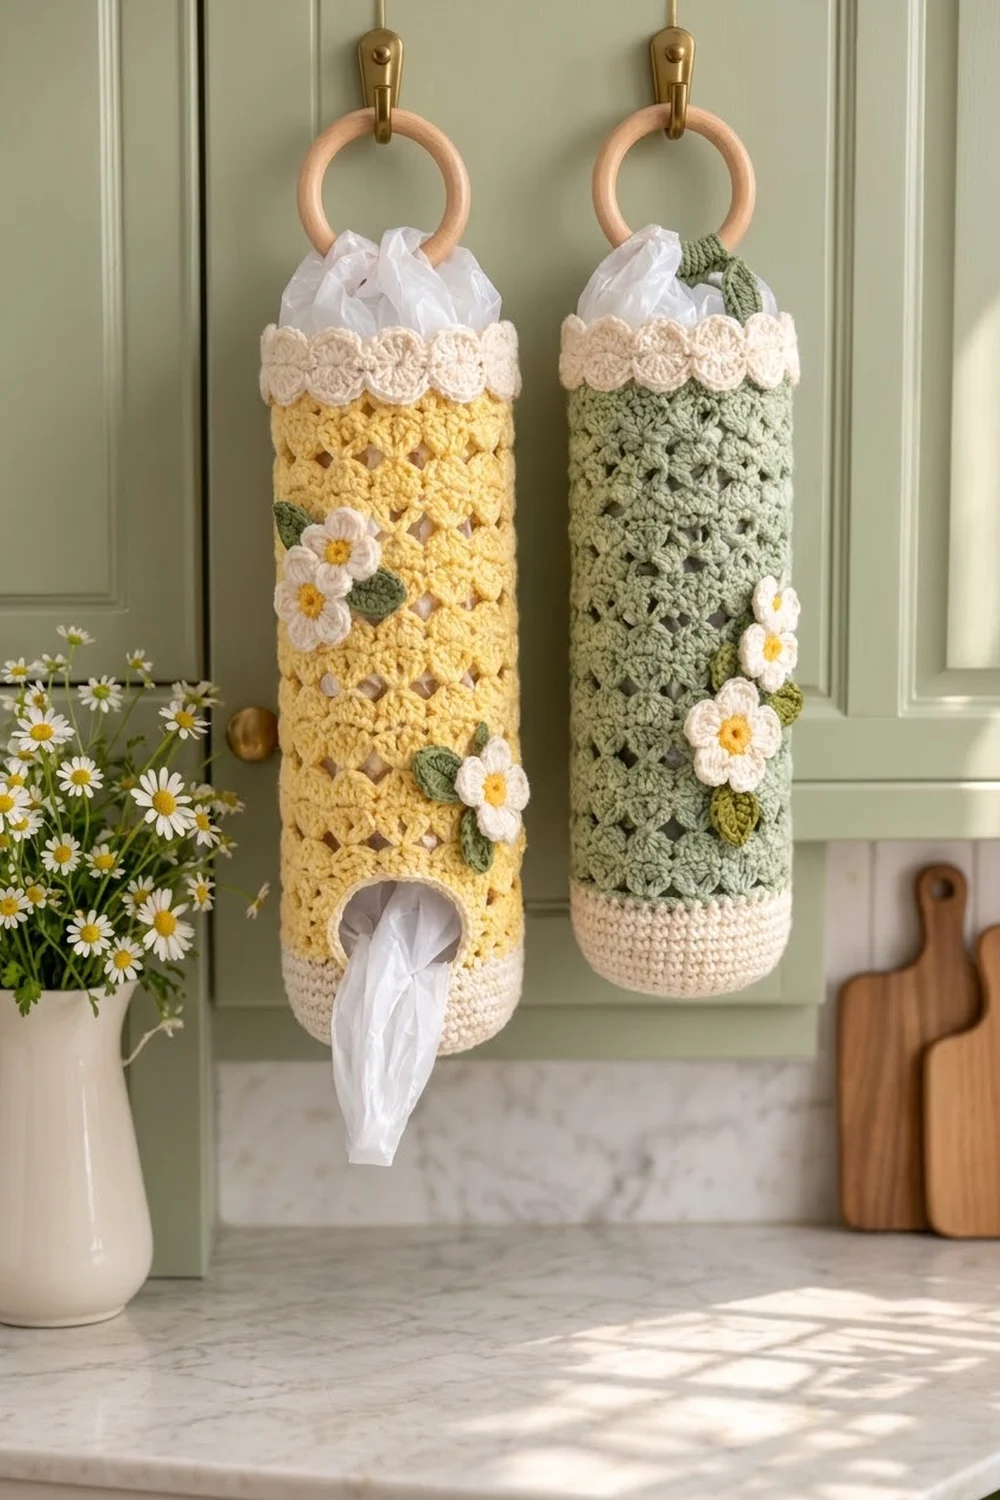
The Daisy Meadow Plastic Bag Holder is a tall, lacy tube that keeps grocery bags tidy and still looks nice hanging in the kitchen. Fill it from the top and pull bags out through the oval hole near the bottom.
The sample has a butter-yellow body in an open shell stitch, a solid cream base, and a cream scalloped top border. Three cream daisies with golden centers and four sage leaves sit on the front. For a softer look, make the body in sage green and use the same sage for the leaves.
The pattern uses US crochet terms. The finished holder is 18 in (45.7 cm) tall and about 4.75 in (12.1 cm) across, with a circumference of 15 in (38.1 cm). It hangs from a 3 in (7.6 cm) wooden ring.
Construction is simple. You work a flat round base in cream, build the wall up from it, and switch to the main color for the lace body. A few turned rows leave room for the dispensing hole, then you go back to working in the round. The top gets a cream scalloped border. Finally, you sew on a strap, the ring, the flowers and the leaves.
Finished Size and Construction
- Finished size: 18 in (45.7 cm) tall, 15 in (38.1 cm) around, about 4.75 in (12.1 cm) across
- Skill level: Easy to intermediate
- Terminology: US
- Yarn weight: Worsted (#4) cotton
- Hook: 5.0 mm (H-8)
- Number of pieces: 1 body, 1 strap, 3 flowers, 4 leaves
- Layout: One seamless tube with appliqués sewn to the front
- Body size before border: 16.75 in (42.5 cm) tall
- Border depth: 1.25 in (3.2 cm)
- Dispensing hole: 2.75 in (7.0 cm) wide x 1.5 in (3.8 cm) tall
Materials
Use a smooth, medium-weight cotton or cotton blend. Cotton keeps the shells crisp and stands up well in a kitchen. Acrylic also works, but it stretches more, so the holder will hang a little longer.
- Color A, butter yellow (body): 110 g / 176 m
- Color B, cream (base, border, hole edge, strap, petals): 70 g / 112 m
- Color C, sage green (leaves): 10 g / 16 m
- Color D, golden yellow (flower centers): 5 g / 8 m
These amounts include a safety margin of about 25%.
Tools:
– 5.0 mm (H-8) crochet hook
– One 3 in (7.6 cm) wooden ring
– Tapestry needle
– 4 stitch markers
– Scissors and a tape measure
– A tall jar or rolled towel about 4.75 in (12.1 cm) across, for blocking
Abbreviations (US Terms)
- ch – chain
- sl st – slip stitch
- sc – single crochet
- hdc – half double crochet
- dc – double crochet
- BLO – back loop only
- MR – magic ring
- st(s) – stitch(es)
- RS / WS – right side / wrong side
Special stitch – Shell: 5 dc worked into the same stitch. The center dc of a shell is its 3rd dc.
Gauge and Checkpoints
- Sc gauge: 16 sc x 16 rounds = 4 in (10.2 cm)
- Shell gauge: 2 shell repeats (12 sts) = 3 in (7.6 cm); 4 shell rounds = 2 in (5.1 cm)
Work the base first and use it as your gauge swatch. If the base is the right size, the rest of the holder will follow.
Checkpoints:
1. After Round 10: The base lies flat and measures 4.75 in (12.1 cm) across.
2. After Round 19: The cream wall is 2.25 in (5.7 cm) tall.
3. After Round 24: Total height is 4.25 in (10.8 cm), and the hole is 2.75 in (7.0 cm) wide.
4. After Round 49: Total height is 16.75 in (42.5 cm).
5. After Round 52: Total height is 18 in (45.7 cm).
If your base is too big, go down to a 4.5 mm hook. If it is too small or ruffled, go up to a 5.5 mm hook. If only the shell rounds come out too tall, keep the hook and pull up shorter dc loops.
Base (Color B, cream)
Work in joined rounds. At the end of each round, join with a sl st to the first sc and ch 1. The ch 1 does not count as a stitch.
Rnd 1: MR, 6 sc in ring, join. (6)
Rnd 2: 2 sc in each st around. (12)
Rnd 3: Sc in next st, 2 sc in next st 6 times. (18)
Rnd 4: Sc in next 2 sts, 2 sc in next st 6 times. (24)
Rnd 5: Sc in next 3 sts, 2 sc in next st 6 times. (30)
Rnd 6: Sc in next 4 sts, 2 sc in next st 6 times. (36)
Rnd 7: Sc in next 5 sts, 2 sc in next st 6 times. (42)
Rnd 8: Sc in next 6 sts, 2 sc in next st 6 times. (48)
Rnd 9: Sc in next 7 sts, 2 sc in next st 6 times. (54)
Rnd 10: Sc in next 8 sts, 2 sc in next st 6 times. (60)
Check that the base is 4.75 in (12.1 cm) across.
Cream Wall
Rnd 11: Sc in BLO of each st around. (60) This makes a ridge where the base turns up into the wall.
Rnds 12–19: Sc in each st around. (60)
Fasten off Color B. The wall should be 2.25 in (5.7 cm) tall.
Body and Dispensing Hole (Color A)
Rnd 20: Join Color A in the join stitch. Ch 1, sc in each st around, join. (60)
Rows 21–23 are turned rows worked over sts 1–49 only. This leaves sts 50–60 (11 sts) unworked to form the hole.
Row 21 (RS): Ch 1, sc in first st, sk 2, shell in next st, sk 2, sc in next st 8 times. Turn. (49: 8 shells + 9 sc)
Row 22 (WS): Ch 3 (counts as dc), 2 dc in first sc, sc in center dc of next shell, shell in next sc 7 times, sc in center dc of last shell, 3 dc in last sc. Turn. (49: 3 + 42 + 1 + 3)
Row 23 (RS): Ch 1, sc in first dc, shell in next sc, sc in center dc of next shell 7 times, shell in next sc, sc in top of turning ch. Do not turn. (49: 8 shells + 9 sc)
Rnd 24 (closing round): Ch 11, sl st to the first sc of Row 23. Ch 1, sc in each of the 49 sts, then sc in each of the 11 chains, join. (49 + 11 = 60)
The hole now sits between the free stitches of Round 20 and the 11 chains. Place a marker at its center. That is the front.
Rnd 25 (Shell A): Ch 1, sc in first st, sk 2, shell in next st, sk 2, sc in next st, sk 2, shell in next st, sk 2 9 times, join to first sc. (60: 10 shells + 10 sc)
Rnd 26 (Shell B): Ch 3 (counts as dc), 2 dc in same st, sc in center dc of next shell, shell in next sc 9 times, sc in center dc of last shell, 2 dc in same st as beginning ch-3, join to top of ch-3. (60: 10 shells, with one shell split across the join, + 10 sc)
Rnd 27 (Shell A): Ch 1, sc in same st, shell in next sc, sc in center dc of next shell 9 times, shell in next sc, join to first sc. (60)
Rnds 28–49: Repeat Rnd 26 on even rounds and Rnd 27 on odd rounds. Every round has 60 sts. Round 49 is a Shell A round.
Fasten off Color A. Total height is now 16.75 in (42.5 cm).
Border (Color B)
Border gauge: Same as the body: 12 sts = 3 in (7.6 cm) and 2 shell rounds = 1 in (2.5 cm).
Rnd 50: Join Color B in the join stitch. Ch 1, sc in each st around (1 sc in each sc and each dc), join. (60 = 10 x 6) This round adds 0.25 in (0.6 cm).
Rnd 51: Work as Rnd 25. (60: 10 shells + 10 sc)
Rnd 52: Work as Rnd 26. (60: 10 shells + 10 sc)
Fasten off. The top edge now shows 10 cream scallops sitting above a row of 10 offset shells.
Why the math works: The tube is round, so there are no sides or corners to count. Every round has 60 stitches, and each shell repeat uses exactly 6 stitches. That gives 10 repeats in every round, from the body up through the border, with no increases or decreases. Round 50 puts one sc in every stitch, so the count stays at 60 and the border shells line up with the body.
Hole edging: With RS facing, join Color B at one bottom corner of the hole. Work 11 sc in the free sts of Rnd 20, 6 sc up the side (about 2 sc for each turned row), 11 sc in the free loops of the ch-11, and 6 sc down the other side. Join. (11 + 6 + 11 + 6 = 34) Fasten off.
Strap (Color B)
Ch 7.
Row 1: Sc in 2nd ch from hook and in each ch across. Turn. (6)
Rows 2–14: Ch 1, sc in each st across. Turn. (6)
The strap measures 1.5 in x 3.5 in (3.8 cm x 8.9 cm). Leave a 12 in (30.5 cm) tail.
Find the back center, directly opposite the hole marker. Fold the strap around the ring. Sew both ends to the inside of the tube over the 6 sts of Rnd 50 at back center, so the ring sits about 1.5 in (3.8 cm) above the edge.
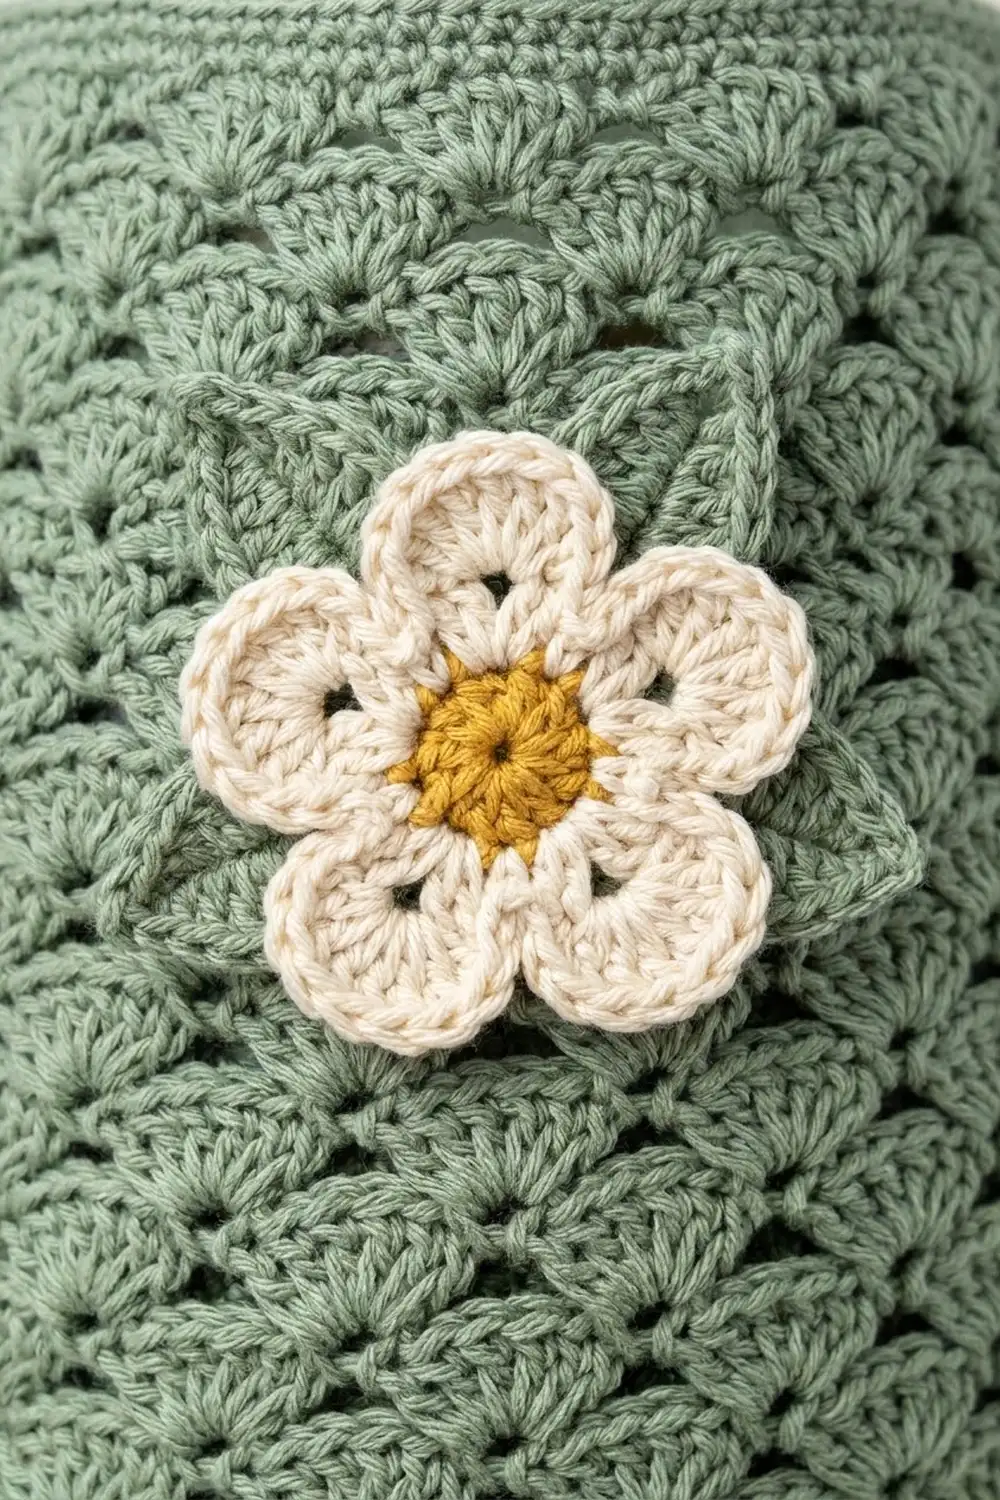
Flowers (make 3)
Rnd 1 (Color D): MR, 10 sc in ring, join. (10) Fasten off.
Rnd 2 (Color B): Join in any st. Sl st in next st, (hdc, 3 dc, hdc) in next st 5 times, join to first sl st. (30: 5 petals of 5 sts + 5 sl sts)
Each flower is 2 in (5.1 cm) across. Leave a 6 in (15.2 cm) tail.
Leaves (make 4)
With Color C, ch 8.
Rnd 1: Working into the chain, starting in the 2nd ch from hook: sl st, sc in next, hdc in next, dc in next 2, hdc in next, (sc, ch 2, sc) in last ch for the tip. Then work along the other side of the chain: hdc in next, dc in next 2, hdc in next, sc in next, sl st in last. (14 sts + ch-2 tip)
Each leaf is 2 in (5.1 cm) long. Leave a 6 in (15.2 cm) tail.
Appliqué Placement
Place the flowers on the front, the same side as the hole:
- Flower 1: Over Rnds 40–43, left of center.
- Flower 2: Over Rnds 36–39, just below and slightly right of Flower 1.
- Flower 3: Over Rnds 29–32, right of center.
- Leaves: Tuck two leaves behind Flower 1, one behind Flower 2 and one behind Flower 3, so the tips stick out from under the petals.
Sew the leaves first, then sew each flower around its center so the petals sit slightly raised. Sew into the dc posts, not across the gaps in the lace.
Final Blocking
- Mist the holder lightly or steam it from about 1 in (2.5 cm) away. Don’t press the iron onto the stitches.
- Slide a tall jar or rolled towel 4.75 in (12.1 cm) across inside the tube.
- Straighten the shells so the fans stack evenly in columns.
- Gently pull the tube to 18 in (45.7 cm) and pin the scallops at the top.
- Pin the flowers and leaves flat.
- Leave it to dry completely before taking out the form.
Final Quality-Control Checklist
- [ ] Every round has 60 sts, with 10 shells per shell round
- [ ] The base lies flat at 4.75 in (12.1 cm)
- [ ] The hole is 2.75 in x 1.5 in (7.0 cm x 3.8 cm) and fully edged with 34 sc
- [ ] Total height is 18 in (45.7 cm)
- [ ] The strap is centered opposite the hole and sewn securely
- [ ] 3 flowers and 4 leaves are sewn firmly on the front
- [ ] All ends are woven in through solid stitches
Troubleshooting
- Base ruffles: Go up a hook size, or check that you made exactly 6 increases per round.
- Base cups upward: Go down a hook size, or check that you didn’t skip any increases.
- Shell count is off: Count the sc between shells. There should be 10 per round.
- Hole is too small: Make sure you left exactly 11 sts unworked and chained exactly 11.
- Holder sags too long: Use cotton instead of acrylic, or leave out 2 shell rounds (1 in / 2.5 cm).
- Seam drifts: Always start each round in the joining stitch.
Care
Hand wash in cool water and lay flat or over a form to dry. Don’t tumble dry, because the lace can stretch out of shape.
Final Notes
Each stage builds on the one before it. The 60-stitch base is 4.75 in (12.1 cm) across. The wall brings the height to 2.25 in (5.7 cm), and the hole section brings it to 4.25 in (10.8 cm). The shell body reaches 16.75 in (42.5 cm), and the border finishes the holder at 18 in (45.7 cm). If you check each measurement as you go, the holder will come out the right size.
Happy crocheting!