

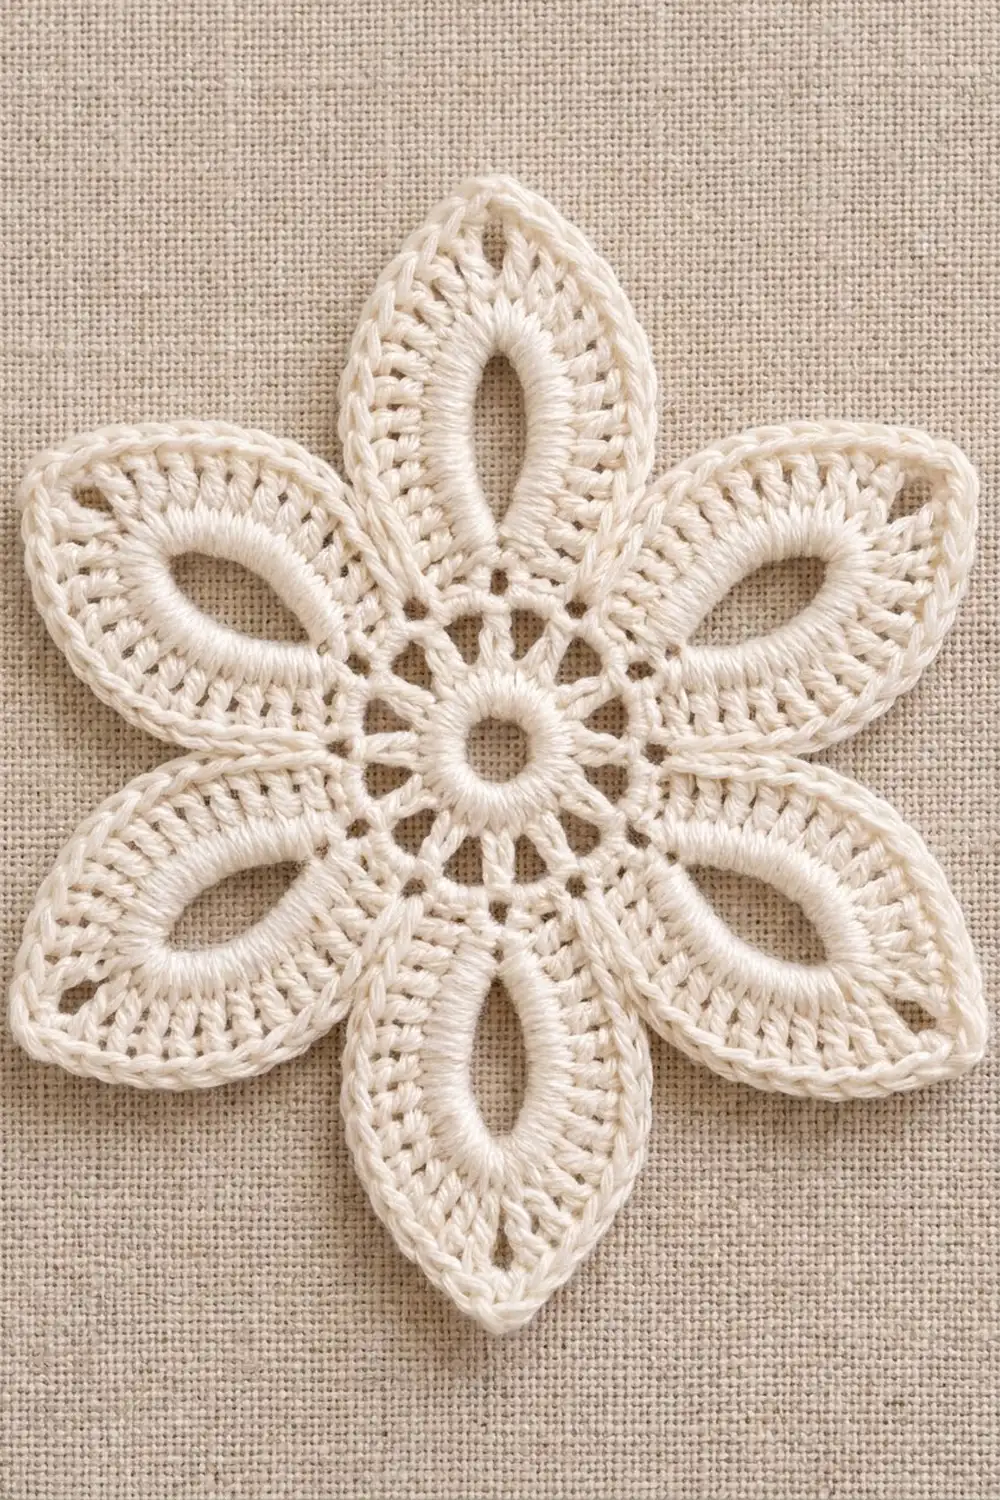
The Ivory Lotus Eyelet Flower is a six-petal lace motif. Each petal is a pointed almond shape with an open, almond-shaped eyelet in the middle. At the center there is a small open ring, then a round of tall spokes with little windows between them, then a solid ring of single crochet that holds the petals in place.
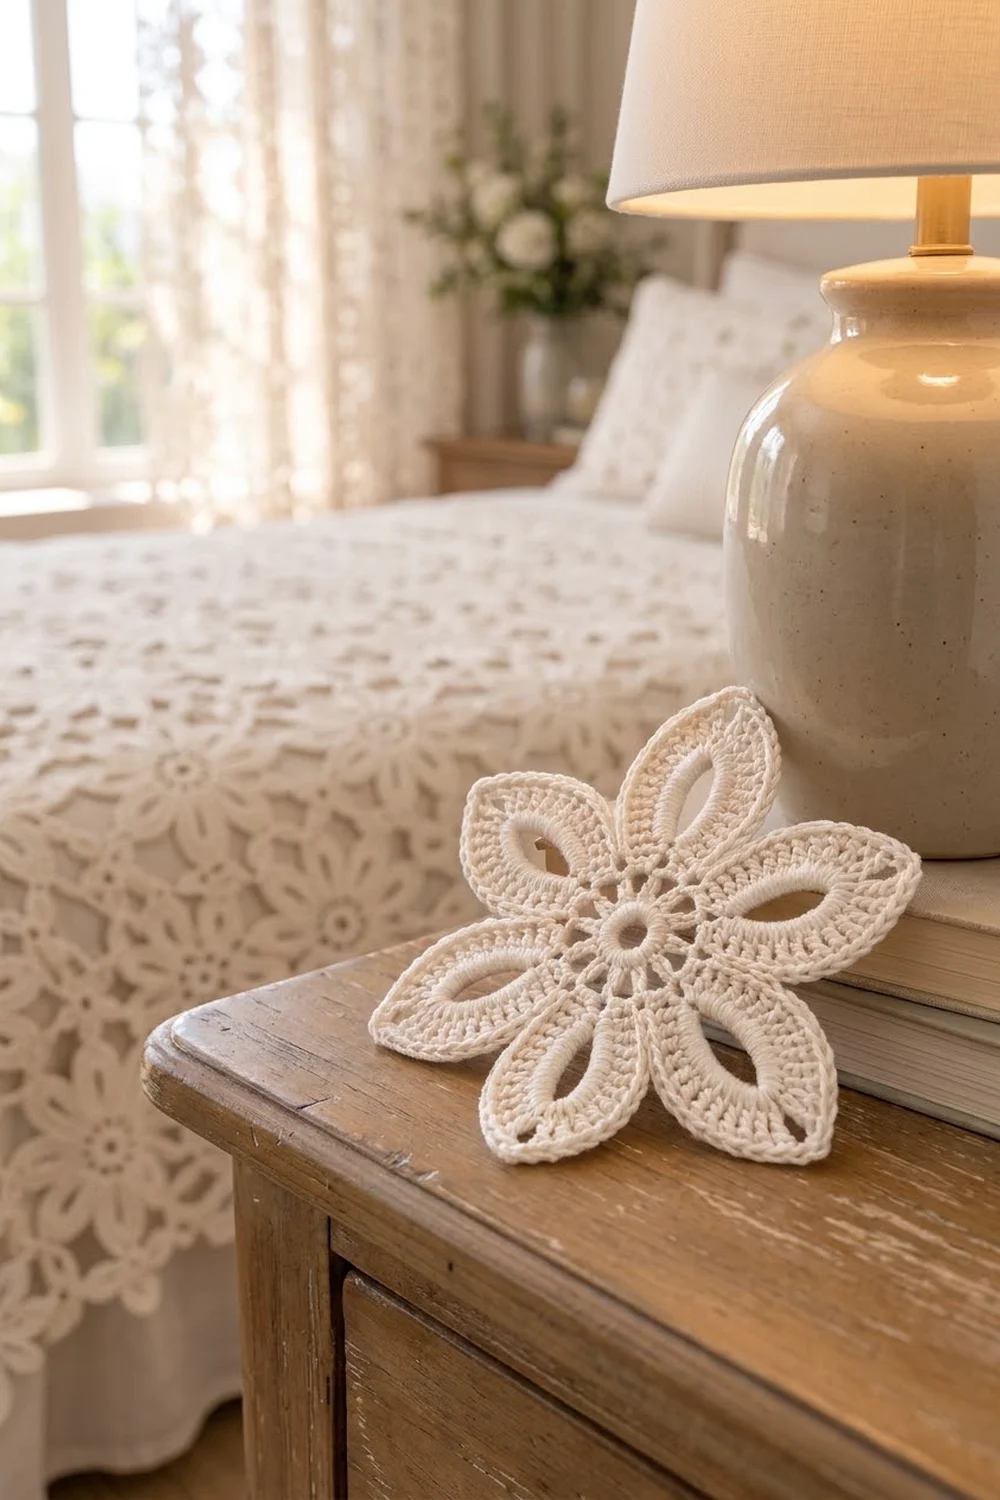
The motif uses one ivory cotton, so it stays soft and timeless and lets the stitch texture stand out. Mercerized cotton gives crisp stitch definition and a gentle sheen. On its own, the finished flower works well as a small doily, a coaster, a gift-tag decoration, or an appliqué for a bag or cushion.
This pattern uses US crochet terms. The finished motif measures 6 in (15.2 cm) from one petal tip to the opposite petal tip after blocking.
You work the motif in the round in 6 rounds, as one piece. First you chain a ring, work a round of double crochet into it, open that out into spokes, and close the spokes with a solid single crochet foundation. Next you make six chain loops that become the petal eyelets and fill them with graduated stitches to shape the petals. A final single crochet round outlines every petal and sharpens the tips.
Finished Size and Construction
- Finished size: 6 in (15.2 cm) tip to tip, blocked
- Skill level: Easy-intermediate
- Terminology: US crochet terms
- Yarn weight: Fingering / Super Fine (#1) mercerized cotton
- Hook: 2.25 mm (US B-1)
- Number of pieces: 1 (single motif)
- Layout: None needed; this is one stand-alone motif
- Piece size: 6 in (15.2 cm) tip to tip
- Size before border: 5.5 in (14.0 cm) tip to tip after Round 5
- Border depth: about 0.25 in (0.6 cm), one round of single crochet (Round 6)
Materials
Yarn: Choose a smooth, tightly plied mercerized cotton in fingering weight, ideally about 170 m per 50 g (186 yd per 1.75 oz). Cotton keeps the pointed petal tips and open eyelets sharp after blocking. Soft acrylic or fuzzy blends blur the eyelets and let the tips curl, so avoid them here. A bright white works too, but warm ivory or cream gives the vintage look of the sample.
- Ivory (main and only color): 10 g, about 35 m (38 yd)
This quantity includes a margin of roughly 30% for a gauge test, yarn tails, and a little frogging. The motif itself uses about 7 g.
Tools:
- 2.25 mm (US B-1) crochet hook
- Tapestry needle
- Scissors
- Stitch marker
- Rust-proof pins
- Blocking mat or folded towel
- Spray bottle with clean water
- Ruler or tape measure
Abbreviations (US Terms)
- ch – chain
- sl st – slip stitch
- sc – single crochet
- hdc – half double crochet
- dc – double crochet
- sk – skip
- st(s) – stitch(es)
- sp – space
- rep – repeat
- * * – repeat the instructions between asterisks as directed
Special stitch, Petal Fill: Work all of these stitches into the ch-20 loop, not into the individual chains, so the loop stays open as the eyelet: 2 sc, 2 hdc, 8 dc, (2 dc, ch 2, 2 dc), 8 dc, 2 hdc, 2 sc. That is 28 sts plus one ch-2 tip sp. The ch-2 sp is the petal tip.
Gauge and Checkpoints
Gauge matters less for a single motif than for a joined project, but it still sets the finished size. Make one test motif, block it, and measure it before you make more for gifts or a set.
Gauge: Rounds 1–3 = 2.25 in (5.7 cm) in diameter, unblocked.
To measure, lay the piece flat without stretching it. Measure straight across the center from outer edge to outer edge.
Checkpoints (measured flat, unblocked unless noted):
- After Round 1: 0.9 in (2.3 cm) diameter
- After Round 2: 1.75 in (4.4 cm) diameter
- After Round 3: 2.25 in (5.7 cm) diameter
- After Round 5: 5.5 in (14.0 cm) tip to tip
- After Round 6 and blocking: 6 in (15.2 cm) tip to tip
If your motif is too big: Switch to a 2.0 mm hook, or work the Round 4 chains more firmly. Long, loose chains are the most common cause of oversized petals.
If your motif is too small: Switch to a 2.5 mm hook. If only the petals look short, check that each Round 4 loop has exactly 20 chains.
If Round 3 cups or ruffles: Change hooks now. A center that doesn’t lie flat at Round 3 won’t lie flat later.
Pattern
Before you start: Leave a 6 in (15.2 cm) tail at the start and weave it in at the end. Place a stitch marker in the first stitch of each round so you can find the join easily. Turn the work only where the pattern tells you to. In this pattern you never turn, so the right side always faces you.
Round 1: Center Ring
Ch 6 and sl st to the first ch to form a ring.
Ch 3 (counts as the first dc), then work 11 dc into the ring. Sl st to the top of the beginning ch-3.
Stitch count: 12 dc.
The ring leaves a small open hole in the center, about 0.3 in (0.8 cm) across. If the hole looks too big, pull the starting tail gently to close it a little before you weave it in.
Round 2: Spokes
Ch 6 (counts as dc + ch 3). *Dc in next dc, ch 3*; rep from * to * 10 more times. Sl st to the 3rd ch of the beginning ch-6.
Stitch count: 12 dc and 12 ch-3 sps.
The dc form the spokes and the ch-3 sps form the small windows around the center. Keep all 12 chain spaces the same size so the windows look even.
Round 3: Solid Ring (Conversion Round)
Ch 1, sc in same st as join, 3 sc in next ch-3 sp. *Sc in next dc, 3 sc in next ch-3 sp*; rep from * to * 10 more times. Sl st to the first sc.
Stitch count: 48 sc = 12 sc worked 1-per-existing dc + 36 sc added in the 12 ch-3 sps (3 each).
That gives 8 sc for each of the 6 petals. Check the diameter here: it should be 2.25 in (5.7 cm).
Round 4: Petal Loops
Ch 1. *Sc in next sc, ch 3, sk 2 sc, sc in next sc, ch 20, sk 1 sc, sc in next sc, ch 3, sk 2 sc*; rep from * to * 5 more times. Sl st to the first sc.
Each repeat uses exactly 8 sc of Round 3 (1 + 2 + 1 + 1 + 1 + 2 = 8), so six repeats use all 48.
Count: 18 sc, 12 ch-3 sps, and 6 ch-20 loops.
In each repeat the three sc are, in order: a valley sc (between petals), a sc at the start of the petal loop, and a sc at the end of the petal loop. Make sure the chain loops don’t twist. When you lay the work flat, the six loops should fan out evenly, like the outline of a flower. Count each chain-20 as you go; a single extra chain shows clearly in the finished petal.
Round 5: Petal Fill
Ch 1, sc in same st as join (valley sc). 3 sc in next ch-3 sp, sk next sc, work Petal Fill in next ch-20 loop, sk next sc, 3 sc in next ch-3 sp.
*Sc in next sc (valley sc), 3 sc in next ch-3 sp, sk next sc, work Petal Fill in next ch-20 loop, sk next sc, 3 sc in next ch-3 sp*; rep from * to * 4 more times. Sl st to the first sc.
Count per petal section: 35 sts (1 valley sc + 3 sc + 28 Petal Fill sts + 3 sc) and 1 ch-2 tip sp.
Stitch count: 210 sts and 6 ch-2 tip sps.
As you work along each loop, slide the stitches together so they cover the chain evenly. The short sc and hdc at the base and the tall dc through the middle create the almond silhouette. The middle of each loop stays open as the eyelet, about 1 in (2.5 cm) long and 0.4 in (1.0 cm) wide.
Keep your tension steady through the dc section. If you tighten up near the tip, the petal leans to one side.
Checkpoint: 5.5 in (14.0 cm) tip to tip.
Border
Border Gauge
The border is one round of sc worked 1-per-st, so it adds about 0.25 in (0.6 cm) all around. That takes the motif from 5.5 in (14.0 cm) to 6 in (15.2 cm) tip to tip.
This motif has no straight sides. In this pattern, a “side” means one petal section, from one valley to the next.
Round 6: Outline Round (Trim Round)
Ch 1. Do not work into the joining st. It is the first valley sc, and you skip it.
Sc in next 3 sc, sc in next 14 sts, (sc, ch 2, sc) in ch-2 tip sp, sc in next 14 sts, sc in next 3 sc.
*Sk next sc (valley sc), sc in next 3 sc, sc in next 14 sts, (sc, ch 2, sc) in ch-2 tip sp, sc in next 14 sts, sc in next 3 sc*; rep from * to * 4 more times. Sl st to the first sc. Fasten off, leaving a 6 in (15.2 cm) tail.
Count per petal section: 36 sc = 34 sc worked 1-per-existing st (the section’s 35 sts minus the 1 skipped valley sc) + 2 sc added in the tip sp. Each section also has 1 ch-2 tip sp.
Stitch count: 216 sc and 6 ch-2 tip sps.
Why the Math Works
Each side of a petal has 3 base sc + 14 Petal Fill sts. You work exactly 17 sc into them, one per stitch, so the edge lies flat without ruffling or pulling in.
At the tip, (sc, ch 2, sc) adds 2 sts around the ch-2 sp. That gives the point enough room to stay sharp instead of rounding off.
At each valley, skipping the 1 valley sc pulls the two neighboring petals in slightly and defines the dip between them. Six sections × 36 sc = 216 sc, which matches the round total.
Final Blocking
- Weave in all ends first. Run them along the back of solid stitches, never across the eyelets or spoke windows.
- Soak the motif in cool water for a few minutes, or mist it well. Roll it in a towel and press out the extra water. Do not wring.
- Lay it face up on the blocking mat. Pin the center ring so the hole is round.
- Pin each petal tip through its ch-2 sp, easing it gently outward. Measure from tip to opposite tip: 6 in (15.2 cm).
- Check that the six tips are evenly spaced, about 60 degrees apart.
- Pin each valley lightly toward the center so all the dips match.
- If you like, put a pin through each eyelet to open it into a clean almond shape.
- Let the motif dry completely before you unpin it. For a crisp doily finish, use a light spray starch.
Final Quality-Control Checklist
- Center hole is open and round
- 12 even spokes with 12 matching windows
- Solid ring of 48 sc lies flat, 2.25 in (5.7 cm) across
- 6 petals, all the same length
- Each petal has one clean, open almond eyelet
- Petal tips are sharp, each with a ch-2 point
- Valleys between petals are even
- Edge has 216 sc and 6 tip sps
- Finished size is 6 in (15.2 cm) tip to tip
- All ends are woven in securely and invisibly
Troubleshooting
Petals are uneven in length. Count the chains in each Round 4 loop. Even one loop of 19 or 21 chains will show.
Eyelets close up or look crowded. Check that you’re working the Petal Fill around the chain loop, not into each chain. Slide the stitches together so the loop stays open.
Motif cups in the middle. Your Round 3 tension is too tight, or a ch-3 sp got fewer than 3 sc. Recount: you should have 48 sc.
Motif ruffles at the edge. Your Round 6 tension is too loose, or extra stitches crept into the petal sides. Each side should have exactly 17 sc.
Tips are rounded. Check that each tip has (2 dc, ch 2, 2 dc) in Round 5 and (sc, ch 2, sc) in Round 6. Pin the tips firmly when you block.
Valleys look bulky. Make sure you skipped the valley sc in Round 6.
Spokes lean. Your ch-3 sps are uneven. Keep the chains the same size and work each dc straight up from the Round 1 dc below it.
Petals lean to one side. Your tension changed partway around the loop. Work the second half of each Petal Fill at the same tension as the first.
Motif is the right size but looks limp. Block again and add light starch, or try a more tightly plied cotton.
Care
Hand wash in cool water with mild soap, press out the water in a towel, and dry flat, reshaping the petals as it dries. If needed, press lightly from the wrong side under a cloth with a warm iron.
Final Notes
Here is the measurement chain for this motif:
- Rounds 1–3 build a 48-sc ring that measures 2.25 in (5.7 cm) across.
- Rounds 4–5 add six eyelet petals and bring the motif to 5.5 in (14.0 cm) tip to tip.
- Round 6 adds 0.25 in (0.6 cm) all around, for a blocked finish of 6 in (15.2 cm).
The key counts are 12 dc, 12 spokes, 48 sc, 210 sts, and 216 sc. Check each one before you start the next round, and the motif will lie flat, the eyelets will stay open, and the petals will finish sharp and even.
Happy crocheting!