

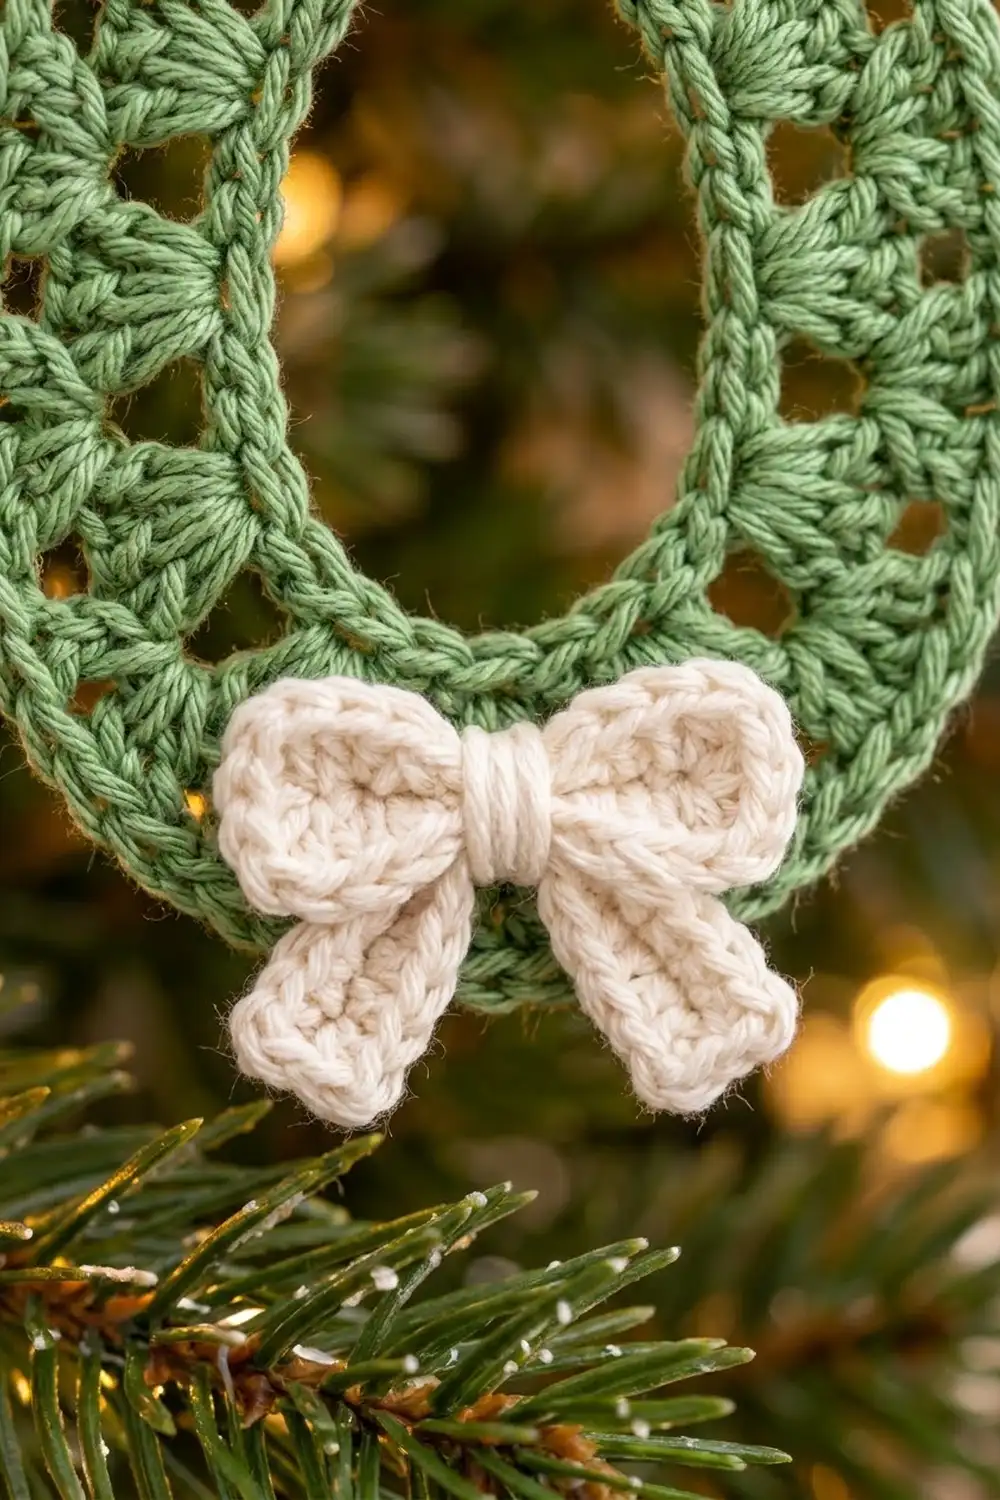
The Sage Window Wreath is a small openwork oval ornament with a soft vintage look. It is a narrow ring of lacy fans and little “windows” around an oval opening, finished with a corded edge, a matching corded hanging loop and a cream bow at the bottom.
The palette is two colors: sage green for the wreath and loop, and cream for the bow. Green and cream look quiet and natural among warm tree lights, gold baubles and real pine.
This pattern uses US crochet terms. The finished wreath measures 3.5 in (8.9 cm) wide by 4.25 in (10.8 cm) tall, not counting the loop. With the loop it is about 5.75 in (14.6 cm) tall.
You work the wreath in six rounds around a chain ring. Increases go only in the two curved ends, which gives the oval shape. The last two rounds form the border. Then you add a corded loop at the top and sew a small cream bow at the bottom center.
Finished Size and Construction
- Finished size: 3.5 in (8.9 cm) wide x 4.25 in (10.8 cm) tall
- Height with hanging loop: about 5.75 in (14.6 cm)
- Skill level: Easy-intermediate
- Terminology: US crochet terms
- Yarn weight: Sport / fine (#2), cotton
- Hook: 2.75 mm (US C-2)
- Number of pieces: 1 wreath, plus a small sewn-on bow
- Layout: Single oval, long axis vertical
- Center opening: about 1.5 in (3.8 cm) wide x 2.25 in (5.7 cm) tall
- Size before border (after Round 4): 3.0 in (7.6 cm) x 3.75 in (9.5 cm)
- Border depth: 0.25 in (0.6 cm) on each side (Rounds 5–6)
Materials
Yarn: Use a smooth, mercerized sport-weight cotton or cotton blend. Cotton shows the fan texture clearly, blocks crisply and keeps its shape on a branch. Avoid fuzzy yarns, because they fill in the windows.
- Sage green (Color A): 10 g, about 33 m (36 yd)
- Cream (Color B): 3 g, about 10 m (11 yd)
These amounts include a margin for gauge swatching and long sewing tails. One ornament uses less than this.
Tools:
– 2.75 mm (US C-2) crochet hook
– Tapestry needle
– 4 locking stitch markers
– Scissors
– Rust-proof pins and a foam blocking mat
– Spray bottle with water
– Ruler or tape measure
Abbreviations (US Terms)
- ch – chain
- sl st – slip stitch
- sc – single crochet
- hdc – half double crochet
- dc – double crochet
- rev sc – reverse single crochet (crab stitch)
- sk – skip
- st(s) – stitch(es)
- sp(s) – space(s)
- rnd – round
- rep – repeat
Special stitches:
Fan: 5 dc worked into the same ch-2 sp.
Reverse sc (rev sc): Work from left to right (right-handed). Insert the hook into the next st to the right, yarn over, pull up a loop, yarn over, and pull through both loops. This makes the twisted, rope-like edge.
Gauge and Checkpoints
Gauge: 24 sc and 28 rows = 4 in (10.2 cm) in rows of sc, or 6 sc and 7 rows per 1 in (2.5 cm).
Gauge matters here because the final size depends on it. Make one complete wreath first and check it at every stage. Measure flat, lightly pinned into an oval, without stretching:
- After Round 1: opening about 1.5 in (3.8 cm) x 2.25 in (5.7 cm)
- After Round 2: about 2.0 in (5.1 cm) x 2.75 in (7.0 cm)
- After Round 3: about 2.5 in (6.4 cm) x 3.25 in (8.3 cm)
- After Round 4: about 3.0 in (7.6 cm) x 3.75 in (9.5 cm)
- After Round 6: 3.5 in (8.9 cm) x 4.25 in (10.8 cm)
Too big? Go down a hook size to 2.5 mm, or tighten your chains. Loose foundation chains are the most common reason for a large opening.
Too small or cupping? Go up to a 3.0 mm hook. If the fans in Round 4 curl upward, your dc are tight. Relax your tension rather than adding stitches.
Wreath Pattern
With Color A:
Foundation: Ch 36 and sl st into the first ch to form a ring, taking care not to twist the chain.
Round 1: Ch 1, then sc in each ch around. Join with a sl st to the first sc. (36 sc)
Now divide the ring into four sections. This sets up the oval:
– Sts 1–10: right side (10 sts)
– Sts 11–18: top end (8 sts)
– Sts 19–28: left side (10 sts)
– Sts 29–36: bottom end (8 sts)
Place a marker in sts 1, 11, 19 and 29. Move them up as you work.
Checkpoint: Pinch the ring into an oval. It should measure about 1.5 in (3.8 cm) x 2.25 in (5.7 cm).
Round 2 (shaping round): Ch 2 (does not count as a st).
– Right side: Hdc in each of the next 10 sts. (10 hdc)
– Top end: [2 hdc in each of next 2 sts, hdc in next st] twice, then 2 hdc in each of next 2 sts. (14 hdc)
– Left side: Hdc in each of the next 10 sts. (10 hdc)
– Bottom end: Work the same as the top end. (14 hdc)
Join with a sl st to the first hdc.
(48 hdc: 10 + 14 + 10 + 14)
All 12 increases are in the curved ends. The sides stay straight, so the opening becomes a true oval instead of a circle.
Round 3 (window round): Ch 5 (counts as dc + ch 2), sk next st. Dc in next st, ch 2, sk next st. Rep from * around. Join with a sl st to the 3rd ch of the beg ch-5.
(24 dc and 24 ch-2 sps)
Each 10-st side holds 5 posts and each 14-st end holds 7 posts (5 + 7 + 5 + 7 = 24). The skipped sts create the small open windows next to the inner edge.
Round 4 (fan round): Sl st into the first ch-2 sp. Ch 1, sc in the same sp, then fan (5 dc) in the next ch-2 sp. Sc in next ch-2 sp, fan in next ch-2 sp. Rep from * around. Join with a sl st to the first sc.
(12 fans and 12 sc = 72 sts)
Each fan spreads over a dc post, and each sc pulls the round in. Together they make the triangular openings between the fans.
Checkpoint: Lay the piece flat. It should measure about 3.0 in (7.6 cm) x 3.75 in (9.5 cm) and lie flat without rippling.
Border
Border gauge: 6 sts per 1 in (2.5 cm) along the edge, the same as the main gauge.
Set up: Each fan repeat (1 sc + 1 fan) is 6 sts. Move your 4 markers so each quarter of the oval holds exactly 3 fan repeats (18 sts). Arrange them so one quarter is centered at the top, one at the bottom and one on each side.
Round 5 (conversion round): Ch 1. Work each quarter like this: sc in sc, sc in each of next 5 dc, sc in sc, sc in next 2 dc, 2 sc in next dc (the center dc of the middle fan), sc in next 2 dc, sc in sc, sc in each of next 5 dc. Rep for all 4 quarters. Join with a sl st to the first sc.
(72 sc worked 1 per st + 4 increases = 76 sc; 19 sts per quarter)
Round 6 (corded edge): Ch 1, do not turn. Rev sc in each st around. Join with a sl st to the first rev sc.
(76 rev sc; 19 per quarter)
Fasten off and weave in the ends.
Why the math works: At 6 sts per inch, 76 sts make an edge about 12.7 in (32.3 cm) long. The outer edge of a 3.5 in x 4.25 in oval is about 12.2 in (31.0 cm). The extra 0.5 in (1.3 cm) of ease balances the natural pull of rev sc, so the edge lies flat instead of cupping. Without the 4 increases, the rev sc would tighten the edge and the oval would curl. If you added an increase in every fan, the edge would ripple.
Hanging Loop
With Color A, join with a sl st in the top-center st of Round 6. This is the 10th st of the top quarter.
- Ch 20, then sl st into the same top-center st to form a loop.
- Work 26 sc into the chain loop, working around the chain and packing the sts tightly so they cover it completely. Sl st into the starting st.
- Fasten off, leaving a 10 in (25.4 cm) tail.
- Wrap the tail firmly 5 times around both legs of the loop, right where it meets the wreath. Then thread the needle up under all the wraps and trim.
This gives a firm, corded loop about 1.5 in (3.8 cm) tall with a neat wrapped collar.
Bow
With Color B:
Bow body: Ch 10.
– Row 1: Sc in 2nd ch from hook and in each ch across. (9 sc)
– Rows 2–5: Ch 1, turn, sc in each st across. (9 sc)
Fasten off, leaving a 12 in (30.5 cm) tail. The rectangle measures about 1.5 in (3.8 cm) x 0.75 in (1.9 cm).
Tails: Ch 9. Sl st in 2nd ch from hook, sc in next 3 ch, hdc in next 4 ch. (8 sts)
Fasten off, leaving a 6 in (15.2 cm) tail. The strip is about 1.3 in (3.3 cm) long.
Assembly:
1. Pinch the bow body in the middle so it forms two loops.
2. Fold the tail strip in half into an upside-down V and place it behind the pinch.
3. Wrap the long body tail 6 times around the center through both layers, then secure it at the back.
The finished bow is about 1.4 in (3.6 cm) wide.
Attach: Center the bow at the bottom of the wreath so it covers Rounds 4–6, with the tails pointing down. Sew it on through the wrapped center plus a few tacks behind each loop, so the loops stay puffy and the bow doesn’t flop forward.
Final Blocking
- Wet the wreath lightly with the spray bottle until it is damp, not soaked. Keep the bow and loop dry if they are already attached.
- Lay the wreath on the blocking mat with the long axis vertical.
- Pin the center opening first, to 1.5 in (3.8 cm) x 2.25 in (5.7 cm), using 4 pins at the top, bottom and sides.
- Pin the outer edge to 3.5 in (8.9 cm) x 4.25 in (10.8 cm), using one pin at the tip of each fan.
- Gently push each triangular window open with a fingertip so it holds its shape.
- Let it dry completely, at least 4 hours.
- Unpin it, then sew on the bow if you haven’t already.
For extra stiffness, mist with a light fabric stiffener before drying.
Final Quality-Control Checklist
- Round 1 has 36 sc and Round 2 has 48 hdc.
- Round 3 has 24 dc posts with even ch-2 windows.
- Round 4 has 12 fans of 5 dc each.
- Rounds 5 and 6 each have 76 sts, with 19 per quarter.
- The wreath measures 3.5 in (8.9 cm) x 4.25 in (10.8 cm).
- The opening is centered and measures 1.5 in (3.8 cm) x 2.25 in (5.7 cm).
- The edge lies flat, with no cupping or ruffling.
- The loop is centered at the top and the wraps are tight.
- The bow is centered at the bottom with the tails pointing down.
- All ends are woven in and invisible from the front.
Troubleshooting
The opening is round, not oval. The Round 2 increases are in the wrong place. Put all of them in the two 8-st end sections.
The ring is twisted. The foundation chain twisted when you joined it. Start again and keep the chain’s front facing you.
The fans curl upward. Your dc tension is tight. Go up half a hook size for Round 4 only.
The edge ruffles. You probably added extra increases in Round 5. Count 19 sts per quarter.
The edge cups inward. Your rev sc is too tight. Loosen your tension, or work Round 6 with a 3.0 mm hook.
The loop is floppy. Pack the 26 sc closer together and pull the collar wraps tighter.
The bow droops. Tack each bow loop to the wreath from behind with a single stitch.
Care
Spot clean or hand wash in cool water, press out the water in a towel, and reshape the ornament flat to dry. Store it flat in tissue paper so the loop and bow keep their shape.

Final Notes
The measurement chain stays simple from start to finish:
- The 36-st ring makes a 1.5 in (3.8 cm) x 2.25 in (5.7 cm) opening.
- Rounds 2–4 build it out to 3.0 in (7.6 cm) x 3.75 in (9.5 cm).
- The 76-st border adds 0.25 in (0.6 cm) on each side, for a finished 3.5 in (8.9 cm) x 4.25 in (10.8 cm) wreath.
Check each stage against those numbers and every ornament you make will match. Make one for each branch, tie one onto a gift, or hang a cluster together on a tree.
Happy crocheting!