

This paisley motif centers on a soft, spinning swirl. Six arms of double crochet turn out from a tiny ring, and each round pushes them a little farther around, so the center looks like it is moving. A band of graded stitches then stretches the circle into a classic paisley teardrop with one tapered point.
The whole motif uses one ivory or cream cotton yarn, which shows the texture clearly. The swirl’s arms, the solid outline, the open chain-loop mesh and the round popcorn edging all stand out in a single neutral shade. The style is vintage lace with a modern, chunky edge.
The pattern uses US crochet terms. The blocked motif measures 8.5 in (21.6 cm) wide by 9.75 in (24.8 cm) tall, popcorn edging included.
Construction is one continuous piece, worked in joined rounds. Rounds 1–5 make the swirl circle. Round 6 shapes the paisley with stitches from half double crochet up to double treble. Round 7 is a solid double crochet outline. Rounds 8–9 form the border: a chain-loop mesh, then popcorn bobbles. Nothing is sewn on and nothing is joined.
Finished Size and Construction
- Finished size: 8.5 in (21.6 cm) wide x 9.75 in (24.8 cm) tall, blocked
- Skill level: Intermediate
- Terminology: US crochet terms
- Yarn weight: DK / light worsted (category 3), cotton or cotton blend
- Hook: 4.0 mm (G-6)
- Number of pieces: 1 single motif
- Layout: One stand-alone paisley, no assembly
- Swirl center size: 4.5 in (11.4 cm) diameter after Round 5
- Size before border: 6 in (15.2 cm) wide x 7.25 in (18.4 cm) tall after Round 7
- Border depth: 1.25 in (3.2 cm) on each side (Rounds 8–9)
Materials
Yarn: Use a smooth, mercerized or matte cotton in DK weight. Cotton holds the swirl ridges and popcorns crisply and blocks flat. Avoid fuzzy or very loose-plied yarn, because it blurs the spiral arms.
- Ivory / cream: 40 g, about 90 m (98 yd). One 50 g ball is enough.
These quantities include a margin of about 15% for gauge swatching and weaving in ends.
Tools:
– 4.0 mm (G-6) crochet hook
– Tapestry needle
– Scissors
– 4 locking stitch markers
– Blocking mat or foam board
– Rustproof pins
– Spray bottle with clean water
– Ruler or tape measure
Abbreviations (US Terms)
- ch – chain
- sl st – slip stitch
- sc – single crochet
- hdc – half double crochet
- dc – double crochet
- tr – treble crochet (yarn over twice, insert hook, pull up a loop, [yarn over, pull through 2 loops] 3 times)
- dtr – double treble crochet (yarn over 3 times, insert hook, pull up a loop, [yarn over, pull through 2 loops] 4 times)
- sp – space
- st(s) – stitch(es)
- sk – skip
- Rnd – round
- pc – popcorn
Special stitch – Popcorn (pc): Work 5 dc in the stated space. Drop the loop from your hook. Insert the hook from front to back into the top of the first dc of the group, pick up the dropped loop and pull it through. Ch 1 to close. The ch-1 does not count as a stitch.
Gauge and Checkpoints
Gauge: 18 dc and 9 rows = 4 in (10.2 cm) in rows of dc, before blocking.
Make Rounds 1–5 first and treat the swirl circle as your gauge test. It shows yarn and hook behavior better than a flat swatch.
Checkpoints:
– After Rnd 1: about 1.25 in (3.2 cm) diameter
– After Rnd 3: about 2.75 in (7.0 cm) diameter
– After Rnd 5: 4.5 in (11.4 cm) diameter, lying flat
– After Rnd 6: about 5.25 in (13.3 cm) wide x 6.5 in (16.5 cm) tall
– After Rnd 7: 6 in (15.2 cm) wide x 7.25 in (18.4 cm) tall
– After Rnd 8: 7 in (17.8 cm) wide x 8.25 in (21.0 cm) tall
– After Rnd 9: 8.5 in (21.6 cm) wide x 9.75 in (24.8 cm) tall
If your circle is too big (more than 4.75 in / 12.1 cm after Rnd 5), go down to a 3.75 mm hook. If it is too small (less than 4.25 in / 10.8 cm), go up to a 4.5 mm hook. If the circle ruffles, your chains are too loose. If it cups, your chains are too tight. Check that each ch-1 sp is a real, relaxed chain.
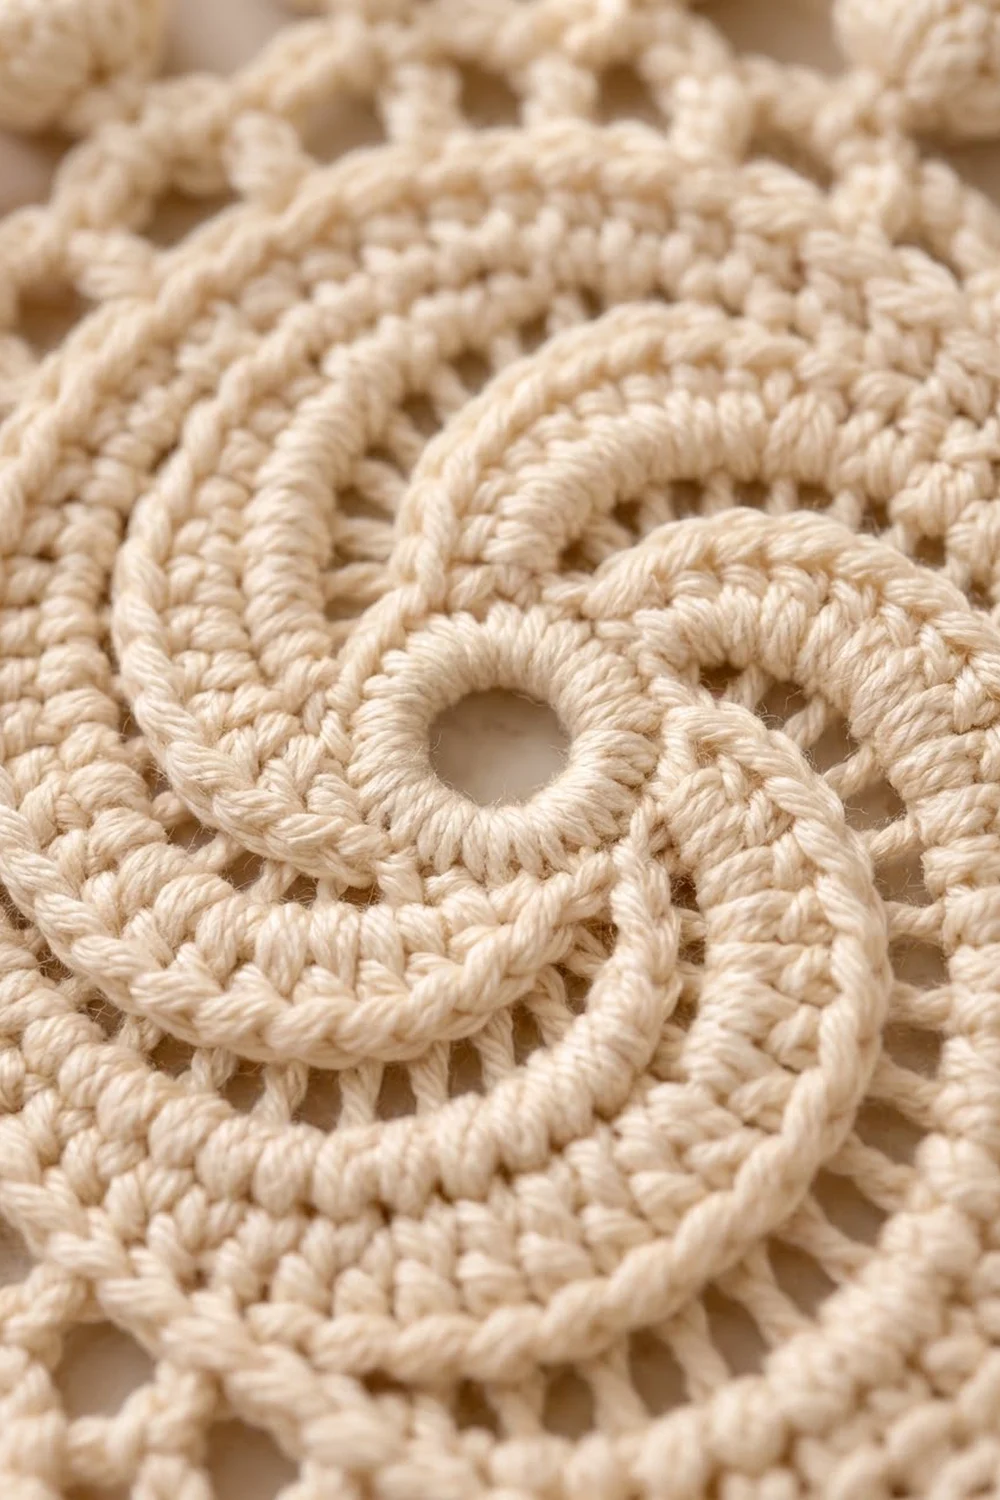
Swirl Center (Rounds 1–5)
The swirl works on one simple rule. Each of the 6 groups skips its own first dc, works dc in the rest of the group, then adds 3 dc and a ch-1 in the space. Each group grows by 2 dc per round, and its starting point moves one stitch forward. That shift is what makes the arms spiral.
Rnd 1: Make a magic ring. Ch 3 (counts as dc), dc in ring, ch 1, 2 dc in ring, ch 1; repeat from * 4 more times. Sl st to the top of the beginning ch-3. Pull the ring closed. (12 dc in 6 groups of 2, and 6 ch-1 sps)
Rnd 2: Sl st in next dc, ch 3 (counts as dc), 3 dc in next ch-1 sp, ch 1. Sk next dc, dc in next dc, 3 dc in next ch-1 sp, ch 1; repeat from * 4 more times. Sl st to top of ch-3. (24 dc in 6 groups of 4, and 6 ch-1 sps)
Rnd 3: Sl st in next dc, ch 3 (counts as dc), dc in next 2 dc, 3 dc in next ch-1 sp, ch 1. Sk next dc, dc in next 3 dc, 3 dc in next ch-1 sp, ch 1; repeat from * 4 more times. Sl st to top of ch-3. (36 dc in 6 groups of 6, and 6 ch-1 sps)
Rnd 4: Sl st in next dc, ch 3 (counts as dc), dc in next 4 dc, 3 dc in next ch-1 sp, ch 1. Sk next dc, dc in next 5 dc, 3 dc in next ch-1 sp, ch 1; repeat from * 4 more times. Sl st to top of ch-3. (48 dc in 6 groups of 8, and 6 ch-1 sps)
Rnd 5: Sl st in next dc, ch 3 (counts as dc), dc in next 6 dc, 3 dc in next ch-1 sp, ch 1. Sk next dc, dc in next 7 dc, 3 dc in next ch-1 sp, ch 1; repeat from * 4 more times. Sl st to top of ch-3. (60 dc in 6 groups of 10, and 6 ch-1 sps)
Each round adds 12 dc. That is the right increase for a flat dc circle, so the swirl lies flat without cupping.
Checkpoint: 4.5 in (11.4 cm) diameter. Place markers in the first dc of Groups 1, 4, 5 and 6. The join sits at the first dc of Group 1, and the groups are numbered in working order.
Paisley Shaping (Round 6)
Round 6 is a conversion round. You work one stitch into each of the 66 positions (60 dc plus 6 ch-1 sps) and add increases. Stitch height rises from hdc on the head to dtr at the point, which pulls the circle into a teardrop.
Rnd 6:
– Groups 1–3 (head): Ch 2 (does not count), hdc in same st as join, hdc in next 9 dc, 2 hdc in ch-1 sp. Hdc in next 10 dc, 2 hdc in ch-1 sp; repeat from * once more. (36 hdc)
– Group 4 (shoulder): Dc in next 10 dc, 2 dc in ch-1 sp. (12 dc)
– Group 5 (point): Tr in next 3 dc, dtr in next 3 dc, (dtr, ch 3, dtr) in next dc for the tip, dtr in next 3 dc, 2 dtr in ch-1 sp. (13 sts and 1 ch-3 tip sp)
– Group 6 (return): Tr in next 4 dc, dc in next 3 dc, hdc in next 3 dc, 2 hdc in ch-1 sp. (12 sts)
Sl st to first hdc.
Round 6 count: 66 sts worked 1 per position + 7 increases = 73 sts, plus 1 ch-3 tip sp. The 7 increases are 3 on the head, 1 on the shoulder, 2 at the point and 1 on the return.
The tip leans slightly toward the return side. This gives the gentle curl at the paisley point.
Outline (Round 7)
Round 7 is a conversion round in dc. Running order from the join: head (36 sts), shoulder (12), point-before-tip (7), tip sp, point-after-tip (6), return (12).
Rnd 7:
– Head: Ch 3 (counts as dc), dc in next 2 sts, 2 dc in next st. Dc in next 3 sts, 2 dc in next st; repeat from * 7 more times. (45 dc)
– Shoulder: Dc in next 5 sts, 2 dc in next st; repeat from * once more. (14 dc)
– Point: Dc in next 7 sts, (2 dc, ch 3, 2 dc) in ch-3 tip sp, dc in next 6 sts. (17 dc and 1 ch-3 tip sp)
– Return: Dc in next 5 sts, 2 dc in next st; repeat from * once more. (14 dc)
Sl st to top of ch-3.
Round 7 count: 73 sts worked 1 per stitch + 13 increase dc + 4 dc in the tip sp = 90 dc, plus 1 ch-3 tip sp. The 13 increases are 9 on the head, 2 on the shoulder and 2 on the return.
Checkpoint: 6 in (15.2 cm) wide x 7.25 in (18.4 cm) tall. Before you start the border, number the Round 7 stitches 1–90 in your head, or mark every 10th one. Stitches 1–45 are the head, 46–59 the shoulder, 60–68 point-before, then the tip sp, then 69–76 point-after, and 77–90 the return.
Border (Rounds 8–9)
Border gauge: Each ch-4 loop spans about 0.65 in (1.7 cm) of the outline. Each popcorn is about 0.6 in (1.5 cm) across. The two border rounds together add 1.25 in (3.2 cm) on every side.
Rnd 8 (chain-loop mesh): Ch 1, sc in same st as join (st 1). Ch 4, sk 2 sts, sc in next st; repeat from * 21 more times, ending with sc in st 67. Ch 4, sk st 68, (sc, ch 5, sc) in ch-3 tip sp, ch 4, sk st 69, sc in st 70. Ch 4, sk 2 sts, sc in next st; repeat from * 5 more times, ending with sc in st 88. Ch 4, sk sts 89–90, sl st to first sc.
Round 8 count: 32 sc, 31 ch-4 loops and 1 ch-5 tip loop, for 32 loops total.
Loops per section (counted by the sc each loop starts from):
– Head: 15 loops
– Shoulder: 5 loops
– Point: 8 loops (3 before the tip, the ch-5 tip loop, then 4 after)
– Return: 4 loops
– Total: 15 + 5 + 8 + 4 = 32 loops
Rnd 9 (popcorn edging): Sl st in first 2 ch of next loop, ch 1. In the same loop work (sc, ch 2, pc, ch 2, sc). In next ch-4 loop work (sc, ch 2, pc, ch 2, sc); repeat from * in each ch-4 loop up to the tip. In the ch-5 tip loop work (sc, ch 2, pc, ch 3, pc, ch 2, sc). Continue the ch-4 loop repeat to the end. Sl st to first sc and fasten off.
Round 9 count: 64 sc and 33 popcorns: Head 15, Shoulder 5, Point 9 (8 loops, with 2 popcorns in the tip loop), Return 4.
Why the math works: Round 7 has 90 stitches. Round 8 places sc on 30 of them: 23 from st 1 to st 67, 1 on st 70 and 6 from st 73 to st 88. It skips the other 60: 2 at each of the 28 regular loops, plus st 68 and st 69, one on each side of the tip. That makes 30 + 60 = 90, so every outline stitch is used exactly once. The tip sp holds the extra 2 sc and the larger ch-5 loop. Skipping only 1 stitch beside the tip keeps the point sharp instead of stretched. In Round 9, each loop holds one popcorn, so popcorn spacing follows the loops evenly around the curve.
Final Blocking
- Weave in all ends along the back of the Round 7 outline, where they will not show through the mesh.
- Mist the motif evenly with water until it is damp but not dripping. For a stubborn cotton, wet it fully and roll it in a towel.
- Lay it face up on the blocking mat. Gently flatten the swirl so all 6 arms lie evenly.
- Pin the top of the head and the tip so the motif measures 9.75 in (24.8 cm) tall.
- Pin the widest point of the head to 8.5 in (21.6 cm).
- Pin each ch-4 loop out to a smooth curve, putting the pin just inside each popcorn. Do not pin through the popcorns, so they stay round.
- Set the tip point and give it a slight curl toward the return side.
- Let it dry completely, at least 12 hours, before unpinning.
Final Quality-Control Checklist
- Six swirl arms, all spiraling in the same direction
- Swirl circle measures 4.5 in (11.4 cm) and lies flat
- Round 7 has exactly 90 dc plus the ch-3 tip sp
- Round 8 has 32 loops, including one ch-5 at the tip
- 33 popcorns in total, with 2 at the tip
- Popcorns all pop to the front (right side)
- Blocked size is 8.5 in (21.6 cm) x 9.75 in (24.8 cm)
- No ends showing on the front
Troubleshooting
Swirl arms look straight, not spiral: You are not skipping the first dc of each group. Skip it every round, and start each round with a sl st into the 2nd dc.
Circle cups after Round 4 or 5: Your ch-1 sps are tight. Loosen them, or go up half a hook size for those chains only.
Point is blunt: Check that the dtr and the (dtr, ch 3, dtr) are placed correctly in Group 5. In Round 8, skip only 1 stitch on each side of the tip.
Popcorns sink to the back: Insert the hook from front to back when closing each popcorn.
Border ruffles: Use ch 3 instead of ch 4 in Round 8, keeping the same skips.
Border pulls in: Use ch 5 loops and a ch-6 tip loop, keeping the same skips.
Care
Hand wash cold with a mild soap and press out the water in a towel without wringing. Lay flat to dry, re-pinning to 8.5 x 9.75 in (21.6 x 24.8 cm) if needed.

Final Notes
The measurement chain is simple to follow. The swirl circle reaches 4.5 in (11.4 cm) with 60 dc. Round 6 shapes it into a teardrop with 73 sts, and the Round 7 outline brings it to 6 x 7.25 in (15.2 x 18.4 cm) with 90 dc. The 32-loop mesh grows it to 7 x 8.25 in (17.8 x 21.0 cm). The 33-popcorn edging finishes it at 8.5 x 9.75 in (21.6 x 24.8 cm).
If you hit the checkpoints at Round 5 and Round 7, the border will fall into place. Happy crocheting!