

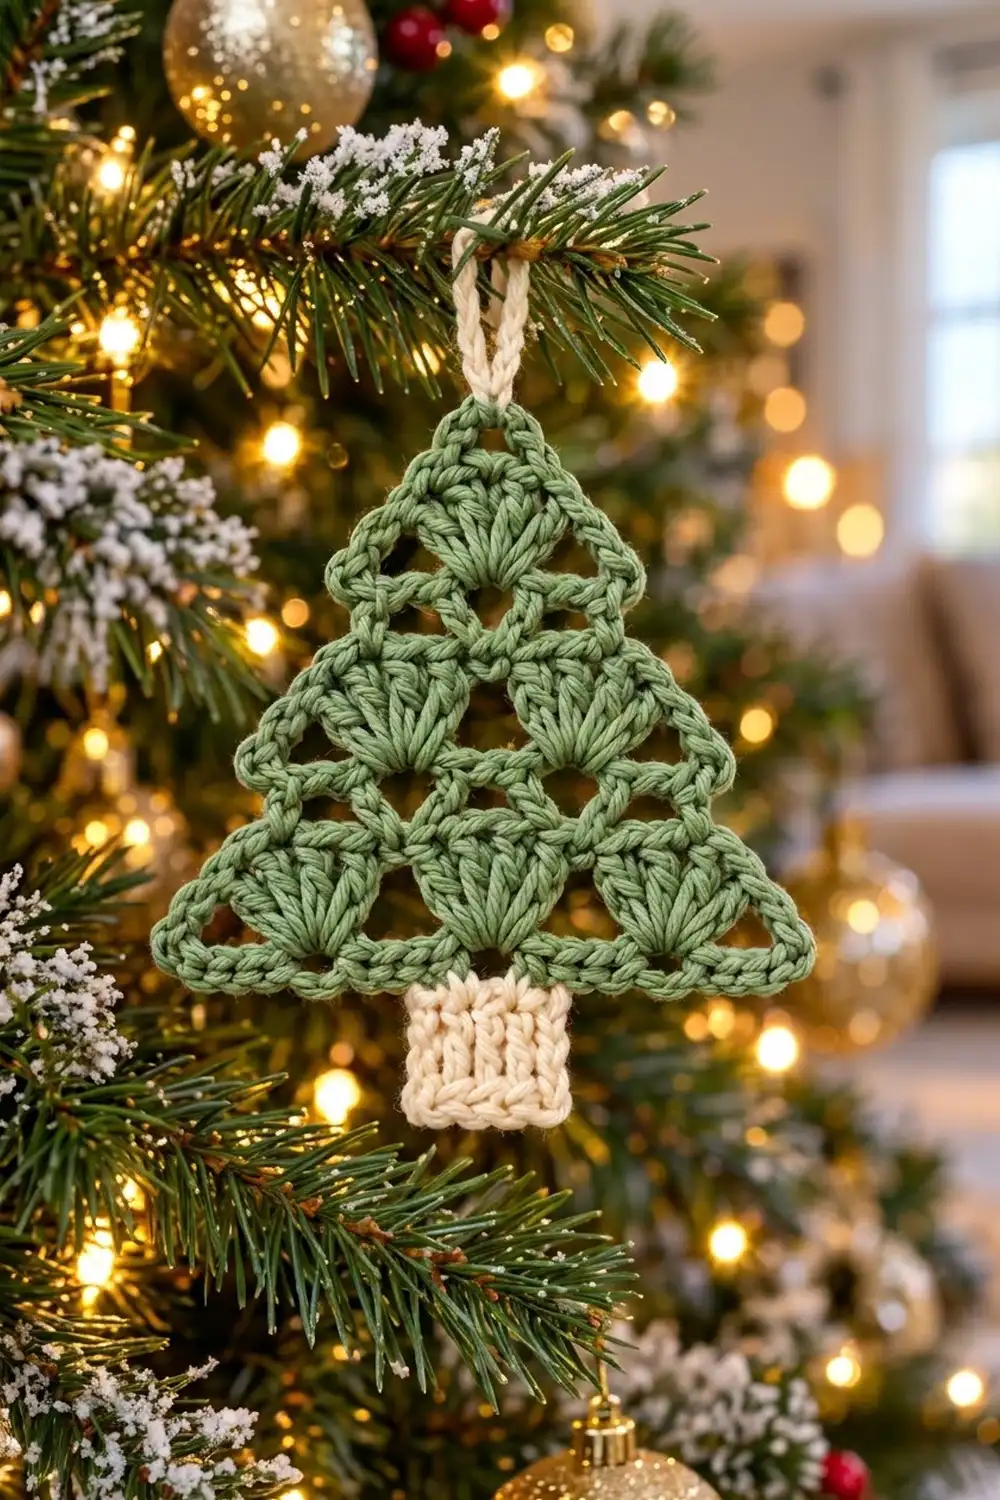
This little tree is built from tall shell fans stacked in three tiers: three fans at the base, two in the middle and one at the top. Chain arches link the fans and leave small triangular windows, so the ornament looks airy against tree lights. A neat single-crochet outline pulls the scalloped edges into a crisp triangle.
The tree is worked in soft sage green. A ribbed cream trunk and a cream hanging loop finish it off. The palette is calm and Scandinavian, and it works on a real tree, a gift tag or a window garland.
This pattern uses US crochet terms. The finished tree is 4.5 in (11.4 cm) wide and 3.25 in (8.3 cm) tall. With the trunk it is 4.25 in (10.8 cm) tall, and with the loop it is 5.25 in (13.3 cm).
You work the tree body flat in five rows from the bottom up, and each tier gets narrower. Then you add one outline round, crochet a small ribbed trunk sideways and sew it on, and finish with the loop.
Finished Size and Construction
- Finished size: 4.5 in (11.4 cm) wide x 3.25 in (8.3 cm) tall (triangle only)
- Total height: 4.25 in (10.8 cm) with trunk; 5.25 in (13.3 cm) with loop
- Skill level: Easy-intermediate
- Terminology: US
- Yarn weight: DK (#3), cotton or cotton blend
- Hook: 3.5 mm (E-4)
- Number of pieces: 1 ornament (tree body plus a small trunk sewn on)
- Layout: 3 shell tiers: 3 shells, then 2, then 1
- Piece size before border: 4.1 in (10.4 cm) wide x 2.75 in (7.0 cm) tall
- Border depth: 1 round of sc, about 0.2 in (0.5 cm)
Materials
Choose a smooth, mercerized or matte cotton in DK weight. Cotton gives crisp stitch definition and holds the triangle shape after blocking. Acrylic also works, but the fans will look softer.
- Sage green (tree): 8 g / 19 m
- Cream (trunk and loop): 3 g / 7 m
These quantities include a margin for swatching and weaving in ends.
Tools:
– 3.5 mm (E-4) crochet hook
– Tapestry needle
– Scissors
– Stitch marker
– Blocking mat and rust-proof pins
– Spray bottle with water
Abbreviations (US Terms)
- ch – chain
- sl st – slip stitch
- sc – single crochet
- tr – treble crochet
- dtr – double treble crochet
- blo – back loop only
- sk – skip
- sp(s) – space(s)
- st(s) – stitch(es)
- RS / WS – right side / wrong side
Special stitch – Shell: Work 7 tr into the same stitch. The center (4th) tr is the shell’s peak.
dtr reminder: Yarn over 3 times, insert hook, pull up a loop, then (yarn over, pull through 2 loops) 4 times.
Gauge and Checkpoints
Base gauge: 20 sc x 22 rows = 4 in (10.2 cm) in sc with a 3.5 mm hook.
Make one tree before you commit to a batch. The checkpoints below help you catch problems early:
- After Row 1: 4.1 in (10.4 cm) across the shell tops.
- After Row 2: 1.1 in (2.8 cm) from the foundation edge to the tops of the dtr.
- After Row 4: 2.0 in (5.1 cm) tall.
- After Row 5: 2.75 in (7.0 cm) tall.
- After the border: 4.5 in (11.4 cm) wide x 3.25 in (8.3 cm) tall.
Too big? Go down to a 3.25 mm hook, or keep the dtr more compact by pulling each loop snug.
Too small? Go up to a 3.75 mm hook. Tight dtr are the usual cause, so let each yarn-over sit loosely on the hook.
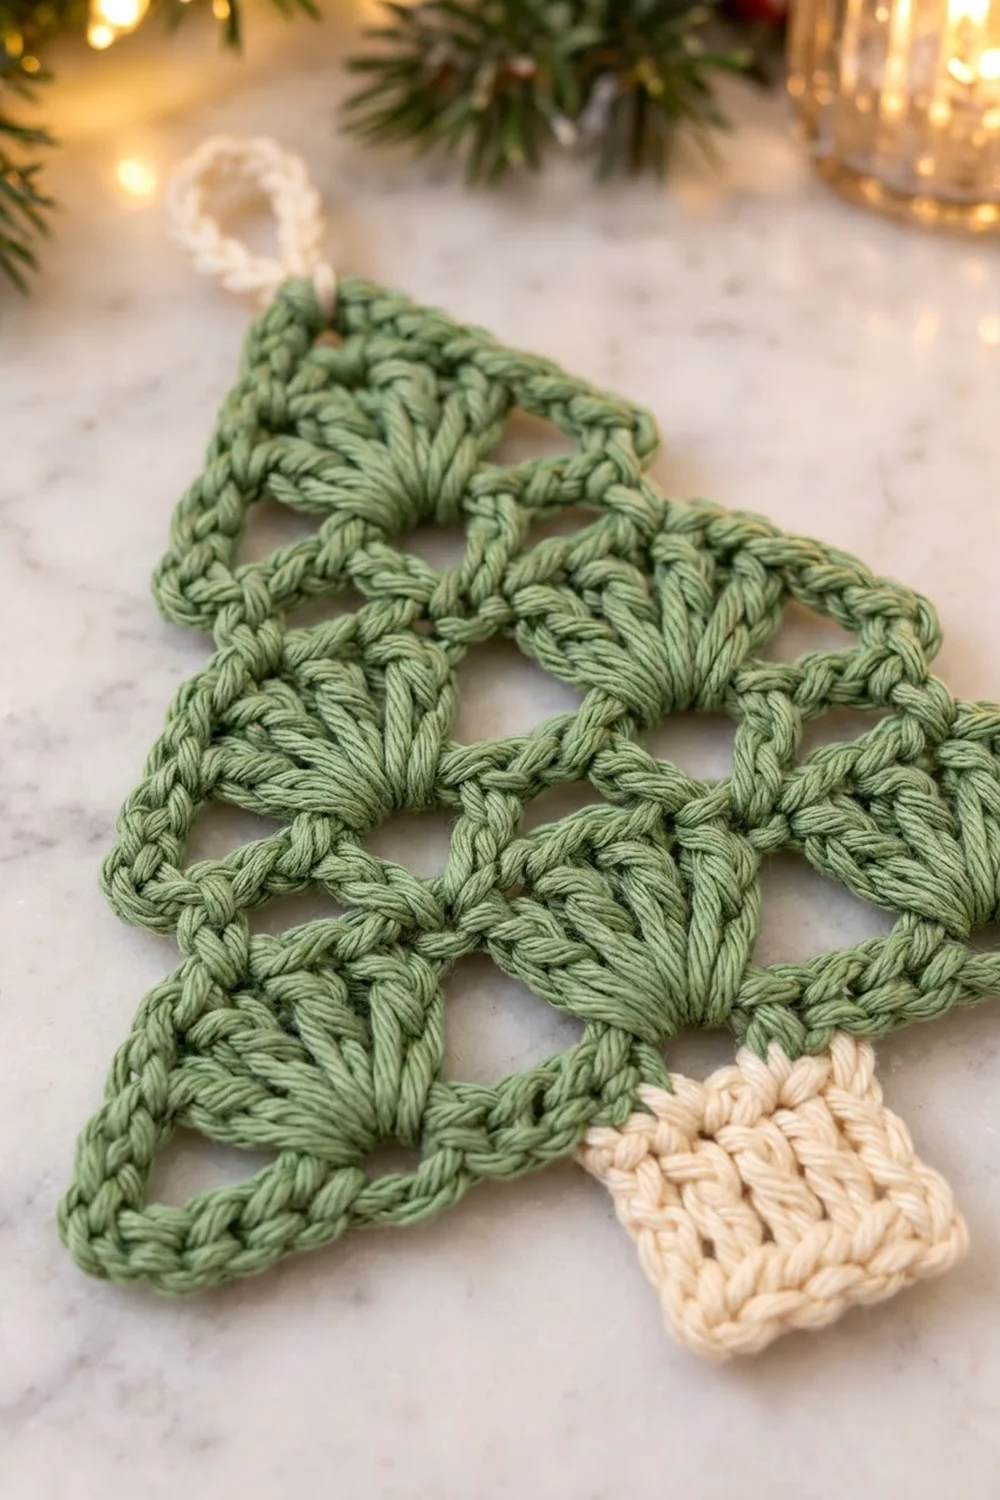
Tree Body
Use sage green. Work in rows and turn at the end of each row.
Foundation: Ch 26.
Row 1 (RS): Sc in 2nd ch from hook, sk 3 ch, Shell in next ch, sk 3 ch, sc in next ch; repeat from * 2 more times. Turn.
(25 sts: 4 sc + 21 tr; 3 shells)*
Each shell grows from a single chain, so the fans open upward from a base point.
Row 2 (WS): Sl st in each of first 4 sts (the sc and 3 tr), ch 1, sc in next tr (center tr of shell), ch 4, sk 3 tr, dtr in next sc, ch 4, sk 3 tr, sc in next tr (center tr); repeat from * once more. Leave the remaining sts unworked. Turn.
(3 sc, 2 dtr, 4 ch-4 sps)*
The sc sit on the shell peaks and the dtr rise from the gaps between the shells. Together with the ch-4 arches, they form the first row of triangular windows. The sl sts start the narrowing, so the outer half of each end shell becomes part of the tree’s edge.
Row 3 (RS): Ch 1, sc in first sc, sk ch-4 sp, Shell in top of next dtr, sk ch-4 sp, sc in next sc; repeat from * once more. Turn.
(17 sts: 3 sc + 14 tr; 2 shells)*
Row 4 (WS): Sl st in each of first 4 sts, ch 1, sc in next tr (center tr), ch 4, sk 3 tr, dtr in next sc, ch 4, sk 3 tr, sc in next tr (center tr). Leave the remaining sts unworked. Turn.
(2 sc, 1 dtr, 2 ch-4 sps)
Row 5 (RS): Ch 1, sc in first sc, sk ch-4 sp, Shell in top of dtr, sk ch-4 sp, sc in last sc. Fasten off.
(9 sts: 2 sc + 7 tr; 1 shell)
Each tier sits 4 chains farther in on both sides. The outer halves of the shells therefore line up along two straight diagonals that meet above the top shell.
Border
Border gauge: 1 round of sc adds about 0.2 in (0.5 cm) on all edges. It also adds a point about 0.3 in (0.8 cm) tall at the apex.
Round 1 (RS facing): With RS facing, join sage green with a sl st in the free loop of the first foundation ch at the bottom right corner.
- Bottom edge: Ch 1, 3 sc in same ch (corner). Sc in the free loop of each of the next 23 ch. 3 sc in the last foundation ch (corner).
Bottom edge = 29 sc, including both 3-sc corners. - Left side, going up: Skip the Row 1 sc that sits over the corner. Then work 1 sc in each of the following:
- each of the 3 outer tr of the first shell (or the sl sts on top of them)
- the Row 2 sc on that shell’s peak
- the Row 3 sc above it
- each of the 3 outer tr of the tier 2 shell
- the Row 4 sc
- the Row 5 sc
- each of the 3 outer tr of the top shell
Side = 13 sc.
3. Apex: (Sc, ch 3, sc) in the center tr of the top shell.
4. Right side, going down: Work 1 sc in each of the following:
– each of the 3 outer tr of the top shell
– the Row 5 sc
– the Row 4 sc
– each of the 3 outer tr of the tier 2 shell
– the Row 3 sc
– the Row 2 sc
– each of the 3 outer tr of the bottom shell
Skip the Row 1 sc over the corner.
Side = 13 sc.
5. Sl st to the first sc. Fasten off.
Round total: 29 + 13 + 2 + 13 = 57 sc, plus 1 ch-3 sp at the apex.
Why the math works:
– Bottom edge: The foundation has 25 working chains. The 2 corner chains take 3 sc each and the 23 between take 1 each: 6 + 23 = 29.
– Sides: Each side crosses three half-shells of 3 tr each (9 sts) and two notches of 2 stacked sc each (4 sts): 9 + 4 = 13. The two sides mirror each other, so the triangle stays symmetrical.
– Apex: The apex has its own 2 sc. The side counts do not include them, so they are not counted twice.
Trunk
Use cream. The trunk is worked sideways, so the back-loop ridges run vertically.
Foundation: Ch 6.
Row 1: Sc in 2nd ch from hook and in each ch across. (5 sc)
Rows 2–7: Ch 1, turn, sc blo in each st across. (5 sc per row)
After Row 7, the trunk measures 1.25 in (3.2 cm) wide x 1 in (2.5 cm) tall. Fasten off and leave a 10 in (25.4 cm) tail.
Attach: Count the 29 bottom border sts from the bottom left corner and place a marker in sts 12 through 18. These 7 center sts match the trunk’s 7 row ends one to one. With the tail, whipstitch each row end to one marked st. Weave in.
Hanging Loop
Join cream with a sl st in the apex ch-3 sp. Ch 12, then sl st in the same ch-3 sp. Work 16 sc over the loop and sl st in the ch-3 sp again. Fasten off and weave in. The finished loop stands about 1 in (2.5 cm) above the point.
Final Blocking
- Weave in all ends along the outline round, away from the open windows.
- Lightly mist the ornament until it is damp but not soaked.
- Lay it RS up on the blocking mat.
- Pin the two bottom corners 4.5 in (11.4 cm) apart.
- Pin the apex point 3.25 in (8.3 cm) above the center of the bottom edge.
- Ease both sides into straight lines, pinning at each notch.
- Use a pin to open each triangular window and set each shell peak.
- Square the trunk to 1.25 in (3.2 cm) x 1 in (2.5 cm).
- Leave it to dry completely before unpinning.
Final Quality-Control Checklist
- Row stitch counts are 25, 3 sc + 2 dtr + 4 ch-4 sps, 17, 2 sc + 1 dtr + 2 ch-4 sps, and 9.
- Every shell has exactly 7 tr.
- Border: bottom 29, each side 13, apex (sc, ch 3, sc), for a total of 57 sc.
- The two sides are mirror images.
- The trunk ribs run vertically and the trunk is centered under sts 12–18.
- Finished size is 4.5 in (11.4 cm) x 3.25 in (8.3 cm).
- The loop is secure and centered on the apex.
- No ends show through the windows.
Troubleshooting
Shells cup or ruffle: The foundation chain is too tight. Chain loosely, or chain with a hook one size up.
Windows look squashed: The dtr are short. Pull up the first loop to full height and keep the yarn-overs loose.
Sides look stepped: You may have worked the Row 2 or Row 4 sl sts into the wrong stitches. Recount: sc plus 3 tr, then start in the center tr.
Border side count is off: Check that you skipped the Row 1 corner sc on both sides. Also check that each notch gets exactly 2 sc.
Trunk is off-center: Recount the bottom border from the corner, keeping the 3 corner sts in the count.
Apex is blunt: Pin the ch-3 point firmly while blocking.
Care
Hand wash in cool water with mild soap and press out the water in a towel. Reshape and dry flat, then store flat so the point stays crisp.
Final Notes
The sizes build on each other. Base gauge gives a Row 1 width of 4.1 in (10.4 cm). Three tiers with 1.1 in (2.8 cm) dtr steps bring the body to 2.75 in (7.0 cm). One sc outline then brings the tree to 4.5 in (11.4 cm) x 3.25 in (8.3 cm). The 1 in (2.5 cm) trunk and 1 in (2.5 cm) loop complete the full 5.25 in (13.3 cm) ornament.
If your checkpoints match, every tree in a batch will hang at the same size.
Happy crocheting!