

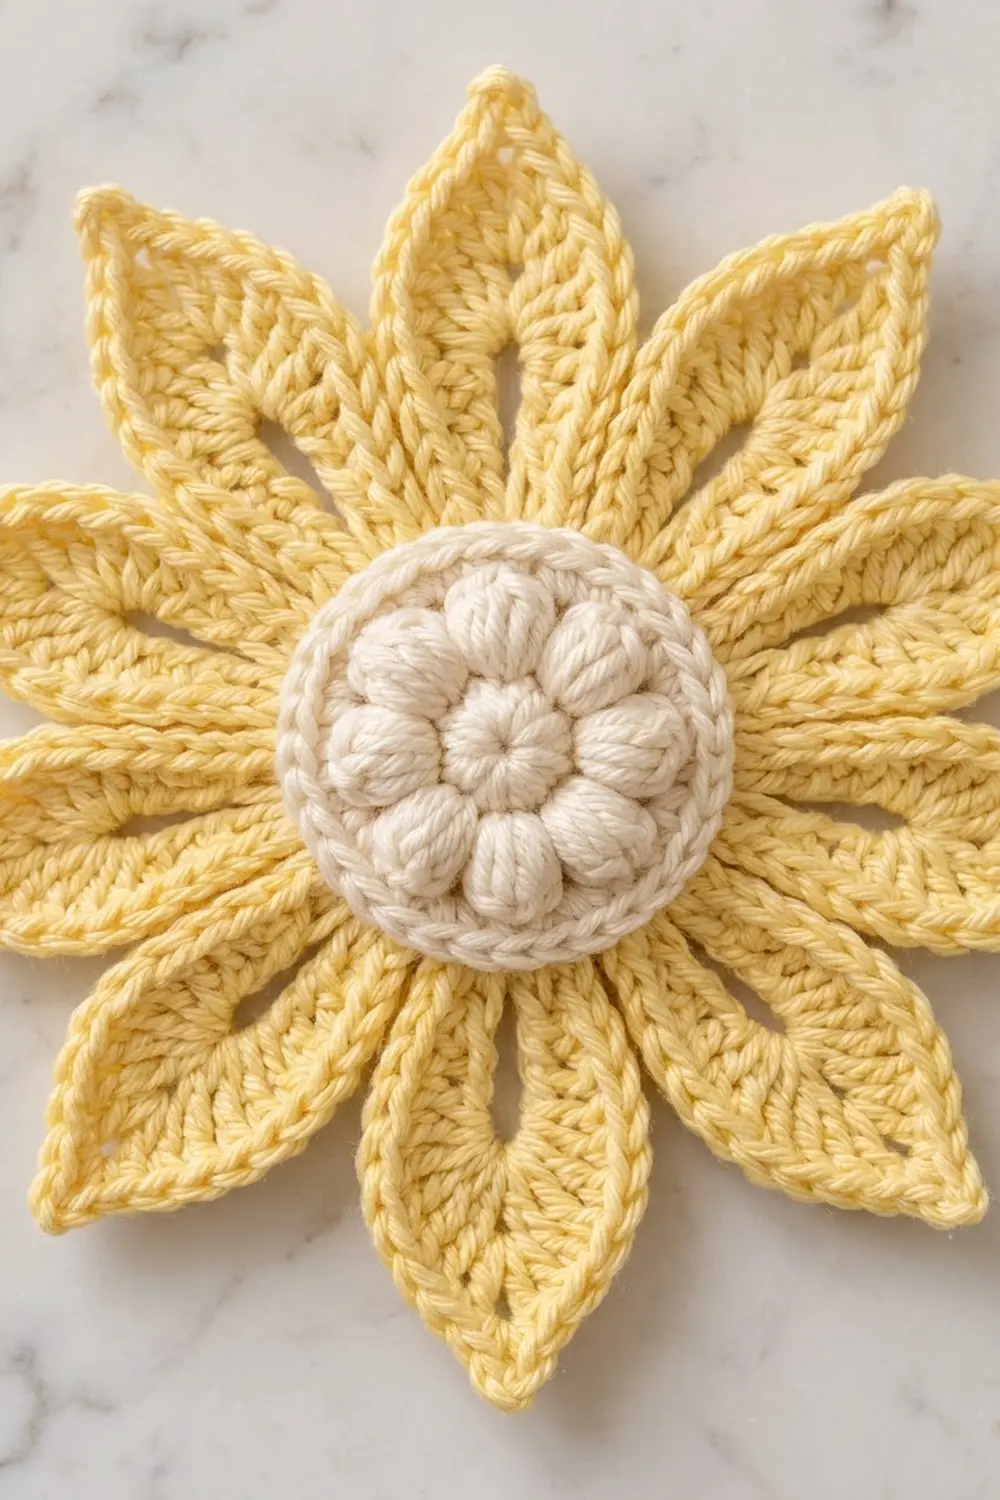
The Buttercup Daisy is a single, flat flower motif with eight long, pointed petals in soft butter yellow and a raised cream center made of puff stitches. Each petal is narrow at the base, widest in the middle and ends in a sharp tip. A neat single crochet outline gives the edge a crisp, braided look.
The colors are gentle and warm: pale buttercup yellow for the petals and creamy off-white for the textured center. The style is classic cottage. The motif works on a tray cloth, as a gift topper or as a decorative flower on its own.
This pattern uses US crochet terms. After blocking, the motif measures about 7 in (17.8 cm) from one petal tip to the opposite tip. It is a quick project, usually under an hour once you know the petal technique.
You work in the round from the center out:
– Make a cream puff-stitch center.
– Add one yellow base round.
– Chain eight long loops.
– Fill each loop to form a full two-sided petal.
– Finish with a single crochet border around every petal.
There is only one piece, so there is no joining.
Finished Size and Construction
- Finished size: 7 in (17.8 cm) tip to tip, blocked
- Skill level: Easy / advanced beginner
- Terminology: US crochet terms
- Yarn weight: Worsted weight (#4) cotton or cotton blend
- Hook: 4.5 mm (US 7)
- Number of pieces: 1
- Layout: Single motif, no joining
- Piece size: 7 in (17.8 cm) tip to tip
- Size before border: 6.5 in (16.5 cm) tip to tip
- Border depth: about 0.25 in (0.6 cm) at each petal tip
Materials
Choose a smooth cotton in worsted weight, either mercerized or soft matte. Cotton holds the pointed tips well and shows the stitch texture clearly. Acrylic also works, but the petals will be softer and may need firmer blocking. Choose a cream with enough contrast against the yellow that the puff center stands out.
- Color A, Butter Yellow (petals): 15 g, about 27 m
- Color B, Cream (center): 5 g, about 9 m
These amounts include a margin of about 20% for your test center, yarn tails and small differences in tension.
Tools:
- 4.5 mm (US 7) crochet hook
- Tapestry needle
- Stitch marker
- Scissors
- Tape measure or ruler
- Rustproof pins and a blocking mat or folded towel
- Spray bottle with water
Abbreviations (US Terms)
- MR – magic ring
- ch – chain
- sl st – slip stitch
- sc – single crochet
- hdc – half double crochet
- dc – double crochet
- tr – treble crochet
- sp – space
- st(s) – stitch(es)
- sk – skip
- RS – right side
Special stitch – Puff stitch (puff): (Yarn over, insert hook in the indicated st or sp, yarn over and pull up a loop to the height of an hdc) 3 times, then yarn over and pull through all 7 loops on the hook. In this pattern, the ch 1 after each puff is written separately and is not part of the puff.
Gauge and Checkpoints
Gauge matters less for a single flower, but it still sets the final size. Make the center first as your test piece and measure it before you start the petals.
- After Round 2: center measures 1.25 in (3.2 cm) across
- After Round 3: center measures 1.5 in (3.8 cm) across
- After Round 4: base circle measures 2 in (5.1 cm) across
- After Round 6: each petal is about 2.25 in (5.7 cm) long from the edge of Round 4 to the tip, and the flower measures 6.5 in (16.5 cm) tip to tip
- After Round 7: flower measures 7 in (17.8 cm) tip to tip
If your Round 4 circle is larger than 2.25 in (5.7 cm), go down one hook size. If it is smaller than 1.75 in (4.4 cm), go up one hook size. A difference of 0.25 in (0.6 cm) at Round 4 grows to about 0.75 in (1.9 cm) at the petal tips, so fix it early.
Pattern
Center (Color B, Cream)
Round 1 (RS): Make an MR. Ch 1 (does not count as a st) and work 8 sc into the ring. Pull the ring closed and join with a sl st to the first sc. (8 sts)
Round 2: Ch 1. Puff in next st, ch 1. Repeat from * 7 more times. Join with a sl st to the top of the first puff. (8 puffs + 8 ch-1 sps = 16 sts)
The puffs should pop forward on the RS. If they lean back, push them to the front with your fingertip before you continue.
Round 3 (conversion round): Ch 1. Sc in top of next puff, 2 sc in next ch-1 sp. Repeat from * 7 more times. Join with a sl st to the first sc. (16 sts worked 1 per existing st + 8 extra = 24 sts)
Fasten off Color B and weave the tail in on the wrong side. The center should be slightly domed, with a firm cream rim.
Base Round (Color A, Butter Yellow)
Round 4: Join Color A with a standing sc in any st of Round 3. Sc in each remaining st around. Join with a sl st to the first sc. (24 sts)
A standing sc gives a cleaner color change than joining with a sl st and chaining up. Keep your tension even and relaxed. Every petal hangs from this round.
Check that the piece lies flat. It should measure 2 in (5.1 cm) across.
Petal Loops
Round 5: Ch 1. Sc in next st, ch 16, sc in next st, ch 1, sk next st. Repeat from * 7 more times. Join with a sl st to the first sc. (16 sc + 8 ch-16 loops + 8 ch-1 sps)
Each repeat uses exactly 3 sts of Round 4, so 8 repeats × 3 sts = 24 sts. The ch 1 over each skipped st makes the small open gap between the petal bases.
Keep the ch-16 loops untwisted. Before Round 6, lay the piece down and check that all eight loops hang straight and are the same length.
Petals
Round 6: Sl st into the first ch-16 loop. Work each whole petal into the loop space, around the chain rather than into the individual chains:
Into the ch-16 loop work: sc, hdc, 2 dc, 3 tr, 2 dc, hdc, sc (first side: 11 sts); ch 2 (tip); then sc, hdc, 2 dc, 3 tr, 2 dc, hdc, sc (second side: 11 sts). Sk next sc, sl st in next ch-1 sp, sk next sc. Repeat from * 7 more times, working each new petal into the next ch-16 loop. Join with a sl st to the first sl st.
(Per petal: 22 sts + 1 ch-2 tip. Round total: 176 petal sts + 8 ch-2 tips + 8 sl sts)
While you work the first side, slide the stitches along the loop so they cover exactly half of it. The ch 2 should sit at the fold of the loop, and the second side fills the other half. Where the two halves meet down the middle, they form the soft center vein of the petal.
On each side, the stitch heights rise from sc to tr and then fall back to sc. This gives the petal its tapered shape: narrow at the base, widest at the three tr and narrow again at the point.
Tension tip: make the tr stitches the same height on every petal. If one petal comes out noticeably longer, the yarn overs on its tr were usually pulled up too loosely.
Checkpoint: each petal is about 2.25 in (5.7 cm) long, and the flower measures 6.5 in (16.5 cm) tip to tip.
Border
Border Gauge
The border is a single crochet outline worked around every petal. Border gauge is about 4.5 sc per 1 in (2.5 cm) along the edge. After Round 6, each petal side measures about 2.75 in (7.0 cm) along its outer curve. That calls for 2.75 × 4.5 = 12.4 sc, rounded to 12 sc per side.
Border Round
Round 7: Continue with Color A. Ch 1. Then repeat this sequence for each petal:
– Sc in each of the first 5 sts of the petal (sc, hdc, 2 dc, first tr).
– 2 sc in the center tr.
– Sc in each of the next 5 sts (last tr, 2 dc, hdc, sc).
– (Sc, ch 2, sc) in the ch-2 tip sp.
– Sc in each of the next 5 sts, 2 sc in the center tr, sc in each of the last 5 sts.
– Sl st in the sl st between petals.
Repeat from * 7 more times. Join with a sl st to the first sc and fasten off.
Per side: 11 sts worked 1 per existing st + 1 extra = 12 sc
Per petal: (22 sts worked 1 per existing st + 2 extra) + 2 tip sc = 26 sc, plus 1 ch-2 tip
Round total: 8 × 26 = 208 sc + 8 ch-2 tips + 8 sl sts
Why the Math Works
The outer edge of each petal is longer than the stitch tops under it, especially at the widest point. One extra sc at the center tr on each side gives the curve the slack it needs without ruffling. The (sc, ch 2, sc) at the tip adds 2 sc and a small chain point, which keeps the tip sharp instead of rounded. The sl st between petals keeps the valleys tight, so the open gaps from Round 5 stay small and neat.
The border adds about 0.25 in (0.6 cm) at each tip. Two opposite tips add 0.5 in (1.3 cm) in total, which takes the flower from 6.5 in (16.5 cm) to 7 in (17.8 cm).
Final Blocking
- Weave in all remaining tails on the wrong side, following the direction of the stitches. Leave at least 0.5 in (1.3 cm) of each tail until blocking is done.
- Mark a 7 in (17.8 cm) circle and its center point on your blocking mat.
- Lay the motif RS up, with the cream center over the center point.
- Spray evenly until the yarn is damp but not dripping.
- Pin each petal tip through its ch-2 sp, placing all 8 tips on the edge of the circle, 3.5 in (8.9 cm) from the center.
- Space the tips evenly, about 2.75 in (7.0 cm) apart around the circle.
- Gently shape each petal so its widest point is in the middle, and smooth the center vein flat.
- Do not press the puff center. Fluff it with your fingertips so it stays domed.
- Let it dry completely, then unpin and trim the tails.
Final Quality-Control Checklist
- Round 3 has 24 sts and the center is gently domed
- Round 4 has 24 sts and measures 2 in (5.1 cm) across
- There are 8 ch-16 loops, none of them twisted
- Each petal has 11 sts per side plus a ch-2 tip
- Each petal side has 12 border sc, for 26 sc per petal
- All 8 tips are sharp and evenly spaced
- The flower measures 7 in (17.8 cm) tip to tip
- The motif lies flat with no ruffling or cupping
- All tails are woven in securely
Troubleshooting
Petals look lopsided. The stitches were not split evenly between the two halves of the loop. Pull out the petal and slide the first 11 sts so they cover exactly half the loop before you work the ch-2 tip.
Petals are too short or crowded. Your chain is tight. Work the ch 16 with a hook one size larger, then switch back.
Petals are floppy or too long. Your chain is loose. Try ch 15 instead of ch 16 and keep all other counts the same.
Petal edges ruffle after the border. Your sc is looser than the border gauge. Leave out the 2 extra sc at the center tr and work 11 sc per side (24 sc per petal).
Petal edges pull and curl inward. Your sc is tighter than the border gauge. Work the border with a hook one size larger.
Tips look rounded. Pull the ch 2 snug in Round 7 and pin each tip through its ch-2 sp when blocking.
Center puffs sink. Pull each puff loop up to the height of an hdc, and push the puffs to the RS after Round 2.
Gaps between petals look too large. Tighten the ch 1 in Round 5 and pull the sl sts snug in Rounds 6 and 7.
Care
Hand wash in cool water with mild soap, press the water out in a towel and dry flat, reshaping the petal tips. Do not wring or tumble dry.
Final Notes
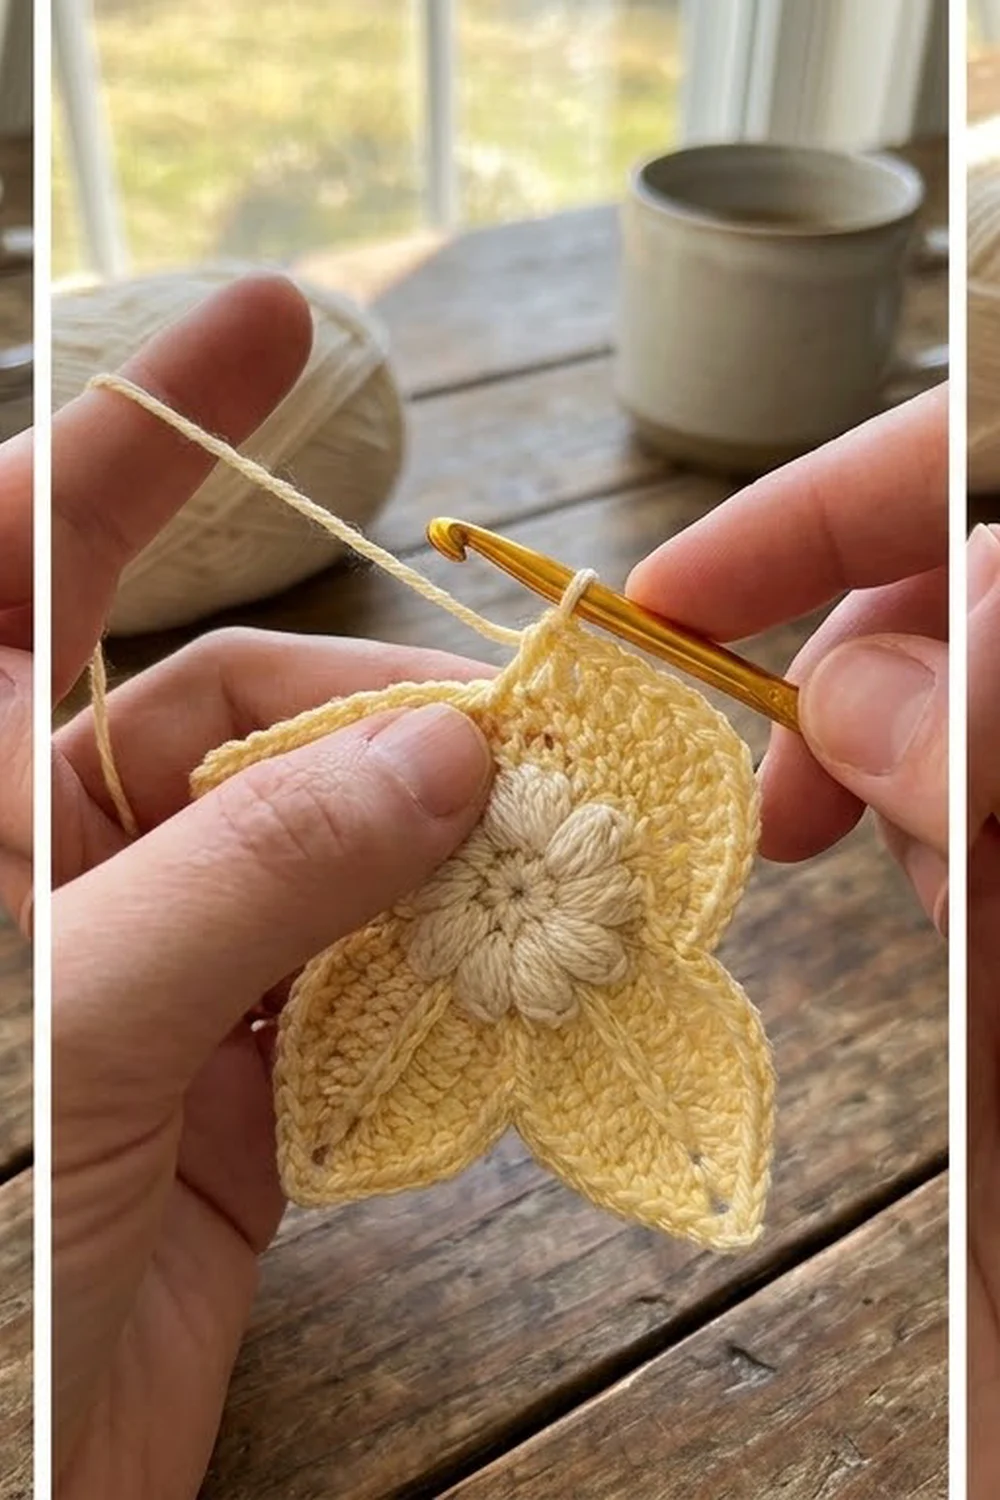
The measurement chain is simple. The center reaches 1.5 in (3.8 cm) at Round 3 and 2 in (5.1 cm) at Round 4. The petals in Round 6 bring the flower to 6.5 in (16.5 cm). The border adds 0.25 in (0.6 cm) at each tip, so the flower finishes at 7 in (17.8 cm). Check each stage and the final size will follow.
Happy crocheting!