

This oval motif has a calm, botanical look. A solid sage-green center carries a raised cream wheat ear, and a lacy cream scalloped border frames it like a vintage doily.
The palette is just two colors, soft sage and warm cream, so the piece suits farmhouse, cottage, and neutral decor. It works as a sachet front, a coaster-style accent, an appliqué for a bag or cushion, or a framed keepsake. The lifestyle photos show many of these motifs joined into curtains and a bedspread, but this pattern covers one single motif.
The pattern uses US crochet terms. The finished motif is 5 in (12.7 cm) wide and 8 in (20.3 cm) tall after blocking.
Here is how it’s built. You work the green oval in the round around a foundation chain, then add one cream outline round. The wheat ear is a separate cream strip that you sew on top. Three cream lace rounds finish the edge.
Finished Size and Construction
- Finished size: 5 in x 8 in (12.7 cm x 20.3 cm)
- Skill level: Intermediate (puff stitches, working around a chain, appliqué)
- Terminology: US crochet terms
- Yarn weight: DK (light worsted, #3), cotton or cotton blend
- Hook: 4.0 mm (US G-6)
- Number of pieces: 1 motif plus 1 sewn-on wheat appliqué
- Layout: A single oval with its long axis vertical
- Size before border (through Round 4): 3 in x 6 in (7.6 cm x 15.2 cm)
- Border depth: 1 in (2.5 cm) on every side
Materials
Yarn: Use a smooth, mercerized or combed DK cotton (about 50 g / 110 m per ball) so the stitches look crisp and the puff leaves stand out. Fuzzy yarns blur the lace openings.
- Sage green: 10 g (about 22 m)
- Cream: 20 g (about 44 m)
These amounts include a safety margin of roughly 30 percent.
Tools:
– 4.0 mm (US G-6) crochet hook
– Tapestry needle
– 4 locking stitch markers
– Scissors
– Rust-proof pins and a blocking mat
– Spray bottle
– Ruler or tape measure
Abbreviations (US Terms)
- ch: chain
- sl st: slip stitch
- sc: single crochet
- hdc: half double crochet
- dc: double crochet
- sk: skip
- sp: space
- st(s): stitch(es)
- rep: repeat
- beg: beginning
- Rnd: round
Special stitches:
Puff stitch (puff): [Yo, insert hook in the stitch you’re told, yo, pull up a loop to about 0.5 in (1.3 cm)] 3 times. You now have 7 loops on the hook. Yo and pull through all 7 loops, then ch 1 to close.
Leaf: Ch 4. Work a puff in the 3rd ch from the hook, then sl st in the next ch (this is the stem ch next to the spine). Sl st in the same spine ch you started from.
Gauge and Checkpoints
Gauge: 18 dc and 10 dc rounds = 4 in (10.2 cm) with a 4.0 mm hook. Each dc round adds about 0.4 in (1.0 cm) to the oval on every side.
Make the green oval first and treat it as your gauge swatch. Check these sizes on the flat, unblocked piece:
- After Rnd 1: about 0.75 in x 3.75 in (1.9 cm x 9.5 cm)
- After Rnd 2: about 1.5 in x 4.5 in (3.8 cm x 11.4 cm)
- After Rnd 3: about 2.5 in x 5.5 in (6.4 cm x 14.0 cm)
- After Rnd 4: 3 in x 6 in (7.6 cm x 15.2 cm)
- After Rnd 5: about 4 in x 7 in (10.2 cm x 17.8 cm)
- After Rnd 7 (blocked): 5 in x 8 in (12.7 cm x 20.3 cm)
If your oval is too big: go down to a 3.5 mm hook. If it’s too small: go up to a 4.5 mm hook.
If the ends cup: your tension is tight on the increase stitches, so loosen up there. If the ends ruffle: you are working loosely; tighten up or go down half a hook size.
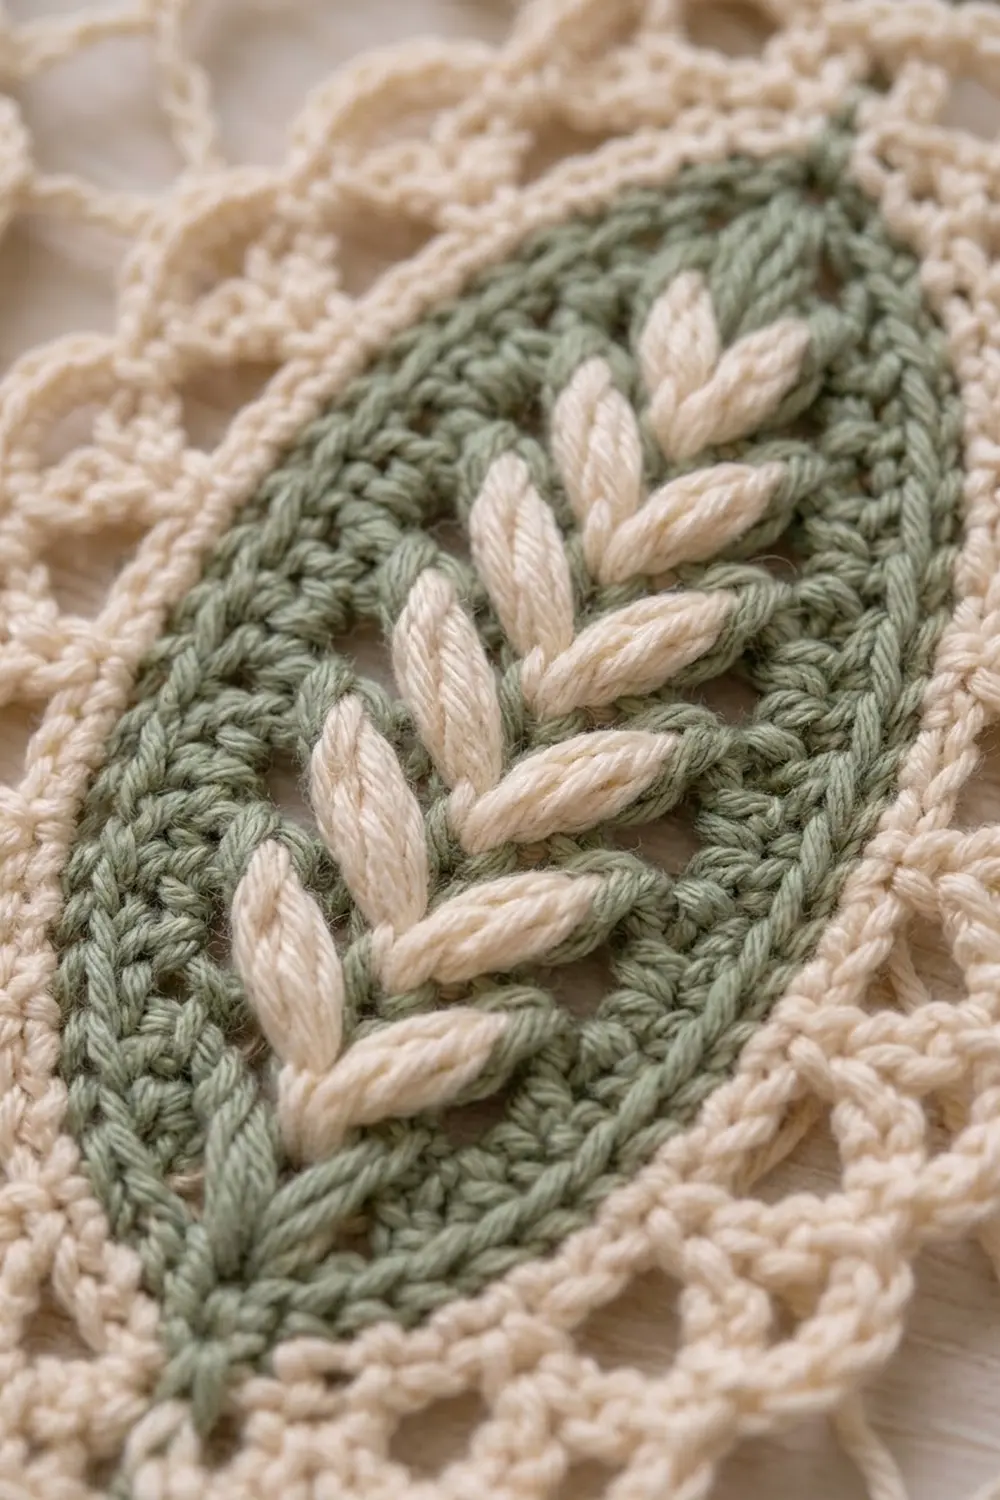
Green Oval Center
Use sage green. The ch-2 at the start of each round does not count as a stitch. Join each round with a sl st to the first dc.
Foundation: Ch 16.
Rnd 1: Ch 2 is already built in, so work 6 dc in the 3rd ch from the hook (this is the end ch). Dc in each of the next 12 ch. Work 6 dc in the last ch. Rotate the piece and work along the opposite side of the foundation chain: dc in each of the next 12 ch. Join. (36 dc: 6 at each end, 12 along each long side.)
Place a marker in the 1st and 6th dc of each end group. Move the markers up as you work.
Rnd 2: Ch 2. Work 2 dc in each of the 6 end sts, dc in each of the next 12 side sts, 2 dc in each of the 6 end sts, then dc in each of the next 12 side sts. Join. (48 dc: 12 at each end, 12 along each side.)
Rnd 3: Ch 2. (Dc in next st, 2 dc in next st) 6 times across the end, then dc in each of the next 12 side sts; rep from * once more. Join. (60 dc: 18 at each end, 12 along each side.)*
Fasten off sage green and weave in the ends.
Checkpoint: The oval is about 2.5 in x 5.5 in (6.4 cm x 14.0 cm), lies flat, and the foundation chain runs straight down the center.
Cream Outline Round
Rnd 4 (conversion round): Join cream with a sl st in the first dc of one long side. Ch 1. Sc in the same st and in each of the next 11 side sts.
Across the end: (sc in next 2 sts, 2 sc in next st) 6 times. Sc in each of the 12 sts of the second side. Rep from * to * across the second end. Join to the first sc.
Count: 60 sc worked 1 per existing stitch, plus 12 extra stitches from the increases = 72 sc (24 at each end, 12 along each side).
Keep the cream yarn attached if you’re going straight into the border, or fasten off and rejoin later.
Checkpoint: 3 in x 6 in (7.6 cm x 15.2 cm).
Wheat Ear Appliqué
Use cream and leave an 8 in (20.3 cm) starting tail.
Spine: Ch 18.
Row 1: Sl st in the 2nd ch from the hook. This is the top of the spine.
Tip leaf: Work 1 leaf into the same ch.
Leaf pairs: Sl st in each of the next 2 ch, then work 1 leaf in the last ch you slipped into. Work a second leaf in that same ch. Rep from * 6 more times (7 pairs).
Stem: Sl st in each of the last 2 ch. Fasten off and leave a 12 in (30.5 cm) tail for sewing.
Count check: 17 working ch = 1 (tip) + 14 (7 pairs x 2 ch) + 2 (stem). That gives you 15 leaves in total: 1 tip leaf and 14 paired leaves.
The appliqué is about 4.5 in (11.4 cm) long and 1.5 in (3.8 cm) wide.
Attaching the Wheat Ear
- Lay the appliqué on the green oval so the spine follows the foundation chain line exactly. The tip leaf should sit about 0.5 in (1.3 cm) below the top cream outline, and the stem should end at the bottom green edge.
- Pin the spine in place. Then open each pair into a V, with one leaf to each side angled upward at about 45 degrees. Make sure every pair matches the pair above it.
- With the long tail, whipstitch the spine down along its full length.
- Tack each leaf at its stem and at its tip only. This leaves the puff body raised.
- Weave the tails in on the back through the green stitches only, so no cream shows through.
Border
Border gauge: Rnd 5 adds about 0.5 in (1.3 cm) to every side. Rnds 6 and 7 together add another 0.5 in (1.3 cm). That gives a total border depth of 1 in (2.5 cm).
Rnd 5 (mesh): Begin with a sl st into the first sc of a long side. Ch 5 (counts as dc + ch 2). Sk the next sc. *Dc in the next sc, ch 2, sk the next sc; rep from * around. Join to the 3rd ch of the beg ch-5.
Count: 36 dc and 36 ch-2 sps. Each long side has 12 sts, giving 6 openings. Each end has 24 sts, giving 12 openings. The total is 6 + 12 + 6 + 12 = 36.
Rnd 6 (loops): Sl st into the first ch-2 sp. Ch 1, then sc in the same sp. Ch 5, sk the next ch-2 sp. *Sc in the next ch-2 sp, ch 5, sk the next ch-2 sp; rep from * around. Join to the first sc.
Count: 18 sc and 18 ch-5 loops. That’s 3 loops on each long side and 6 loops on each end.
Rnd 7 (scallops): Sl st into the first ch-5 loop. In each loop around, work (sc, hdc, 5 dc, hdc, sc). Join to the first sc. Fasten off.
Count: 18 scallops x 9 sts = 162 sts. Each long side has 3 scallops (27 sts), and each end has 6 scallops (54 sts). The total is 27 + 54 + 27 + 54 = 162.
Why the math works: Rnd 4 has 72 stitches, which divides evenly by 4. Every 2 stitches make 1 mesh opening (72 ÷ 2 = 36). Every 2 openings make 1 loop (36 ÷ 2 = 18). Each loop gets 1 scallop. Because the 12-stitch sides and 24-stitch ends also divide by 4, the scallops land in the same place on both halves and the motif stays symmetrical.
The skipped ch-2 spaces under each ch-5 loop create the open arches beneath the scallops.
Final Blocking
- Weave in all the remaining tails before blocking.
- Mist the motif until it’s damp all the way through but not dripping.
- Lay it face up on the blocking mat. Gently pat the green center flat without pressing the puff leaves.
- Pin the oval to 5 in x 8 in (12.7 cm x 20.3 cm). Start with the four outermost points: top, bottom, and the widest point of each side.
- Pin the tip of every scallop so it is evenly rounded, then open each mesh window into a neat square.
- Lightly re-fluff the leaves with your fingertips so they stay plump.
- Let it dry completely, at least 8 hours, before unpinning.
Final Quality-Control Checklist
- The motif measures 5 in x 8 in (12.7 cm x 20.3 cm).
- The green oval has exactly 60 sts after Rnd 3.
- The cream outline has 72 sc.
- There are 36 mesh openings, 18 loops, and 18 scallops.
- Each long side has 3 scallops and each end has 6.
- The wheat ear has 1 tip leaf and 7 even pairs.
- The spine is centered and straight.
- No cream tails show on the green front.
- The motif lies flat with no cupping or ruffling.
Troubleshooting
Oval ends are pointed or cupped: Check that you worked 6 increases per end in Rnds 2 and 3. Make the increase stitches slightly looser.
Ends ruffle after Rnd 4: Your sc is loose. Go down to a 3.5 mm hook for Rnd 4 only.
Wrong number of mesh openings: Recount Rnd 4. It must be exactly 72 sts.
Scallops are crowded at the ends: Lengthen the ch-5 loops at the ends to ch-6. Keep the stitch counts the same.
Puff leaves look flat: Pull the puff loops up a little taller and tack only at the stem and tip.
Spine wanders off-center: Unpick it, then pin all along the foundation chain before sewing it down again.
Care
Hand wash in cool water with a mild detergent, gently press the water out in a towel, and dry flat, pinning it back into shape. Don’t wring the motif or put it in the dryer, because this can flatten the leaves.
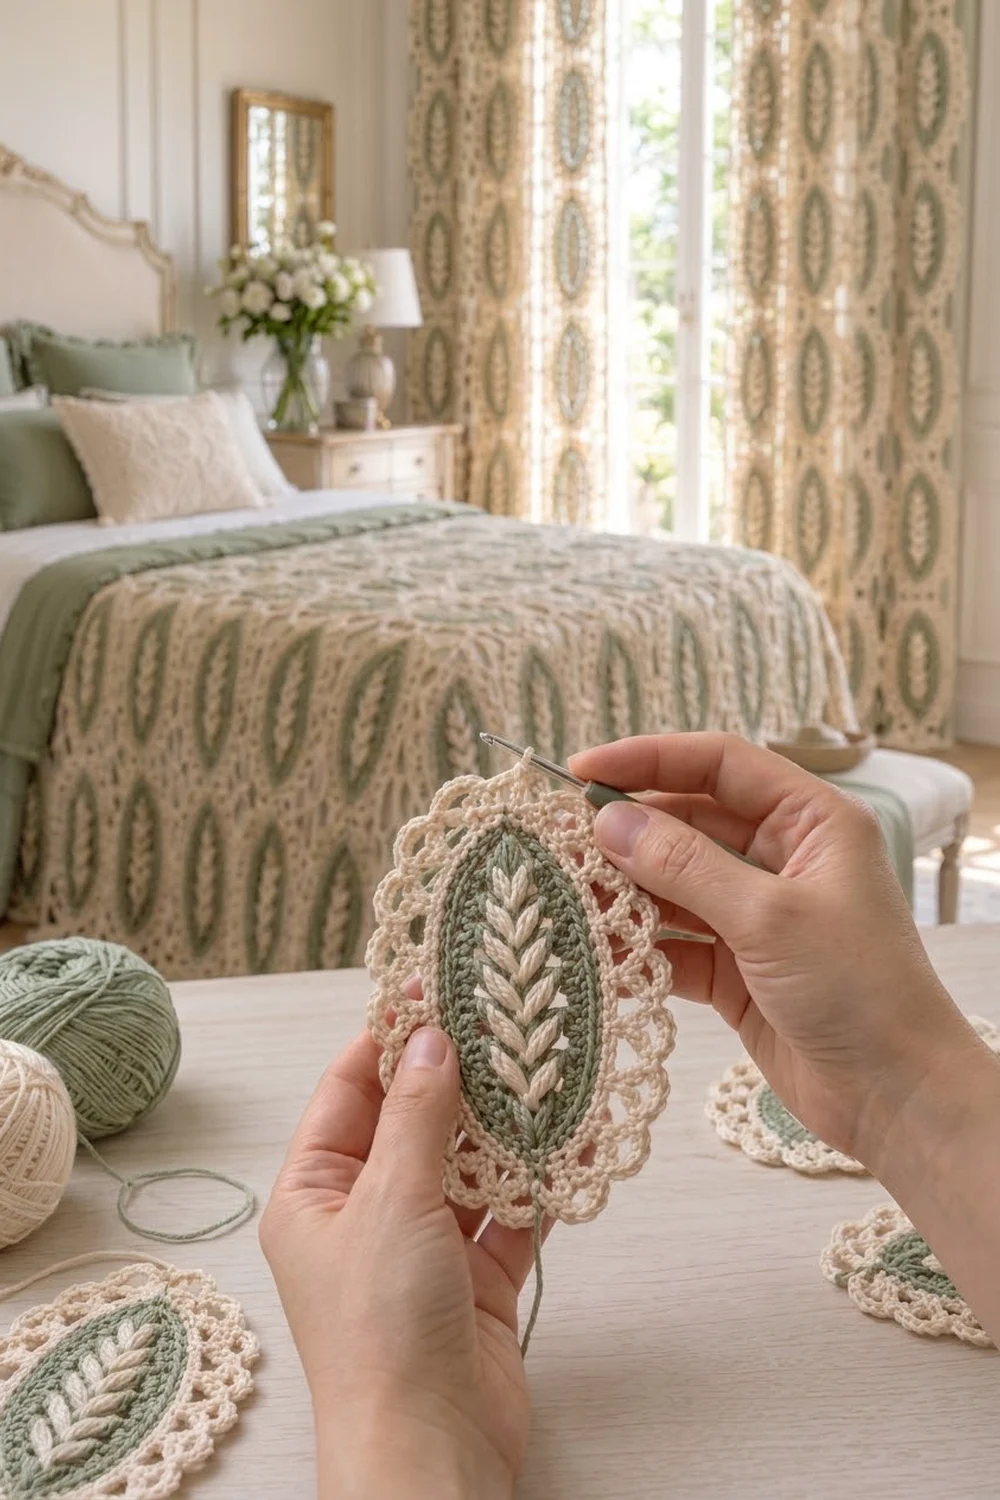
Final Notes
The size of this motif builds up step by step. The 16-chain foundation and three green dc rounds make an oval of about 2.5 in x 5.5 in (6.4 cm x 14.0 cm). The cream outline brings it to 3 in x 6 in (7.6 cm x 15.2 cm). The lace border adds 1 in (2.5 cm) on every side for a blocked size of 5 in x 8 in (12.7 cm x 20.3 cm).
The stitch counts follow one sequence: 36, 48, 60, 72, then 36 openings, 18 loops, and 162 stitches. If your counts match at each stage, the motif will come out symmetrical.
Happy crocheting!