

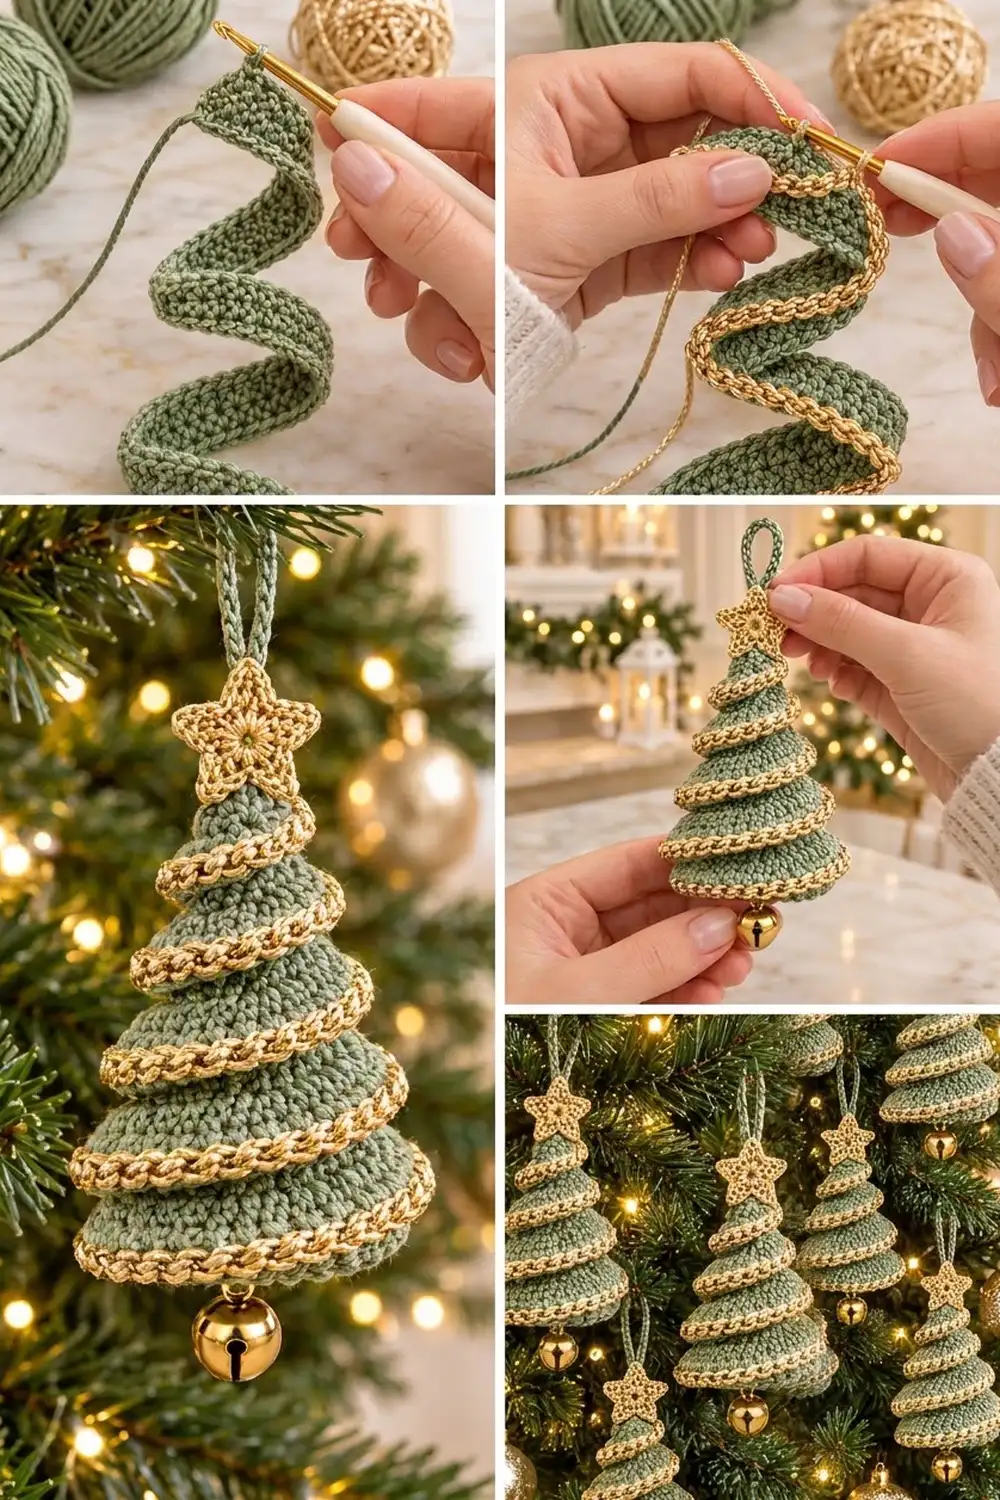
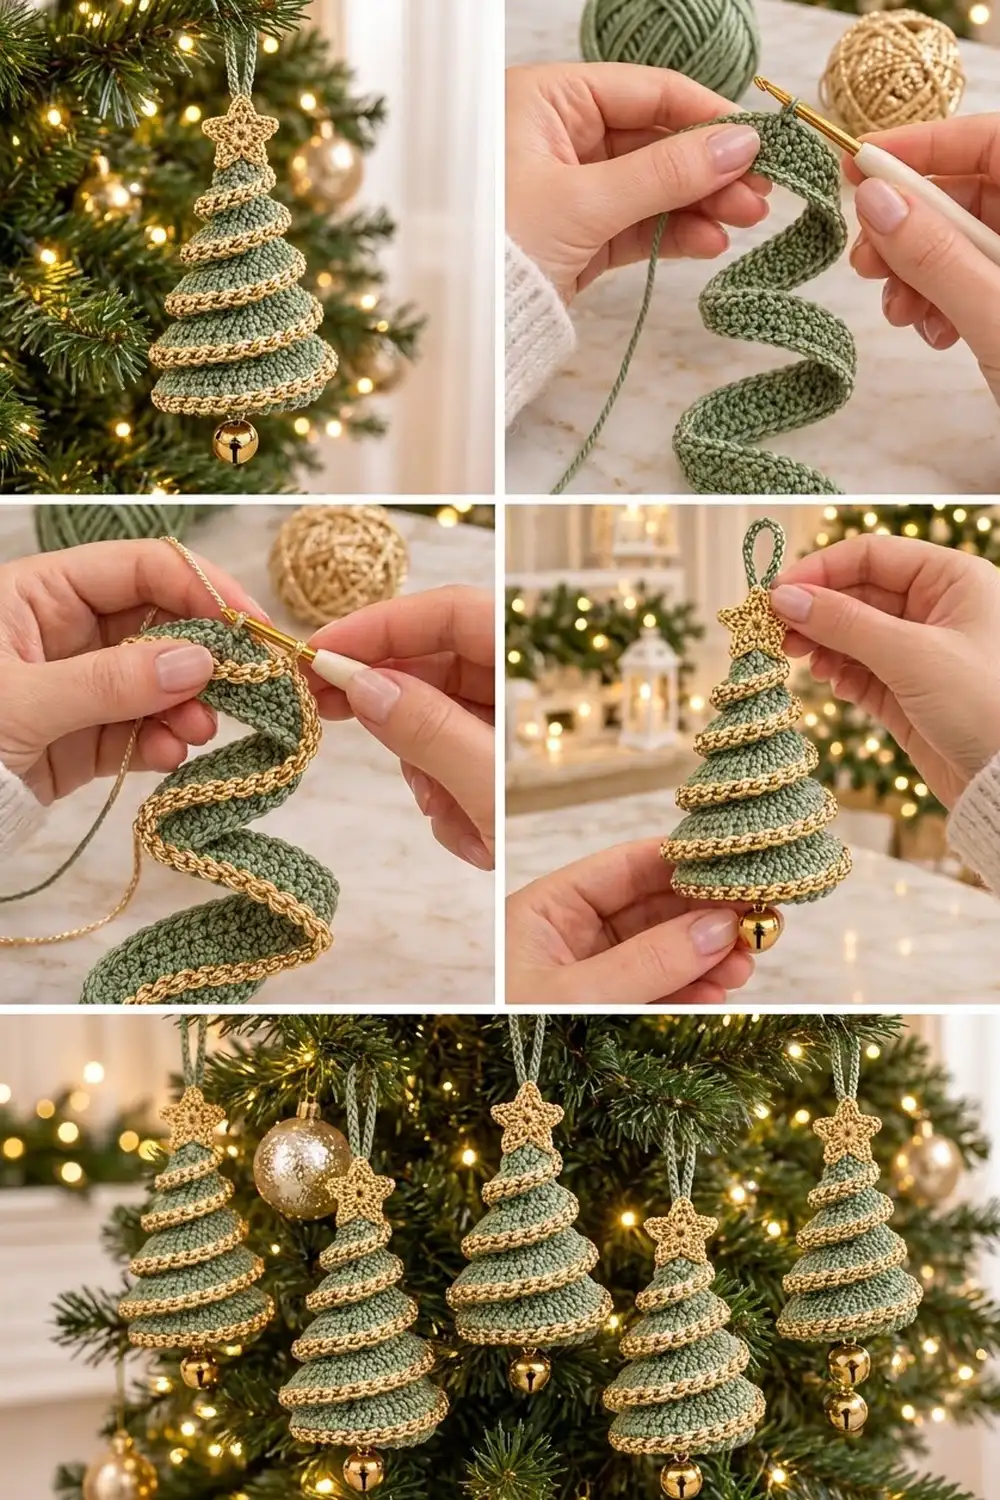
This little tree is made from one curling strip. A long sage-green band is worked so that one edge is longer than the other, which makes it twist into a corkscrew. You then coil it into six stacked tiers, each one smaller than the one below. A corded gold edge traces every tier, a gold star sits at the top, and a tiny jingle bell hangs underneath.
The look is soft and vintage-inspired. Sage green and metallic gold read as festive without being loud. The ornament suits a natural, cream-and-gold tree as well as a classic one.
This pattern uses US crochet terms. The finished tree body measures 3.5 in (8.9 cm) tall and 2.75 in (7.0 cm) across the base. With the star it is 4.5 in (11.4 cm) tall, plus a 1.5 in (3.8 cm) hanging loop.
Construction is simple. You work the green strip lengthwise in three rows, add two gold edging rows along the longer edge, then coil and stitch it into a cone. A small star, a chain loop and a bell finish it off.
Finished Size and Construction
- Finished size: tree body 3.5 in (8.9 cm) tall × 2.75 in (7.0 cm) base diameter. Overall 4.5 in (11.4 cm) tall with star.
- Skill level: Easy-intermediate
- Terminology: US crochet terms
- Yarn weight: Sport (#2) cotton for green, sport-weight metallic for gold
- Hook: 3.0 mm (C/2–D/3)
- Number of pieces: 1 ornament, made from 3 crocheted components (spiral strip, star, hanging chain) plus a bell
- Layout: single coiled cone, 6 tiers
- Strip size: 25 in (63.5 cm) long on the inner edge
- Strip width before border: 0.5 in (1.3 cm)
- Border depth: 0.25 in (0.6 cm), so the finished strip is 0.75 in (1.9 cm) wide
Materials
Yarn. Choose a smooth, firm cotton or cotton blend in sport weight for the green. Cotton holds the tier flare better than acrylic. For the gold, use a sport-weight metallic or a cotton-metallic blend that doesn’t shred when worked as reverse single crochet.
- Color A, sage green: 10 g, about 31 m
- Color B, metallic gold: 6 g, about 30 m
These quantities include a margin of about 30% for swatching and for a spare strand to hang the bell.
Tools:
– 3.0 mm crochet hook
– Tapestry needle
– 6 locking stitch markers
– One 0.6 in (1.5 cm) gold jingle bell
– Scissors
– Measuring tape
– Spray bottle and pins for blocking
– Optional: fabric stiffener or diluted craft glue
Abbreviations (US Terms)
- ch – chain
- sl st – slip stitch
- sc – single crochet
- hdc – half double crochet
- dc – double crochet
- sk – skip
- st(s) – stitch(es)
- RS – right side
- rev sc – reverse single crochet
Special stitch: Reverse single crochet (rev sc). With RS facing, work from left to right (right to left if you crochet left-handed). Insert the hook into the next stitch to the right, yarn over, pull up a loop, yarn over and pull through both loops. This twists each stitch and makes the raised, corded gold ridge.
Gauge and Checkpoints
Gauge: 24 sc and 26 rows = 4 in (10.2 cm) in Color A with a 3.0 mm hook. That works out to 6 sc per 1 in (2.5 cm).
Gauge matters because tier lengths are set in stitches. Test one piece first. Make a short practice strip of 30 sc, work all three rows, and check that the 30 sc measure 5 in (12.7 cm) and that the strip starts to curl after Row 3.
Checkpoints:
– After Row 1: 150 sc measure 25 in (63.5 cm).
– After Row 3: the strip is 0.5 in (1.3 cm) wide and twists into a loose corkscrew.
– After the border: the strip is 0.75 in (1.9 cm) wide.
– Star: 1.25 in (3.2 cm) from tip to tip.
– Assembled tree body: 3.5 in (8.9 cm) tall, 2.75 in (7.0 cm) across.
If your piece is too big, go down 0.25 mm in hook size. If it is too small, go up 0.25 mm. Don’t change the stitch counts. The tier lengths depend on them.
Spiral Strip
Use Color A.
Foundation: Ch 151.
Row 1 (RS): Sc in 2nd ch from hook and in each ch across, turn. (150 sc)
Check that the strip measures 25 in (63.5 cm). This edge becomes the inner edge of the tree, the one that is stitched down.
Row 2: Ch 1, sc in each st across, turn. (150 sc)
Row 3 (conversion row): Ch 2 (doesn’t count as a st), hdc in next 2 sts, 2 hdc in next st; repeat from * 50 times in total. (150 + 50 = 200 hdc)
Fasten off and leave a 12 in (30.5 cm) tail. Don’t turn the work.
This row works 1 hdc into each of the 150 existing sc and adds 50 extra hdc, one in every third stitch. The outer edge is now 4/3 the length of the inner edge, and that difference makes the strip twist. If the strip only ruffles in waves instead of spiraling, check that you increased in every third stitch and not more often.
At this stage the strip measures 25 in (63.5 cm) along the inner edge and 0.5 in (1.3 cm) wide.
Star Topper
Use Color B.
Round 1: Make a magic ring, ch 1, work 10 sc into the ring, then sl st to the first sc. Pull the ring closed. (10 sc)
Round 2 (points): Ch 4, sc in 2nd ch from hook, hdc in next ch, dc in next ch, sk next sc, sl st in next sc; repeat from * 5 times in total. The last sl st lands in the joining st. (5 points)
Each point uses 2 stitches of Round 1: 1 skipped and 1 slip stitched. 5 × 2 = 10, so the star closes evenly. The ring of sc forms the round center seen in the photo.
Fasten off and leave an 8 in (20.3 cm) tail. The star measures 1.25 in (3.2 cm) tip to tip.
Hanging Chain
Use Color A. Ch 18, which is about 3 in (7.6 cm). Fasten off and leave 6 in (15.2 cm) tails at both ends. Folded in half, it makes a 1.5 in (3.8 cm) loop.
Border
The gold border runs along the 200-stitch outer edge only. The inner foundation edge and the two short ends get no border. The inner edge is hidden inside the tree, and the ends are tucked in during assembly.
Border gauge: 1 gold sc per hdc of Row 3. The gold should lie flat along the edge without cupping or flaring beyond the curl that is already there.
Per side:
– Outer long edge: 200 sts
– Inner long edge: 0
– Each short end: 0
Border Row 1: With RS facing, join Color B with a sl st in the first hdc of Row 3. Ch 1, then sc in the same st and in each st across. (200 sc) Don’t turn.
Border Row 2: Ch 1, then rev sc in each st, working back toward the start. (200 rev sc) Fasten off and leave a 6 in (15.2 cm) tail.
Why the math works. The outer edge has exactly 200 hdc. One sc goes into each, so Border Row 1 neither adds nor removes length. It keeps the 4:3 ratio (200:150) that controls the spiral. Rev sc works one-to-one back across those 200 sc, so the corded ridge sits evenly with no puckers. The two rows add 0.25 in (0.6 cm), so the strip is 0.75 in (1.9 cm) wide.
Assembly
Mark the tiers. Working along the inner (Row 1) edge, place locking markers counting from the narrow starting end of the coil. Use either end of the strip as the top end.
| Tier | Stitches in tier | Marker after st | Inner length |
|---|---|---|---|
| 1 (tip) | 12 | 12 | 2 in (5.1 cm) |
| 2 | 18 | 30 | 3 in (7.6 cm) |
| 3 | 21 | 51 | 3.5 in (8.9 cm) |
| 4 | 27 | 78 | 4.5 in (11.4 cm) |
| 5 | 33 | 111 | 5.5 in (14.0 cm) |
| 6 (base) | 39 | 150 | 6.5 in (16.5 cm) |
12 + 18 + 21 + 27 + 33 + 39 = 150, which uses every stitch of the strip.
Coil the tip. Roll the first 12 stitches tightly on themselves, gold edge facing down and outward, into a small closed point. Thread the 12 in (30.5 cm) green tail through and stitch the tip closed.
Coil the tiers. Spiral the strip downward. Place each new coil so its inner edge sits just under the gold edge of the coil above, with about 0.5 in (1.3 cm) of each tier showing. Bring each marker round to sit directly under the one above it. With the green tail, whipstitch the inner edge to the wrong side of the tier above, catching only green stitches so nothing shows on the outside.
Finish the base. Tuck the final short end under the base tier and stitch it flat. The base stays open, like a hollow cone.
Add the loop and star. Fold the hanging chain in half and pass both tails down through the tip. Knot them securely inside. Sew the star to the front of the tip with its center over the top coil and one point upright, using the gold tail.
Add the bell. Thread a 6 in (15.2 cm) strand of Color B through the inside of the tip, drop it down the hollow center, and tie the bell so it hangs about 0.25 in (0.6 cm) below the base rim. Knot it, add a drop of glue if you like, and trim.
Checkpoint: the tree body is 3.5 in (8.9 cm) tall and 2.75 in (7.0 cm) across the base.
Final Blocking
- Lightly mist the whole ornament with water until it is damp, not soaked.
- Stuff the hollow cone with a rolled paper towel to hold its shape.
- Use your fingers to tilt each gold edge gently outward and downward so the tiers flare evenly.
- Press the star flat and pin its five points onto a scrap of foam if needed.
- For a firmer finish, brush a thin coat of diluted fabric stiffener inside the tiers only, keeping it off the gold.
- Let it dry completely, at least 8 hours, standing upright.
- Remove the paper towel and check the height and base diameter again.
Final Quality-Control Checklist
- [ ] Strip Row 1 and Row 2 have 150 sc each.
- [ ] Row 3 has 200 hdc, with increases in every third stitch.
- [ ] Both border rows have 200 stitches.
- [ ] Six tiers, getting smaller evenly toward the top.
- [ ] Each tier shows about 0.5 in (1.3 cm) of green plus the gold edge.
- [ ] No whipstitches are visible on the outside.
- [ ] The star has 5 even points and sits centered on the tip.
- [ ] The loop is secure and the ornament hangs straight.
- [ ] The bell hangs centered below the base.
- [ ] Body is 3.5 in (8.9 cm) tall and 2.75 in (7.0 cm) wide.
Troubleshooting
The strip ruffles instead of spiraling. You have too many increases. Recount Row 3: it should have exactly 200 hdc.
The strip barely curls. Your Row 3 is too loose or you missed increases. Work Row 3 with slightly firmer tension, or redo it.
The gold edge cups or waves. Your border tension doesn’t match the green. Go up or down 0.25 mm for the gold rows only.
The tree leans. The markers aren’t lined up. Unpick and restitch so each marker sits directly under the one above it.
The tiers collapse. Use fabric stiffener inside, or stitch each tier a little higher under the one above it.
Metallic yarn frays during rev sc. Work more slowly, and use a hook with a smooth, rounded head.
The star curls. Pin it flat while damp, or back it with a felt star cut to 1.25 in (3.2 cm).
Care
Spot clean with a damp cloth and cool water, then reshape and let it air dry. Store the ornament flat or hanging, in a box where it won’t be crushed, so the tiers keep their flare.
Final Notes
Every measurement comes from the gauge of 6 sc per 1 in (2.5 cm):
- 150 sc make a 25 in (63.5 cm) inner edge.
- Row 3 turns that into a 200 hdc outer edge, and the 4:3 ratio drives the spiral.
- Two one-to-one gold rows add 0.25 in (0.6 cm) without changing that ratio.
- Six tiers of 12, 18, 21, 27, 33 and 39 stitches use all 150 stitches.
- Together they make a tree 3.5 in (8.9 cm) tall and 2.75 in (7.0 cm) wide, topped by a 1.25 in (3.2 cm) star.
If your stitch counts match at each checkpoint, the tree will come out the right size. Once you’ve made one, it’s easy to make a set for the whole tree.
Happy crocheting!