

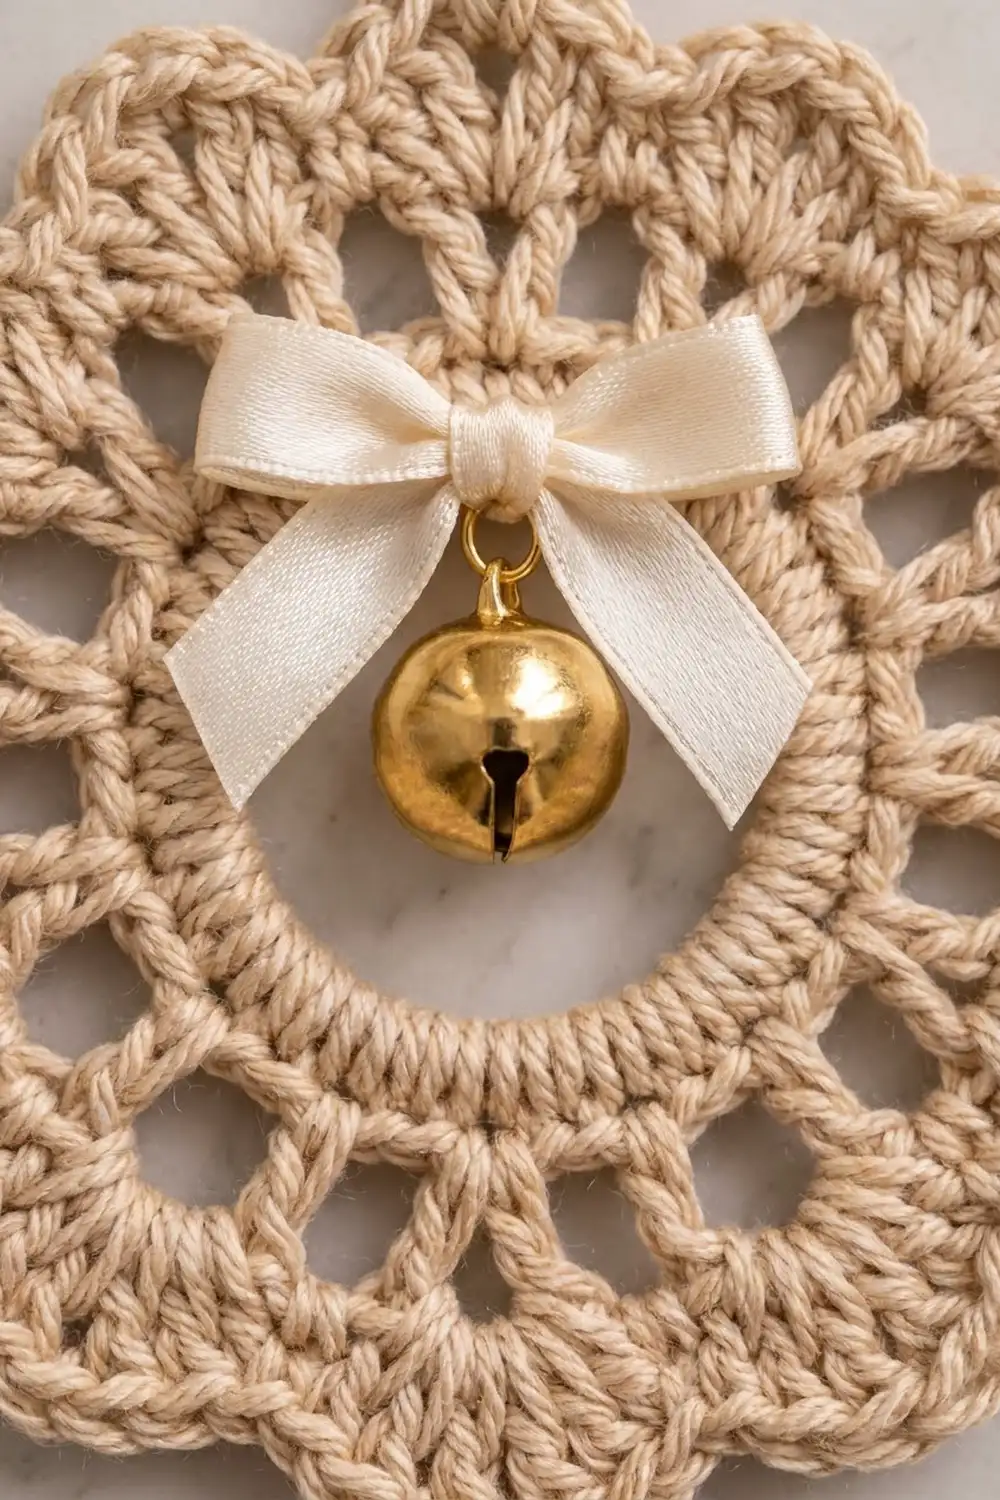
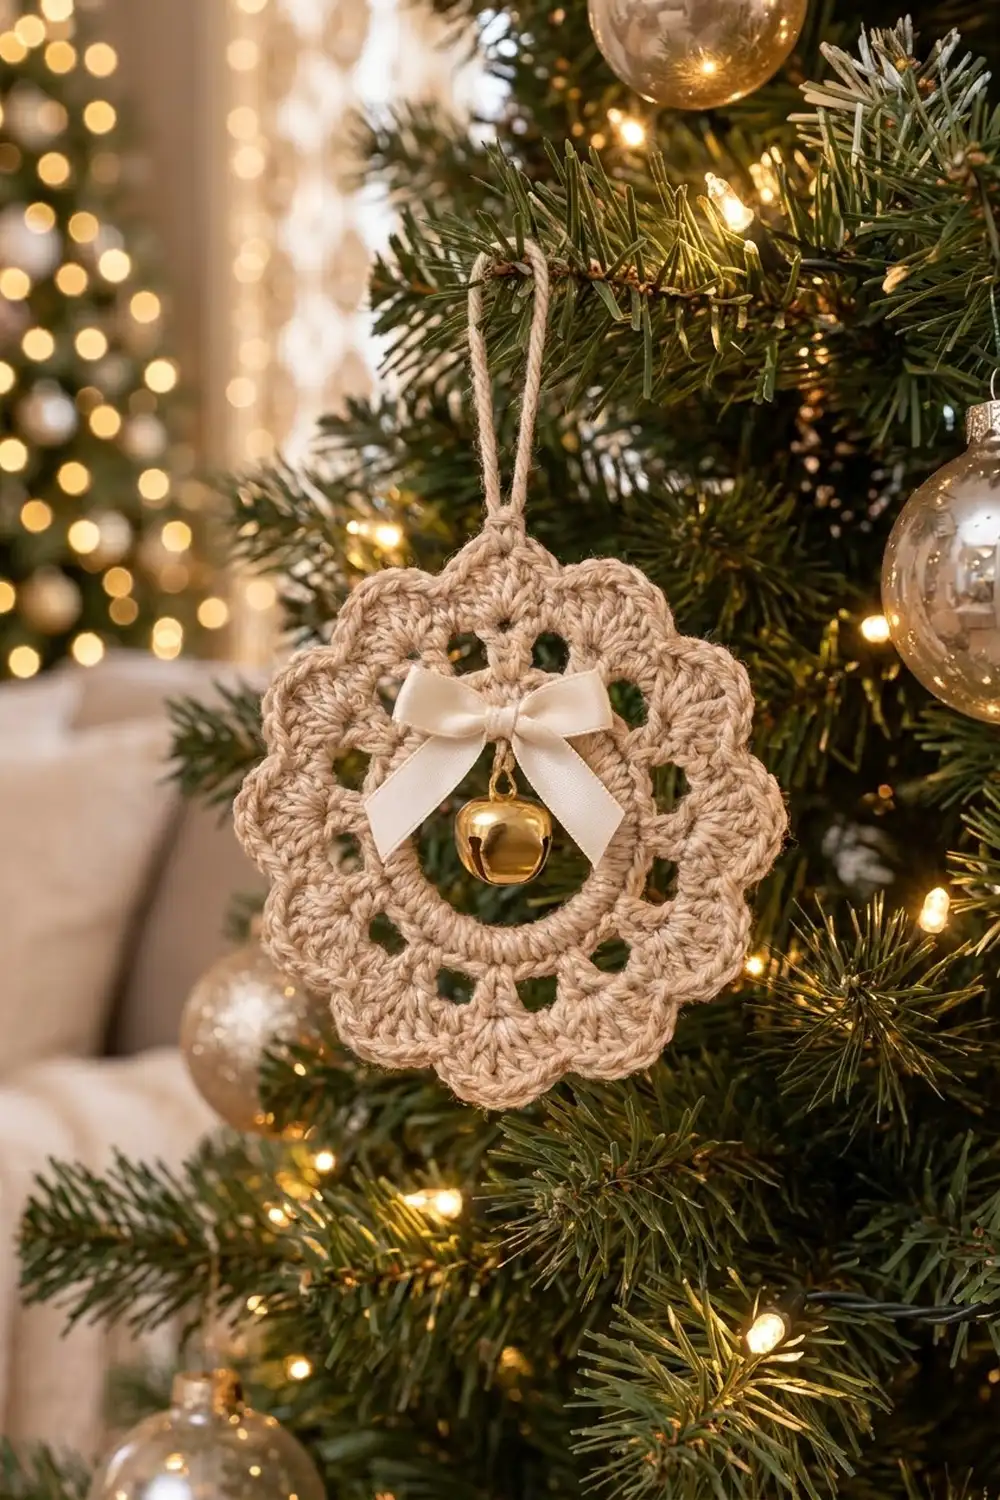
This little wreath is a single crocheted motif. A dense, padded ring sits in the center, a round of open windows surrounds it, and ten soft scallops finish the outer edge. An ivory satin bow sits at the top of the ring, and a small gold jingle bell hangs inside the center opening.
The yarn is a warm beige, close to oatmeal or champagne. With the ivory ribbon and the gold bell, it looks like a quiet, vintage-style Christmas ornament. It works on a tree, tied to a gift, or hung in a window, and it is quick enough to make several in one evening.
All instructions use US crochet terms. The finished wreath measures 3.5 in (8.9 cm) across, with a center opening of 1.25 in (3.2 cm), plus a hanging loop about 1.5 in (3.8 cm) tall.
The construction is simple. You work single crochet over a chain ring, then a round of double crochet spokes, a round of V-shells, and a scalloped edging round. The chain hanging loop, the bow, and the bell go on last.
Finished Size and Construction
- Finished size: 3.5 in (8.9 cm) diameter, scallop tip to scallop tip
- Center opening: 1.25 in (3.2 cm)
- Skill level: Easy
- Terminology: US crochet terms
- Yarn weight: DK (light worsted, weight 3)
- Hook: 3.5 mm (E-4)
- Number of pieces: 1 crocheted motif, plus a ribbon bow and a bell
- Layout: One round motif worked in joined rounds
- Piece size: 3.5 in (8.9 cm)
- Size before border (after Round 3): 2.75 in (7.0 cm)
- Border depth (Round 4 scallops): 0.375 in (1.0 cm) on each side
Materials
Use a smooth DK cotton or cotton blend. Cotton gives crisp stitch definition, holds the scallops well, and blocks flat. Avoid fuzzy or very splitty yarn, because the open windows need clean edges to show up clearly.
Mercerized cotton has a soft sheen that suits the gold bell. Matte cotton gives a more rustic, farmhouse look. Both work with the same stitch counts as long as you match the gauge.
- Beige / oatmeal DK cotton: 10 g, about 23 m, per ornament
- Ivory satin ribbon, 3/8 in (1.0 cm) wide: 8 in (20.3 cm) per bow
- Gold jingle bell, 5/8 in (1.6 cm): 1 per ornament
The quantities include a margin for your test piece, tails, and the hanging loop. One ornament actually uses about 7 g of yarn.
Tools:
- 3.5 mm (E-4) crochet hook
- Tapestry needle
- Sharp scissors
- Stitch marker
- Sewing needle and ivory thread (or fabric glue)
- Ruler or tape measure
- Blocking mat and rust-proof pins
- Spray bottle with water
Abbreviations (US Terms)
- ch – chain
- sl st – slip stitch
- sc – single crochet
- dc – double crochet
- st(s) – stitch(es)
- sp – space
- sk – skip
- rnd – round
Special stitch – V-shell: (2 dc, ch 2, 2 dc) all worked into the same space.
Starting chain note: Wherever a round starts with ch 3, that ch 3 counts as the first dc.
Gauge and Checkpoints
Make one test wreath before you make a batch. Lay it flat, smooth it lightly with your fingers, and measure it at each checkpoint below before blocking.
- After Round 1: the ring’s outer edge measures 1.75 in (4.4 cm), and the opening is about 1.25 in (3.2 cm)
- After Round 2: 2.25 in (5.7 cm) across
- After Round 3: 2.75 in (7.0 cm) across
- After Round 4: 3.5 in (8.9 cm) across, scallop tip to scallop tip
Gauge for this project: Rounds 1–2 measure 2.25 in (5.7 cm) across.
Measure across the full width through the center, then turn the piece a quarter turn and measure again. The two numbers should be within 0.125 in (0.3 cm) of each other. If they aren’t, the piece is stretched out of shape, so smooth it back into a circle before you decide whether your gauge is off.
If the piece is more than 0.25 in (0.6 cm) too big at any checkpoint, go down to a 3.25 mm (D-3) hook. If it is more than 0.25 in (0.6 cm) too small, go up to a 3.75 mm (F-5) hook. If the ring cups or ruffles, check your tension in Round 1 first, because that round is the base for everything after it.
Pattern
Center Ring
Foundation: Ch 20, then sl st in the first ch to form a ring. Make sure the chain isn’t twisted.
Round 1: Ch 1. Working over the ring (into the center hole, not into the chains), make 30 sc. Sl st in the first sc to join. (30 sc)
Slide the stitches around the ring as you go. They should pack tightly, cover the chain completely, and form a firm, padded circle. If they feel crowded, push them together. Don’t skip stitches to make room.
Tip: hold the starting yarn tail along the ring and work your sc over it as well. This pads the ring a little more and hides the tail, so you have one less end to weave in later.
The ring should lie flat, with an outer edge of 1.75 in (4.4 cm).
Window Spokes
Round 2: Ch 3 (counts as dc), dc in the same st, ch 3, sk 2 sts. 2 dc in the next st, ch 3, sk 2 sts. Repeat from * 8 more times. Sl st in the top of the beginning ch 3 to join.
Count: 20 dc (2 dc in each of 10 sc) + 10 ch-3 spaces.
Each repeat uses 3 sc from Round 1 (you work into 1 and skip 2). Ten repeats × 3 sts = 30 sts, so the round ends exactly where it started. The ch-3 bridges over the skipped stitches make the ring of small open windows around the padded center.
Checkpoint: 2.25 in (5.7 cm) across.
Shell Round
Round 3: Sl st in the next dc, then sl st in the next ch-3 sp. Ch 3 (counts as dc), then work (dc, ch 2, 2 dc) in the same sp to finish the first V-shell. Ch 1. V-shell in the next ch-3 sp, ch 1. Repeat from * 8 more times. Sl st in the top of the beginning ch 3 to join.
Count: 10 V-shells = 40 dc + 10 ch-2 spaces + 10 ch-1 spaces.
Each V-shell sits directly above a window, and each ch-1 sits above a 2-dc spoke from Round 2. This keeps the windows open and gives the scallops a solid base.
Checkpoint: 2.75 in (7.0 cm) across. This is your size before the border.
Border
The border is one scallop round. Its gauge is 1 scallop per V-shell, and each finished scallop is about 1 in (2.5 cm) wide at its base.
Round 4: Sl st in the next dc, then sl st in the next ch-2 sp. Ch 3 (counts as dc), then 6 dc in the same sp. Sc in the next ch-1 sp. 7 dc in the next ch-2 sp, sc in the next ch-1 sp. Repeat from * 8 more times. Sl st in the top of the beginning ch 3 to join.
Count: 70 dc + 10 sc = 80 sts (10 scallops).
Per scallop: 7 dc + 1 sc = 8 sts, and 10 scallops × 8 sts = 80 sts.
Why the math works: Round 3 has exactly 10 ch-2 spaces (the shell tips) and 10 ch-1 spaces (the valleys). Each 7-dc fan grows out of a shell tip, and each sc anchors a valley. Seven dc in one space spread into roughly a half circle, so the scallop rounds out without ruffling. The outer circumference grows from about 8.6 in (21.9 cm) after Round 3 to about 11 in (27.9 cm) after Round 4. That matches the 0.375 in (1.0 cm) border depth on each side.
Tip: when you work into a ch-2 space, put your hook under the whole chain, not into the chain stitches. This keeps each fan centered over its shell.
Fasten off, leaving a 6 in (15.2 cm) tail. Weave the tail through the back of the stitches.
Hanging Loop
Lay the wreath right side up. Pick any scallop and mark its center dc (the 4th of 7). This is now the top of the ornament.
Join yarn with a sl st in the marked dc. Ch 15, then sl st in the same dc. Fasten off and weave both tails into the back.
The chain folds into a loop about 1.5 in (3.8 cm) tall.
Bow and Bell
- Thread the jingle bell onto the 8 in (20.3 cm) piece of ribbon and slide it to the middle.
- Lay the ribbon over the top of the center ring, directly below the hanging loop, so the bell hangs inside the opening.
- Tie a small bow on the front of the ring. Leave the bell on a short center drop so it hangs about 0.5 in (1.3 cm) below the bow.
- Trim the ribbon ends at an angle so each tail is about 1 in (2.5 cm) long.
- Fix the knot to the ring with 2–3 small stitches in ivory thread, or a small dot of fabric glue.
The bow should sit centered on top of the ring, and the bell should hang freely in the center opening.
Final Blocking
- Weave in all yarn tails. If you can, leave the bow off until after blocking, because satin ribbon can get water spots. If the bow is already on, keep it dry.
- Mist the wreath with water until it is damp, not soaked.
- Lay it right side up on the blocking mat.
- Pin the center opening into a true circle, 1.25 in (3.2 cm) across.
- Pin each of the 10 scallop tips so the wreath measures 3.5 in (8.9 cm) across in every direction.
- Use your fingertips to open each window from Round 2 evenly.
- Let it dry completely, usually 4–6 hours, before you take out the pins.
- Add the bow and bell now if you haven’t yet.
For extra stiffness on the tree, mist the dry wreath with a light fabric stiffener and pin it again until dry.
Final Quality-Control Checklist
- [ ] Round 1 has 30 sc and fully covers the chain ring
- [ ] Round 2 has 20 dc and 10 even windows
- [ ] Round 3 has 10 V-shells
- [ ] Round 4 has 10 scallops and 80 sts in total
- [ ] The wreath measures 3.5 in (8.9 cm) across
- [ ] The center opening measures 1.25 in (3.2 cm)
- [ ] The hanging loop is centered on a scallop and is about 1.5 in (3.8 cm) tall
- [ ] The bow is centered at the top of the ring, below the loop
- [ ] The bell hangs freely inside the opening
- [ ] All tails are woven in and can’t be seen from the front
Troubleshooting
The ring is wavy after Round 1. You have too many stitches, or your sc are very loose. Recount to 30 and tighten your tension.
The chain shows through Round 1. Push the sc together more firmly, or use a slightly thicker yarn.
The wreath cups in Round 2 or 3. Your chains are too tight. Loosen your ch-3 spaces, or go up one hook size for that round only.
The windows are uneven. You skipped the wrong number of stitches somewhere. Each repeat of Round 2 has to use exactly 3 sc.
The scallops ruffle. Your dc are too loose or too tall. Go down one hook size for Round 4, and check that you have exactly 7 dc in each space.
The scallops look flat and pointed. Your dc are too tight. Relax your tension so each fan opens fully.
The ornament hangs crooked. The loop is off center. Take it out, rejoin in the 4th dc of a scallop, and re-center the bow below it.
The bell doesn’t jingle. It is pressed against the ring. Make its center drop a little longer so it hangs free.
Care
Spot clean only, with a damp cloth and mild soap, then lay flat to dry. Store the ornament flat in tissue paper so the scallops and the bow keep their shape.
Final Notes
This wreath depends on a short, steady chain of measurements. The 30-sc ring sets the 1.25 in (3.2 cm) opening and the 1.75 in (4.4 cm) outer edge. Round 2 opens it to 2.25 in (5.7 cm) with 10 windows. Round 3 builds 10 V-shells to reach 2.75 in (7.0 cm). Round 4 adds 10 eight-stitch scallops, 80 sts in total, for a finished diameter of 3.5 in (8.9 cm). A 15-chain loop, an ivory bow, and a gold bell finish the ornament.
Check each stage against these numbers, and every wreath you make will match the first one.
Happy crocheting!