

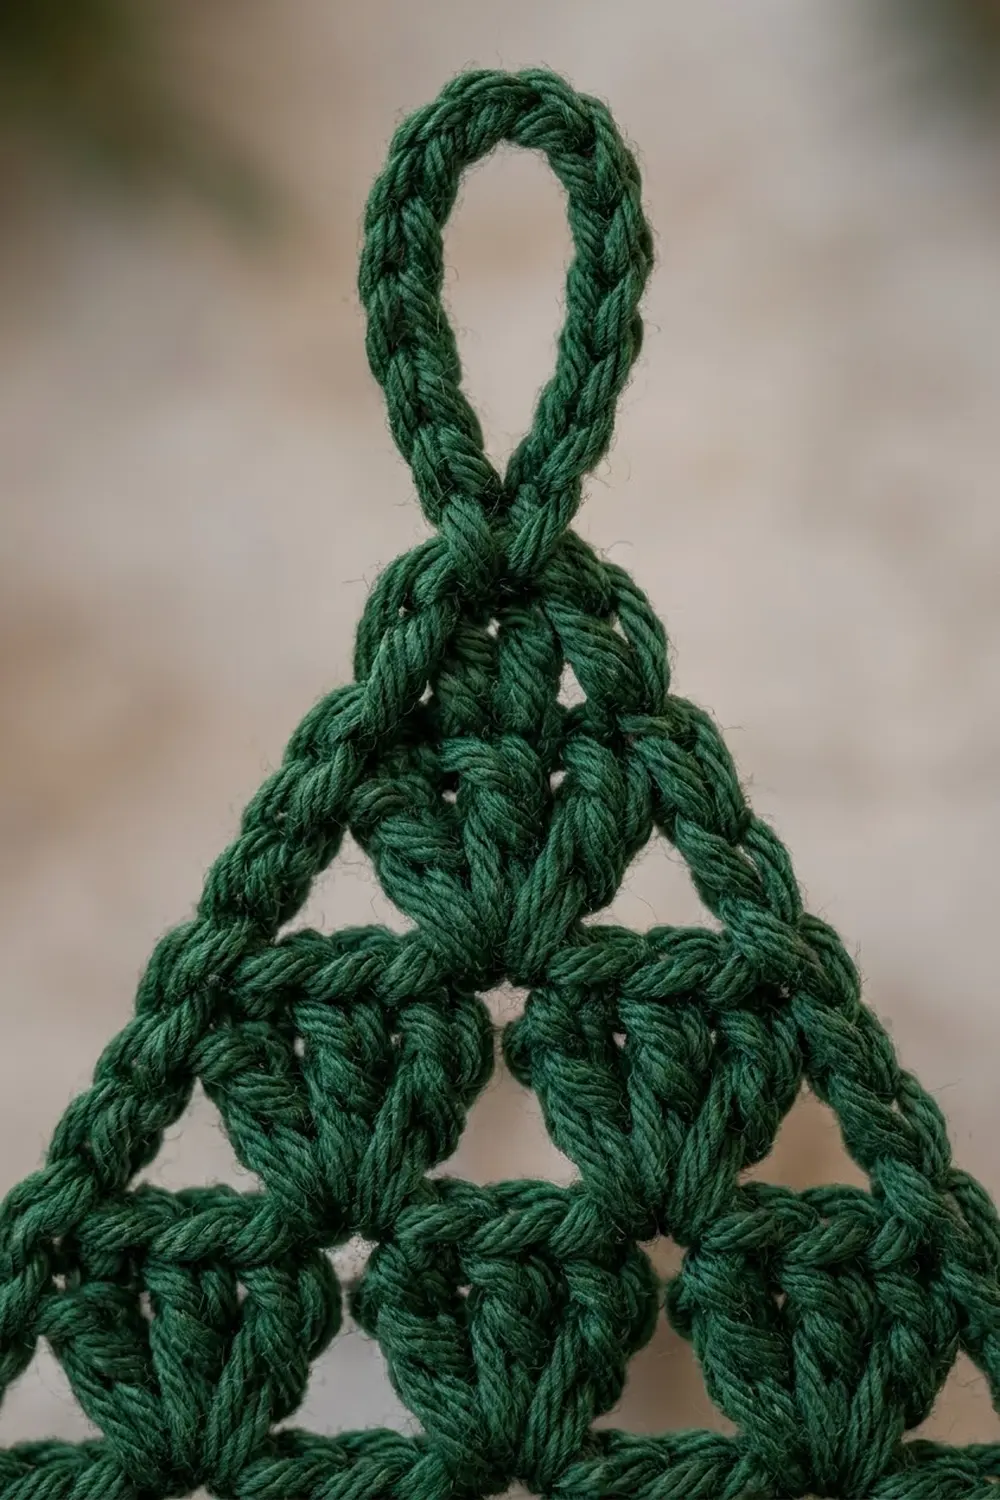
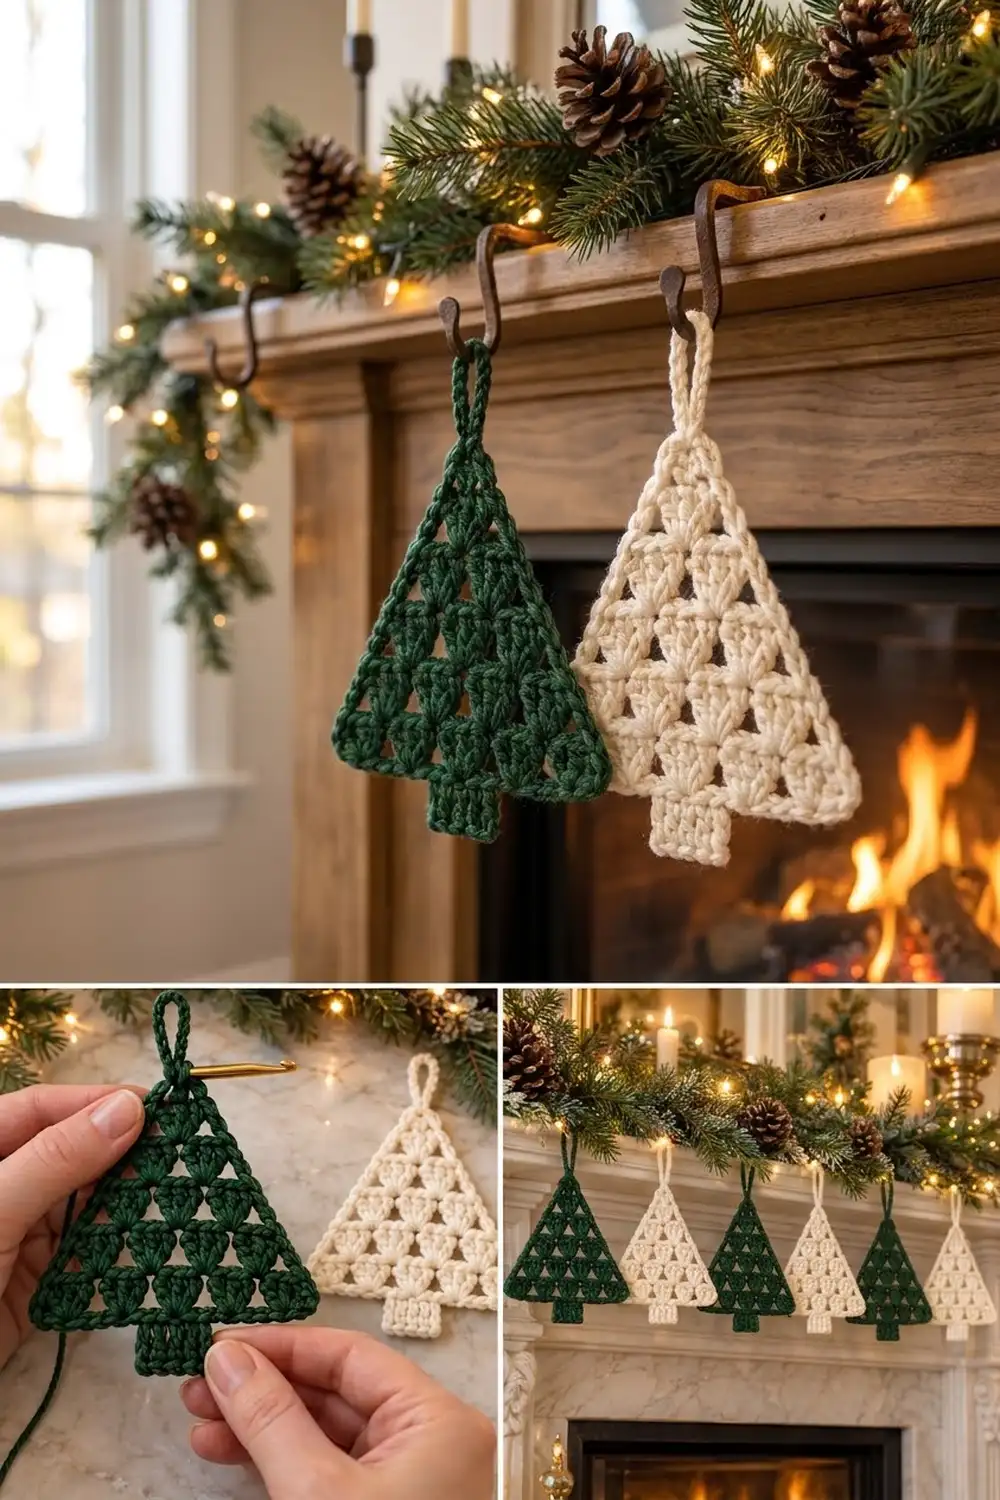
This little tree is made from fan shells stacked in a pyramid: four across the bottom, then three, then two, then one at the top. Small triangular holes form between the fans. The result looks lacy but still holds its shape, so it works on a tree branch, a gift tag or a mantel.
The samples are in two classic holiday shades: a deep forest green and a soft cream. Each ornament uses one color only. The fans, the outline border, the trunk and the hanging loop are all in the same yarn, so you never have to change colors. The pattern uses US crochet terms throughout.
The finished tree measures 5.5 in (14.0 cm) wide and 3.5 in (8.9 cm) tall across the triangle. The trunk adds 1 in (2.5 cm), for a total height of 4.5 in (11.4 cm) without the loop. With the loop, it measures about 5.75 in (14.6 cm).
The tree is one piece. You work four rows of shells from the bottom up, and each row steps in by half a shell on each side. Next, one round of single crochet straightens the stepped sides and frames the shape. You then add the trunk to the center of the bottom edge and finish with a covered loop at the top.
Finished Size and Construction
- Finished size: 5.5 in (14.0 cm) wide × 3.5 in (8.9 cm) tall across the triangle
- Total height: 4.5 in (11.4 cm) with the trunk; about 5.75 in (14.6 cm) with the loop
- Skill level: Easy / advanced beginner
- Terminology: US crochet terms
- Yarn weight: Worsted (#4)
- Hook: 4.0 mm (G-6)
- Number of pieces: 1
- Layout: One single triangle; no joining
- Piece size before border: 5 in (12.7 cm) wide × 3 in (7.6 cm) tall
- Border depth: 1 round of sc, about 0.25 in (0.6 cm)
- Trunk: 1 in (2.5 cm) wide × 1 in (2.5 cm) tall
Materials
Choose a smooth worsted-weight cotton or cotton blend. Cotton shows the fan stitches clearly and blocks to a crisp, flat triangle. Acrylic works too, but it may curl slightly at the points, so block it with steam.
- Forest green (sample 1): 15 g, about 25 m (27 yd) per ornament
- Cream (sample 2): 15 g, about 25 m (27 yd) per ornament
You only need one color for each ornament. These amounts include a margin of about 3 g for gauge differences and weaving in ends.
Tools:
– 4.0 mm (G-6) crochet hook
– Tapestry needle
– Scissors
– Stitch markers (2)
– Ruler or tape measure
– Blocking mat, rust-proof pins and a spray bottle
– Optional: spray starch for a stiffer ornament
Abbreviations (US Terms)
- ch – chain
- sl st – slip stitch
- sc – single crochet
- dc – double crochet
- st(s) – stitch(es)
- sp – space
- sk – skip
- RS / WS – right side / wrong side
- rep – repeat
Special stitch: Shell – work 5 dc into the same stitch or space.
Gauge and Checkpoints
Make one test tree before you buy a lot of yarn or plan a set. The ornament is small, so the tree itself is your gauge swatch.
Shell gauge: The finished Row 1 measures 5 in (12.7 cm) across and 0.75 in (1.9 cm) tall. That means each shell repeat is 1.25 in (3.2 cm) wide.
Border gauge: 5 sc = 1 in (2.5 cm).
Checkpoints:
– After Row 1: 5 in (12.7 cm) wide, 0.75 in (1.9 cm) tall
– After Row 2: the top of the row spans 3.75 in (9.5 cm); total height 1.5 in (3.8 cm)
– After Row 3: the top of the row spans 2.5 in (6.4 cm); total height 2.25 in (5.7 cm)
– After Row 4: the top shell spans 1.25 in (3.2 cm); total height 3 in (7.6 cm)
– After the border: 5.5 in (14.0 cm) × 3.5 in (8.9 cm)
– After the trunk: 4.5 in (11.4 cm) total height
If Row 1 is wider than 5 in (12.7 cm), go down to a 3.75 mm hook. If it is narrower than 4.75 in (12.1 cm), go up to a 4.5 mm hook. Make the foundation chain with the same hook you use for the rest. If the chain is tight but the dc are correct, make only the chain one hook size larger.
Pattern
Foundation
Ch 26.
Row 1 (RS)
Sc in the 2nd ch from the hook. Sk 2 ch, Shell in the next ch, sk 2 ch, sc in the next ch. Rep from * 3 more times. Turn.
Count: 4 shells and 5 sc = 25 sts.
All 25 working chains are used: 1 + (4 × 6) = 25. Each fan opens upward from its base chain, and a small triangular gap forms between neighboring fans.
Row 2 (WS)
Sl st in the next 2 dc. Ch 1 (does not count as a st). Sc in the next dc, which is the center dc of the first shell. Shell in the sp between this shell and the next shell, sc in the center dc of the next shell. Rep from * 2 more times. Leave the last 2 dc and the end sc unworked. Turn.
Count: 3 shells and 4 sc = 19 sts.
Each new shell sits right where two Row 1 shells meet. This staggers the fans and opens a new triangular hole above the center of each lower shell.
Row 3 (RS)
Sl st in the next 2 dc. Ch 1. Sc in the center dc of the first shell. Shell in the sp between shells, sc in the center dc of the next shell. Rep from * once more. Turn.
Count: 2 shells and 3 sc = 13 sts.
Row 4 (WS)
Sl st in the next 2 dc. Ch 1. Sc in the center dc of the first shell. Shell in the sp between the 2 shells. Sc in the center dc of the next shell.
Count: 1 shell and 2 sc = 7 sts.
Fasten off. Each row drops by exactly 6 sts (25, 19, 13, 7) because it loses one shell (5 dc) and one sc. The triangle should now measure 5 in (12.7 cm) wide × 3 in (7.6 cm) tall. Each side has four small steps. That is normal, and the border will straighten them.
Border
Border gauge: 5 sc = 1 in (2.5 cm). You work one round with the RS (the Row 1 side) facing you, going counterclockwise.
How the edge is counted: Each corner gets a 3-sc corner group. The counts below are the edge stitches between the corner groups, so corner stitches are never counted twice.
Border Round
Bottom-right corner: With the RS facing and the trunk edge at the bottom, join the yarn in the last foundation ch at the right end (the ch that holds the end sc of Row 1). Ch 1, then work 3 sc in this ch. Place a marker in the center sc.
Right side, 20 sc. Repeat these steps for each of Rows 1–4, working upward:
– 3 sc around the post of the outer dc of the row’s end shell
– 1 sc in the top of that outer dc
– 1 sc in the top of the next dc
That is 5 sc per row. Skip the center dc and the sc of the next row that sits on it, then move up to the next row’s end shell.
Apex: Work 3 sc in the center dc of the Row 4 shell. Place a marker in the center sc.
Left side, 20 sc. Repeat these steps for each of Rows 4–1, working downward:
– 1 sc in the top of the next dc
– 1 sc in the top of the outer dc
– 3 sc around the post of that outer dc
That is 5 sc per row.
Bottom-left corner: Work 3 sc in the first foundation ch (the ch that holds the first sc of Row 1).
Bottom edge, 23 sc: Work 1 sc in the free loop of each of the 23 foundation chains between the corners. Sl st to the first sc. Do not fasten off yet if you plan to go straight on to the trunk; otherwise fasten off.
Round total: 23 + 20 + 20 + (3 × 3) = 72 sc.
Count per side, including the center sc of each corner group: bottom 25, right 22, left 22.
Why the Math Works
The bottom edge uses all 25 foundation chains: 23 edge sc plus the 2 corner chains. At 5 sc per 1 in (2.5 cm), that is 5 in (12.7 cm), the same as the unbordered width. So the bottom edge stays flat.
Each side climbs 4 rows of 0.75 in (1.9 cm) while stepping in half a shell, about 0.625 in (1.6 cm), per row. That makes each diagonal step about 1 in (2.5 cm) long, so 5 sc per step is exact gauge. Over 4 steps, 20 sc plus the corner halves cover the full side of about 4.4 in (11.2 cm) with no cupping or ruffling.
The border adds 0.25 in (0.6 cm) on each side and at the top and bottom. That brings the triangle to 5.5 in (14.0 cm) × 3.5 in (8.9 cm).
Trunk
Turn the tree upside down so the bottom edge faces up, with the RS still facing you. Count the 23 bottom-edge sc: there are 9 sc, then the center 5 sc, then 9 sc. Mark the 10th and 14th sc.
Row 1 (RS): Join the yarn in the 10th sc (or continue from the border with sl sts if you did not fasten off). Ch 3 (counts as dc). Dc in each of the next 4 sc. Turn. (5 dc)
Row 2 (WS): Ch 3 (counts as dc). Dc in each of the next 4 sts, working the last dc into the top of the turning ch. (5 dc)
Fasten off. The trunk measures 1 in (2.5 cm) wide × 1 in (2.5 cm) tall, with 9 border sc showing on each side of it.
Hanging Loop
Join the yarn in the center sc of the apex corner group. Ch 12, then sl st in the same sc to form a loop. Work 18 sc into the loop, covering the chain completely. Sl st into the apex sc.
Fasten off. The covered loop stands about 1.25 in (3.2 cm) tall and looks thick and rope-like.
Weave in all ends along the border on the WS.
Final Blocking
- Lightly mist the tree with water until it is damp but not dripping. For cotton you can also dip and squeeze it.
- Lay it RS up on a blocking mat.
- Pin the two bottom corners 5.5 in (14.0 cm) apart, keeping the bottom edge straight.
- Pin the apex 3.5 in (8.9 cm) above the center of the bottom edge.
- Run your fingers along each side so the border lies in a straight line. Pin every 1 in (2.5 cm) if needed.
- Pull each fan gently open so the triangular holes are clear and even.
- Square the trunk to 1 in (2.5 cm) × 1 in (2.5 cm) and pin its two lower corners.
- Pin the loop upright from the apex.
- Optional: apply a light spray starch for a stiffer ornament.
- Let it dry completely before unpinning.
Final Quality-Control Checklist
- Shell rows read 4, 3, 2, 1 from the bottom, and every shell has exactly 5 dc
- Row counts are 25, 19, 13 and 7 sts
- Each triangular hole is open and roughly the same size
- The border has 72 sc: 23 bottom, 20 per side and three 3-sc corner groups
- The sides are straight, with no visible steps
- The trunk is 5 sts wide, centered with 9 border sc on each side
- The tree measures 5.5 in (14.0 cm) × 3.5 in (8.9 cm); total height is 4.5 in (11.4 cm) without the loop
- The loop is fully covered and firmly attached at the apex
- All ends are woven in invisibly on the WS
Troubleshooting
Sides ruffle after the border: You are working too many sc around the posts. Keep it to exactly 3 per post, or switch to a smaller hook for the border only.
Sides pull inward or cup: Your border tension is tight. Loosen up, or use a hook 0.5 mm larger for the border round.
Bottom edge flares: The foundation chain was too loose. Rework it with a smaller hook, or work the bottom edge sc slightly tighter.
Bottom edge puckers: The foundation chain was too tight. Next time, chain with a larger hook.
Shells lean to one side: Work the Row 2–4 shells right into the space between the two lower shells, not into a dc beside it.
Tree is too short for its width: Your dc are short. Pull up a slightly taller loop on each dc, or go up a hook size for the shell rows only.
Trunk is off-center: Recount the bottom edge. There must be 9 sc on each side of the 5 trunk stitches.
Loop flops over: Pack the sc more tightly onto the chain and add a little starch.
Care
Hand wash in cool water with mild soap. Press out the water in a towel, then reshape and dry flat, pinning it again if you want crisp points.
Final Notes
The size depends on a short chain of measurements. Row 1 must be 5 in (12.7 cm) wide, and each shell row adds 0.75 in (1.9 cm). Four rows give a 3 in (7.6 cm) triangle.
The 72-sc border at 5 sc per 1 in (2.5 cm) takes that to 5.5 in (14.0 cm) × 3.5 in (8.9 cm). The 1 in (2.5 cm) trunk brings the total height to 4.5 in (11.4 cm), and the loop to about 5.75 in (14.6 cm).
If you check Row 1 and the border gauge, everything else falls into place. Make one in forest green and one in cream, and hang them side by side.
Happy crocheting!