

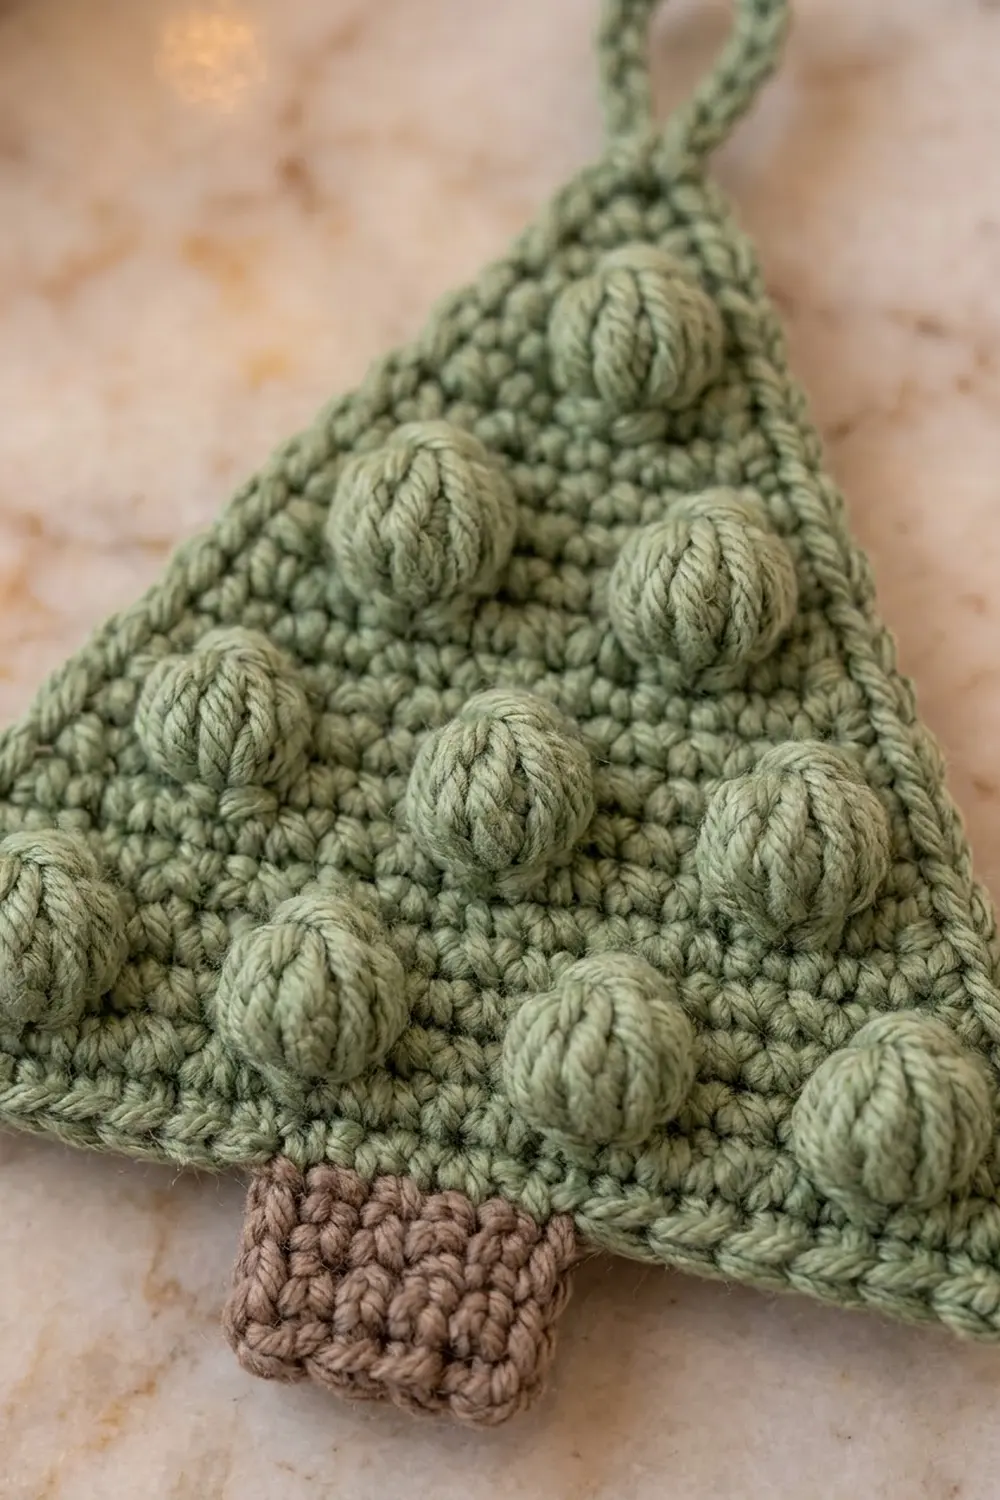
This little tree is one flat piece of crochet, made for hanging on a branch, tying onto a gift, or setting on a mantel. It’s a clean triangle of single crochet with ten round bobbles that sit up like ornaments, a small brown trunk, and a sturdy loop at the top.
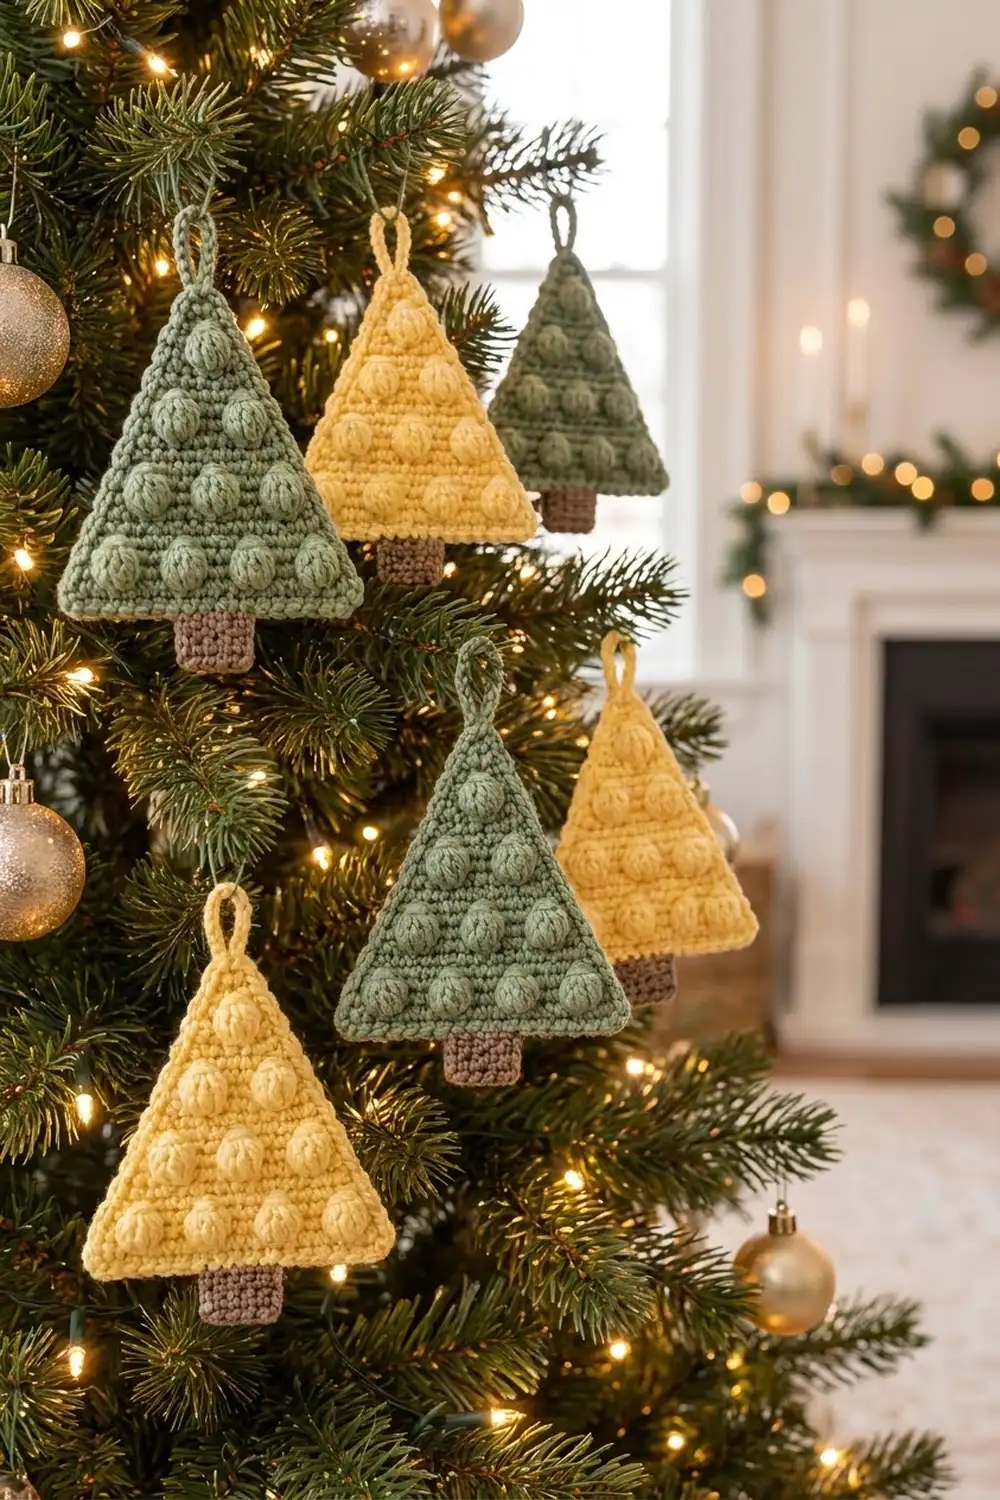
The pictured trees come in two colors, sage green and butter yellow, each with a taupe-brown trunk. Bobbles in the same color as the tree give it texture without looking busy, so a mix of both colors looks good together on one tree.
The pattern uses US crochet terms. The finished triangle is about 4.5 in (11.4 cm) wide and 4.25 in (10.8 cm) tall. With the trunk the tree is about 5 in (12.7 cm) tall, and about 6 in (15.2 cm) with the hanging loop.
You work the tree flat from the bottom edge up. Decreases at both ends shape the triangle, and the bobbles go on wrong-side rows so they push out to the front. A single crochet edging squares up the sides. Then you add the trunk in brown and finish with the green or yellow hanging loop.
Finished Size and Construction
- Finished size (triangle with edging): 4.5 in (11.4 cm) wide × 4.25 in (10.8 cm) tall
- Trunk: 1.1 in (2.8 cm) wide × 0.8 in (2.0 cm) tall
- Total height with trunk: 5 in (12.7 cm); with loop, 6 in (15.2 cm)
- Skill level: Easy (advanced beginner)
- Terminology: US
- Yarn weight: Medium / worsted (#4)
- Hook: 4.0 mm (US G-6)
- Number of pieces: 1 (single flat ornament)
- Layout: Triangle worked in rows, trunk worked off the base, loop at the top
- Piece size before edging: 4.2 in (10.7 cm) wide × 3.8 in (9.7 cm) tall
- Edging depth: 1 round of sc, about 0.2 in (0.5 cm)
Materials
Use a smooth worsted-weight yarn, either acrylic or cotton. Bobbles look best in plied yarn with good stitch definition. Fuzzy or split-prone yarn will blur them. The quantities below assume yarn with about 200 yd (183 m) per 100 g.
Yarn, per ornament:
– Color A (tree): sage green OR butter yellow, 10 g, about 18 m (20 yd)
– Color B (trunk): taupe brown, 2 g, about 4 m (4.4 yd)
These amounts include a safety margin of about 30%. If you’re making a set, one 100 g skein of each tree color makes about ten trees, and a small ball of brown covers the trunks for all of them.
Tools:
– 4.0 mm (US G-6) crochet hook
– Tapestry needle
– Scissors
– 2 locking stitch markers
– Ruler or tape measure
– Blocking mat and rust-proof pins
– Spray bottle with water
Abbreviations (US Terms)
- ch – chain
- sc – single crochet
- sl st – slip stitch
- sc2tog – single crochet 2 together (1 decrease)
- sc3tog – single crochet 3 together (2 decreases)
- st(s) – stitch(es)
- RS / WS – right side / wrong side
- bob – bobble (see below)
Special stitch: Bobble (bob). Yarn over, insert the hook into the stitch, yarn over and pull up a loop, yarn over and pull through 2 loops. Repeat from * to * 4 more times in the same stitch (6 loops on the hook). Yarn over and pull through all 6 loops. The bobble counts as 1 stitch. Because you make it with the WS facing you, it pops out on the RS. Keep the sc right after a bobble snug so the bobble closes tightly.
Gauge and Checkpoints
Gauge: 18 sc and 20 rows = 4 in (10.2 cm) in single crochet.
Make one tree before you commit to a full set, and use it as your gauge swatch. Check these measurements as you go:
- After Row 1: 19 sc should measure 4.2 in (10.7 cm) across.
- After Row 10: the piece should be about 2 in (5.1 cm) tall.
- After Row 19: the triangle should be about 3.8 in (9.7 cm) tall, measured from the foundation edge to the point.
- After the edging: about 4.5 in (11.4 cm) wide × 4.25 in (10.8 cm) tall.
- After the trunk: about 5 in (12.7 cm) from the base of the trunk to the top point.
If Row 1 is wider than 4.2 in (10.7 cm), go down to a 3.75 mm (US F-5) hook. If it’s narrower, go up to a 4.5 mm (US 7) hook. Single crochet ornaments should be firm. If you can see light through the fabric, use a smaller hook even if your width is close.
Tree Pattern
Use Color A. Bobbles are worked only on WS rows (Rows 4, 8, 12 and 16). Decreases are worked only on RS rows, starting with Row 3.
Before you start, put a locking marker on the first stitch of Row 1 to mark the RS.
Foundation: Ch 20.
Row 1 (RS): Sc in the 2nd ch from the hook and in each ch across. Turn. (19 sts)
Row 2 (WS): Ch 1, sc in each st across. Turn. (19 sts)
Row 3 (RS): Ch 1, sc2tog, sc in next 15 sts, sc2tog. Turn. (17 sts)
Row 4 (WS, bobble row): Ch 1, sc in next 2 sts, bob in next st, sc in next 3 sts; repeat from * to * 2 more times, bob in next st, sc in last 2 sts. Turn. (17 sts: 13 sc + 4 bobbles)
Row 5 (RS): Ch 1, sc2tog, sc in next 13 sts, sc2tog. Turn. (15 sts)
Row 6 (WS): Ch 1, sc in each st across. Turn. (15 sts)
Row 7 (RS): Ch 1, sc2tog, sc in next 11 sts, sc2tog. Turn. (13 sts)
Row 8 (WS, bobble row): Ch 1, sc in next 2 sts, bob in next st, sc in next 3 sts; repeat from * to * 1 more time, bob in next st, sc in last 2 sts. Turn. (13 sts: 10 sc + 3 bobbles)
Row 9 (RS): Ch 1, sc2tog, sc in next 9 sts, sc2tog. Turn. (11 sts)
Row 10 (WS): Ch 1, sc in each st across. Turn. (11 sts)
Row 11 (RS): Ch 1, sc2tog, sc in next 7 sts, sc2tog. Turn. (9 sts)
Row 12 (WS, bobble row): Ch 1, sc in next 2 sts, bob in next st, sc in next 3 sts, bob in next st, sc in last 2 sts. Turn. (9 sts: 7 sc + 2 bobbles)
Row 13 (RS): Ch 1, sc2tog, sc in next 5 sts, sc2tog. Turn. (7 sts)
Row 14 (WS): Ch 1, sc in each st across. Turn. (7 sts)
Row 15 (RS): Ch 1, sc2tog, sc in next 3 sts, sc2tog. Turn. (5 sts)
Row 16 (WS, bobble row): Ch 1, sc in next 2 sts, bob in next st, sc in last 2 sts. Turn. (5 sts: 4 sc + 1 bobble)
Row 17 (RS): Ch 1, sc2tog, sc in next st, sc2tog. Turn. (3 sts)
Row 18 (WS): Ch 1, sc in each st across. Turn. (3 sts)
Row 19 (RS): Ch 1, sc3tog. (1 st) Don’t fasten off. Go straight on to the edging.
Why the bobbles stagger: Each pair of decrease rows takes 2 stitches off each side. That means stitch 3 in a bobble row lines up with stitch 5 of the bobble row below it. The bobbles on Row 8 fall halfway between the ones on Row 4, and the same is true all the way up. That gives you the offset 4-3-2-1 layout, with 10 bobbles in total.
Checkpoint: The triangle should measure 4.2 in (10.7 cm) across the base and 3.8 in (9.7 cm) tall, with all 10 bobbles raised on the RS.
Border (Edging Round)
The edging is one round of sc in Color A, worked with the RS facing you. It straightens out the stepped edges left by the decreases and gives the trunk a clean row of stitches to work into.
Border gauge: You work 1 sc into each row end on the slanted sides, and 1 sc into each foundation chain on the base. Each corner gets 3 sc.
Edging Round (RS): Ch 1. Work 3 sc in the top of the sc3tog (top corner). Rotate the piece and work down the first slanted side: 1 sc in the end of each of Rows 18 through 1 (18 sc). Work 3 sc in the first foundation ch (bottom corner). Working into the free loops of the foundation ch, sc in each of the next 17 ch. Work 3 sc in the last foundation ch (bottom corner). Work up the second slanted side: 1 sc in the end of each of Rows 1 through 18 (18 sc). Join with a sl st to the first sc. (62 sts)
Counts per side. The middle sc of each 3-sc group is the corner stitch, and each side count below includes its 2 corner stitches:
– Left slanted side: 1 corner + 1 + 18 + 1 + 1 corner = 22 sts
– Base: 1 corner + 1 + 17 + 1 + 1 corner = 21 sts
– Right slanted side: 1 corner + 1 + 18 + 1 + 1 corner = 22 sts
– Total: 22 + 21 + 22 − 3 shared corners = 62 sts
Why the math works: The base has 19 foundation chains: 1 under each corner group and 17 between them. The slanted sides have 18 row ends each, because Row 19 is the top point itself and is covered by the top corner group. The slanted edge is about 4.3 in (10.9 cm) long, so 18 sc along it come to slightly fewer stitches per inch than the gauge. That’s a little under one stitch per row end, which keeps the diagonal from rippling. The 3-sc corners keep the 3 points sharp.
Hanging loop: Sl st into the next st, which is the middle sc of the top corner group. Ch 12, then sl st in the same st to form a loop. Work 16 sc into the loop, then sl st into the same top st. Fasten off and weave in the end.
Trunk
Use Color B. With the RS facing you and the tree upside down, count along the base edging. Between the 2 corner stitches there are 19 sc. Put markers in the 8th and 12th of these. The 5 stitches from marker to marker are the center of the base.
Row 1: Join Color B with a standing sc (or sl st and ch 1, then sc) in the marked 8th st, then sc in the next 4 sts. Turn. (5 sts)
Rows 2–4: Ch 1, sc in each st across. Turn. (5 sts)
Fasten off after Row 4. The trunk measures 1.1 in (2.8 cm) wide × 0.8 in (2.0 cm) tall. Weave in both ends along the trunk’s side edges so the brown doesn’t show through the tree.
Checkpoint: From the bottom of the trunk to the top corner, the tree should measure about 5 in (12.7 cm), and the trunk should sit exactly in the middle.
Final Blocking
- Weave in all the ends before you block, threading them through the sc fabric on the WS and staying away from the bobbles.
- Lay the ornament RS up on the blocking mat.
- Pin the 3 corners first. The base should be 4.5 in (11.4 cm) wide and the point should be 4.25 in (10.8 cm) above the base edge.
- Pin the trunk square at 1.1 in (2.8 cm) wide.
- Mist the ornament lightly with water until it’s damp but not soaked. Don’t press the bobbles flat.
- With your fingertip, push each bobble out from the WS so it’s fully rounded on the RS.
- Let it dry completely, which usually takes a few hours, before you unpin it.
- If you’re using acrylic and want crisper edges, you can steam-block it instead. Hold the iron above the fabric and never touch it to the yarn.
Final Quality-Control Checklist
- Row 1 had exactly 19 sts, and each decrease row finished with the counts listed.
- There are 10 bobbles in a staggered 4-3-2-1 layout, all raised on the RS.
- The edging round has 62 sts (22 / 21 / 22 per side, corners included).
- The three corners are sharp, and the slanted sides are straight, without waves.
- The trunk is 5 sts wide, 4 rows tall, and centered on the 8th–12th base sts.
- The loop is firmly attached at the top point and is about 1 in (2.5 cm) tall.
- The triangle measures 4.5 in (11.4 cm) × 4.25 in (10.8 cm) after blocking.
- All ends are woven in and hidden on the WS.
Troubleshooting
Bobbles are on the wrong side. Bobbles always pop out on the side facing away from you. Make sure Rows 4, 8, 12 and 16 are WS rows. Check the marker on Row 1, which marks the RS.
Bobbles look flat or loose. Pull the final yarn over through all 6 loops firmly, and work the next sc tightly. Going down half a hook size for the bobble rows also helps.
The triangle leans to one side. You probably skipped a decrease at one end. Count the stitches after each RS row. Each one should lose exactly 2 stitches.
The slanted edges ripple. You may have worked 2 sc into some row ends. Stick to exactly 18 sc per slanted side.
The slanted edges pull in or cup. Your edging tension is tighter than your body tension. Work the edging round with a 4.5 mm (US 7) hook.
The trunk is off-center. Count again from the corner stitch. There should be 7 base stitches on each side of the trunk.
Care
Hand wash in cool water with mild soap, press out the water gently, and dry flat. Push the bobbles back into shape while the ornament is damp, and store it flat between seasons.
Final Notes
The measurements build on each other. A gauge of 18 sc = 4 in (10.2 cm) gives a 19-stitch base 4.2 in (10.7 cm) wide. Nineteen rows bring the triangle to 3.8 in (9.7 cm) tall. The 62-stitch edging round brings it to 4.5 in (11.4 cm) × 4.25 in (10.8 cm). The 5-stitch trunk adds 0.8 in (2.0 cm), for a total of 5 in (12.7 cm), and the loop finishes the ornament at 6 in (15.2 cm). If you check your counts at each checkpoint, every tree in your set will come out the same size.
Happy crocheting!