

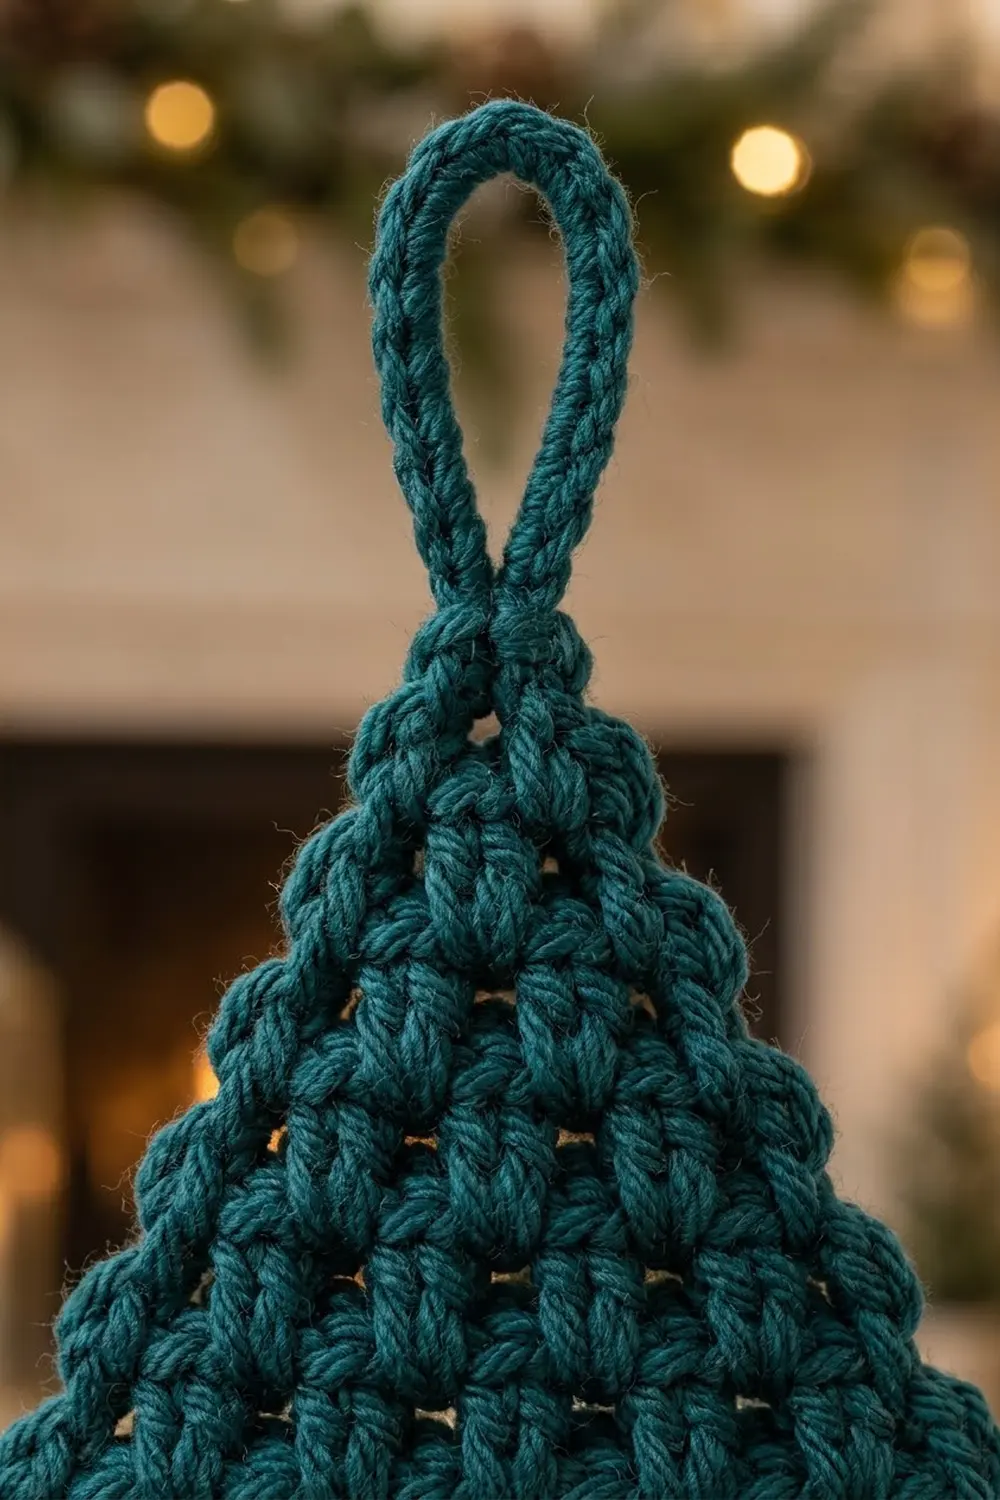
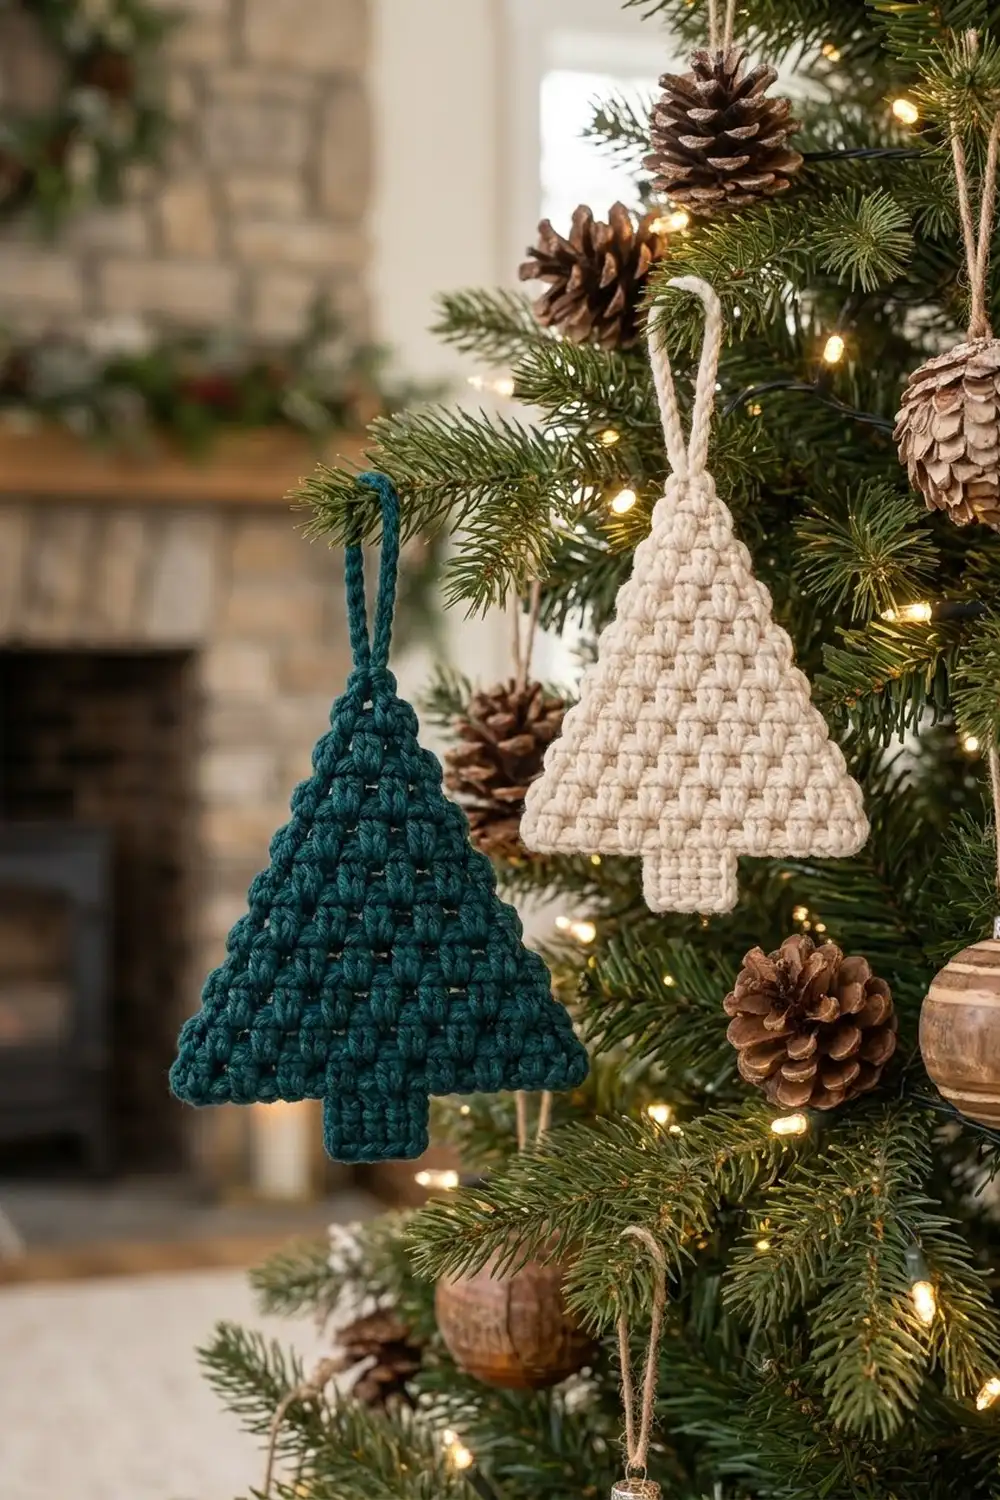
This little tree is a flat Christmas ornament made in one piece, with a chunky, brick-like texture. Rows of small puff stitches sit offset over plain single crochet, so the surface looks like tiny stacked branches. A short square trunk sits at the base, a neat single crochet border outlines the whole shape, and a sturdy wrapped loop at the tip makes it ready to hang.
The sample comes in two classic colorways: a deep evergreen teal and a soft natural cream. Each tree uses one color only, so you can make a matching set or alternate the two colors on a tree, a mantel, or a gift package. The style is simple, cozy, and modern.
The pattern uses US crochet terms. The finished ornament measures 4.75 in (12.1 cm) wide and 5.5 in (14.0 cm) tall without the loop, or 6.75 in (17.1 cm) tall with the loop.
Construction is simple. You work the triangle from the bottom up in rows, decreasing at both ends on every wrong-side row. The puffs shift into a brick pattern on their own as the rows get shorter. Then you add the trunk into the foundation chain, work one border round around the whole outline, and finish with a wrapped hanging loop.
Finished Size and Construction
- Finished size: 4.75 in (12.1 cm) wide x 5.5 in (14.0 cm) tall, plus a 1.25 in (3.2 cm) loop
- Skill level: Easy / advanced beginner
- Terminology: US crochet terms
- Yarn weight: Worsted weight (#4)
- Hook: 4.5 mm (US 7)
- Number of pieces: 1 (the trunk and border are worked directly onto the tree)
- Layout: Triangle with a centered trunk below and a hanging loop at the tip
- Triangle size before border: 4.25 in (10.8 cm) wide x 4 in (10.2 cm) tall
- Trunk size before border: 1.25 in (3.2 cm) wide x 1 in (2.5 cm) tall
- Overall size before border: 4.25 in (10.8 cm) wide x 5 in (12.7 cm) tall
- Border depth: 0.25 in (0.6 cm) on every edge
Materials
Choose a smooth worsted weight yarn that shows stitches clearly. Cotton or a cotton blend gives the crispest puffs and the firmest shape, which helps an ornament hang flat. Soft acrylic also works. Avoid fuzzy or loosely plied yarns, because they blur the texture.
Yarn (per ornament, one color):
- Evergreen teal: 10 g / 20 m (22 yd), or
- Natural cream: 10 g / 20 m (22 yd)
One tree uses about 7 g. The amounts above include a margin for gauge testing, the loop, and weaving in ends.
Tools:
- 4.5 mm (US 7) crochet hook
- Tapestry needle
- Scissors
- Stitch markers (2)
- Ruler or measuring tape
- Blocking mat and rust-proof pins
- Spray bottle with water
Abbreviations (US Terms)
- ch – chain
- sc – single crochet
- sc2tog – single crochet 2 together: (insert hook in next st or row-end, yo, pull up a loop) 2 times, yo, pull through all 3 loops
- sc3tog – single crochet 3 together: (insert hook in next st, yo, pull up a loop) 3 times, yo, pull through all 4 loops
- sl st – slip stitch
- st(s) – stitch(es)
- yo – yarn over
- RS / WS – right side / wrong side
- rep – repeat
Special stitch – Puff: (Yo, insert hook in next st, yo, pull up a loop to sc height) 2 times, yo, pull through all 5 loops on hook. Do not chain to close. A puff counts as 1 st and pushes toward the RS as a small raised bump.
Gauge and Checkpoints
Gauge: 16 sts and 17 rows = 4 in (10.2 cm) in the puff pattern (puff rows alternating with sc rows), before blocking.
This project is small, so the tree is your gauge test. Work the triangle first and measure it before you add the trunk and border.
Checkpoints:
- After Row 1: 17 sts measure 4.25 in (10.8 cm) across.
- After Row 8: the piece is about 1.9 in (4.8 cm) tall, with 11 sts in the top row.
- After Row 17: 4.25 in (10.8 cm) wide at the base and 4 in (10.2 cm) tall to the tip.
- After the trunk: the trunk is 1.25 in (3.2 cm) wide and 1 in (2.5 cm) tall; the whole piece is 5 in (12.7 cm) tall.
- After the border: 4.75 in (12.1 cm) wide and 5.5 in (14.0 cm) tall.
If your piece is too big, switch to a 4 mm (US G-6) hook. If it is too small, switch to a 5 mm (US H-8) hook. If only the height is off, change how tall you pull up the loops in each puff. Taller puffs make a taller tree without changing the width.
Tree Triangle
You work the triangle flat in rows from the bottom up. Work puffs on RS rows only. WS rows are plain sc with one decrease at each end.
Ch 18.
Row 1 (WS): Sc in 2nd ch from hook and in each ch across, turn. (17 sts)
Place markers in the first and last loops of the foundation chain to mark the corners.
Row 2 (RS): Ch 1 (does not count as a st here and throughout), sc in first st, *puff in next st, sc in next st; rep from * across, turn. (17 sts: 8 puffs, 9 sc)
Row 3 (WS): Ch 1, sc2tog over first 2 sts, sc in each st across to last 2 sts, sc2tog over last 2 sts, turn. (15 sts: 13 sc + 2 sc2tog)
Work into the top of each puff like any other stitch. Do not skip the puffs.
Row 4 (RS): Ch 1, sc in first st, *puff in next st, sc in next st; rep from * across, turn. (15 sts: 7 puffs, 8 sc)
One stitch came off each edge in Row 3, so every puff in Row 4 sits above a sc from Row 2, not above a puff. That shift makes the brick texture without any extra counting.
Row 5 (WS): Rep Row 3. (13 sts)
Row 6 (RS): Rep Row 4. (13 sts: 6 puffs, 7 sc)
Row 7 (WS): Rep Row 3. (11 sts)
Row 8 (RS): Rep Row 4. (11 sts: 5 puffs, 6 sc)
Row 9 (WS): Rep Row 3. (9 sts)
Row 10 (RS): Rep Row 4. (9 sts: 4 puffs, 5 sc)
Row 11 (WS): Rep Row 3. (7 sts)
Row 12 (RS): Rep Row 4. (7 sts: 3 puffs, 4 sc)
Row 13 (WS): Rep Row 3. (5 sts)
Row 14 (RS): Rep Row 4. (5 sts: 2 puffs, 3 sc)
Row 15 (WS): Rep Row 3. (3 sts)
Row 16 (RS): Ch 1, sc in first st, puff in next st, sc in last st, turn. (3 sts: 1 puff, 2 sc)
Row 17 (WS): Ch 1, sc3tog over all 3 sts. (1 st)
Fasten off and weave in the tail toward the center.
Puff total: 8 + 7 + 6 + 5 + 4 + 3 + 2 + 1 = 36 puffs, ending with one puff just below the tip.
Checkpoint: 4.25 in (10.8 cm) wide x 4 in (10.2 cm) tall.
Trunk
You work the trunk into the free loops of the foundation chain, centered under the triangle.
Turn the triangle upside down with the RS facing you. Count the 17 free loops of the foundation chain and skip the first 6.
Row 1 (RS): Join yarn with a sc in the 7th loop, sc in each of the next 4 loops, turn. (5 sts)
This leaves 6 free loops on each side of the trunk: 6 + 5 + 6 = 17.
Rows 2–4: Ch 1, sc in each st across, turn. (5 sts)
Fasten off after Row 4 and weave in the tail.
Checkpoint: The trunk is 1.25 in (3.2 cm) wide x 1 in (2.5 cm) tall, and the whole piece is 5 in (12.7 cm) tall.
Border and Hanging Loop
The border is one round of sc around the full outline. It hides the stepped decrease edges, squares the trunk corners, and gives the tree its smooth, cord-like edge.
Border gauge: 1 sc in each row-end and 1 sc in each foundation loop or stitch, with 3 sc in each outer corner and 1 sc2tog at each inner corner.
Rnd 1 (RS): With the RS facing and the tip at the top, join yarn with a sc in the Row 17 st at the tip. Then continue:
- Tip: Ch 12, sc in the same tip st. (2 sc + ch-12 loop)
- First slanted side: Sc in the row-end of each of Rows 16 through 2. (15 sc)
- Bottom corner: 3 sc in foundation loop 1. (3 sc)
- Ledge: Sc in loops 2–5. (4 sc)
- Inner corner: Sc2tog over loop 6 and the row-end of trunk Row 1. (1 st)
- Trunk side: Sc in the row-ends of trunk Rows 2 and 3. (2 sc)
- Trunk corner: 3 sc in the first st of trunk Row 4. (3 sc)
- Trunk bottom: Sc in each of the next 3 sts. (3 sc)
- Trunk corner: 3 sc in the last st of trunk Row 4. (3 sc)
- Trunk side: Sc in the row-ends of trunk Rows 3 and 2. (2 sc)
- Inner corner: Sc2tog over the row-end of trunk Row 1 and loop 12. (1 st)
- Ledge: Sc in loops 13–16. (4 sc)
- Bottom corner: 3 sc in loop 17. (3 sc)
- Second slanted side: Sc in the row-end of each of Rows 2 through 16. (15 sc)
Join with a sl st to the first sc. (61 sts + ch-12 loop)
Count check: 2 + 15 + 3 + 4 + 1 + 2 + 3 + 3 + 3 + 2 + 1 + 4 + 3 + 15 = 61 sts. Each segment is counted between corners, and each corner group is listed separately, so no stitch is counted twice.
Loop finish: Sl st into the ch-12 loop, work 18 sc firmly over the loop, then sl st into the tip sc. Fasten off and weave in the tail down one slanted side. Covering the loop with sc makes it thick and firm, so it keeps its teardrop shape.
Why the math works:
- The triangle base has 17 loops. The trunk uses the 5 center loops. Each side uses 1 corner loop, 4 ledge loops, and 1 loop in the sc2tog: 5 + (1 + 4 + 1) x 2 = 17.
- The trunk bottom has 5 sts: 1 corner st + 3 plain sts + 1 corner st.
- Each slanted side has 17 rows. Row 17 is the tip and Row 1 ends at the corner loop, which leaves 15 row-ends for 15 sc.
- At 4 sts and 4.25 rows per inch, 1 sc per row-end almost matches the natural edge length. The small difference pulls the edge snug, which keeps the slanted sides straight.
- The 3-sc groups add the fullness that outer corners need to lie flat. Each sc2tog removes the extra fullness where a ledge meets the trunk.
Checkpoint: 4.75 in (12.1 cm) wide x 5.5 in (14.0 cm) tall, with a 1.25 in (3.2 cm) loop.
Final Blocking
- Lay the ornament RS up on a blocking mat.
- Mist it evenly until damp, not soaked.
- Pin the tip, the two bottom corners of the triangle, and the four trunk corners first.
- Check the size: 4.75 in (12.1 cm) across the base and 5.5 in (14.0 cm) from tip to trunk bottom.
- Pin along both slanted sides so they run straight from tip to corner.
- Press each puff gently with a fingertip to round it out without flattening it.
- Set the loop straight up from the tip in a neat teardrop.
- Let it dry completely, usually 2–4 hours, before you remove the pins.
For extra stiffness, mist with light fabric starch at step 2.
Final Quality-Control Checklist
- 36 puffs in a brick pattern, with one puff at the top
- Triangle base has 17 sts; every RS row has an odd count with sc at both edges
- Trunk is centered, with 6 free foundation loops on each side before the border
- Border has 61 sts, with crisp 3-sc corners at the base and trunk
- Inner corners are tidy, with no gaps
- Loop is fully covered with 18 sc and sits straight above the tip
- Finished size is 4.75 in (12.1 cm) x 5.5 in (14.0 cm), plus a 1.25 in (3.2 cm) loop
- All ends are woven in and hidden on the RS
- Ornament lies flat without curling
Troubleshooting
The puffs line up in columns instead of a brick pattern. Each WS row must remove exactly one stitch at each end, or the puffs will not shift.
The triangle leans to one side. One edge is missing a decrease. Count each RS row; it should always be an odd number that starts and ends with sc.
The puffs look flat. Pull the loops up a little taller and keep the last yo snug. Work puffs on RS rows only.
The slanted sides ripple after the border. Work exactly 15 sc per slanted side, never 2 in one row-end.
The slanted sides pucker. Go up 0.5 mm in hook size for the border round only.
There is a hole at an inner corner. Make sure the sc2tog takes in both the last ledge loop and the first trunk row-end.
The trunk is off center. Before you join, count again: skip 6, work 5, leave 6.
Care
Spot clean or hand wash in cool water, press out the water in a towel, and dry flat. Reshape and pin again if the outline loses its crispness.
Final Notes
Each stage builds on the measurement before it. The 17-st foundation sets a 4.25 in (10.8 cm) base, and 17 rows of puff rows and decrease rows make a 4 in (10.2 cm) triangle. The 5-st trunk adds 1 in (2.5 cm), for a piece 5 in (12.7 cm) tall. One 61-st border round adds 0.25 in (0.6 cm) on every edge, which brings the tree to 4.75 in (12.1 cm) x 5.5 in (14.0 cm). The 1.25 in (3.2 cm) wrapped loop goes on top.
Once you have made one, the rest go quickly in teal, cream, or any color you like.
Happy crocheting!