

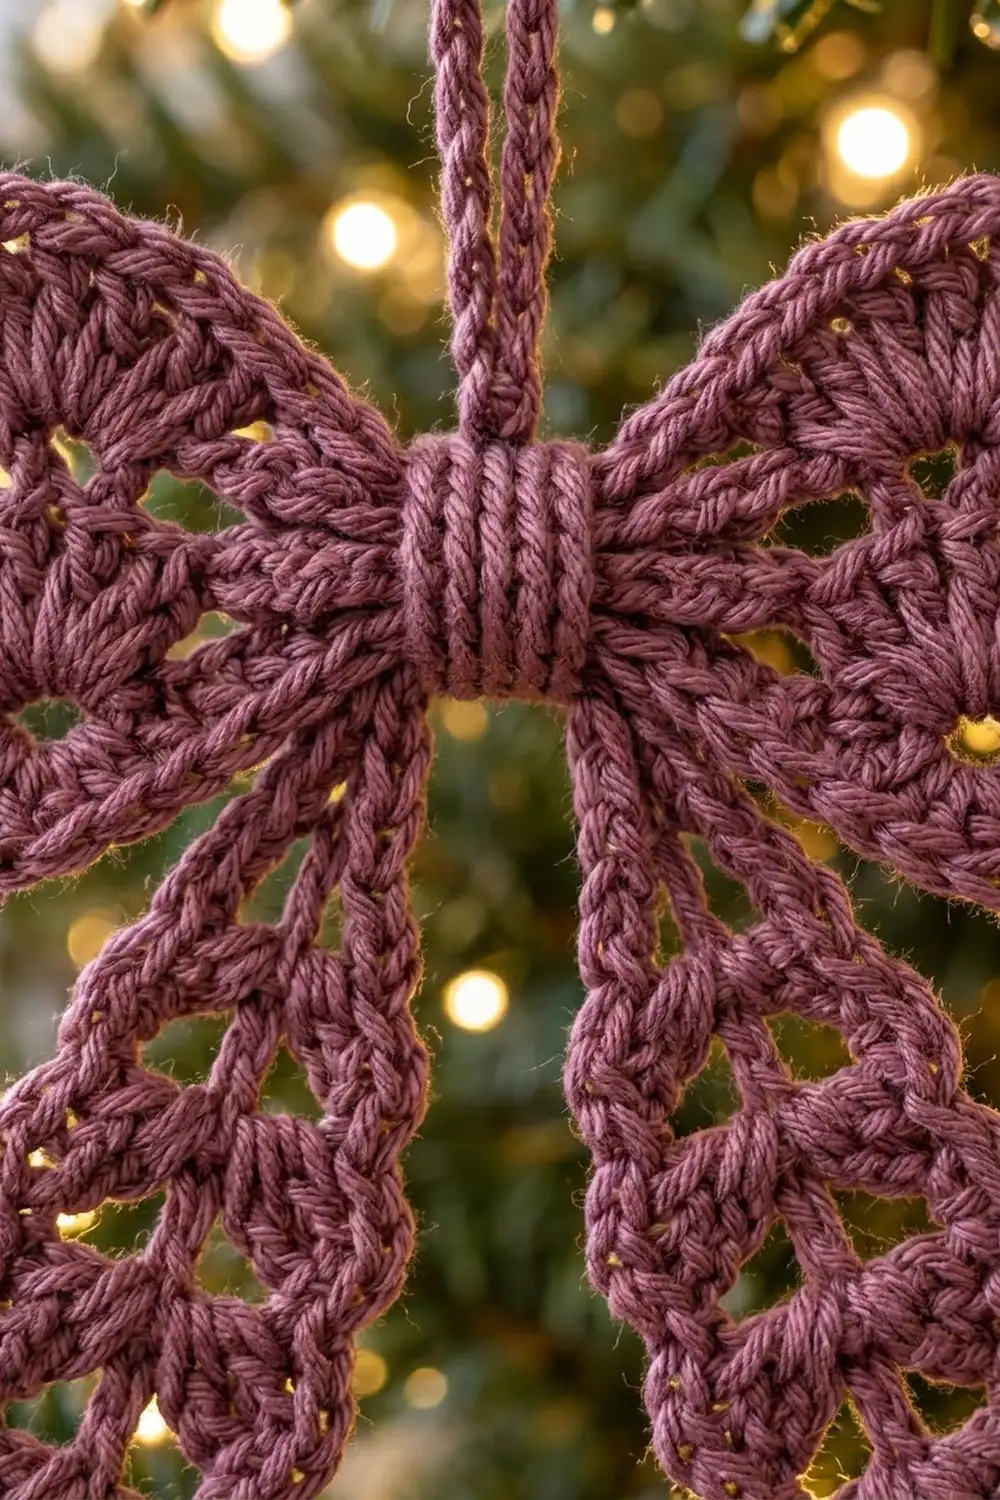
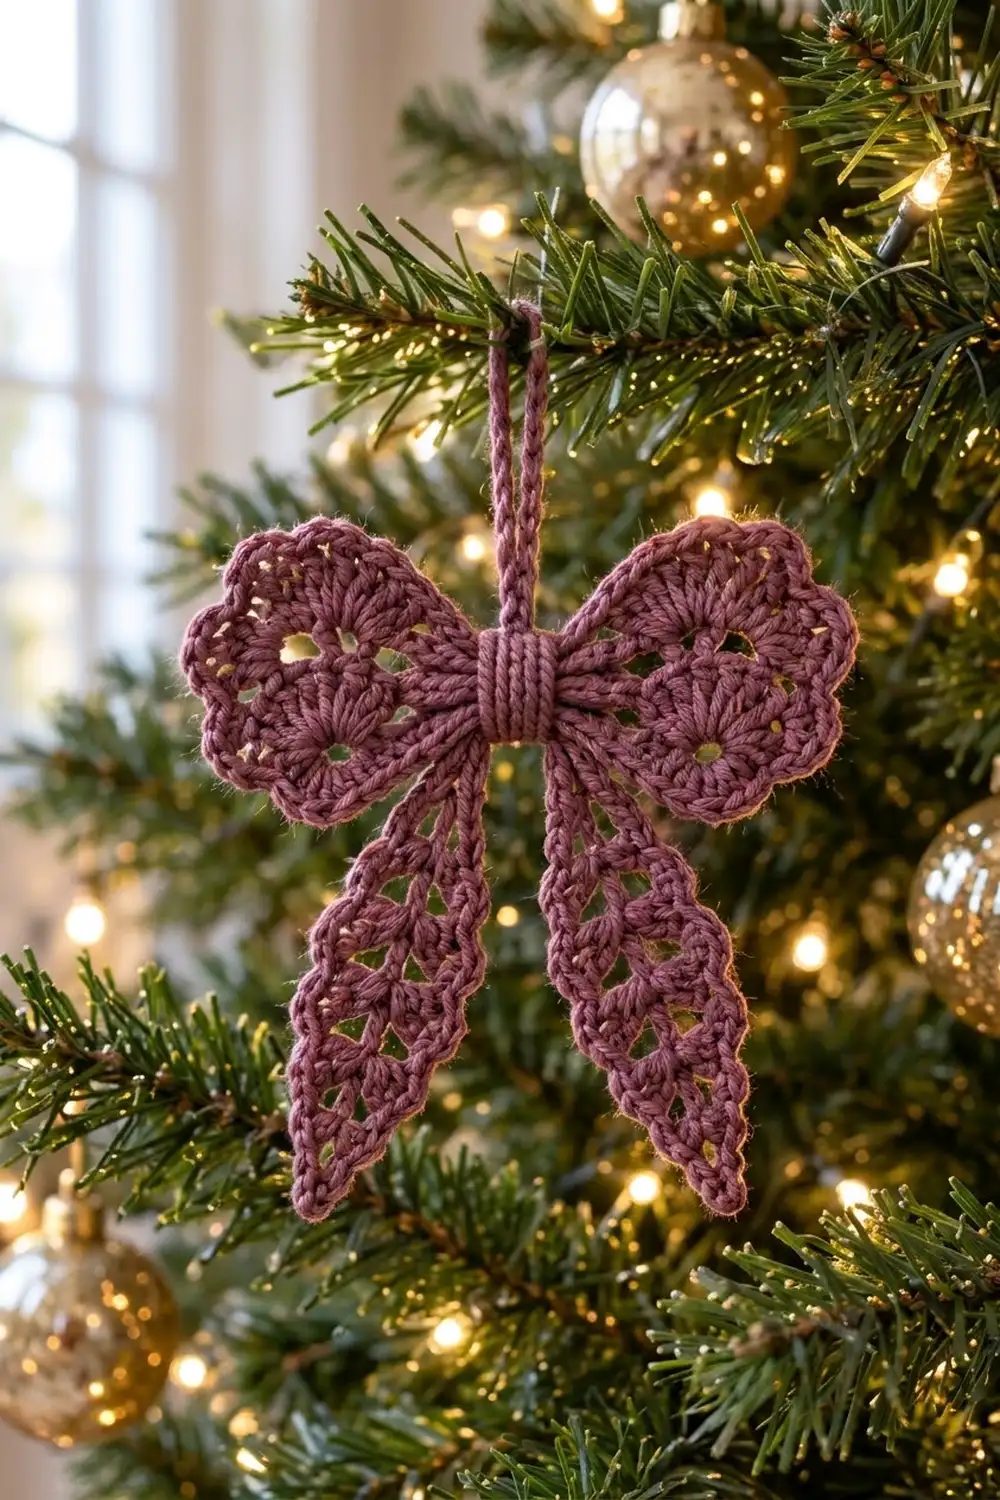
The Sugarplum Lace Bow is a small, lacy bow ornament made to hang on your tree. It has two rounded wings with scalloped edges, two long mesh tails with pointed tips, and a snug ridged wrap in the middle. A slim chain cord at the top makes the hanging loop.
The sample is worked in one dusty plum shade in a fine, smooth cotton yarn. The color suits gold lights and glass baubles but doesn’t look too sweet. The style is vintage and delicate, and the shape stays crisp because each part is small and firmly stitched.
This pattern uses US crochet terms. The finished bow is about 4 in (10.2 cm) wide and 4.25 in (10.8 cm) tall, and the hanging loop adds about 2 in (5.1 cm).
Construction is simple. You crochet two wings in the round, two tails around a foundation chain, one small center wrap in rows, and one slip-stitch cord. After edging and blocking, you pinch the wings, place the tails behind them, close the wrap around the middle and tuck the cord ends inside it.
Finished Size and Construction
- Finished size: about 4 in (10.2 cm) wide x 4.25 in (10.8 cm) tall, plus a 2 in (5.1 cm) loop
- Skill level: Easy to intermediate
- Terminology: US crochet terms
- Yarn weight: Sport / fine (#2), cotton or cotton blend
- Hook: 2.75 mm (US C-2)
- Number of pieces: 1 finished ornament, assembled from 6 small components (2 wings, 2 tails, 1 wrap, 1 cord)
- Layout: Symmetrical bow, with wings left and right, tails angled down and outward, and the wrap at center
- Piece size: each wing 2.25 in (5.7 cm) across; each tail 3.25 in (8.3 cm) long x 1.1 in (2.8 cm) wide
- Size before border: wing 1.5 in (3.8 cm) across; tail 3 in (7.6 cm) long x 0.9 in (2.3 cm) wide
- Border depth: about 0.375 in (1.0 cm) on the wings and about 0.1 in (0.3 cm) on the tail sides
Materials
Yarn: Use a smooth, mercerized sport-weight cotton (#2) with roughly 150 m per 50 g. Mercerized cotton shows stitch detail clearly and holds a crisp shape after blocking. Avoid fuzzy or very stretchy yarns, because the mesh windows and scallops will blur.
- Dusty plum / mauve: 10 g, about 30 m (33 yd) per ornament
These quantities include a margin of about 25% for your gauge swatch and sewing tails. One 50 g ball makes about five ornaments.
Tools:
– 2.75 mm (US C-2) crochet hook
– Tapestry needle
– Scissors
– Rust-proof pins and a foam blocking mat
– Spray bottle with water
– Optional: fabric stiffener or a light starch spray
Abbreviations (US Terms)
- ch – chain
- sl st – slip stitch
- sc – single crochet
- hdc – half double crochet
- dc – double crochet
- tr – treble crochet
- sk – skip
- sp(s) – space(s)
- st(s) – stitch(es)
- blo – back loop only
- rnd – round
Special stitch – Scallop: 5 dc worked into the same stitch.
Gauge and Checkpoints
Make one wing and one tail before anything else. Exact gauge matters less on an ornament than on a garment, but the wings and tails must fit together, so check these sizes:
- Wing after Rnd 1: 0.75 in (1.9 cm) across
- Wing after Rnd 2: 1.5 in (3.8 cm) across
- Wing after border: 2.25 in (5.7 cm) across
- Tail after Rnd 1: 3 in (7.6 cm) long x 0.9 in (2.3 cm) at the widest point
- Tail after border: 3.25 in (8.3 cm) long x 1.1 in (2.8 cm) wide
- Wrap: 1.5 in (3.8 cm) long x 0.6 in (1.5 cm) wide
If your pieces are too big: go down to a 2.5 mm hook, or tighten your chains. Loose chains are the usual cause of long tails.
If your pieces are too small: go up to a 3.0 mm hook. Keep the same hook for all six components so the proportions stay matched.
Pattern
Wings (make 2)
Each wing is a small circle with an open center. Only its outer curve gets scallops in the border round. The plain inner section gathers into the wrap later.
Rnd 1: Ch 6, sl st to the first ch to form a ring. Ch 3 (counts as dc), work 15 dc into the ring, sl st to the top of the beginning ch-3. (16 dc)
The ring stays open and forms the eyelet in the middle of the wing. Don’t pull the starting tail tight.
Rnd 2: Ch 3 (counts as dc), dc in the same st, 2 dc in each st around, sl st to the top of the beginning ch-3. (32 dc)
Checkpoint: the wing should lie flat and measure 1.5 in (3.8 cm) across. Don’t fasten off. Go straight on to the wing border in the Border section.
Tails (make 2)
Each tail is worked around both sides of one foundation chain. Treble crochets in the middle make it widest there, shorter stitches taper the ends, and the ch-1 spaces form the mesh windows.
Foundation: Ch 26 (25 working chains plus 1 turning chain).
Rnd 1, side 1: Sc in the 2nd ch from the hook, hdc in the next ch, [ch 1, sk next ch, dc in next ch] 3 times, [ch 1, sk next ch, tr in next ch] 5 times, [ch 1, sk next ch, dc in next ch] 2 times, ch 1, sk next ch, hdc in next ch.
Point: Work (sc, ch 3, sc) in the last ch.
Side 2: Rotate and work into the free loops on the other side of the chain, using the same chains as side 1. Hdc in the ch holding the side-1 hdc, [ch 1, sk next ch, dc in next ch] 2 times, [ch 1, sk next ch, tr in next ch] 5 times, [ch 1, sk next ch, dc in next ch] 3 times, ch 1, sk next ch, hdc in next ch, sc in the last ch (the same ch as the first sc). Sl st to the first sc.
Count: each side has 13 sts (sc or hdc, 10 tall sts, hdc) and 11 ch-1 sps. The point has 2 sc and 1 ch-3 sp. (28 sts, 22 ch-1 sps, 1 ch-3 sp)
Chain check: side 1 uses 24 chains and the point uses the 25th, so all 25 working chains are used. The sc end is the narrow top of the tail and the ch-3 end is the pointed tip.
Checkpoint: 3 in (7.6 cm) long and 0.9 in (2.3 cm) wide across the tr section. Don’t fasten off. Go straight on to the tail border.
Center Wrap (make 1)
Ch 7.
Row 1: Sc in the 2nd ch from the hook and in each ch across. (6 sc)
Rows 2–12: Ch 1, turn, sc blo in each st across. (6 sc per row)
Working in the back loop only creates the raised ridges seen on the wrap. Fasten off and leave an 8 in (20.3 cm) tail for sewing. Checkpoint: 1.5 in (3.8 cm) long x 0.6 in (1.5 cm) wide.
Hanging Cord (make 1)
Ch 36. Sl st in the back bump of the 2nd ch from the hook and in each ch across. (35 sl st)
Fasten off and leave a 6 in (15.2 cm) tail. The cord should measure about 4.5 in (11.4 cm). Folded in half, that gives a 2 in (5.1 cm) loop, plus 0.25 in (0.6 cm) at each end to tuck under the wrap.
Border
The border is the scalloped edge on each wing and the firm sc outline on each tail. Work it straight after the last round of each piece.
Border gauge: one scallop covers 4 stitches of the round below and should stand about 0.375 in (1.0 cm) proud of Rnd 2.
Wing Border (Rnd 3)
Rnd 3: Ch 1, sc in the same st as the join, sk 1 st, scallop (5 dc) in the next st, sk 1 st. Sc in the next st, sk 1 st, scallop in the next st, sk 1 st; repeat from * 4 more times (6 scallops total). Sc in each of the last 8 sts. Sl st to the first sc. Fasten off and leave a 6 in (15.2 cm) tail.
Count: 6 sc and 30 dc in the scalloped section, plus 8 sc in the plain section. (44 sts)
Why the math works: Rnd 2 has 32 sts. Six scallop repeats of 4 sts each use 24 sts, and the remaining 8 sts get 1 sc each: 24 + 8 = 32, so the round closes exactly. The scallops cover three-quarters of the circle, which becomes the outer edge of the wing. The 8 plain sc form the inner edge, which you pinch into the wrap. Keeping that edge flat stops bulky shells from bunching in the middle.
Tail Border (Rnd 2)
Rnd 2: Ch 1. Along side 1, sc in each st and 1 sc in each ch-1 sp (24 sc). At the point, sc in the first point sc, work (2 sc, ch 2, 2 sc) in the ch-3 sp, then sc in the second point sc (6 sc and 1 ch-2 sp). Along side 2, sc in each st and 1 sc in each ch-1 sp (24 sc). Sl st to the first sc. Fasten off and leave an 8 in (20.3 cm) tail.
Count: 28 sc worked one per existing stitch, plus 22 sc in the ch-1 spaces, plus 4 sc in the point space. (54 sc, 1 ch-2 sp)
Why the math works: each side has 13 sts and 11 spaces, so it gets 24 sc. The point gets 6 sc: 24 + 6 + 24 = 54. Because the sc are worked into the spaces rather than over them, the windows stay open. The ch-2 at the point keeps the tip sharp instead of rounded.
Assemble the Bow
- Pinch the wings: using the wing’s yarn tail, run a gathering stitch through the 8 plain sc on each wing and pull until that edge measures about 0.5 in (1.3 cm). Knot it, but don’t cut the tail yet.
- Place the wings: lay the wings right side up with their gathered edges touching at the center, overlapping about 0.25 in (0.6 cm). Tack them together with two or three stitches.
- Add the tails: put both tails behind the wings with their narrow sc tops at the center, one over the other. Angle them down and outward so the tips sit about 2.5 in (6.4 cm) apart. Tack them to the back of the wings.
- Wrap the center: lay the wrap across the front of the gathered center with its ridges running across the bow, and bring both short ends to the back.
- Insert the cord: fold the cord in half and lay both ends upright under the back of the wrap, with 0.25 in (0.6 cm) inside.
- Close the wrap: sew the short ends of the wrap together at the back, catching the cord ends, both wing centers and both tail tops in the seam. Pull it snug.
Size checkpoint: two 2.25 in (5.7 cm) wings with 0.5 in (1.3 cm) lost to gathering and overlap give 2.25 + 2.25 − 0.5 = 4 in (10.2 cm) wide.
Final Blocking
- Weave in all remaining tails along the backs of the stitches, keeping them out of the eyelets and mesh windows.
- Spray the whole bow until it is evenly damp but not dripping.
- Lay it face up on the blocking mat. Pin the wings out to their round shape, putting one pin in the tip of each scallop.
- Pin each tail straight and flat with a pin in the point and one at each side of the tr section, so the mesh windows open evenly.
- Check the measurements: 4 in (10.2 cm) wide and 4.25 in (10.8 cm) tall.
- Optional: mist lightly with fabric stiffener or starch for an ornament that holds its shape firmly.
- Let it dry completely, usually 6–12 hours, before unpinning.
Final Quality-Control Checklist
- Wing eyelets are open and centered.
- Each wing has exactly 6 even scallops along its outer curve.
- Each tail has 11 open windows on each side and a sharp point.
- Tails are the same length, angled symmetrically, and their tips sit at the same height.
- The wrap is snug, with its ridges horizontal and its seam hidden at the back.
- The loop is centered and both cord ends are secured inside the wrap.
- The bow measures 4 in (10.2 cm) x 4.25 in (10.8 cm), with a 2 in (5.1 cm) loop.
- No yarn tails show from the front.
Troubleshooting
Wing ruffles or cups: Rnd 2 is too loose or too tight. Check that you have exactly 32 dc, or change hook size by 0.25 mm.
Scallops don’t fit evenly: recount Rnd 2. The border only works on exactly 32 sts.
Tail twists: the foundation chain was twisted. Block it firmly, or remake it with a slightly looser chain.
Mesh windows close up: in the tail border, make sure you work sc into the ch-1 sps rather than over the chains into the stitches.
Tails are different lengths: chain tension changed between them. Block both to 3.25 in (8.3 cm), or remake the longer one.
Center looks bulky: pull the wing gathering tighter and trim any excess sewing yarn from inside the wrap.
Bow droops on the tree: add stiffener, or shorten the loop so the bow hangs closer to the branch.
Care
Hand wash in cool water with mild soap, press out the water in a towel, and reshape and pin to dry. Store flat or in a tissue-lined box so the scallops stay crisp.
Final Notes
Everything in this bow follows one measurement chain. Wing Rnd 1 at 0.75 in (1.9 cm) grows to 1.5 in (3.8 cm) at Rnd 2 and to 2.25 in (5.7 cm) with the scalloped border. Two gathered, overlapped wings give the 4 in (10.2 cm) width. Tails grow from 3 in (7.6 cm) to 3.25 in (8.3 cm) after edging and set the 4.25 in (10.8 cm) height. The 1.5 in (3.8 cm) wrap closes the middle, and the 4.5 in (11.4 cm) cord folds into a 2 in (5.1 cm) loop. If the first wing and tail hit their checkpoints, the rest of the bow will fit. Make one, then a few more in the same plum shade to fill your tree.
Happy crocheting!