

This little bell is a soft, vintage-style Christmas ornament. The body is cream cotton with rows of small eyelet holes. A gold scalloped hem runs around the bottom, a gold ball clapper peeks out underneath, and a cream bow with gold edging sits at the top below a gold hanging loop.
The palette is just two colors: warm cream and metallic gold. It looks good on a tree, tied to a gift, or hung in a window, and the eyelet holes catch the light from fairy lights behind it.
This pattern uses US crochet terms. The finished bell is 3.1 in (7.9 cm) tall and 3.8 in (9.7 cm) wide across the hem when flattened. With the hanging loop and clapper, the whole ornament is about 5.4 in (13.7 cm) tall.
The bell is worked top-down in joined rounds. You start at a small chain ring and alternate eyelet rounds with solid increase rounds, so the bell flares as it grows. A gold scallop border finishes the hem. The clapper, hanging cord, and bow are small separate parts that you sew on at the end.
Finished Size and Construction
- Finished bell size: 3.1 in (7.9 cm) tall x 3.8 in (9.7 cm) wide at the hem, measured flat
- Overall height with loop and clapper: about 5.4 in (13.7 cm)
- Skill level: Easy-Intermediate
- Terminology: US crochet terms
- Yarn weight: Sport (#2) cotton, plus a sport-weight metallic or gold cotton
- Hook: 2.75 mm (US C/2)
- Number of pieces: 1 ornament, made from 6 small parts (bell, clapper, hanging cord, bow wing, bow tails, center wrap)
- Layout: Single 3D bell; no blocks to join
- Bell size before border: 2.6 in (6.6 cm) tall x 3.3 in (8.4 cm) wide at the hem, flat
- Border depth: 0.5 in (1.3 cm), 2 rounds
Materials
Use a smooth, mercerized cotton if you can. It shows the eyelets clearly, holds its bell shape, and takes stiffener well. For the gold, a metallic-blend sport yarn or a gold cotton gives a corded, shiny edge.
- Cream (MC): 10 g, about 31 m
- Gold (CC): 6 g, about 18 m
These quantities include a margin of about 20% for gauge checking and tails.
Tools:
- 2.75 mm (US C/2) crochet hook
- Tapestry needle
- 1 stitch marker
- Scissors
- A small pinch of fiberfill (for the clapper)
- Optional: fabric stiffener or starch, plus a small cone, egg cup, or plastic shot glass to block over
Abbreviations (US Terms)
- ch – chain
- sl st – slip stitch
- sc – single crochet
- dc – double crochet
- sc2tog – single crochet 2 together
- sk – skip
- sp – space
- st(s) – stitch(es)
- MR – magic ring
- RS – right side
Special stitch: Shell – 5 dc worked into the same stitch.
Counting note: On solid increase rounds, every dc and every ch-1 sp from the round before counts as one stitch.
Gauge and Checkpoints
Gauge: 24 dc x 12 rounds = 4 in (10.2 cm) in cream, worked in the round. In sc, 26 sts x 28 rows = 4 in (10.2 cm).
This is a small project, so the bell itself is your test piece. Work through Round 3 and measure before you go on.
- After Round 1: The ring lies flat and is about 0.8 in (2.0 cm) across, with a center opening of about 0.4 in (1.0 cm).
- After Round 3: The tube is 1.3 in (3.3 cm) wide flat and 0.9 in (2.3 cm) tall.
- After Round 5: The bell is 2.0 in (5.1 cm) wide flat at the bottom edge and 1.6 in (4.1 cm) tall.
- After Round 8: The bell is 3.3 in (8.4 cm) wide flat at the hem and 2.6 in (6.6 cm) tall.
If the bell is too big, switch to a 2.5 mm hook. If it is too small or stiff, switch to a 3.0 mm hook. The stitch counts stay the same either way. Only the size changes.
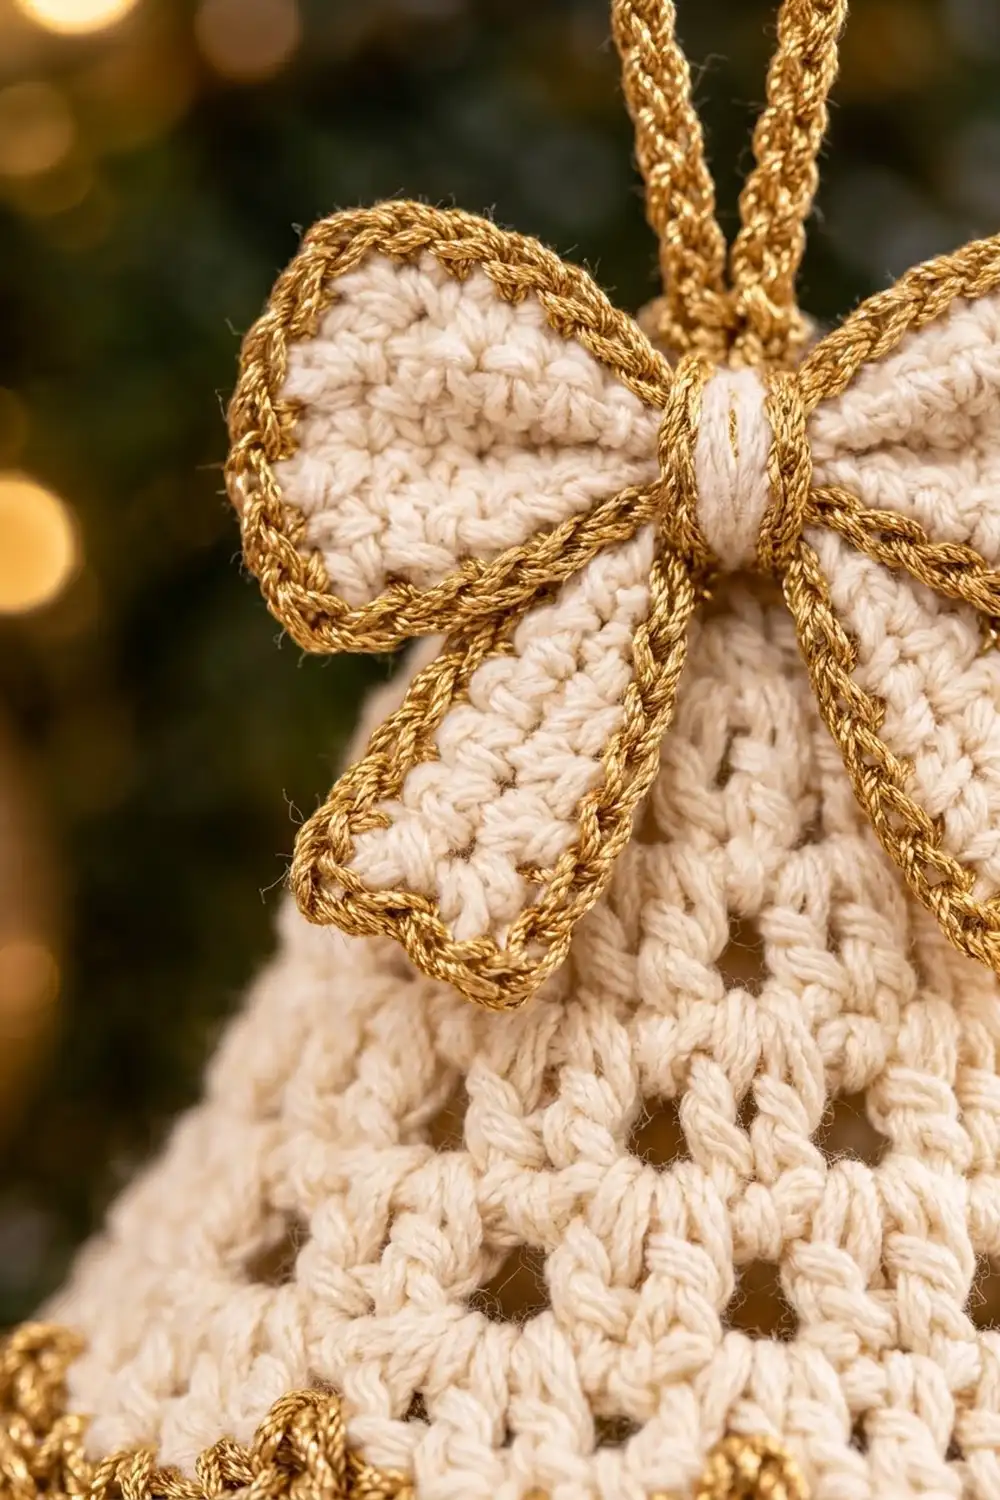
Bell Body
Work in joined rounds with RS facing. Do not turn. The beginning ch-3 counts as a dc throughout.
Foundation: With cream, ch 8. Sl st to the first ch to form a ring.
Round 1: Ch 1, work 16 sc into the ring. Sl st to the first sc to join. (16 sc)
This ring is the open top of the bell.
Round 2: Ch 3, dc in each remaining st around. Join with a sl st to the top of the beg ch-3. (16 dc)
This round has no increases, so the top of the bell rises straight up.
Round 3 (eyelet): Ch 4 (counts as dc + ch 1), sk next st, dc in next st, ch 1, sk next st; repeat from * 7 more times. Join with a sl st to the 3rd ch of the beg ch-4. (8 dc + 8 ch-1 sps = 16 sts; 8 eyelets)*
Round 4 (solid increase): Ch 3, 2 dc in next ch-1 sp, dc in next dc, 2 dc in next ch-1 sp; repeat from * 6 more times. Join. (24 dc)*
Count check: 16 sts worked 1 each + 8 extra = 24.
Round 5 (eyelet): Ch 4, sk next st, dc in next st, ch 1, sk next st; repeat from * 10 more times. Join to the 3rd ch of the beg ch-4. (12 dc + 12 ch-1 sps = 24 sts; 12 eyelets)*
Round 6 (solid increase): Ch 3, dc in next st, 2 dc in next st, dc in next 2 sts, 2 dc in next st; repeat from * 6 more times. Join. (32 dc)*
Count check: 24 sts worked 1 each + 8 extra = 32.
Round 7 (eyelet): Ch 4, sk next st, dc in next st, ch 1, sk next st; repeat from * 14 more times. Join to the 3rd ch of the beg ch-4. (16 dc + 16 ch-1 sps = 32 sts; 16 eyelets)*
Round 8 (solid increase): Ch 3, dc in next 2 sts, 2 dc in next st, dc in next 3 sts, 2 dc in next st; repeat from * 6 more times. Join. (40 dc)*
Count check: 32 sts worked 1 each + 8 extra = 40.
Fasten off cream and weave in the ends. Each eyelet round has 4 more holes than the one before (8, 12, 16), so the eyelets spread out as the bell flares. Check your work against the Round 8 checkpoint now.
Clapper Ball
With gold:
Round 1: MR, 6 sc in ring. Do not join. Place a marker and move it up each round. (6)
Round 2: 2 sc in each st around. (12)
Rounds 3–4: Sc in each st around. (12)
Push the MR tail inside and stuff firmly with a small pinch of fiberfill.
Round 5: Sc2tog 6 times. (6)
Round 6: Sc2tog 3 times. (3)
Do not fasten off. Ch 16 for the clapper cord, about 2.7 in (6.9 cm). Fasten off, leaving a 6 in (15.2 cm) tail. The ball is about 0.6 in (1.5 cm) across.
Hanging Cord
With gold: Ch 25. Sl st in 2nd ch from hook and in each ch across. (24 sl st)
Fasten off, leaving an 8 in (20.3 cm) tail. The cord is about 4.0 in (10.2 cm) long. Folded in half, it makes a loop about 2.0 in (5.1 cm) tall. Working sl sts back along the chain gives the cord a firm, rope-like look.
Bow
The bow has three flat parts stacked on top of each other: a wide wing piece in front, a narrower tail piece behind it, and a center wrap that cinches them together.
Wing Piece
With cream: Ch 15.
Row 1: Sc in 2nd ch from hook and in each ch across. Turn. (14)
Rows 2–7: Ch 1, sc in each st across. Turn. (14)
The piece is 2.2 in (5.6 cm) x 1.0 in (2.5 cm). Fasten off cream.
Gold edging: With RS facing, join gold in the first st of Row 7. Ch 1, 3 sc in the same st (corner), sc in next 12 sts, 3 sc in last st (corner). Working down the row ends, sc in the ends of the next 5 rows. Working along the foundation ch, 3 sc in the first ch (corner), sc in next 12 ch, 3 sc in last ch (corner). Sc in the ends of the next 5 rows. Join to the first sc. (46 sc)
Count check: 4 corners x 3 sc = 12, plus 2 long sides x 12 = 24, plus 2 short sides x 5 = 10, for a total of 46. Each short side has 7 row ends: 1 corner row at each end plus 5 rows between them.
The edged wing is 2.4 in (6.1 cm) x 1.3 in (3.3 cm). Fasten off and weave in the ends.
Tail Piece
With cream: Ch 13.
Row 1: Sc in 2nd ch from hook and in each ch across. Turn. (12)
Rows 2–4: Ch 1, sc in each st across. Turn. (12)
The piece is 1.8 in (4.6 cm) x 0.6 in (1.5 cm). Fasten off cream.
Gold edging: Work it the same way as the wing piece edging, with 10 sc along each long side between the corners and 2 sc along each short side. (36 sc: 12 corner + 20 long side + 4 short side)
The edged tail piece is 2.1 in (5.3 cm) x 0.9 in (2.3 cm).
Center Wrap
With cream: Ch 9.
Row 1: Sc in 2nd ch from hook and in each ch across. Turn. (8)
Row 2: Ch 1, sc in each st across. (8)
Fasten off, leaving a 6 in (15.2 cm) tail. The strip is 1.2 in (3.0 cm) x 0.3 in (0.8 cm).
Shape the Bow
- Pinch the wing piece across its center, folding it into 2 or 3 small pleats so the two halves puff out into rounded triangles.
- Pinch the tail piece the same way. Angle its two ends downward to make an upside-down V.
- Lay the wing piece on top of the tail piece with the pinched centers lined up.
- Wrap the center strip tightly around both centers and sew its ends together at the back. Use the leftover tail to tack the layers together through the center.
Border
Border gauge: Border Round 1 has 1 sc in each st, so it keeps the 40-st count and the same width as Round 8. Each shell puts 5 dc over 3 sts of the round below, which makes the hem ruffle outward.
Border Round 1: With RS facing, join gold in any st of Round 8. Ch 1, sc in the same st and in each st around. Join to the first sc. (40 sc)
Border Round 2 (scallops): Ch 1, sc in the first st, sk next st, shell in next st, sk next st, sc in next st, sk next st, shell in next st, sk next st; repeat from * 8 more times. Join to the first sc. (10 shells; 10 sc + 50 dc = 60 sts)*
Why the math works: Each repeat uses exactly 4 base stitches (sc, sk, shell, sk). 40 ÷ 4 = 10, so you get 10 full scallops with no leftover stitches and no half-scallop at the join. About 5 scallops show across the front of the bell.
Fasten off and weave in the ends. The border adds 0.5 in (1.3 cm), so the bell is now 3.1 in (7.9 cm) tall and 3.8 in (9.7 cm) wide across the scallops when flattened.
Final Blocking
- Weave in all remaining ends on the bell. Leave the clapper cord tail and the hanging cord tail loose.
- Dampen the bell, or brush it with fabric stiffener thinned as the bottle directs.
- Slide the bell over a small cone, egg cup, or shot glass about 2.1 in (5.3 cm) across at the base. Smooth Round 2 so it stands straight and let the lower rounds flare.
- Pull each scallop out gently, and pin it if needed so all 10 sit evenly.
- Press the bow flat and let it dry. If you want crisp wings, stiffen the wing tips lightly.
- Let everything dry completely, ideally overnight.
- Clapper: Thread the clapper cord tail up through the inside of the bell and out through the top ring. Adjust it until the ball hangs about 0.3 in (0.8 cm) below the scallops, then secure the tail around Round 1.
- Hanging loop: Fold the cord in half. Sew both ends to the top of Round 1, catching the clapper tail as you go.
- Bow: Sew the bow to the front of the bell, centered over Rounds 1–3, with the top of the wings just below the base of the loop.
Final Quality-Control Checklist
- The top ring has 16 sc, and Round 2 stands straight
- The eyelet rounds have 8, 12, and 16 holes, with no missing chain spaces
- Round 8 has exactly 40 dc and there is no ruffling before the border
- There are 10 even gold scallops with no gap at the join
- The clapper is round and firm and hangs just below the hem
- The bow is centered, both wings are the same size, and the tails form a clean V
- The hanging loop is about 2.0 in (5.1 cm) tall and firmly attached
- All ends are woven in, and none show through the eyelets
Troubleshooting
The bell curls inward at the hem. Your increase rounds are too tight. Go up a hook size for Rounds 6 and 8, or check that you made all 8 increases.
The hem ruffles before the border. You added too many stitches. Count Round 8 again. It should be exactly 40.
The scallops crowd together. You probably missed a skip. Each repeat must use 4 base sts.
The eyelets are hard to see. Keep each ch-1 loose, and block over a form to open the holes.
The clapper hangs inside the bell. Let out more cord before you secure it, or add 2 ch to the cord.
The bow wings flop. Pleat them more tightly at the center and stiffen them lightly.
Care
Hand wash in cool water, lay flat to dry, then reshape over a form. If you used stiffener, stiffen again after washing.
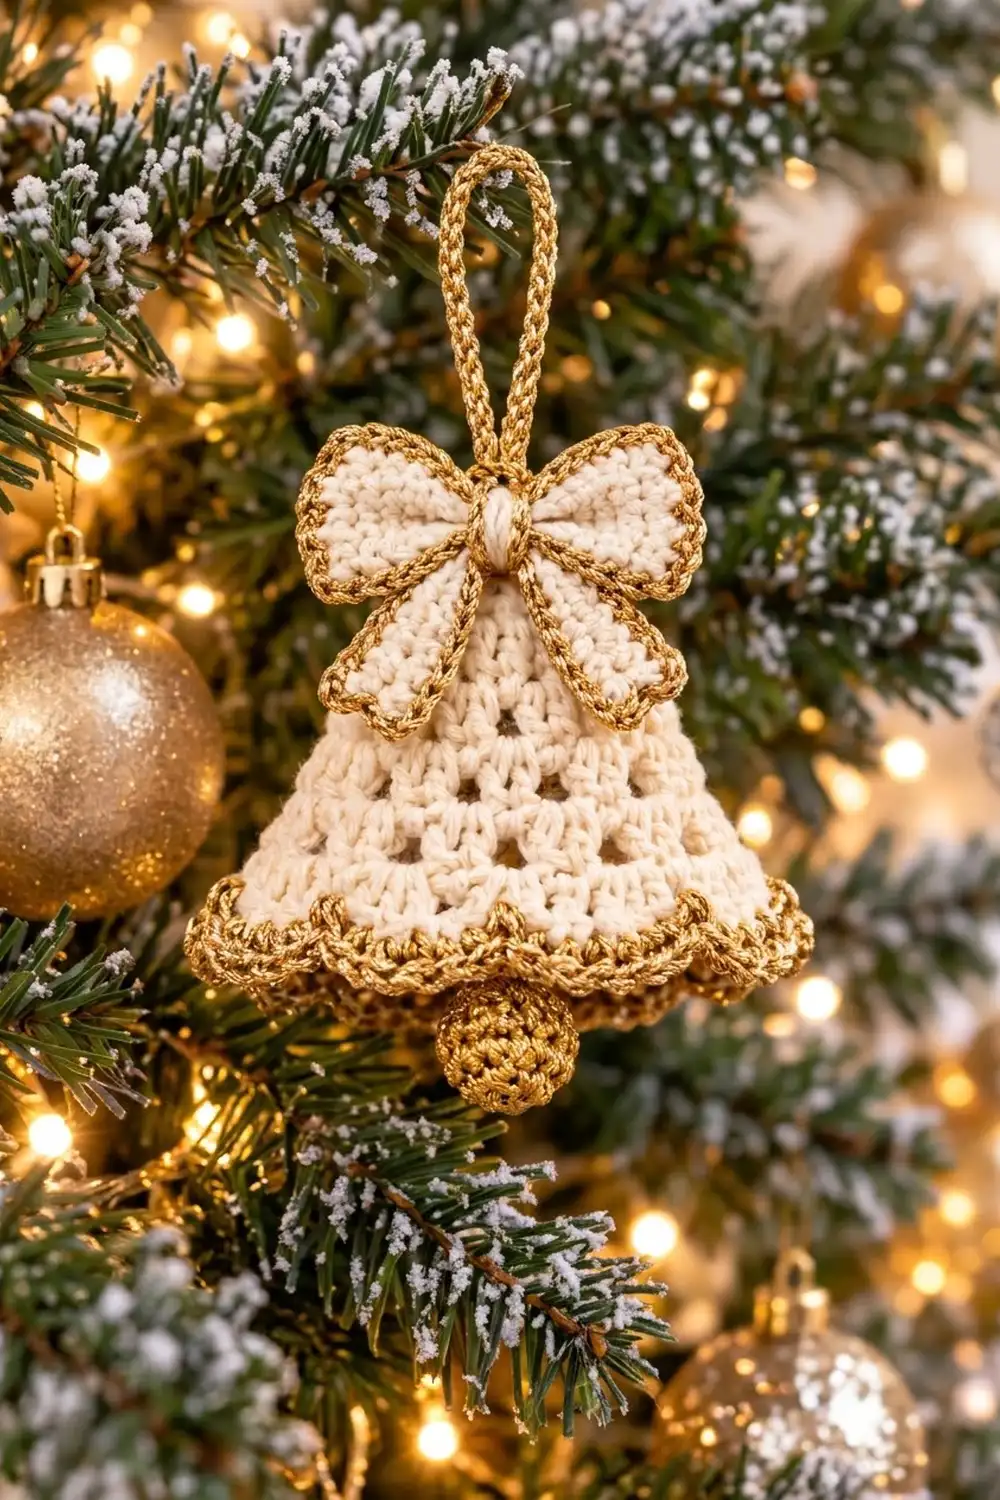
Final Notes
The measurements build in a clear chain. The 16-st top ring grows to 24, 32, and then 40 sts, giving a bell 2.6 in (6.6 cm) tall and 3.3 in (8.4 cm) wide. The 40-st hem divides exactly into 10 scallops, which bring the bell to 3.1 in (7.9 cm) x 3.8 in (9.7 cm). The clapper, loop, and layered bow finish the ornament at about 5.4 in (13.7 cm) tall.
If your piece matches each checkpoint, the finished bell will match too. Make one, then make a set for the whole tree.
Happy crocheting!