

The Rosewood Diamond Bedspread is a classic heirloom-style coverlet made from textured square motifs. Each square holds a raised, ribbed diamond set on point, with lacy openwork triangles in the corners. When the squares are joined, the diamonds line up into a tiled pattern across the bed.
The design uses one color, a soft dusty rose, so the texture is the main feature. The raised rings catch the light, and the open corners add some lace without making the bedspread fragile. It works well in a romantic, vintage, or cottage-style bedroom.
The pattern uses US crochet terms. Each motif measures 8.75 in (22.2 cm) square. The finished bedspread, including the border, measures 72 x 89.5 in (182.9 x 227.3 cm), which drapes nicely over a full or queen bed.
Construction is simple and repeatable. You first work the diamond center in the round. Then you add four corner triangles in rows, one at a time, and finish each motif with two edge rounds. Finally, you slip stitch 80 motifs together and work a three-round border.
Finished Size and Construction
- Finished size: 72 x 89.5 in (182.9 x 227.3 cm) including border
- Skill level: Intermediate
- Terminology: US crochet terms
- Yarn weight: Worsted (#4) cotton or cotton blend
- Hook: US H-8 (5.0 mm)
- Number of pieces: 80 identical motifs
- Layout: 8 motifs wide x 10 motifs long
- Motif size: 8.75 in (22.2 cm) square
- Size before border: 70 x 87.5 in (177.8 x 222.3 cm)
- Border depth: 1 in (2.5 cm)
Materials
Yarn: Choose a smooth, tightly plied worsted cotton or cotton-acrylic blend, about 180 m (197 yd) per 100 g. Cotton shows the ribbed diamond clearly and blocks crisply. Avoid fuzzy or loosely spun yarns, which blur the texture and make the small mesh holes close up.
- Dusty Rose: 2,400 g, about 4,320 m (24 balls of 100 g / 180 m)
- Each motif uses about 22 g (about 40 m).
- Joining uses about 150 g, and the border about 120 g.
Quantities include a margin of roughly 15% for gauge differences and swatching. Buy all the yarn from a single dye lot.
Tools:
– US H-8 (5.0 mm) crochet hook
– US I-9 (5.5 mm) hook (optional, for joining)
– Yarn needle
– Scissors
– Stitch markers
– Measuring tape
– Blocking mats and rust-proof pins
– Spray bottle
Abbreviations (US Terms)
- ch – chain
- sl st – slip stitch
- sc – single crochet
- dc – double crochet
- sp – space
- sk – skip
- st(s) – stitch(es)
- RS / WS – right side / wrong side
- FPdc – front post double crochet: yarn over, insert hook from front to back to front around the post of the stitch, and complete a dc.
- dc2tog – double crochet 2 together: yarn over, insert hook in next st, pull up a loop, yarn over, pull through 2 loops; repeat from * once, then yarn over and pull through all 3 loops on hook.
- dc3tog / dc5tog – worked like dc2tog, but over 3 or 5 sts (pull through 4 or 6 loops at the end).
- Beg dec (beginning decrease) – sl st in first st, ch 2 (does not count as a st), dc2tog over next 2 sts. This uses 3 sts and makes 1 st.
- End dec (end decrease) – dc3tog over last 3 sts. This uses 3 sts and makes 1 st.
Gauge and Checkpoints
Gauge:
– 14 dc = 4 in (10.2 cm)
– 16 sc = 4 in (10.2 cm)
– 1 dc row is about 0.5 in (1.3 cm) tall
Make one full motif before you start the rest, and block it lightly. It is the most reliable gauge swatch for this project.
Checkpoints for one motif:
– After Round 1: about 1.25 in (3.2 cm) across
– After Round 3: about 3.5 in (8.9 cm) per side
– After Round 5: about 5.75 in (14.6 cm) per side, or about 8 in (20.3 cm) from point to point
– After the triangles: about 8 in (20.3 cm) square
– After Edge Round 1: 8.25 in (21.0 cm) square
– After Edge Round 2: 8.75 in (22.2 cm) square
If your motif is too big, go down one hook size. If it is too small, go up one hook size.
Size matters a lot here. A difference of just 0.25 in (0.6 cm) per motif adds up to 2.5 in (6.4 cm) over the 10-motif length.
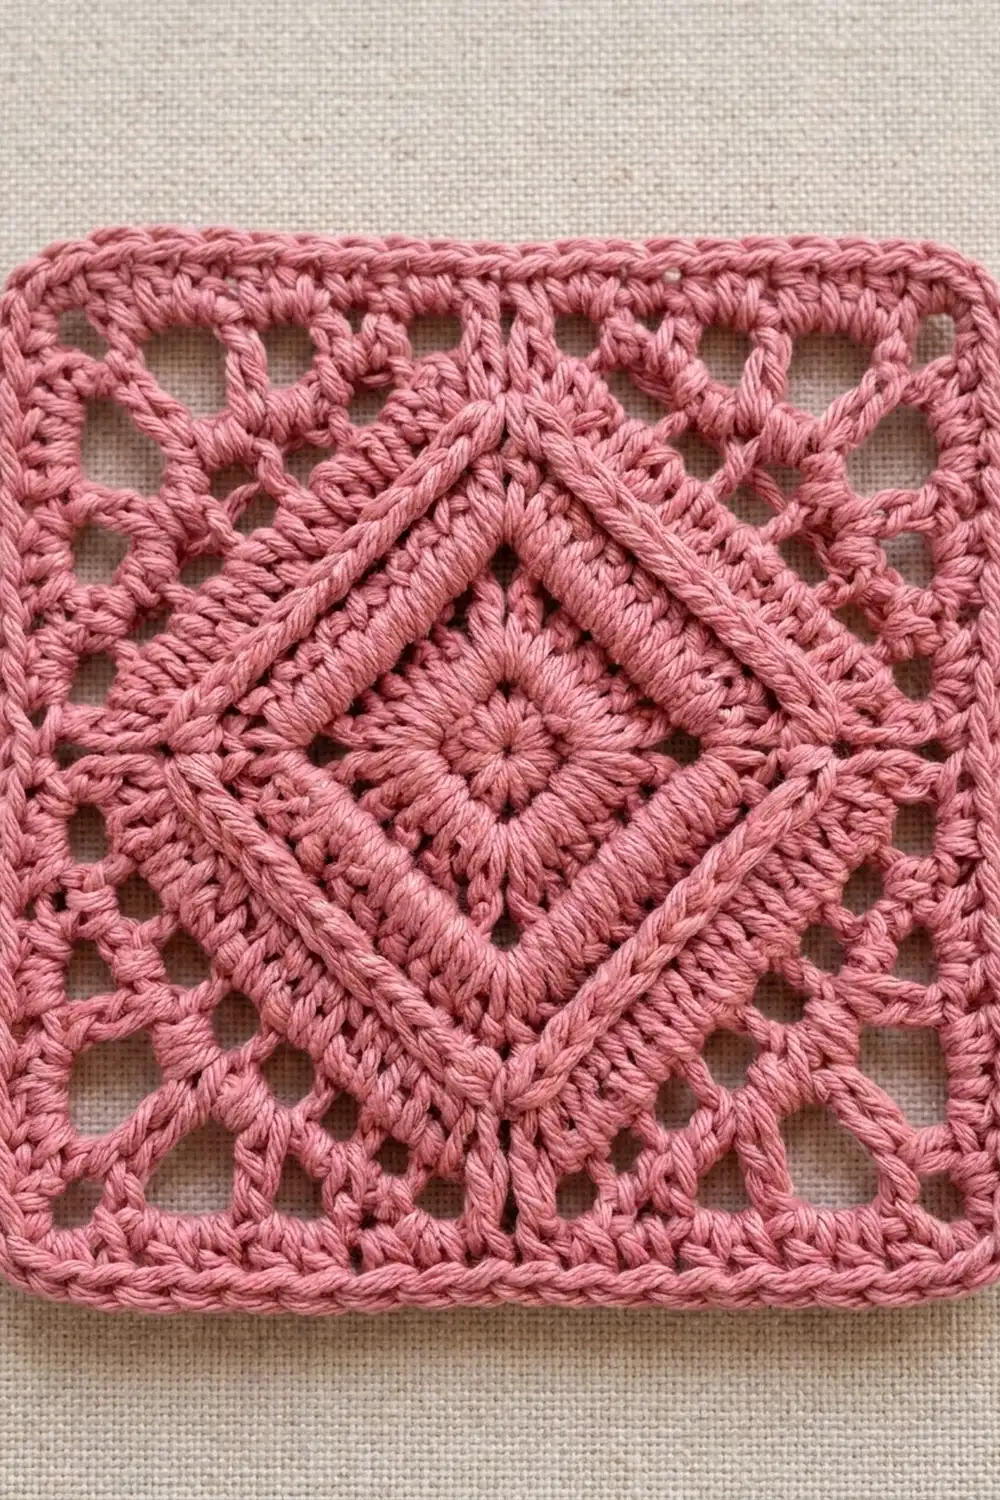
Motif Part 1: Diamond Center
Work in rounds with the RS facing throughout. The ch-2 corner spaces form the fine lines that run out to the diamond’s tips.
Round 1: Make a magic ring. Ch 3 (counts as dc), 2 dc in ring, ch 2, 3 dc in ring, ch 2; repeat from * 2 more times. Sl st to top of the beginning ch-3. Pull the ring closed, but leave a small open center.
(12 dc, 4 ch-2 sps; 3 dc per side)
Round 2: Sl st in next 2 dc and into the corner sp. Ch 3 (counts as dc), then (dc, ch 2, 2 dc) in the same sp. FPdc around each of next 3 dc, (2 dc, ch 2, 2 dc) in next corner sp; repeat from * 2 more times. FPdc around each of last 3 dc, and sl st to top of the ch-3.
(28 sts; 7 per side: 2 corner dc + 3 FPdc + 2 corner dc)
Round 3: Sl st in next dc and into the corner sp. Ch 3, then (dc, ch 2, 2 dc) in the same sp. Dc in each of next 7 sts, (2 dc, ch 2, 2 dc) in next corner sp; repeat from * 2 more times. Dc in each of last 7 sts, and sl st to join.
(44 sts; 11 per side)
Round 4: Work as Round 2, but with FPdc around each of the 11 side sts.
(60 sts; 15 per side)
Round 5: Work as Round 3, with dc in each of the 15 side sts. Fasten off.
(76 dc; 19 per side, 4 ch-2 corner sps)
The FPdc rounds (2 and 4) stand up as raised rings, and the plain dc rounds (3 and 5) sit between them. Together they make the ribbed look of the diamond.
Motif Part 2: Lacy Corner Triangles
Now turn the diamond on point. Each of its four sides becomes the long edge of one corner triangle. Work each triangle in rows, and turn at the end of every row.
Each row loses 2 sts at each end, which keeps the triangle’s sides at a true 45-degree angle. Count each ch-1 as 1 st.
Row 1 (RS): Join yarn in a corner ch-2 sp. Ch 3 (counts as dc), dc in each of next 19 dc, then dc in next corner ch-2 sp. Turn.
(21 sts)
Row 2 (WS): Beg dec, ch 1, sk next st, dc in next st. Ch 1, sk next st, dc in next st; repeat from * 5 more times. Ch 1, sk next st, end dec. Turn.
(17 sts: 9 dc-type sts + 8 ch-1 sps)
Row 3 (RS): Sl st in first st, ch 2 (does not count), and dc2tog over the next ch-1 sp and the next dc. Dc in each of the next 11 sts and sps, then end dec over the last dc, ch-1 sp, and st. Turn.
(13 sts)
Row 4 (WS): Beg dec, ch 3, sk next 3 sts, dc in next st, ch 3, sk next 3 sts, end dec. Turn.
(9 sts: 3 dc-type sts + 2 ch-3 sps; this row makes the large oval holes)
Row 5 (RS): Sl st in first st and into the next ch-3 sp. Ch 2 (does not count), then 2 dc in the same sp. Dc in next dc, 2 dc in next ch-3 sp, and leave the last st unworked. Turn.
(5 dc)
Row 6 (WS): Ch 1 (does not count), dc5tog over all 5 sts. Fasten off.
(1 st: the square corner)
Repeat Rows 1–6 on the other three sides of the diamond. Each diamond corner sp ends up holding one Row 1 dc from each of the two triangles beside it. The piece is now about 8 in (20.3 cm) square.
Motif Part 3: Edge Rounds
Edge Round 1 (RS): Join yarn in the top of any Row 6 tip. Ch 1, then (sc, ch 2, sc) in the same st to make the corner. Work 3 sc evenly in each of the next 5 row ends down to the diamond point (15 sc). Work 1 sc in the diamond corner sp between the two Row 1 dc. Work 3 sc in each of the 5 row ends of the next triangle (15 sc). Then work (sc, ch 2, sc) in the next tip; repeat from * around, ending with 15 sc on the last leg. Sl st to the first sc.
(132 sc; 33 per side: 1 corner sc + 15 + 1 + 15 + 1 corner sc)
Edge Round 2: Sl st into the corner sp. Ch 1, then (sc, ch 2, sc) in the same sp. Sc in each of next 33 sc, (sc, ch 2, sc) in next corner sp; repeat from * around, ending with sc in the last 33 sc. Sl st to join and fasten off.
(This conversion round is 33 sts worked 1 per st + 2 new corner sc = 35 sc per side; 140 sc total)
Check the count: 35 sc ÷ 4 sc per in = 8.75 in (22.2 cm). This matches the motif size.
Make All Pieces
Make 80 motifs in Dusty Rose, all identical. Weave in the ends on the WS, through the solid stitches rather than the mesh, so they don’t show through the holes.
Layout (8 wide x 10 long, M = motif):
M M M M M M M M
M M M M M M M M
M M M M M M M M
M M M M M M M M
M M M M M M M M
M M M M M M M M
M M M M M M M M
M M M M M M M M
M M M M M M M M
M M M M M M M M
Turn every motif the same way, so the stitch direction stays consistent across the bedspread.
Joining
Method: Slip stitch join with the WS of both motifs together. This leaves the slim raised seam visible on the front.
- Hold two motifs with WS together and edges lined up.
- Join yarn through both corner ch-2 sps together, and sl st.
- Sl st through the outer loop of each motif for every pair of matching sts, 35 pairs in all.
- Sl st through the next pair of corner sps.
- Work through stitches only, so there is a 1-to-1 match: 35 sts on one motif to 35 sts on the other.
First join the motifs into 10 strips of 8 along their short seams. Then join the strips along their long seams.
Where four corners meet, sl st through the corner sps together and carry on. Do not add any stitches at the seams.
Tension: Your sl sts must stretch as far as the motif edge does. If a seam puckers, switch to the I-9 (5.5 mm) hook for joining.
Checkpoint: One 8-motif strip should measure 70 in (177.8 cm). The joined bedspread should measure 70 x 87.5 in (177.8 x 222.3 cm).
Border
Border gauge: 16 sc = 4 in (10.2 cm), the same as the motif edge.
Border Round 1 (RS): Join yarn in any outer corner sp of the bedspread. Ch 1, then (sc, ch 2, sc) in the same sp. Sc in each sc along the side, and skip the joined corner sps at the seams. At each outer corner, work (sc, ch 2, sc). Sl st to join.
– Short sides: (8 x 35 = 280 sts worked 1 per st) + 2 corner sc = 282 sc
– Long sides: (10 x 35 = 350 sts worked 1 per st) + 2 corner sc = 352 sc
Border Round 2: Sl st into the corner sp. Ch 3 (counts as dc), then (ch 2, dc) in the same sp. Dc in each st along each side, and work (dc, ch 2, dc) in each corner sp. Sl st to join.
– Short sides: 282 + 2 = 284 dc
– Long sides: 352 + 2 = 354 dc
Border Round 3: Sl st into the corner sp. Ch 1, then (sc, ch 2, sc) in the same sp. Sc in each st along each side, and work (sc, ch 2, sc) in each corner. Sl st to join and fasten off.
– Short sides: 284 + 2 = 286 sc
– Long sides: 354 + 2 = 356 sc
Why the math works: Each motif side has exactly 35 sc, which already includes its own corner sc. So the border starts at 280 and 350 sts, with nothing added at the seams. At 4 sc per in, 280 sts = 70 in (177.8 cm) and 350 sts = 87.5 in (222.3 cm), which matches the joined size exactly.
The border adds only 2 sts per side per round, and only at the corners, so the edges stay flat. The border is 1 in (2.5 cm) deep: about 0.25 in (0.6 cm) for each sc round and 0.5 in (1.3 cm) for the dc round. That brings the finished size to 72 x 89.5 in (182.9 x 227.3 cm).
Final Blocking
- Lay the bedspread flat on blocking mats, a clean carpet, or a bed covered with towels. Block it in sections if you need to.
- Mist it evenly until it is damp, but not soaked.
- Pin the outer corners first, measuring 72 in (182.9 cm) across and 89.5 in (227.3 cm) down.
- Pin along the edges every 4 in (10.2 cm), and keep the seams straight.
- Gently open the oval holes and mesh in each corner triangle with your fingertips.
- Press the raised diamond rings flat with your palm, without stretching them.
- Let it dry completely before removing the pins.
Final Quality-Control Checklist
- All 80 motifs measure 8.75 in (22.2 cm) square, within 0.125 in (0.3 cm)
- Every motif has 35 sc per side
- The diamond tips meet the midpoint of each motif side
- Seams lie flat and stay continuous across the four-corner intersections
- Short sides of the border have 286 sts and long sides have 356 sts
- The finished size is 72 x 89.5 in (182.9 x 227.3 cm)
- All ends are woven in through solid stitches
Troubleshooting
- Diamond cups or ruffles: Your FPdc tension is uneven. Keep the post stitches the same height as a regular dc.
- Triangles too short to reach the corners: Your rows are short. Pull up a slightly taller first loop on each dc.
- Triangle corners pull in: You worked fewer than 3 sc per row end in Edge Round 1. Recount, so each leg has 15 sc.
- Motifs vary in size: Block each motif to 8.75 in (22.2 cm) before joining.
- Seams pucker: Join with the larger hook, and don’t pull each sl st tight.
- Border waves: Your count is too high. Check for extra stitches at the seam points.
Care
Hand wash or machine wash cold on a gentle cycle in a large mesh bag, then dry flat. Don’t hang it to dry, because the weight will stretch the motifs.
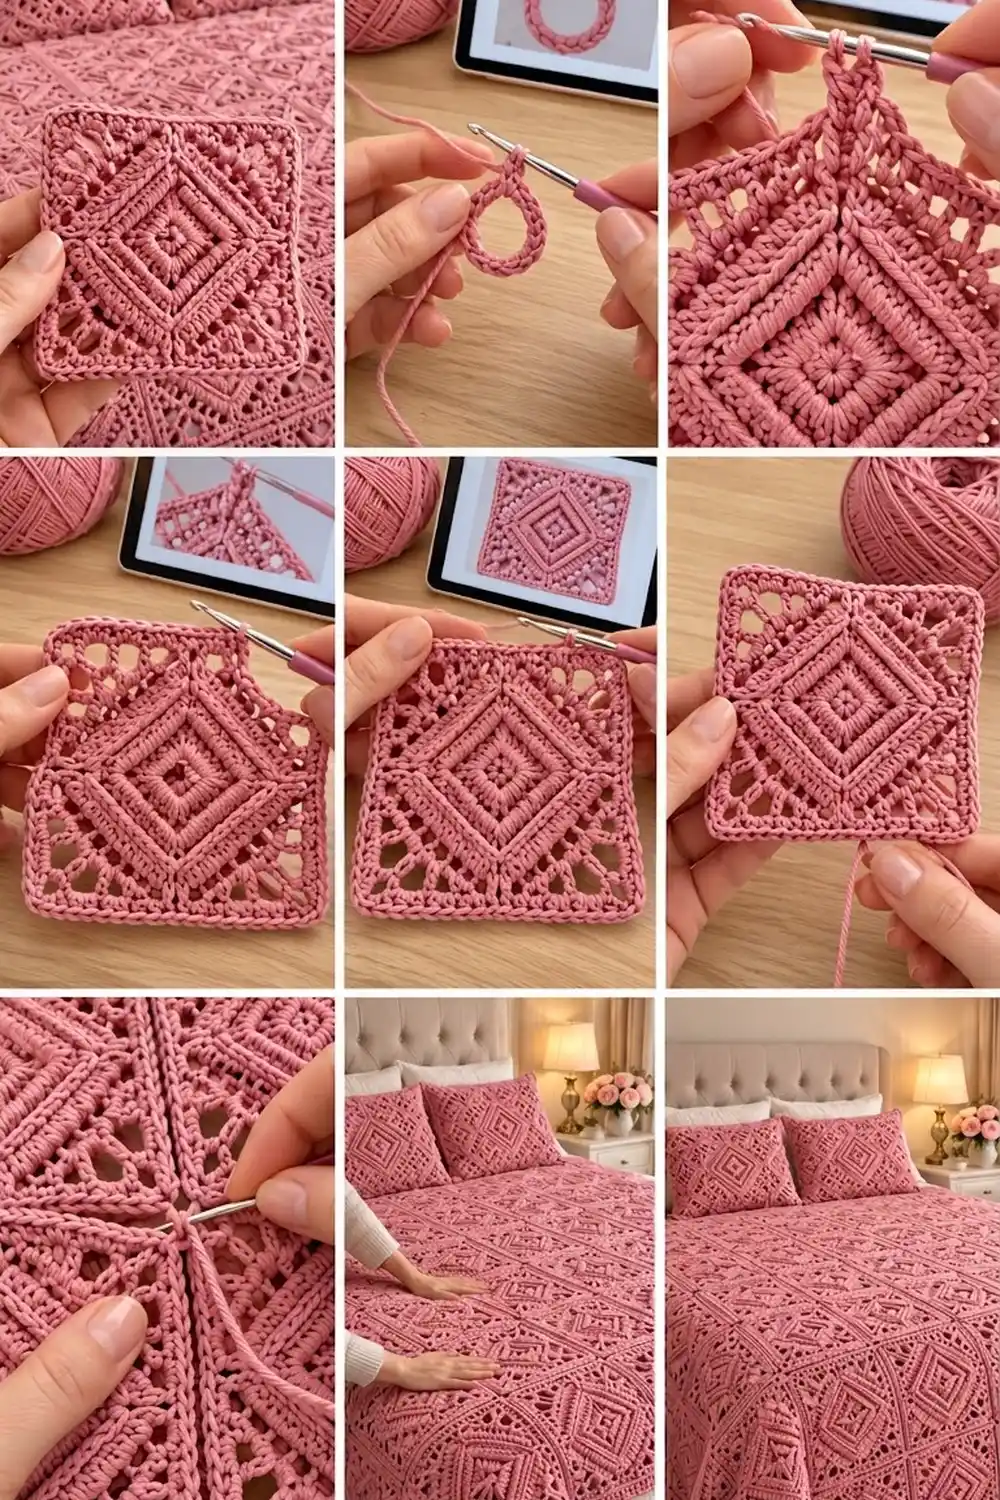
Final Notes
The size of the whole bedspread comes from one measurement chain. The diamond measures 5.75 in (14.6 cm) per side. The triangles bring the motif to 8 in (20.3 cm), and the edge rounds bring it to 8.75 in (22.2 cm) with 35 sc per side.
The joined layout of 8 x 10 motifs measures 70 x 87.5 in (177.8 x 222.3 cm). The 1 in (2.5 cm) border brings it to 72 x 89.5 in (182.9 x 227.3 cm). Check each link in the chain as you go, and the bedspread will lie flat and square.
Happy crocheting!