

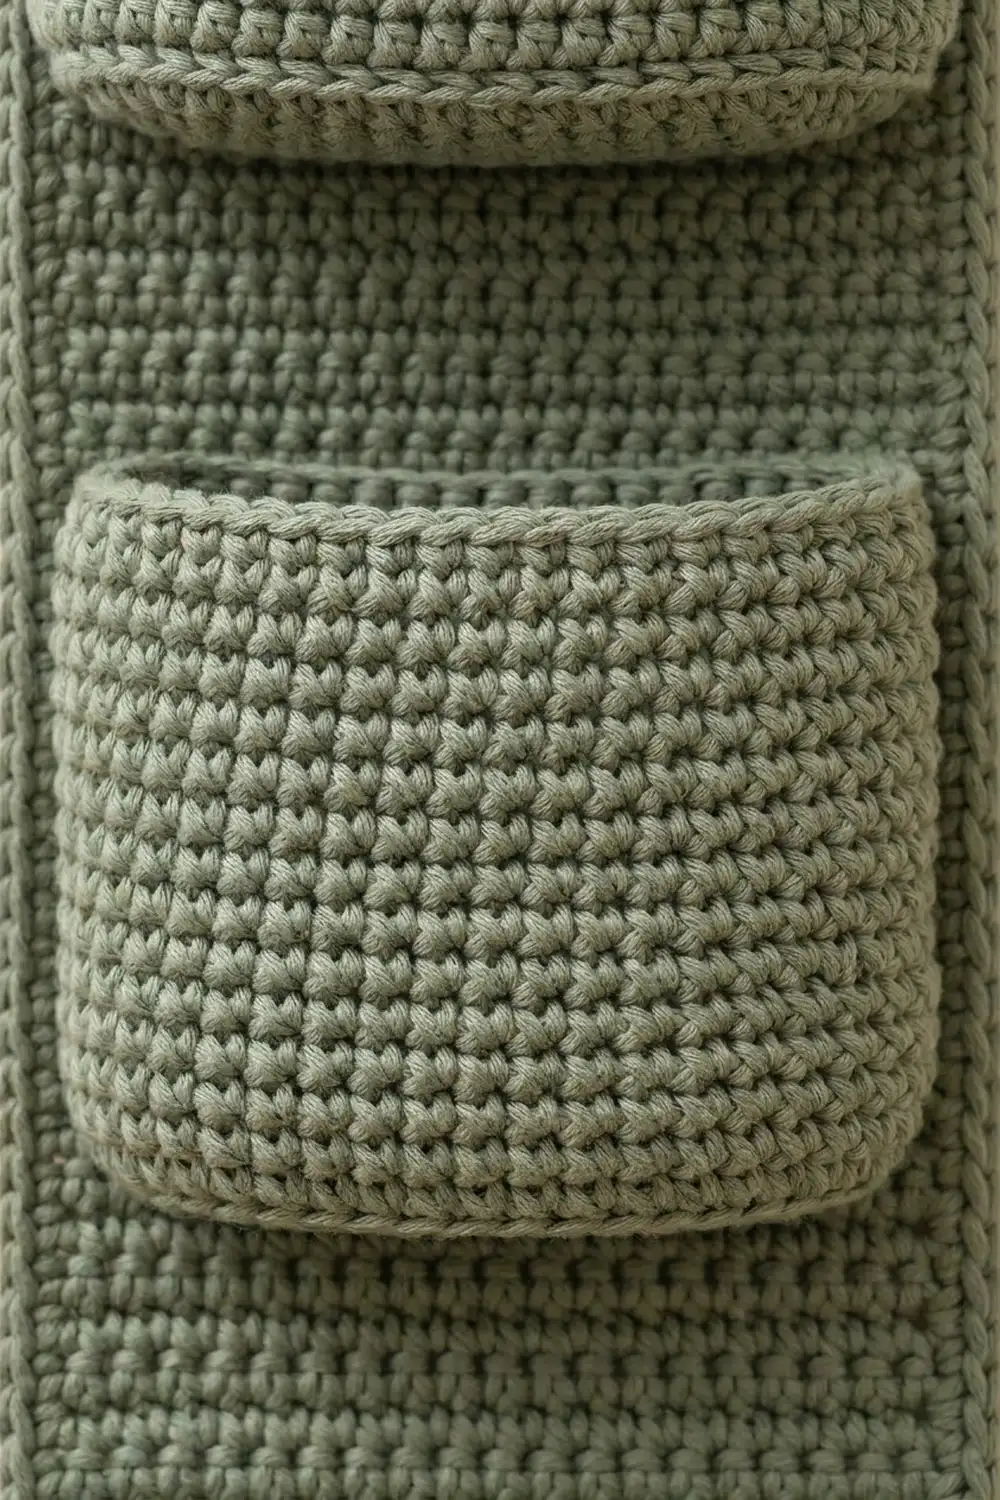
This hanging toilet paper holder is one long, solid backing panel with three open-top pockets stitched to its front. The top two pockets each hold a standard roll. They have a solid band at the bottom, a band of staggered open mesh in the middle, and a solid rim. The bottom pocket is solid all over and a little shorter, which makes it a good fit for a spare roll lying sideways, a rolled hand towel, or wipes.
The sample uses one color, a soft sage green cotton. The style is calm and modern, and the open mesh keeps the piece from looking heavy on the wall. Two tabs at the top fold over a towel bar or rod, so you don’t need hardware or drilling. The holder works well beside a toilet, on the back of a door, or on a narrow wall in a small bathroom.
The pattern uses US crochet terms. With the border on, the panel measures 9 x 23 in (22.9 x 58.4 cm), and the tabs add a hanging loop above that.
Construction overview: first you crochet the backing panel in sc rows, add a two-round sc border, and work two tabs off the top edge. Next you make three pockets. Each one starts with an oval base worked in rounds, and the walls are worked straight up from it. Last, you whipstitch each pocket’s back wall flat against the panel. Everything is plain sc except the dc mesh, so this makes a relaxing project.
Finished Size and Construction
- Finished panel size: 9 x 23 in (22.9 x 58.4 cm), not counting the tabs
- Skill level: Easy-Intermediate
- Terminology: US
- Yarn weight: Aran / heavy worsted (#4) cotton
- Hook: 5.5 mm (I-9)
- Number of pieces: 4 (1 panel with tabs, 2 mesh pockets, 1 solid pocket)
- Layout: pockets stacked in a single vertical column on the panel
- Panel size before border: 8 x 22 in (20.3 x 55.9 cm)
- Border depth: 0.5 in (1.3 cm) on each side
- Mesh pocket size: 8 in (20.3 cm) wide when flattened, with walls 4.5 in (11.4 cm) tall
- Solid pocket size: 8 in (20.3 cm) wide when flattened, with walls 3 in (7.6 cm) tall
Materials
Yarn: pick a smooth, firm cotton or cotton blend in Aran / heavy worsted weight. Cotton holds its shape when the pockets are loaded and doesn’t mind bathroom humidity. Stay away from very soft, stretchy, or splitty yarns, because the mesh will sag under the weight of a roll.
- Sage green: 175 g, approximately 300 yd (274 m)
That amount includes a margin of about 25% for your gauge swatch, tension differences, and sewing tails.
Tools:
- 5.5 mm (I-9) crochet hook
- Tapestry needle
- 4 to 6 locking stitch markers
- Rustproof pins
- Measuring tape
- Scissors
- A standard toilet paper roll for test-fitting
Abbreviations (US Terms)
- ch – chain
- sl st – slip stitch
- sc – single crochet
- dc – double crochet
- st(s) – stitch(es)
- sk – skip
- sp – space
- BLO – back loop only
- Rnd – round
- beg – beginning
Special stitch – mesh unit: one dc followed by ch 1. Each mesh unit counts as 2 sts, so a mesh round has the same stitch total as a solid round.
Gauge and Checkpoints
Gauge: 14 sc and 16 rows = 4 in (10.2 cm) in sc rows. In the mesh, one dc round is 0.5 in (1.3 cm) tall.
Make one mesh pocket before you start the panel. It’s a quick, honest swatch, and it confirms that a roll fits. If the pocket comes out right, the panel will too, because the two share the same 28-stitch width.
Checkpoints:
- Pocket base after Rnd 5: about 6.25 x 2.5 in (15.9 x 6.4 cm), 56 sts
- Pocket wall: 16 in (40.6 cm) around, which is 8 in (20.3 cm) across when flattened
- Mesh pocket walls: 4.5 in (11.4 cm) tall when finished
- Panel at Row 44: 8 in (20.3 cm) wide and 11 in (27.9 cm) long
- Panel after Row 88: 8 x 22 in (20.3 x 55.9 cm)
Too big? Go down 0.5 mm in hook size. Too small? Go up 0.5 mm. Make the same hook change for the pockets and the panel so their 28-st widths still match. If your gauge is right but the roll is very snug, go up 0.5 mm for every piece. Don’t add stitches to the pockets alone.
Panel
Ch 29.
Row 1: Sc in 2nd ch from hook and in each ch across. Turn. (28 sc)
Rows 2–88: Ch 1 (doesn’t count as a st), sc in each st across. Turn. (28 sc)
Put a marker in Row 44 and measure there. Don’t fasten off after Row 88. The border starts from here.
Border
Border gauge: sc row-ends are shorter than sc stitches are wide, so on the long sides you work 7 sc across every 8 row-ends. The panel’s 88 rows make 11 groups of 8, which gives 11 x 7 = 77 sc. At 3.5 sts per inch, 77 sc is 22 in (55.9 cm), which matches the panel length exactly, so the sides lie flat without ruffling or puckering. On the top and bottom edges, work 1 sc per st.
In the counts below, each side includes its 2 corner stitches, meaning the center sc of each 3-sc corner group. Each corner belongs to two sides, so the round total is the sum of the four sides minus 4.
Rnd 1: Ch 1, 3 sc in first st of Row 88, sc in each of next 26 sts, 3 sc in last st. Then work 77 sc evenly down the side; 3 sc in first foundation ch, sc in each of next 26 ch, 3 sc in last ch; 77 sc evenly up the second side. Join with a sl st to first sc.
– Top and bottom: 30 sts each (corner + 1 + 26 + 1 + corner)
– Long sides: 81 sts each (corner + 2 + 77 + corner)
– Total: 30 + 30 + 81 + 81 − 4 = 218 sts
Rnd 2: Ch 1, sc in each st around, working 3 sc in each corner center st. Join.
– Top and bottom: 32 sts each
– Long sides: 83 sts each
– Total: 32 + 32 + 83 + 83 − 4 = 226 sts (218 + 8 corner increases)
Fasten off.
Why the math works: each border round adds one sc, about 0.25 in (0.6 cm), to every edge. Two rounds add 0.5 in (1.3 cm) on each side, so the 8 x 22 in panel becomes 9 x 23 in (22.9 x 58.4 cm).
Hanging Tabs
Count the top-edge sts of Rnd 2 from corner to corner, 1 through 32. The tabs go on sts 4–9 and 24–29. That leaves 3 sts outside each tab and 14 sts between the two tabs.
Row 1: With the right side facing, join yarn in st 4. Ch 1, sc in same st and in next 5 sts. Turn. (6 sc)
Rows 2–14: Ch 1, sc in each st across. Turn. (6 sc)
Fasten off, leaving a 12-in (30.5 cm) tail. Make the second tab the same way, starting in st 24. Each tab is about 1.7 in (4.3 cm) wide and 3.5 in (8.9 cm) long. Fold each tab to the back and whipstitch Row 14 to the back of the panel, 1.5 in (3.8 cm) below the top edge. The loop fits a rod up to 1.25 in (3.2 cm) across.
Mesh Pocket (make 2)
Oval Base
Ch 16.
Rnd 1: Sc in 2nd ch from hook and in next 13 ch, 3 sc in last ch. Working along the other side of the foundation chain, sc in next 13 ch, 2 sc in last ch. Join. (32 sts)
Rnd 2: Ch 1, 2 sc in first st, sc in next 13 sts, 2 sc in each of next 3 sts, sc in next 13 sts, 2 sc in each of next 2 sts. Join. (38 sts)
Rnd 3: Ch 1, sc in first st, 2 sc in next st, sc in next 13 sts, [sc in next st, 2 sc in next st] 3 times, sc in next 13 sts, [sc in next st, 2 sc in next st] twice. Join. (44 sts)
Rnd 4: Ch 1, [sc in next 2 sts, 2 sc in next st] once, sc in next 13 sts, [sc in next 2 sts, 2 sc in next st] 3 times, sc in next 13 sts, [sc in next 2 sts, 2 sc in next st] twice. Join. (50 sts)
Rnd 5: Ch 1, [sc in next 3 sts, 2 sc in next st] once, sc in next 13 sts, [sc in next 3 sts, 2 sc in next st] 3 times, sc in next 13 sts, [sc in next 3 sts, 2 sc in next st] twice. Join. (56 sts)
Checkpoint: the base should measure about 6.25 x 2.5 in (15.9 x 6.4 cm).
Walls
Rnd 6: Ch 1, sc in BLO of each st around. Join. (56 sts) This round makes a crisp ridge where the base turns up into the wall.
Rnds 7–9: Ch 1, sc in each st around. Join. (56 sts) This is the solid lower band, 1 in (2.5 cm) tall.
Rnd 10 (mesh set-up): Ch 4 (counts as dc + ch 1), sk next st, [dc in next st, ch 1, sk next st] 27 times. Join with a sl st in 3rd ch of beg ch-4. (28 dc + 28 ch-1 sps = 56 sts)
Rnd 11 (offset mesh): Sl st into first ch-1 sp. Ch 4 (counts as dc + ch 1), [dc in next ch-1 sp, ch 1] 27 times. Join in 3rd ch of beg ch-4. (28 dc + 28 ch-1 sps = 56 sts)
Every dc now sits above an opening from the round below, and that’s what makes the staggered, lattice-like holes.
Rnds 12–14: Repeat Rnd 11. (56 sts each) Together, the five mesh rounds measure 2.5 in (6.4 cm).
Rnd 15 (conversion): Ch 1, sc in each dc and in each ch-1 sp around. Join. (28 sc in dc + 28 sc in sps = 56 sts)
Rnds 16–18: Ch 1, sc in each st around. Join. (56 sts) This is the solid rim, 1 in (2.5 cm) tall.
Fasten off, leaving a 36-in (91.4 cm) tail for sewing. The walls should be 4.5 in (11.4 cm) tall.
Solid Pocket (make 1)
Work Rnds 1–6 as for the Mesh Pocket. (56 sts)
Rnds 7–17: Ch 1, sc in each st around. Join. (56 sts)
Fasten off, leaving a 36-in (91.4 cm) tail. The 12 wall rounds come to 3 in (7.6 cm) tall.
Make All Pieces
Every piece is sage green:
- 1 panel with border and 2 tabs
- 2 mesh pockets
- 1 solid pocket
Layout (top to bottom on the panel front):
[ TAB ]            [ TAB ]
+-------------------------+
|  1.5 in margin          |
|  [ MESH POCKET 1 ]      |  rim 1.5 in, base 6 in
|  4 in gap               |
|  [ MESH POCKET 2 ]      |  rim 10 in, base 14.5 in
|  4 in gap               |
|  [ SOLID POCKET  ]      |  rim 18.5 in, base 21.5 in
|  1.5 in margin          |
+-------------------------+
All measurements are from the top edge of the bordered panel. In metric, the rims sit at 3.8 cm, 25.4 cm, and 47.0 cm, and the bases at 15.2 cm, 36.8 cm, and 54.6 cm. The margins are 3.8 cm and the gaps are 10.2 cm. The 4-in gaps leave room for the tops of the rolls to stick out above each rim.
Joining
Method: whipstitch through both loops, using the pocket tails.
Flatten each pocket so the join seam sits at one side fold. With 56 sts around, each flattened layer has 28 sts, the same as the 28 body columns of the panel inside the border.
- Pin the pocket’s back layer to the front of the panel with its rim at the height shown in the layout. Line the fold lines up with the inner edge of the border, so 0.5 in (1.3 cm) of border shows on each side.
- Rim: whipstitch the 28 back-layer rim sts one-to-one onto the 28 panel columns behind them.
- Sides: sew down each fold line through the panel. On the sc sections, catch 1 panel row for each pocket round. On the mesh, catch 2 panel rows for each mesh round.
- Base: whipstitch the 28 back-half loops of the Rnd 6 ridge one-to-one across the panel.
Tension: pull each stitch snug, but stop before the panel dimples. When you turn the panel over, it should still lie flat.
Size checkpoint: with all three pockets attached, the panel should still measure 9 x 23 in (22.9 x 58.4 cm), and the front layer of each pocket should bow outward without strain.
Final Blocking
- Weave in all ends on the back of the panel.
- Soak the piece in cool water for 10 minutes, then gently press the water out. Don’t wring it.
- Roll it in a towel to remove the extra moisture.
- Lay it flat and pin the panel to 9 x 23 in (22.9 x 58.4 cm), keeping the long edges straight.
- Put a toilet roll, or a jar wrapped in a towel, in each mesh pocket so the mesh opens evenly.
- Let it dry completely, then hang it and load it.
Final Quality-Control Checklist
- Panel is 9 x 23 in (22.9 x 58.4 cm) with straight edges
- Border Rnd 2 has 226 sts
- Tabs sit 3 sts in from each corner, are the same length, and are sewn securely
- Every pocket round has 56 sts
- Mesh holes are staggered and even
- Gaps between pockets are 4 in (10.2 cm)
- A standard roll slides in and out easily
- No loose ends show on the front
Troubleshooting
- Long sides ruffle: there are too many sc along the row-ends. Rework at 7 sc per 8 rows.
- Long sides pull in: there are too few sts. Count for 77 per side.
- Mesh leans or spirals: start each round in the first ch-1 sp, as written.
- Pocket is too tight for a roll: go up one hook size for every piece.
- Pocket sags forward: tighten the rim whipstitches and make sure the side seams catch the panel.
- Panel curls at the top: the tabs were sewn too tightly. Loosen them and re-sew.
Care
Hand wash, or machine wash cool on a gentle cycle, and lay flat to dry. Reshape the pockets while they’re still damp.

Final Notes
Each measurement builds on the one before it. A gauge of 14 sc per 4 in makes a 28-st panel 8 in (20.3 cm) wide, and 88 rows make it 22 in (55.9 cm) long. Two border rounds bring it to 9 x 23 in (22.9 x 58.4 cm). Each 56-st pocket flattens to 28 sts, matching the panel body, so pockets and panel join stitch for stitch. Check your gauge on the first pocket and everything after it will fit.
Happy crocheting!