

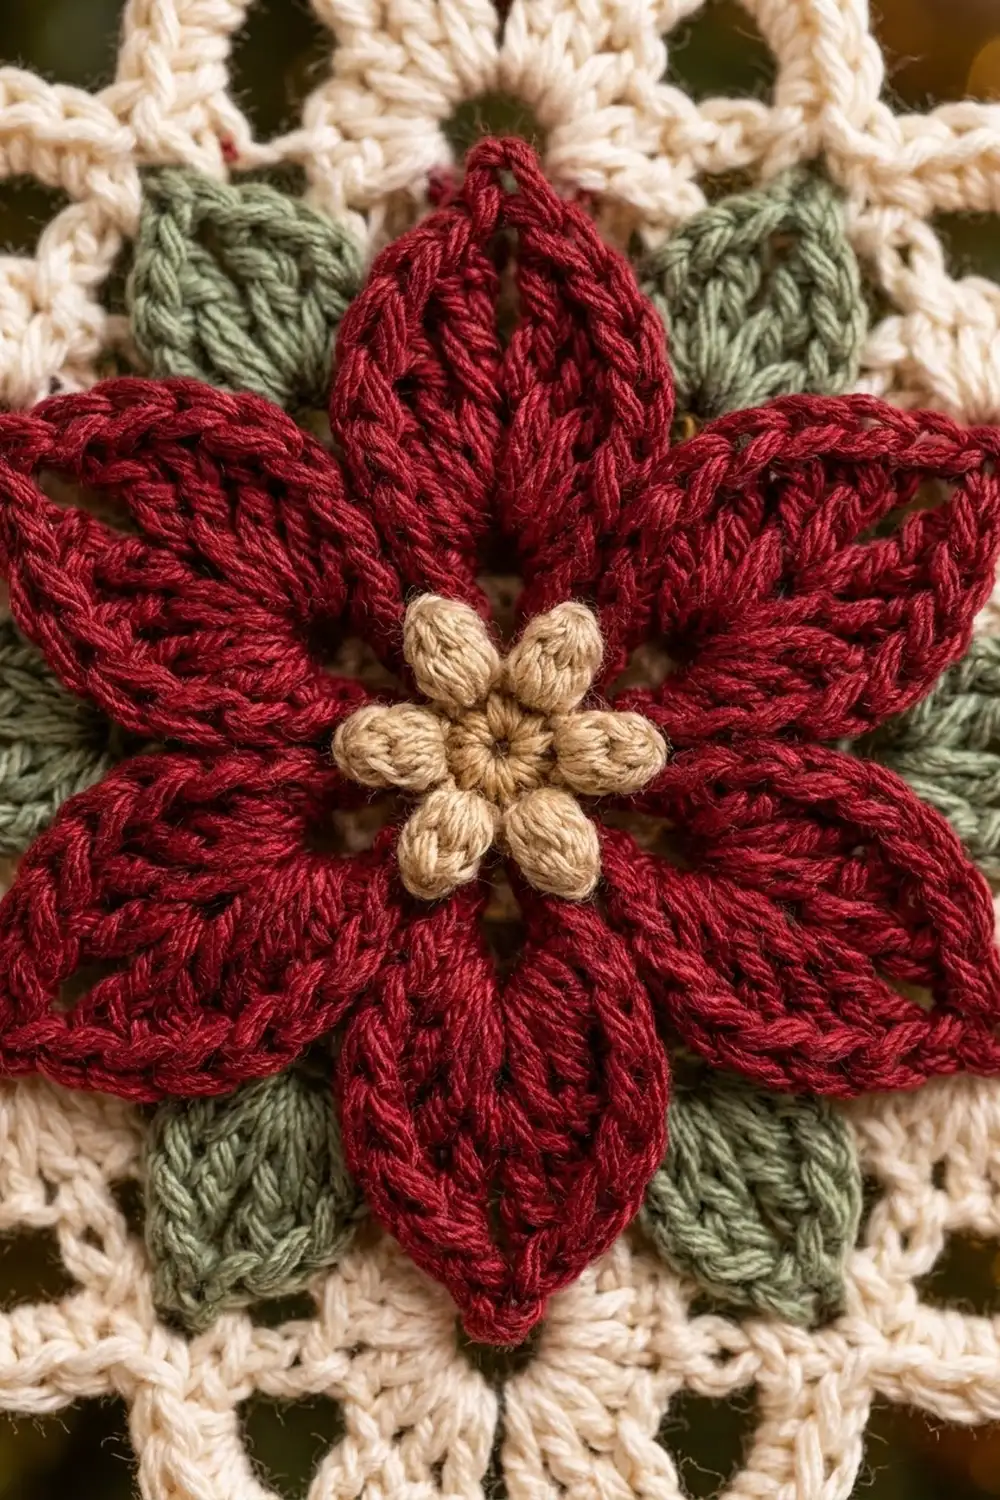
This six-pointed lace ornament has a raised poinsettia at its center. Six pointed red petals open around a tan center with small puff bobbles, and small sage-green leaves tuck into the gaps between the petals. A cream lace star frames the flower, with scalloped shell points and a sturdy hanging loop.
The colors are classic Christmas: cream, deep red, sage green and warm tan. Mercerized cotton gives the stitches a soft shine and crisp definition, so the ornament looks heirloom-style on a tree, in a gift box or tied to a wrapped present.
The pattern uses US crochet terms. The finished ornament measures 5 in (12.7 cm) from point to point and 4.25 in (10.8 cm) from valley to valley. The hanging loop adds 2 in (5.1 cm).
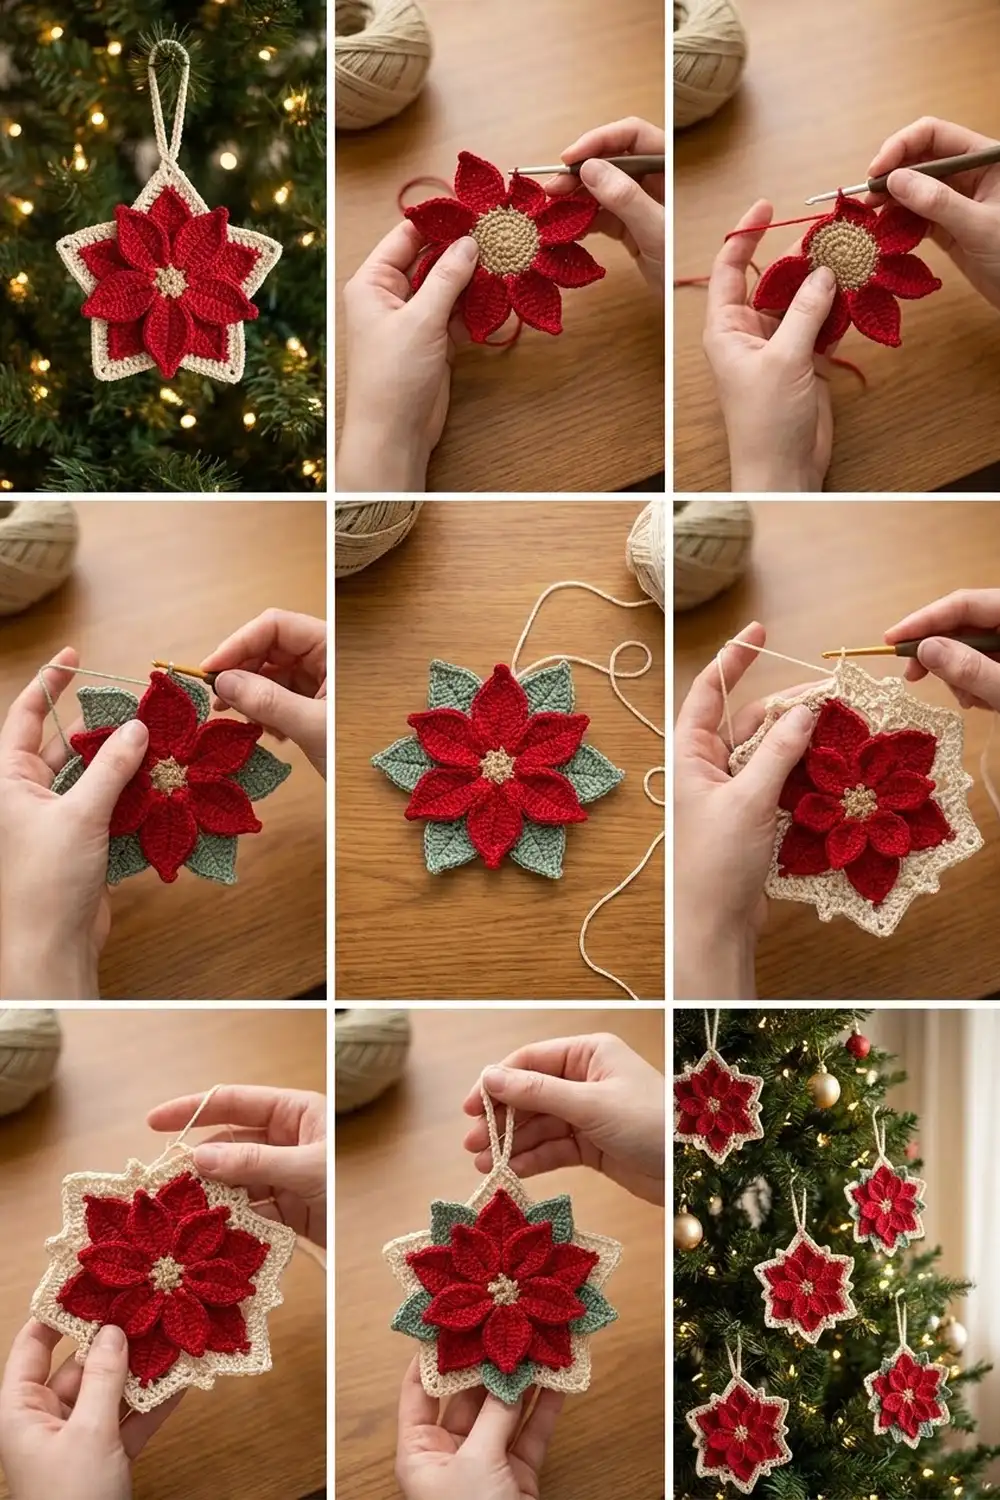
You make the whole ornament in one piece, working in the round from the center out. The tan center comes first, then the red petals, then the green leaves. After that, cream rounds build a solid ring, a mesh round, a shaping round and a scalloped lace edge. You only change colors at the ends of rounds, and nothing needs sewing except the woven-in ends.
Finished Size and Construction
- Finished size: 5 in (12.7 cm) point to point; 4.25 in (10.8 cm) valley to valley
- Hanging loop: 2 in (5.1 cm) folded length
- Skill level: Intermediate
- Terminology: US crochet terms
- Yarn weight: Super fine (#1) mercerized cotton or size 3 crochet thread
- Hook: 2.25 mm (B-1)
- Number of pieces: 1
- Layout: Single six-pointed motif, worked in the round
- Flower size (Rounds 1–6): 2.75 in (7.0 cm) across
- Size before border (after Round 10): 4 in (10.2 cm) point to point
- Border depth (Rounds 11–12): 0.5 in (1.3 cm) on each side
Materials
Choose a smooth, mercerized cotton in super fine weight. Cotton holds the pointed petals and lace arches much better than acrylic, and it takes blocking well. Size 3 crochet thread works the same way.
- Cream (frame and hanger): 12 g, about 41 m
- Deep red (petals): 5 g, about 17 m
- Sage green (leaves): 3 g, about 10 m
- Tan (center): 2 g, about 7 m
These quantities include a margin of about 20 percent for swatching, joins and weaving in ends.
Tools:
– 2.25 mm (B-1) crochet hook
– Tapestry needle
– Scissors
– Stitch marker
– Rustproof pins and a foam blocking mat
– Spray bottle with water
– Optional: fabric stiffener or starch spray
Abbreviations (US Terms)
- ch: chain
- sl st: slip stitch
- sc: single crochet
- hdc: half double crochet
- dc: double crochet
- tr: treble crochet
- sp(s): space(s)
- st(s): stitch(es)
- MR: magic ring
- rep: repeat
Special stitch – Puff stitch (puff): (Yarn over, insert hook in stitch, pull up a loop to 0.25 in [0.6 cm]) 3 times. Yarn over and pull through all 7 loops on the hook, then ch 1 to close. The closing ch 1 does not count as a stitch.
Shell terms: A “petal shell” is (sc, hdc, 2 dc, tr, ch 2, tr, 2 dc, hdc, sc) worked into one space. A “leaf” is (hdc, 2 dc, tr, ch 2, tr, 2 dc, hdc) worked into one space.
Gauge and Checkpoints
Gauge matters less for an ornament than for a garment, but the lace only lies flat when the inner rounds are the right size. Treat your first ornament as your test piece and measure at each checkpoint:
- After Round 2: center measures 0.75 in (1.9 cm) across.
- After Round 4: petals measure 2.25 in (5.7 cm) from tip to opposite tip.
- After Round 6: flower with leaves measures 2.75 in (7.0 cm) across.
- After Round 8: the cream dc ring measures 3.25 in (8.3 cm) across.
- After Round 10: 4 in (10.2 cm) from point to point.
- After Round 12: 5 in (12.7 cm) from point to point.
A difference of up to 0.25 in (0.6 cm) at any checkpoint is fine.
If your piece is too big, go down to a 2 mm hook, or tighten your chains. Loose chains are the usual cause of floppy arches.
If your piece is too small or cupping, go up to a 2.5 mm hook, or relax your tension on the chain loops in Rounds 5, 7 and 9.
Pattern
Center (Tan)
Round 1: Make an MR. Ch 1, work 12 sc into the ring. Pull the ring closed and sl st to the first sc to join. (12 sc)
Round 2: Ch 1. Puff in next st, sl st in next st. Rep from * 5 more times. Sl st to the top of the first puff to join. (6 puffs + 6 sl sts = 12 sts)
Fasten off and leave a 6 in (15.2 cm) tail. Push the puffs to the front with your fingertip so they stand up as round bobbles.
Petals (Red)
Round 3: Join red with a sl st in any sl st from Round 2. Ch 1, sc in the same st, ch 6. Sc in next sl st (skipping the puff), ch 6. Rep from * 4 more times. Sl st to the first sc to join. (6 sc, 6 ch-6 sps)
Each ch-6 loop arches behind a puff, so the bobbles stay in front.
Round 4: Sl st into the first ch-6 sp. Work a petal shell in each ch-6 sp around: (sc, hdc, 2 dc, tr, ch 2, tr, 2 dc, hdc, sc). Skip the Round 3 sc so the shells sit side by side. Sl st to the first sc to join. (6 petals; 10 sts + 1 ch-2 tip each = 60 sts + 6 ch-2 sps)
The graduated shell, rising from sc through hdc and dc to tr, forms the pointed petal shape. The ch-2 makes a sharp tip. Fasten off.
Checkpoint: 2.25 in (5.7 cm) from tip to tip.
Leaves (Green)
Round 5: Join green with a sl st in any petal-tip ch-2 sp. Ch 1, sc in the same sp, ch 9. Sc in next petal-tip ch-2 sp, ch 9. Rep from * 4 more times. Sl st to the first sc to join. (6 sc, 6 ch-9 sps)
Each ch-9 dips into the V between two petals. The green sc sits snugly inside the red tip, so it barely shows.
Round 6: Ch 1. Sc in next sc, work a leaf in the next ch-9 sp: (hdc, 2 dc, tr, ch 2, tr, 2 dc, hdc). Rep from * 5 more times. Sl st to the first sc to join. (6 sc + 6 leaves of 8 sts = 54 sts + 6 ch-2 sps)
Each leaf points outward between two petals. Fasten off.
Checkpoint: 2.75 in (7.0 cm) across.
Cream Frame
Round 7: Join cream with a sl st in any sc above a petal tip. Ch 1, sc in the same st, ch 5, sc in the next leaf ch-2 sp, ch 5. Sc in next petal-tip sc, ch 5, sc in next leaf ch-2 sp, ch 5. Rep from * 4 more times. Sl st to the first sc to join. (12 sc, 12 ch-5 sps)
Round 8 (conversion round): Ch 3 (counts as dc). Work 5 dc in the next ch-5 sp. Dc in next sc, 5 dc in next ch-5 sp. Rep from * around. Sl st to the top of the beginning ch-3 to join. (12 dc worked 1-per-sc + 60 dc worked into spaces = 72 dc)
This is the solid cream ring around the flower. Think of it as 6 sections of 12 dc each. Stitch 1 of each section sits above a petal tip, and stitch 7 sits above a leaf.
Checkpoint: 3.25 in (8.3 cm) across, lying flat.
Round 9 (mesh): Ch 1, sc in the same st (stitch 1, above a petal). Ch 4, skip 2 dc, sc in next dc. Rep from * around, ending with ch 4, skip 2 dc, sl st to the first sc. (24 sc, 24 ch-4 sps; 4 sps per section)
Name the 4 spaces in each section L1, L2, L3 and L4. The petal tip sits at the sc between L4 and the next section’s L1. The leaf valley sits at the sc between L2 and L3.
Round 10 (shaping): Sl st into L1. Ch 3 (counts as dc), 4 dc in the same sp. 3 sc in L2, 3 sc in L3, 5 dc in L4, then 5 dc in the next L1. Continue the pattern around, ending with 5 dc in the last L4. Sl st to the top of the ch-3 to join. Skip all Round 9 sc. (Per section: 5 + 3 + 3 + 5 = 16 sts; total 96 sts)
The tall dc groups on either side of each petal tip build the points. The short sc groups form the valleys.
Checkpoint: 4 in (10.2 cm) from point to point. Do not fasten off.
Border
The last two rounds form the lace border: open arches, then a scalloped shell edge.
Border gauge: The two border rounds add 0.5 in (1.3 cm) on each side. That takes the piece from 4 in (10.2 cm) to 5 in (12.7 cm) point to point.
Round 11 (arches): Sl st in the next 2 dc to reach the 3rd (center) dc of the first L1 group. Ch 1, sc in the same st. Ch 5, sc in the 2nd (center) sc of the L2 group, ch 3, sc in the center sc of the L3 group, ch 5, sc in the center dc of the L4 group, ch 7, sc in the center dc of the next L1 group. Rep from * around. On the last repeat, replace the final sc with a sl st to the first sc. (Per section: 4 sc + ch-5, ch-3, ch-5 and ch-7 sps; total 24 sc, 24 sps)
The ch-7 arch crosses the petal-tip point. The short ch-3 pulls the valley in.
Round 12 (scallop edge): Sl st into the first ch-5 sp. Work (sc, hdc, 3 dc, hdc, sc) in the ch-5 sp, 3 sc in the ch-3 sp, (sc, hdc, 3 dc, hdc, sc) in the next ch-5 sp, and (sc, hdc, 3 dc, ch 3, 3 dc, hdc, sc) in the ch-7 sp. Rep from * around. Skip all Round 11 sc. Sl st to the first sc to join. (Per section: 7 + 3 + 7 + 10 = 27 sts + 1 ch-3 tip; total 162 sts + 6 ch-3 sps)
Fasten off.
Why the math works: Each section keeps exactly 12 stitches in Round 8, 4 spaces in Round 9 and 16 stitches in Round 10. That means every Round 11 anchor lands on a center stitch: the center dc for the points and the center sc for the valleys. The six sections stay identical, so 6 × 27 = 162 and every point matches. The long arch and the tallest shell sit at each point, and the 3-sc valley sits at each leaf, which gives the star its silhouette.
Hanging Loop
Join cream with a sl st in the ch-3 sp of the point you want at the top. Ch 40, then sl st in the same ch-3 sp. Work 44 sc over the chain loop, then sl st into the tip again. Fasten off.
The finished loop hangs 2 in (5.1 cm) above the point.
Final Blocking
- Weave in all ends on the back. Run each tail through stitches of its own color.
- Soak the ornament in cool water for 5 minutes, then gently press out the water in a towel. Don’t wring it.
- Lay it face up on the blocking mat.
- Pin the 6 ch-3 tips first, spacing them so opposite tips are 5 in (12.7 cm) apart.
- Pin each 3-sc valley so opposite valleys are 4.25 in (10.8 cm) apart.
- Pin open each ch-7 arch, and the ch-5 arches if they curl.
- Pinch each red petal tip and green leaf tip into a point with your fingertips, then lift the puffs so they stand up.
- Optional: mist with starch or fabric stiffener for a crisp ornament.
- Let it dry completely before you unpin it, usually 12–24 hours.
Final Quality-Control Checklist
- 6 tan puffs stand up in the center
- 6 pointed red petals, each with a sharp ch-2 tip
- 6 green leaves, one in each gap between petals
- Cream dc ring is flat and even all the way around (72 dc)
- 6 points line up with the 6 red petals
- 6 valleys line up with the 6 leaves
- Round 12 has 162 sts and 6 ch-3 tips
- Point to point measures 5 in (12.7 cm), valley to valley 4.25 in (10.8 cm)
- Hanging loop is centered on a point and measures 2 in (5.1 cm)
- All ends are woven in invisibly on the back
Troubleshooting
The center cups or the puffs sink. Your puffs are too tight. Pull each loop up to a full 0.25 in (0.6 cm) before closing it.
The petals look rounded instead of pointed. Check that you worked the ch 2 between the two tr, then pinch the tips while blocking.
The leaves are hidden behind the petals. Your ch-9 is too short. Work the chain loosely so the leaf sits out in the gap.
Round 8 ruffles. Use a smaller hook for Round 8 only, or check that you worked exactly 5 dc per space.
The points look blunt. Check that the Round 11 anchors land on the center dc of each 5-dc group, and that the ch-7 is not too tight.
Your stitch count is off in Round 12. Count one section at a time. Each section should have 27 sts and 1 ch-3.
The ornament twists when it hangs. Re-block it flat, and center the loop exactly on a ch-3 tip.
Care
Hand wash in cool water with mild soap, press dry in a towel, and re-block flat. Store flat, away from direct sunlight, so the red doesn’t fade.
Final Notes
The measurement chain is simple: a 0.75 in (1.9 cm) center grows to 2.25 in (5.7 cm) petals and a 2.75 in (7.0 cm) flower. The cream dc ring brings it to 3.25 in (8.3 cm), the shaping round to 4 in (10.2 cm), and the border to the finished 5 in (12.7 cm) star. If each checkpoint matches, the finished star will match too. Make one for your tree, then make a few more to give as gifts.
Happy crocheting!