

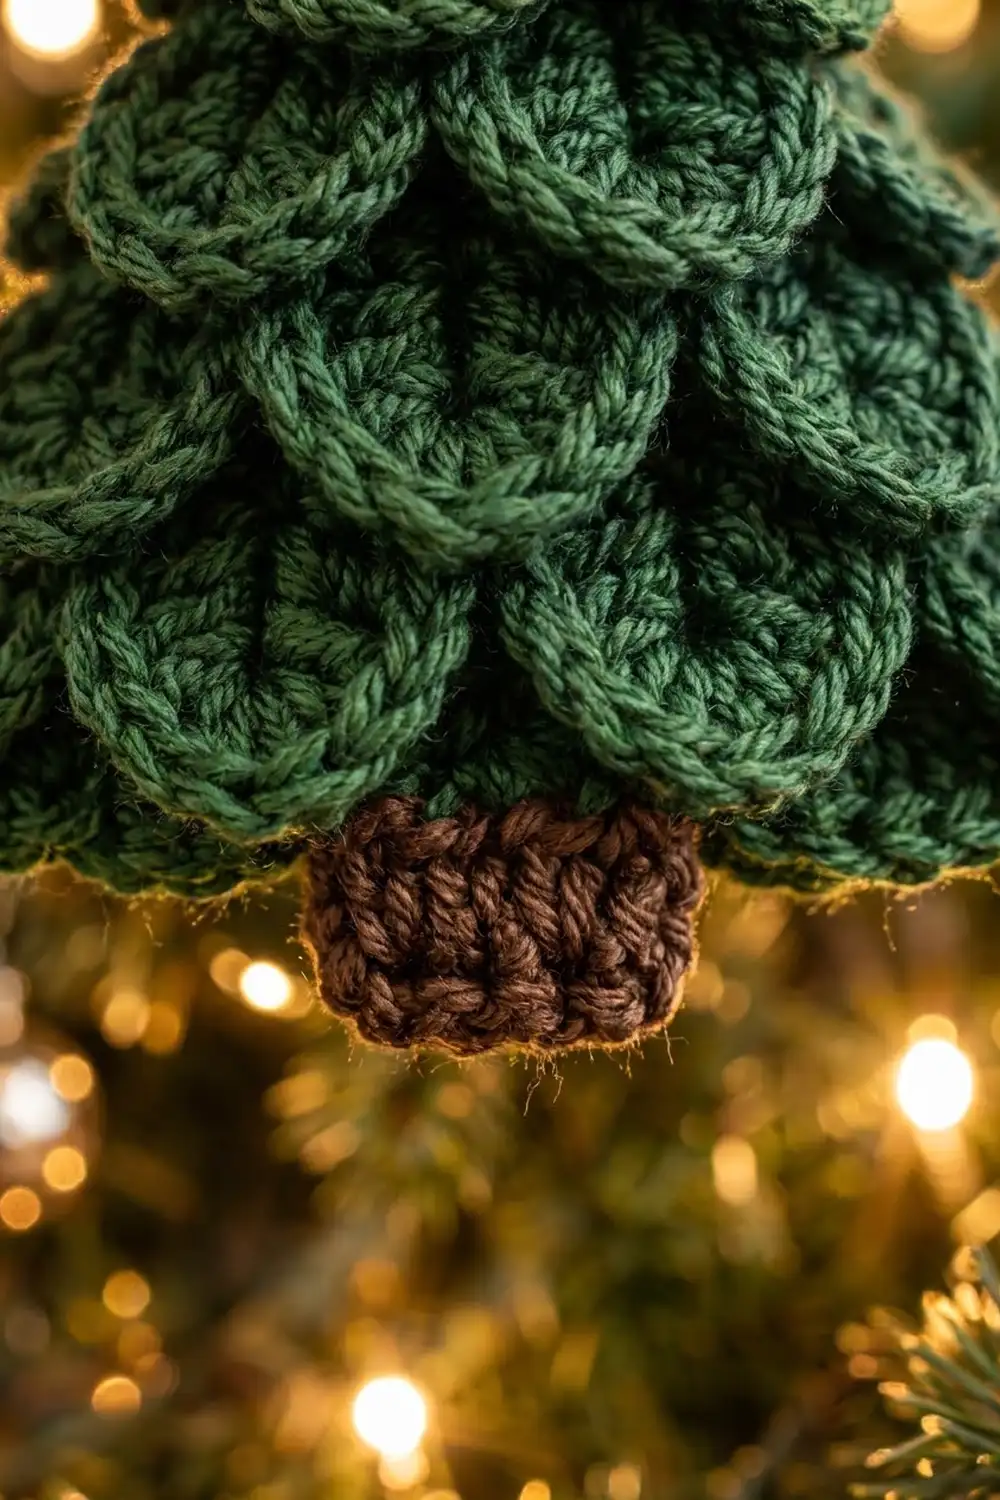
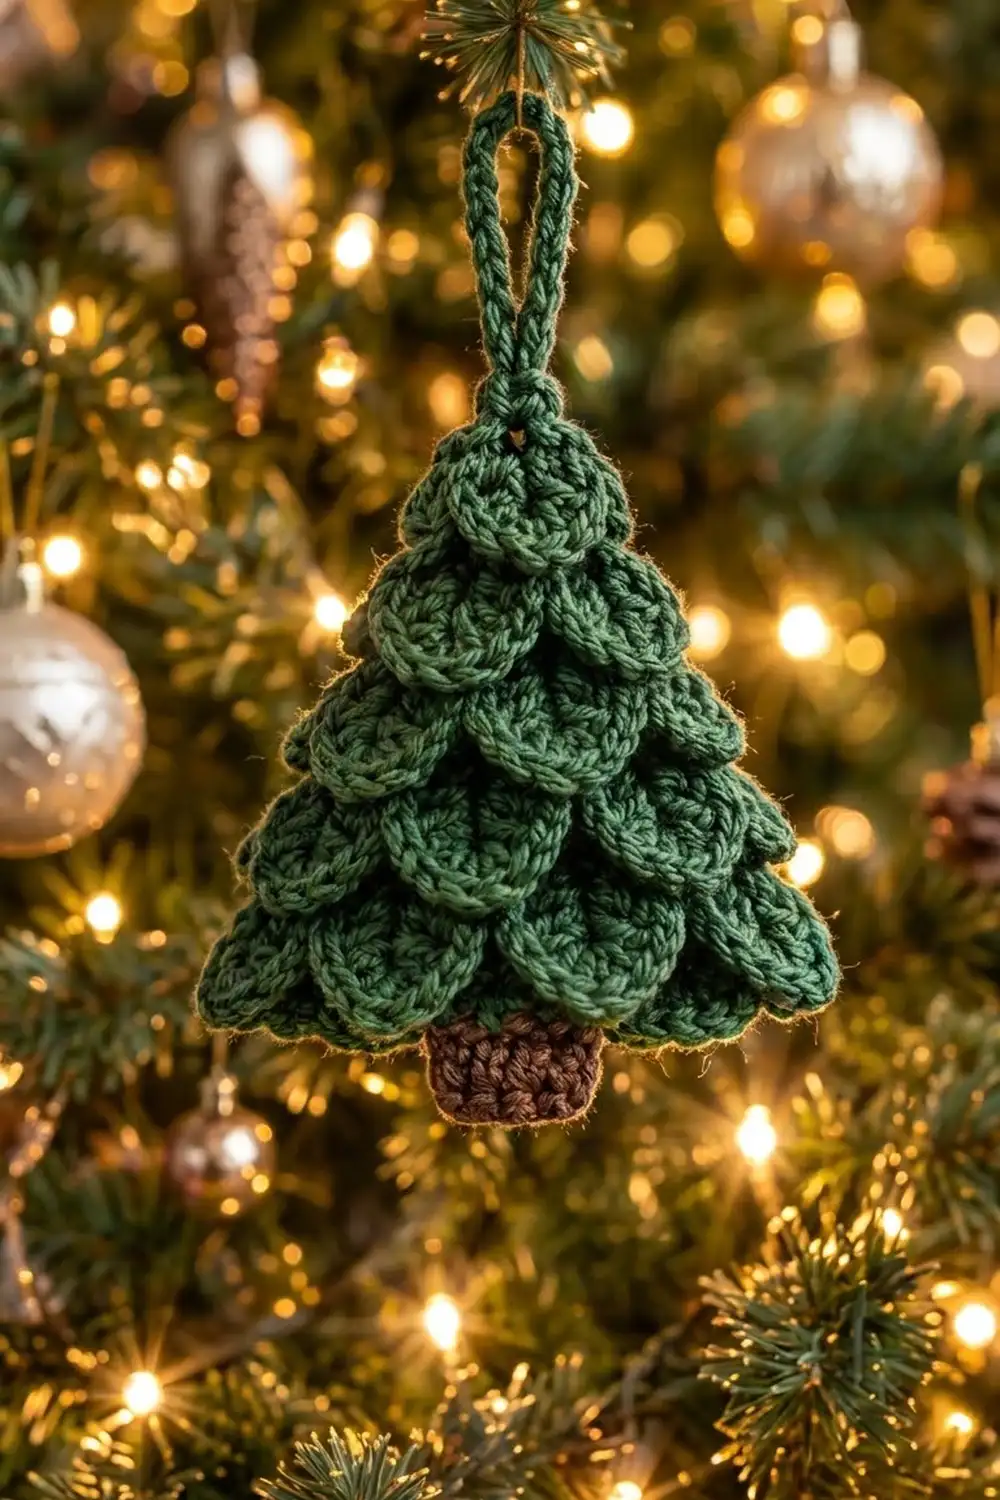
This little tree is made of crocodile-stitch scales. Fifteen rounded green “needles” overlap in five tiers to form a classic triangle shape, with a sturdy brown trunk below and a thick loop on top for hanging. It looks great on a real tree, tied onto a gift, or hung in a window.
The palette is simple: deep forest green for the tree and loop, and chocolate brown for the trunk. Each scale is a fan of double crochets with a soft point at the bottom tip. The tiers overlap, so the tree looks full and three-dimensional even though it’s worked flat.
The pattern uses US crochet terms. The finished ornament is about 3.5 in (8.9 cm) wide and 4 in (10.2 cm) tall without the loop, or about 5.75 in (14.6 cm) tall with the loop.
Construction is straightforward. You work a single row of green sc, then build five tiers from the bottom up. Each tier is a base row of treble-crochet pairs topped by a row of scales, and each new tier has one scale fewer than the one below. Then you add the hanging loop at the peak, work the brown trunk into the free loops of the foundation chain, and finish the trunk with one round of edging.
Finished Size and Construction
- Finished size: 3.5 in (8.9 cm) wide x 4 in (10.2 cm) tall, plus a 1.75 in (4.4 cm) loop
- Skill level: Intermediate (crocodile stitch)
- Terminology: US
- Yarn weight: DK (#3)
- Hook: 3.25 mm (US D-3)
- Number of pieces: 1
- Layout: Single flat ornament with 5 tiers of scales (5-4-3-2-1, 15 scales in total)
- Piece size: 3.5 in x 4 in (8.9 cm x 10.2 cm)
- Trunk size before edging: 0.8 in x 0.8 in (2.0 cm x 2.0 cm)
- Edging depth (trunk only): 1 sc row, about 0.2 in (0.5 cm)
Materials
Yarn: Use a smooth DK cotton, a cotton blend, or a firm acrylic. Fuzzy yarns hide the scale outlines, so avoid them. Smooth yarn lets each fan stand out clearly.
- Forest green: 15 g (about 35 m / 38 yd)
- Chocolate brown: 3 g (about 7 m / 8 yd)
Crocodile stitch uses a lot of yarn for its size. These amounts include a margin of about 20%, so you won’t run short.
Tools:
– 3.25 mm (US D-3) crochet hook
– Tapestry needle
– Scissors
– Stitch marker
– Ruler or tape measure
– Pins and a foam board for blocking
Abbreviations (US Terms)
- ch – chain
- sl st – slip stitch
- sc – single crochet
- dc – double crochet
- tr – treble crochet
- sk – skip
- sp – space
- st(s) – stitch(es)
- RS / WS – right side / wrong side
Special stitch – Scale: Turn the work so the tr pair lies sideways. Work 6 dc around the post of the first tr, going from the top of the post down to the base. Ch 1 (this makes the tip of the scale). Then work 6 dc around the post of the second tr, going from the base up to the top. That’s 12 dc and 1 ch-1 tip per scale. The finished scale fans out and falls toward the RS.
Gauge and Checkpoints
Gauge: 24 sc and 26 rows = 4 in (10.2 cm), which is 6 sc per 1 in (2.5 cm).
Instead of a separate swatch, use the foundation row as your test. It should measure 3.5 in (8.9 cm) across. If it’s wider, change to a 3 mm hook. If it’s narrower, change to a 3.5 mm hook. Then start again, because every tier depends on this width.
Checkpoints:
– Foundation row: 21 sc, 3.5 in (8.9 cm) wide
– After Tier 1: about 3.5 in (8.9 cm) wide, with each scale about 0.7 in (1.8 cm) long
– After Tier 3: the top tier is about 2.1 in (5.3 cm) wide
– After Tier 5: the green tree is about 3.4 in (8.6 cm) tall from the lowest scale tip to the peak
– Trunk with edging: 1.2 in x 0.9 in (3.0 cm x 2.3 cm)
If scales are too big: Your tr are too tall. Pull the first loop on the hook snug before you yarn over, or go down half a hook size.
If scales cup or curl: You’re crowding the dc onto the posts. Space the 6 dc evenly along the full length of each post.
Pattern
Foundation
With green, ch 22.
Foundation row (RS): Sc in the 2nd ch from the hook and in each ch across. (21 sc)
The piece should measure 3.5 in (8.9 cm). Keep the free loops along the bottom of the chain unworked, because you’ll work the trunk into them later.
Tier 1 (5 scales)
Base row 1 (WS): Ch 1 and turn. Sc in the first st. Then repeat the following 5 times: ch 1, sk 1 st, 2 tr in the next st, ch 1, sk 1 st, sc in the next st.
That’s 5 tr pairs, 6 sc, 10 ch-1 sps. Check the stitch use: 1 + (4 x 5) = 21 sts, which matches the foundation row exactly.
Scale row 1 (RS): Turn. Sl st in the first sc. Then repeat the following 5 times: Scale over the next tr pair, sl st in the next sc.
That’s 5 scales (60 dc), 6 sl sts. The scales should hang down over the foundation row.
Moving Up to the Next Tier
Repeat this transition after every scale row. Don’t fasten off.
Turn so the WS is facing. Ch 1, sl st in the next ch-1 sp, then sl st in the first tr of the end pair. Keep the scale folded toward the RS while you do this. You’re now at the center of the end pair.
Tier 2 (4 scales)
Base row 2 (WS): Ch 1 (does not count as a stitch). Sc in the gap between the 2 tr of the end pair. Then repeat the following 4 times: ch 1, 2 tr in the next sc (the sc between two scales), ch 1, sc in the gap between the 2 tr of the next pair.
That’s 4 tr pairs, 5 sc. The new pairs sit directly above the 4 inner sc of Base row 1, so each new scale lands between two scales of the tier below.
Scale row 2 (RS): Turn. Sl st in the first sc. Then repeat the following 4 times: Scale, sl st in the next sc.
That’s 4 scales (48 dc). The tier is about 2.8 in (7.1 cm) wide. Work the transition.
Tier 3 (3 scales)
Base row 3: Work as Base row 2, but repeat the instructions 3 times. That’s 3 pairs, 4 sc.
Scale row 3: Work as Scale row 2, but repeat the instructions 3 times. That’s 3 scales (36 dc), about 2.1 in (5.3 cm) wide.
Work the transition.
Tier 4 (2 scales)
Base row 4: Work as before, but repeat the instructions 2 times. That’s 2 pairs, 3 sc.
Scale row 4: Work as before, but repeat the instructions 2 times. That’s 2 scales (24 dc), about 1.5 in (3.8 cm) wide.
Work the transition.
Tier 5 (1 scale)
Base row 5: Ch 1. Sc in the gap of the end pair, ch 1, 2 tr in the next sc, ch 1, sc in the gap of the last pair. That’s 1 pair, 2 sc.
Scale row 5: Turn. Sl st in the first sc, Scale, sl st in the last sc. That’s 1 scale (12 dc), about 0.8 in (2.0 cm) wide.
Tree totals: 15 scales and 180 dc (60 + 48 + 36 + 24 + 12).
Hanging Loop
Turn. Sl st in the ch-1 sp, sl st in the first tr, then sl st in the gap between the 2 tr. This is the peak, behind the top scale.
Ch 20, then sl st in the same gap. To thicken the loop, work 1 sl st in the back bump of each of the 20 ch. Sl st once more in the gap and fasten off.
The loop should stand about 1.75 in (4.4 cm) tall.
Trunk
Hold the tree upside down with the RS facing. Count the free loops of the foundation chain. There are 21, and the center 5 are loops 9 to 13.
Row 1: Join brown in loop 9. Ch 1, sc in the same loop and in the next 4 loops. (5 sc)
Rows 2–5: Ch 1 and turn. Sc in each st across. (5 sc)
Don’t fasten off. Go straight on to the edging.
The trunk measures 0.8 in x 0.8 in (2.0 cm x 2.0 cm).
Border (Trunk Edging)
The tree itself doesn’t get a border. The scalloped rims of the scales are the finished outline, and adding stitches to them would flatten the fans. The only edging is one row around the three free sides of the trunk, which squares and firms it.
Border gauge: Same as the main gauge: 6 sc per 1 in (2.5 cm) and 6.5 rows per 1 in (2.5 cm).
Edging row: Ch 1 but don’t turn. Work as follows:
– Down the side: Work 5 sc down the side, 1 sc in each row end.
– Bottom: Work 3 sc in the first st of Row 5 (corner), 1 sc in each of the next 3 sts, then 3 sc in the last st (corner). That’s 9 sts along the bottom, including both 3-sc corner groups.
– Up the side: Work 5 sc up the other side, 1 sc in each row end.
– Finish: Sl st into the foundation free loop next to the trunk and fasten off.
That’s 19 sc in total (5 + 9 + 5).
Why the math works:
– Sides: Row gauge (6.5 per in) and stitch gauge (6 per in) are nearly equal, so 1 sc per row end keeps the sides flat with no ruffling or pulling.
– Corners: The bottom edge had 5 sts. The two 3-sc corner groups each add 2 sts, giving 5 + 4 = 9 bottom sts, so the corners turn a clean 90°.
– Size: The edging adds 1 st width on each side, so the trunk becomes 7 sts wide, which is about 1.2 in (3.0 cm). It also adds 1 row of height, giving 6 rows, about 0.9 in (2.3 cm).
Tier 1 scales cover about 0.3 in (0.8 cm) of the trunk top, leaving about 0.6 in (1.5 cm) of brown visible.
Final Blocking
- Weave in all ends behind the scales, keeping green ends in green areas and brown ends in brown areas.
- Mist the ornament lightly with water until it’s damp but not soaked.
- Lay it RS up on a foam board. Pin the foundation corners 3.5 in (8.9 cm) apart, and pin the peak 3.4 in (8.6 cm) above the lowest scale tip.
- Using your fingertip, shape each scale into a rounded fan with its tip pointing straight down.
- Pin the trunk square at 1.2 in x 0.9 in (3.0 cm x 2.3 cm).
- Leave it to dry completely, then unpin it. For acrylic, steam lightly from about 1 in (2.5 cm) above the piece without pressing it flat.
Final Quality-Control Checklist
- [ ] Five tiers counting 5-4-3-2-1 scales from the bottom up, 15 in total
- [ ] Every scale has 6 dc on each side and a ch-1 tip
- [ ] Each scale sits centered between two scales of the tier below
- [ ] Width is 3.5 in (8.9 cm) and height without the loop is 4 in (10.2 cm)
- [ ] Trunk is centered under the middle scale of Tier 1
- [ ] Trunk edging is 19 sc with square corners
- [ ] Loop is about 1.75 in (4.4 cm) tall, firm and centered
- [ ] No ends showing on the RS
Troubleshooting
- The tree is lopsided: A base row probably started in the wrong gap. Re-count so there are exactly k pairs and k + 1 sc.
- The scales point sideways: Work the first post top to bottom and the second post bottom to top.
- There are gaps between the tiers: Keep the ch-1s snug, and don’t add extra chains.
- The trunk is off-center: Count the free loops again and start the trunk in loop 9 of 21.
- The loop is floppy: Make sure you worked the sl sts along the back bumps of the chain, or add a second pass.
Care
Hand wash in cool water, press out the water in a towel, and dry flat, reshaping the scales. Store flat or hanging so the fans keep their shape.
Final Notes
Here is the measurement chain from start to finish:
– Foundation: 21 sc at 6 per in, giving 3.5 in (8.9 cm)
– Tier 1: 5 scales, the same width
– Tiers 2–5: each tier loses one scale, narrowing through 2.8 in (7.1 cm), 2.1 in (5.3 cm), 1.5 in (3.8 cm), and 0.8 in (2.0 cm)
– Trunk: 5 sc that become 7 after the edging, giving 1.2 in (3.0 cm)
– Finished ornament: 4 in (10.2 cm) tall plus a 1.75 in (4.4 cm) loop
If your foundation row matches gauge, everything else falls into place. Make one for every branch of the family tree.
Happy crocheting!