

This little mug ornament is a flat, cheerful decoration with a warm rust-orange body, a creamy “foam” rim, and a chunky curved handle. It looks like a cup of cocoa or spiced latte, which makes it a good fit for tree branches, gift tags, and advent garlands.
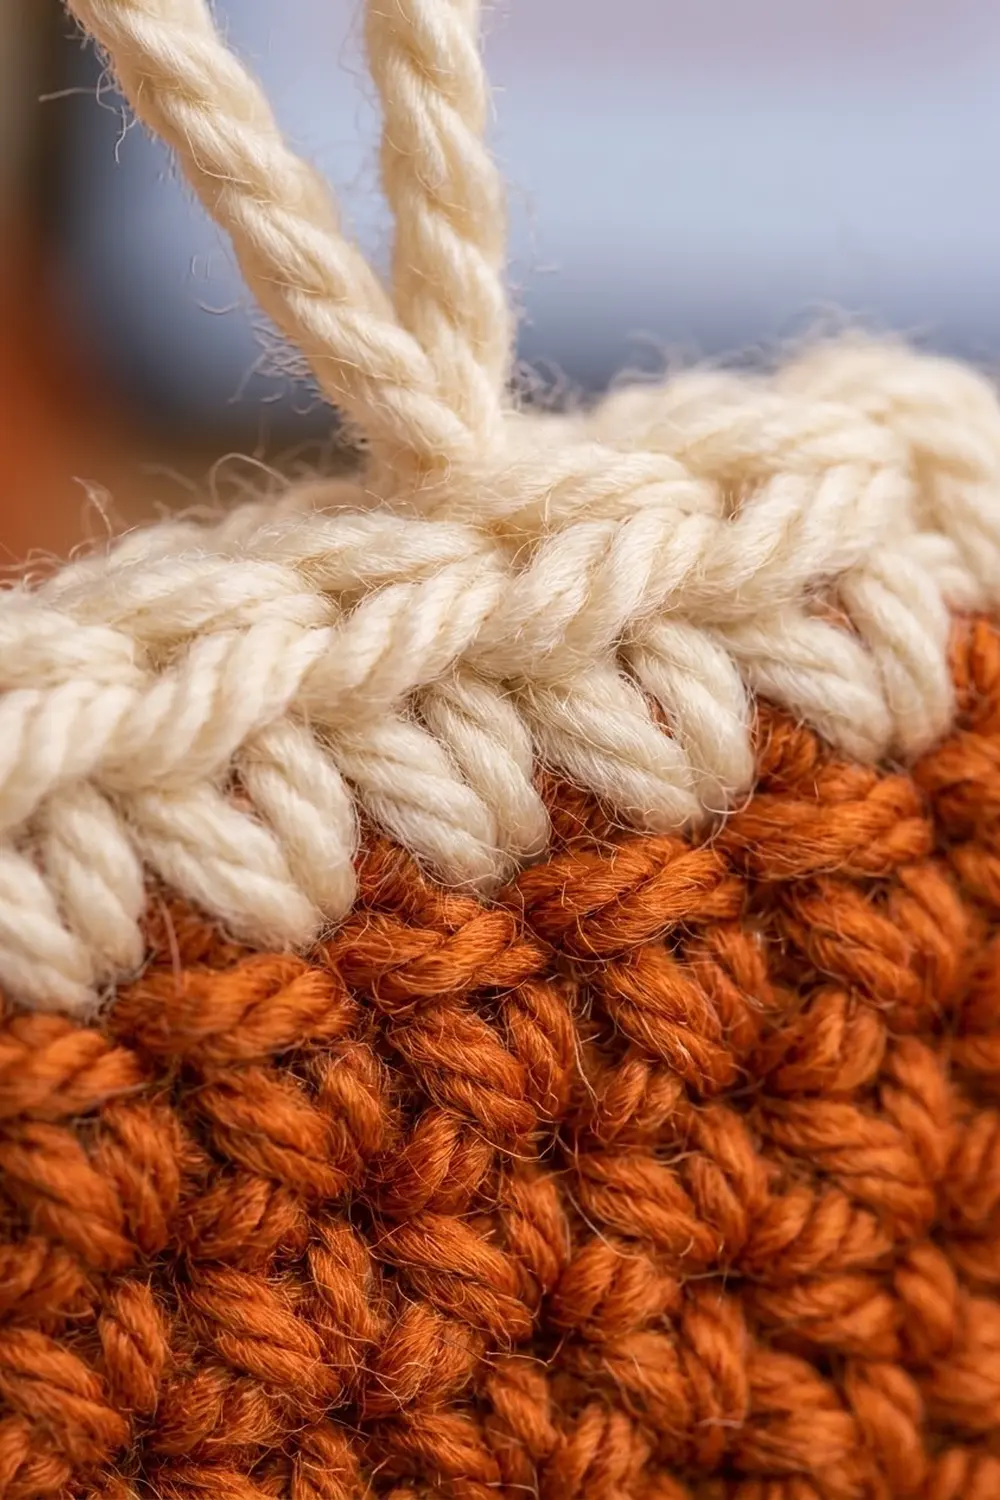
The style is simple and tidy. Firm rows of single crochet make a dense fabric with a clear grid texture. A single round of edging softens the corners and gives the mug a finished outline. A cream hanging loop sits right at the center of the rim, so the ornament hangs straight.
This pattern uses US crochet terms. The finished ornament measures about 4.2 in (10.7 cm) wide including the handle and 3.2 in (8.1 cm) tall without the loop, or 4.7 in (11.9 cm) tall with the loop.
Construction is quick. You crochet the body in rows, work one edging round around the whole rectangle, then add two cream rim rows across the top. The handle is worked straight onto the right edge, and the loop is chained straight from the rim. There is no sewing apart from weaving in ends.
Finished Size and Construction
- Finished size: 4.2 in (10.7 cm) wide x 3.2 in (8.1 cm) tall, plus a 1.5 in (3.8 cm) loop
- Skill level: Easy
- Terminology: US crochet terms
- Yarn weight: Worsted (#4, medium)
- Hook: 4.0 mm (G-6)
- Number of pieces: 1
- Layout: Single flat piece, no joining
- Body size before edging: 2.7 in (6.9 cm) wide x 2.4 in (6.1 cm) tall
- Size after edging round: 3.1 in (7.9 cm) wide x 2.8 in (7.1 cm) tall
- Edging (border) depth: 0.2 in (0.5 cm) per side
- Cream rim depth: 0.4 in (1.0 cm)
- Handle reach: about 1.1 in (2.8 cm) beyond the body edge
Materials
Yarn: Use a smooth worsted-weight yarn, around 200 m per 100 g. Acrylic or an acrylic-wool blend holds its shape well and shows the single crochet texture clearly. Fuzzy or splitty yarns hide the stitch grid and make the handle harder to shape.
- Color A, rust orange (body, edging, handle): 8 g / 16 m
- Color B, cream (rim, hanging loop): 3 g / 6 m
These amounts are for one ornament and include a margin for gauge swatching and weaving in ends. To make a set of six, multiply by six: 48 g / 96 m of Color A and 18 g / 36 m of Color B.
Tools:
- 4.0 mm (G-6) crochet hook
- 3.75 mm (F-5) hook, optional, if your gauge runs loose
- Tapestry needle
- Scissors
- Stitch marker
- Ruler or tape measure
- Foam blocking board and rust-proof pins
- Spray bottle with water
Abbreviations (US Terms)
- ch – chain
- sl st – slip stitch
- sc – single crochet
- sc2tog – single crochet 2 together: insert hook in next st, pull up a loop, insert hook in following st, pull up a loop, yarn over and draw through all 3 loops on hook (1 st decreased)
- st(s) – stitch(es)
- sp – space
- RS / WS – right side / wrong side
Special technique – working around a chain: Insert your hook into the space under the chain instead of into the individual chains, so the stitches wrap around and enclose the chain. This makes the handle smooth and rounded.
Gauge and Checkpoints
Gauge: 18 sc and 20 rows = 4 in (10.2 cm) in sc worked in rows.
That works out to 4.5 sts and 5 rows per inch. This is firmer than the yarn label probably suggests. That is on purpose, because a dense fabric keeps the ornament flat and stops stuffing-free shapes from curling.
Test one piece first. Instead of a separate swatch, make one complete body (Rows 1–12) and measure it. The body is your swatch.
Checkpoints:
- After Row 1: 12 sc = 2.7 in (6.9 cm) wide
- After Row 6: height 1.2 in (3.0 cm)
- After Row 12: 2.7 in (6.9 cm) x 2.4 in (6.1 cm)
- After the edging round: 3.1 in (7.9 cm) x 2.8 in (7.1 cm)
- After the rim: total height 3.2 in (8.1 cm)
A tolerance of ±0.1 in (0.3 cm) is fine.
Too big? Go down to a 3.75 mm hook, or tighten your grip on the working yarn.
Too small? Go up to a 4.5 mm hook. Do not add stitches, because the edging and handle counts depend on 12 body stitches and 12 body rows.
Mug Body
Worked flat in rows with Color A. The ch 1 at the start of each row does not count as a stitch.
Foundation: With Color A, ch 13.
Row 1 (RS): Sc in 2nd ch from hook and in each ch across, turn. (12 sc)
Rows 2–12: Ch 1, sc in each st across, turn. (12 sc per row)
At the end of Row 12, do not fasten off. Check that the body measures 2.7 in (6.9 cm) wide x 2.4 in (6.1 cm) tall, with 12 sts in every row and straight side edges. If one side leans, you probably missed or added a stitch at a row end. Count every row before moving on.
Border (Edging Round)
Border gauge: The edging uses the same sc gauge as the body. One sc worked into each row end lies flat because 5 rows per inch is close to 4.5 sts per inch. Skipping the two corner rows on each side keeps the fit exact.
Corner definition: Each corner is 3 sc worked into one stitch. The middle sc of those 3 is the corner stitch. The other two count toward the sides on either side of it.
Continue with Color A from the end of Row 12. Do not turn.
Edging Round: Ch 1.
- Top edge: Work 3 sc in the first st of Row 12, sc in each of the next 10 sts, 3 sc in the last st.
- Left side: Working down the row ends, sc in each of the row ends of Rows 11 through 2. (10 sc)
- Bottom edge: Working into the free loops of the foundation chain, 3 sc in the first ch, sc in each of the next 10 ch, 3 sc in the last ch.
- Right side: Working up the row ends, sc in each of the row ends of Rows 2 through 11. (10 sc)
- Sl st to the first sc to join. (52 sc)
Count per side:
- Top: 1 corner st + 1 + 10 + 1 + 1 corner st = 14 sts including both corners
- Bottom: 14 sts including both corners
- Left side: 1 corner st + 1 + 10 + 1 + 1 corner st = 14 sts including both corners
- Right side: 14 sts including both corners
Why the math works: There are 4 sides of 14 sts each, but each corner stitch is shared by two sides, so the total is (4 x 14) − 4 = 52 sc. You can also count it as 4 corner sts + 4 sides x 12 sts between corners = 52. The 3-sc corner groups cover Rows 1 and 12 on each side, which is why only Rows 2–11 get a stitch in their row ends.
Fasten off Color A, leaving a 6 in (15.2 cm) tail. The piece now measures 3.1 in (7.9 cm) x 2.8 in (7.1 cm).
For the handle, number the stitches on the right side between the two corner stitches from 1 (top) to 12 (bottom). Place a stitch marker in st 2 and another in st 11.
Cream Rim
The rim is worked across the 14 top-edge stitches, from corner stitch to corner stitch.
Rim Row 1 (RS): Join Color B with a sl st in the top-right corner stitch. Ch 1, sc in the same st and in each st across to the top-left corner stitch, turn. (14 sc)
Rim Row 2 (WS): Ch 1, sc2tog, sc in each of the next 10 sts, sc2tog, turn. (12 sts)
The two decreases round off the top corners into soft shoulders, like foam sitting on top of the mug. Do not fasten off. Leave Color B attached for the hanging loop.
Rim checkpoint: The total height is now 3.2 in (8.1 cm). The cream band is 0.4 in (1.0 cm) deep and runs the full width of the edged body.
Hanging Loop
You are still working with Color B. Count the 12 sts of Rim Row 2 and find the center, between st 6 and st 7.
- Sl st across into st 6.
- Ch 16, then sl st in st 7. This makes the loop.
- To make the cord thicker, sl st in each of the 16 ch back along the loop, then sl st in st 6.
Fasten off, leaving a 6 in (15.2 cm) tail. The loop should stand about 1.5 in (3.8 cm) above the rim.
Handle
The handle is worked onto the right side of the edging round with Color A, using the marked stitches.
Handle Row 1: With RS facing, join Color A with a sl st in right-side st 10. Ch 12, then sl st in st 3. This makes an arch spanning the 6 sts between them (sts 4–9). Sl st in st 2 (marked). Turn so you are working back along the arch. Work 18 sc around the ch-12 arch (see Special Technique). Sl st in st 10, then sl st in st 11 (marked). (18 sc)
Handle Row 2: Turn, ch 1. Working into the 18 sc of Row 1, (sc in each of the next 2 sts, 2 sc in the next st) 6 times. Sl st in st 2 on the body, then sl st in st 1. (24 sc)
The 6 increases sit on the outer curve, which gives the handle its full C shape without cupping. Fasten off, leaving a 6 in (15.2 cm) tail.
Handle checkpoint: The handle reaches about 1.1 in (2.8 cm) out from the body. The total ornament width is 4.2 in (10.7 cm), and the handle lies flat against your work surface.
If the arch puckers, your ch 12 is too tight. If it ripples, your 18 sc are too loose. See Troubleshooting.
Weave in all ends along the edging on the WS. Take each tail back through a few stitches in the opposite direction so it stays put.
Final Blocking
- Pin the ornament RS up on a foam board.
- Pin the body to 3.1 in (7.9 cm) wide x 3.2 in (8.1 cm) tall, including the rim. Place one pin at each corner, then one pin at the middle of each side.
- Shape the handle into an even C. Pin its outer edge so it sits 1.1 in (2.8 cm) out from the body, with the inner opening clearly round.
- Pin the hanging loop upward in a neat teardrop, 1.5 in (3.8 cm) tall.
- Mist with water until damp but not soaked. For acrylic, you can steam lightly with an iron held 1 in (2.5 cm) above the piece. Never press.
- Let it dry completely, usually 2–4 hours, before unpinning.
Final Quality-Control Checklist
- Body has 12 rows of 12 sc each
- Edging round has 52 sc, with 14 sts per side including corners
- Rim Row 1 has 14 sc and Rim Row 2 has 12 sts
- Rim corners are softly rounded and match each other
- Handle Row 1 has 18 sc and Row 2 has 24 sc
- Handle is attached between sts 2 and 11 on the right side and centered vertically
- Hanging loop sits at the exact center of the rim
- Size is 4.2 in (10.7 cm) x 3.2 in (8.1 cm), give or take 0.1 in (0.3 cm)
- All ends are woven in, and no tails show on the RS
- Ornament hangs straight from the loop without tilting
Troubleshooting
Body edges slant or wave. Your stitch count changed. Check that every row starts with ch 1 and that the first sc goes in the first stitch, not the turning chain.
Edging corners pull or cup. Make sure each corner gets exactly 3 sc in one stitch. If they still cup, work the edging with a hook one size larger.
Sides ruffle after the edging. You probably added extra stitches into Rows 1 and 12. Work only 10 row-end sc per side.
Rim looks square, not rounded. Check that you worked sc2tog at both ends of Rim Row 2. Shape the shoulders with your fingers while blocking.
Handle puckers the body. Your ch 12 is too tight. Chain more loosely, or chain with a hook one size larger and switch back for the sc.
Handle flares or ruffles. Your sc around the arch are too loose. Pack the 18 sc firmly, and keep the Row 2 increases evenly spaced.
Ornament tilts when hung. The loop is off center. Remove it and rework it between sts 6 and 7 of Rim Row 2.
Care
Spot clean with mild soap and cool water, then lay flat to dry, reshaping the handle while it is damp. Store flat or hanging, away from heat, so it keeps its shape from year to year.

Final Notes
The measurement chain is short and easy to check. Start with 12 sc at 2.7 in (6.9 cm) wide, worked over 12 rows to 2.4 in (6.1 cm) tall. The 52-stitch edging brings the body to 3.1 in (7.9 cm) x 2.8 in (7.1 cm). Two cream rim rows add 0.4 in (1.0 cm) for a total height of 3.2 in (8.1 cm). The handle’s 18 and 24 sc rows reach 1.1 in (2.8 cm) out, for a finished width of 4.2 in (10.7 cm), and the cream loop adds 1.5 in (3.8 cm) on top.
If your first ornament matches these checkpoints, every mug after it will match too. Make one for the tree, a handful for gift toppers, or a whole set in different mug colors with the same cream rim.
Happy crocheting!