

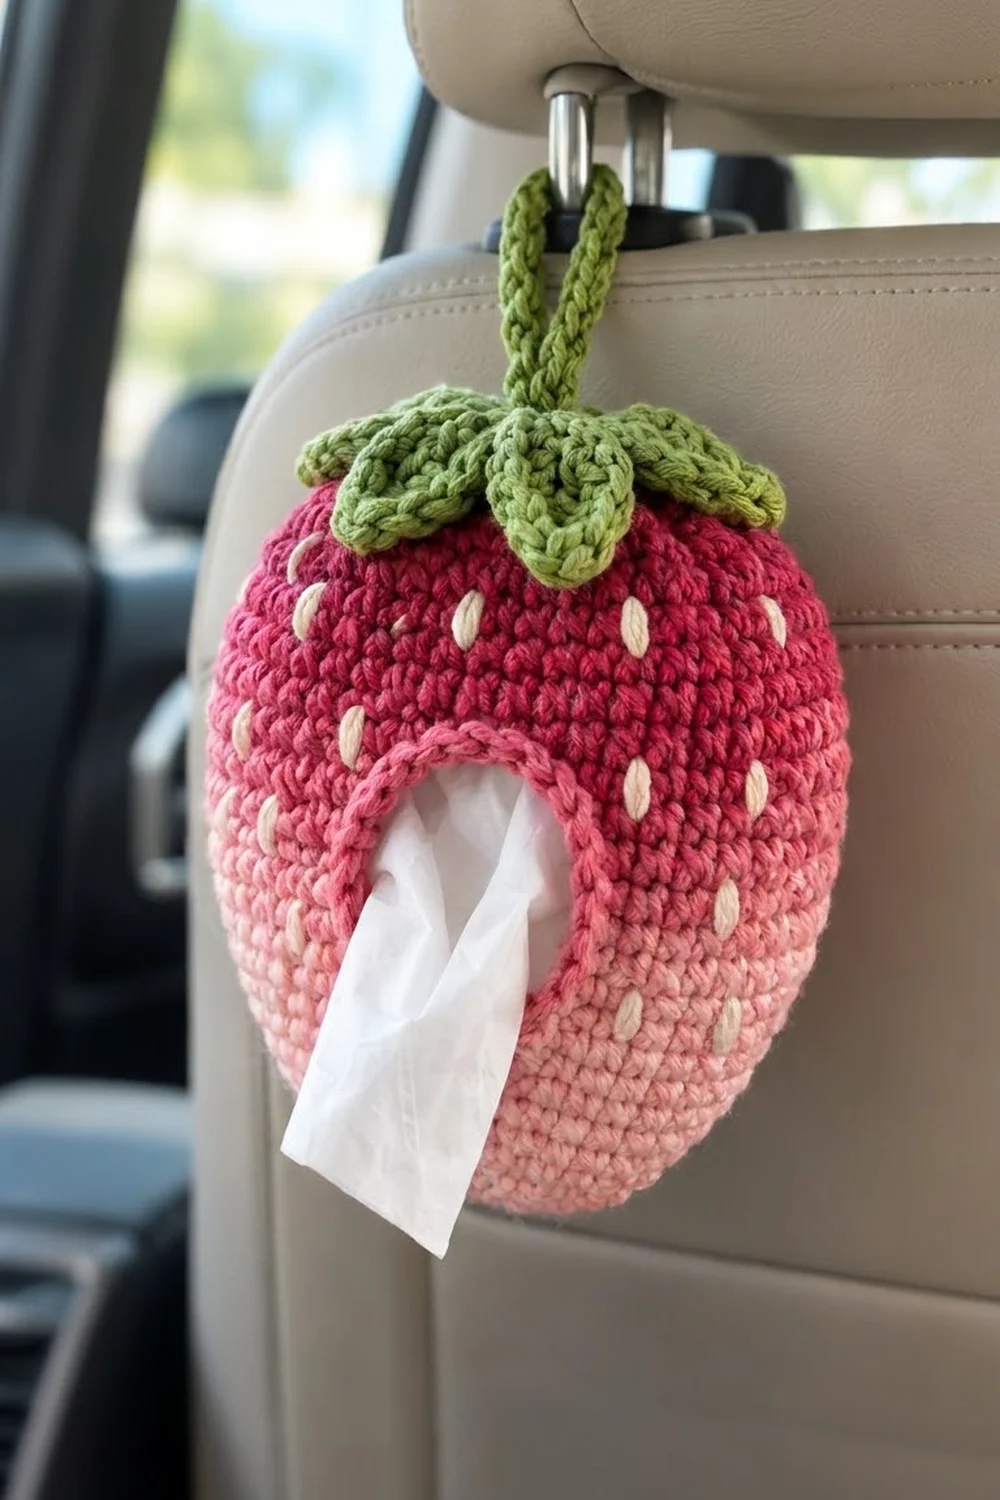
This little strawberry hangs from your car headrest and keeps tissues within reach. It has a plump, rounded body, a leafy green calyx and a sturdy loop that slips over a headrest post. Tissues pull out one at a time through an oval opening on the front.
The color fades from deep raspberry at the top, through medium pink, to soft light pink at the bottom. Cream embroidered seeds finish the strawberry look. The style is cheerful and slightly retro, and the dense single crochet fabric holds its shape well.
The pattern uses US crochet terms. The finished body is about 5 in (12.7 cm) wide and 6.75 in (17.1 cm) tall. The loop adds about 4 in (10.2 cm) above the calyx, so the whole piece hangs about 10.75 in (27.3 cm) long.
You crochet the body from the top down in joined rounds. You work rows over the middle section to leave the tissue opening, then close the round again and decrease to a rounded point. Then you add a rim to the opening, embroider the seeds, make the calyx and loop, and sew them to the top.
Finished Size and Construction
- Finished body size: about 5 in (12.7 cm) wide x 6.75 in (17.1 cm) tall
- Body circumference at widest point: 16 in (40.6 cm)
- Skill level: Easy-intermediate
- Terminology: US crochet terms
- Yarn weight: Worsted (#4), cotton or cotton blend
- Hook: 4.0 mm (G-6)
- Number of pieces: 1 body, plus 2 small appliqués (calyx and loop)
- Layout: Single hollow body. The calyx and loop are centered on top and the opening is on the front.
- Opening size before rim: 2.2 in (5.6 cm) wide x 2.4 in (6.1 cm) tall
- Rim depth: about 0.3 in (0.8 cm)
- Opening size after rim: about 1.6 in (4.1 cm) wide x 1.8 in (4.6 cm) tall
Materials
Use a smooth worsted-weight cotton, about 2 m per gram. Cotton gives crisp stitches, resists stretching from the weight of the tissues, and washes well. Acrylic also works, but the fabric will be softer and may sag more.
- Color A, raspberry red: 55 g (110 m)
- Color B, medium pink: 55 g (110 m)
- Color C, light pink: 35 g (70 m)
- Color D, leaf green: 20 g (40 m)
- Color E, cream: 3 g (5 m)
These quantities include a margin of about 15% for swatching and tension differences.
Tools:
– 4.0 mm (G-6) crochet hook
– Tapestry needle
– Stitch markers (at least 2)
– Scissors
– Measuring tape
– Spray bottle and a small towel or plastic bag for blocking
Abbreviations (US Terms)
- ch – chain
- sl st – slip stitch
- sc – single crochet
- hdc – half double crochet
- dc – double crochet
- inc – 2 sc in the same stitch
- sc2tog – single crochet 2 together
- BLO – back loop only
- FLO – front loop only
- MR – magic ring
- RS / WS – right side / wrong side
- st(s) – stitch(es)
Special stitch – invisible decrease (inv dec): Insert the hook into the front loop of the next st, then into the front loop of the following st. Yarn over and pull through both front loops (2 loops on hook). Yarn over and pull through both loops. Use this for every decrease in the body so the bottom shaping stays smooth.
Joined rounds: At the end of each body round, sl st to the first sc. Then ch 1, which does not count as a stitch. Work the first sc of the next round into the same st as the join.
Gauge and Checkpoints
Gauge: 18 sc x 20 rounds = 4 in (10.2 cm) in sc worked in the round.
That works out to 4.5 sts and 5 rounds per inch. The fabric should be firm with no visible gaps, because tissues and seeds both need a tight surface.
Make the body first and use it as your test piece. Check your measurements at these points:
- After Rnd 8 (48 sts): the flat disc measures about 3.2 in (8.1 cm) across.
- After Rnd 16 (72 sts): the circumference is 16 in (40.6 cm) when measured gently, without stretching.
- After Row 32: the gap is 2.2 in (5.6 cm) wide and 2.4 in (6.1 cm) tall.
- After Rnd 47: the body is about 6.75 in (17.1 cm) tall when lightly filled.
If your piece is too big: go down half a hook size, to 3.75 mm. If it’s too small: go up to 4.5 mm. Check at Rnd 8, before you have invested much time.
Part 1: Body – Top Shoulders
Start with Color A. Every round is joined as described above.
Rnd 1: MR, 6 sc in ring. Join. (6 sts)
Rnd 2: Inc in each st around. Join. (12 sts)
Rnd 3: (Sc 1, inc) 6 times. Join. (18 sts)
Rnd 4: (Sc 2, inc) 6 times. Join. (24 sts)
Rnd 5: (Sc 3, inc) 6 times. Join. (30 sts)
Rnd 6: (Sc 4, inc) 6 times. Join. (36 sts)
Rnd 7: (Sc 5, inc) 6 times. Join. (42 sts)
Rnd 8: (Sc 6, inc) 6 times. Join. (48 sts)
Checkpoint: the disc measures 3.2 in (8.1 cm) across.
From here you increase only on every other round. This curves the fabric into rounded shoulders.
Rnd 9: Sc in each st around. Join. (48 sts)
Rnd 10: (Sc 7, inc) 6 times. Join. (54 sts)
Rnd 11: Sc around. Join. (54 sts)
Rnd 12: (Sc 8, inc) 6 times. Join. (60 sts)
Rnd 13: Sc around. Join. (60 sts)
Rnd 14: (Sc 9, inc) 6 times. Join. (66 sts)
Rnd 15: Sc around. Join. (66 sts)
Rnd 16: (Sc 10, inc) 6 times. Join. (72 sts)
Checkpoint: the circumference is 16 in (40.6 cm).
Rnds 17–20: Sc around. Join. (72 sts each round)
At the final join of Rnd 20, pull Color B through to finish the sl st. Cut Color A, leaving a 6 in (15.2 cm) tail.
Part 2: Body – Tissue Opening
Now you work back and forth in rows. The last 10 sts of Rnd 20 are left unworked to form the top edge of the opening. The gap sits just after the join, and that spot becomes the center front.
Row 21 (RS): Ch 1. Sc in the first 62 sts. Leave the last 10 sts unworked. Turn. (62 sts)
Rows 22–32: Ch 1, sc in each of the 62 sts, turn. (62 sts each row)
You finish Row 32 on the WS, at the same edge where Row 21 started.
Checkpoint: the gap is 10 sts wide, or 2.2 in (5.6 cm), and 12 rows tall, or 2.4 in (6.1 cm).
Close the gap: At the end of Row 32, ch 10. Carry the chain across the gap and sl st to the first sc of Row 32, which is on the opposite edge of the gap.
Rnd 33: Ch 1 and turn so the RS faces you. Sc in each of the 10 ch, then sc in each of the 62 sc. Join. (72 sts: 62 sts worked one into each existing st, plus 10 sts worked into the chain)
At the join, change to Color C and cut Color B.
The rows look very slightly different from the rounds because every other row faces the WS. This is barely visible in dense cotton and blocks out well.
Part 3: Body – Tapered Bottom
Use the invisible decrease throughout.
Rnd 34: (Sc 10, inv dec) 6 times. Join. (66 sts)
Rnd 35: Sc around. Join. (66 sts)
Rnd 36: (Sc 9, inv dec) 6 times. Join. (60 sts)
Rnd 37: Sc around. Join. (60 sts)
Rnd 38: (Sc 8, inv dec) 6 times. Join. (54 sts)
Rnd 39: Sc around. Join. (54 sts)
Rnd 40: (Sc 7, inv dec) 6 times. Join. (48 sts)
Rnd 41: (Sc 6, inv dec) 6 times. Join. (42 sts)
Rnd 42: (Sc 5, inv dec) 6 times. Join. (36 sts)
Rnd 43: (Sc 4, inv dec) 6 times. Join. (30 sts)
Rnd 44: (Sc 3, inv dec) 6 times. Join. (24 sts)
Rnd 45: (Sc 2, inv dec) 6 times. Join. (18 sts)
Rnd 46: (Sc 1, inv dec) 6 times. Join. (12 sts)
Rnd 47: Inv dec 6 times. Join. (6 sts)
Fasten off, leaving an 8 in (20.3 cm) tail. Weave the tail through the front loops of the last 6 sts, pull it tight to close the bottom, and secure it inside. Weave in all color-change tails on the WS.
Checkpoint: the body is about 6.75 in (17.1 cm) tall and 5 in (12.7 cm) wide when lightly filled.
The every-other-round decreases at the start keep the lower body full. The decreases in every round at the end form the rounded strawberry point.
Part 4: Calyx
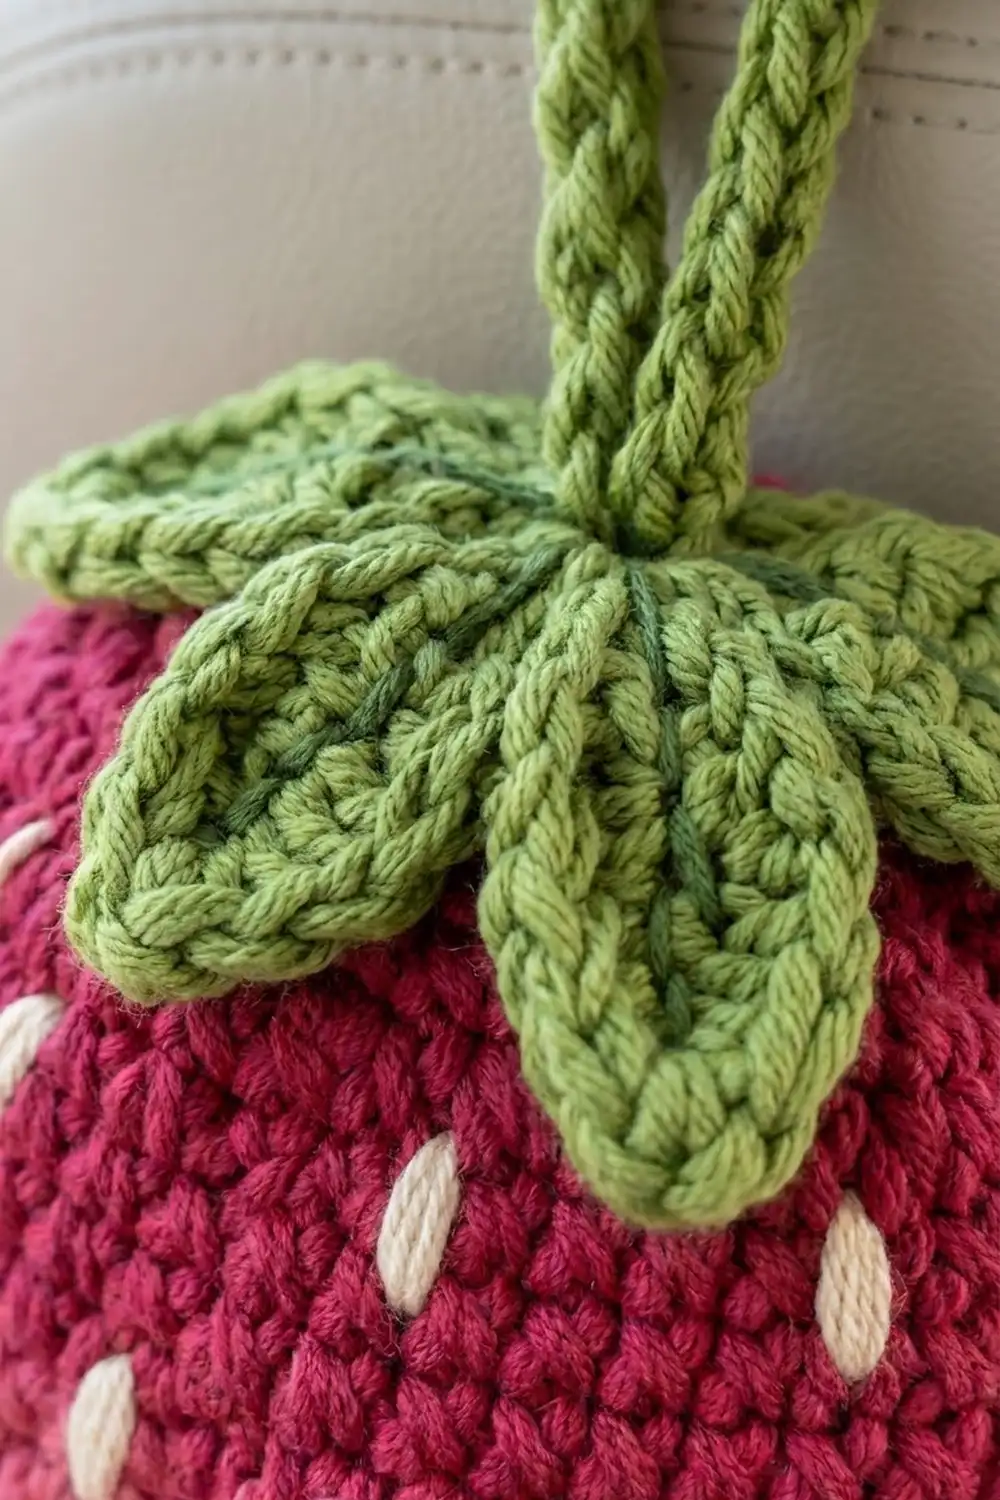
Use Color D. The calyx is one flat piece with six leaves. Each leaf is worked on both sides of a chain, and a line of slip stitches down the middle forms the vein.
Rnd 1: MR, 6 sc in ring. Join. (6 sts)
Rnd 2: Inc in each st around. Join. (12 sts)
Rnd 3 (leaves): Repeat the steps below 6 times. Each leaf uses 2 sts of Rnd 2, so the 6 leaves use all 12.
- Ch 9.
- Side 1: Starting in the 2nd ch from the hook and working back toward the center, work sc, hdc, dc, dc, dc, hdc, sc, sl st. That is 8 sts, ending at the base of the leaf.
- Side 2: Rotate the leaf and work into the free loops on the other side of the chain, from the base out to the tip: sl st, sc, hdc, dc, dc, dc, hdc, sc. That is another 8 sts.
- Tip: Ch 2, then sl st in the 2nd ch from the hook to make a pointed picot.
- Vein: Sl st down the center of the leaf, working between the two sides into the chain foundation. Work 8 sl sts back to the base.
- Sl st in the next st of Rnd 2.
Count the leaves when you finish: you should have 6. The calyx measures about 4.5 in (11.4 cm) across, and each leaf is about 1.8 in (4.6 cm) long.
Fasten off, leaving a 16 in (40.6 cm) tail for sewing.
Part 5: Hanging Loop
Use Color D.
Foundation: Ch 41.
Row 1: Sc in the 2nd ch from the hook and in each ch across. Turn. (40 sts)
Row 2: Ch 1. Sl st loosely in the BLO of each st across. (40 sts)
Row 2 makes a braided ridge down the strap. The strap measures about 8.9 in (22.6 cm) long and 0.4 in (1.0 cm) wide. Fasten off, leaving a 12 in (30.5 cm) tail.
Border: Tissue Opening Rim
The rim works like a border around the opening. Use Color B with the RS facing you. Join the yarn at the top-right corner of the opening.
Border gauge: Use the same sc gauge, 4.5 sts per inch. Work 1 sc into each stitch along the top and bottom edges, and 1 sc into each row end along the sides.
Rim Rnd 1: Work one sc2tog at each corner. Each corner sc2tog uses the last stitch of one edge and the first stitch of the next.
- Top edge: Work into the 10 unworked sts of Rnd 20. Sc in 8 sts, then sc2tog over the last top st and the first side row end.
- Left side: Work 1 sc into each of the next 10 row ends, then sc2tog over the last row end and the first bottom st.
- Bottom edge: Work into the free loops of the ch-10. Sc in 8 sts, then sc2tog over the last bottom st and the first row end.
- Right side: Work 1 sc into each of the 10 row ends. Then sc2tog over the last row end and the first top st, which is where you started.
- Join.
That gives 8 + 10 + 8 + 10 = 36 sc plus 4 sc2tog, for 40 sts. It uses 44 positions: 10 top, 12 left, 10 bottom and 12 right.
Rim Rnd 2: Sl st in the BLO of each st around. (40 sts) Fasten off and weave in the ends.
Why the math works: Each side has 12 row ends, which equals 12 rows. At 5 rows per inch that is 2.4 in, but 12 sc at 4.5 sts per inch would measure about 2.7 in. The extra length eases into the concave inner curve of the opening. The 4 corner decreases take up the rest and round the rectangle into an oval.
The rim is about 0.3 in (0.8 cm) deep. It narrows the opening to about 1.6 in x 1.8 in (4.1 cm x 4.6 cm), which is snug enough to hold tissues in place.
Seeds and Assembly
Seeds: Thread Color E on a tapestry needle. Each seed is a double-wrapped straight stitch over 1 round, about 0.2 in (0.5 cm) tall. Stagger the seeds about 1 in (2.5 cm) apart on these rounds:
- Rnds 12, 18, 24, 30 and 36: 5 to 6 seeds each
- Rnd 41: 4 seeds
You’ll have about 30 seeds in total. Keep them at least 2 sts away from the rim, and leave Rnds 1–8 bare because the calyx will cover them. Knot the ends inside.
Attach the calyx and loop:
- Fold the strap in half to form a loop. Place both ends on the MR of the body so they overlap the top by 0.5 in (1.3 cm).
- Sew the strap ends down securely with several passes.
- Place the calyx on top so its center covers the strap ends. Line up one leaf with the center of the opening.
- Sew around the calyx Rnd 2 with small whipstitches.
- Tack each leaf at its base and halfway along. Leave the tips free so they lift slightly.
Checkpoint: the loop hangs about 4 in (10.2 cm) above the calyx.
Final Blocking
- Fill the body firmly with a small towel or a scrunched plastic bag until it reaches 6.75 in (17.1 cm) tall and 5 in (12.7 cm) wide.
- Mist the whole body with water until it is evenly damp but not soaked.
- Press the rim gently into a smooth oval with your fingers.
- Pat the calyx leaves flat and open, and shape each tip into a point.
- Straighten the loop and hang the piece, or let it dry upright.
- Leave it to dry completely, which takes about 24 hours. Then remove the filling.
- Feed about 15 folded pocket tissues through the opening and pull the first one partway out.
Final Quality-Control Checklist
- Your stitch counts match at Rnds 8, 16, 33 and 47.
- The circumference is 16 in (40.6 cm) at the widest point.
- The opening has a 40-st rim with smoothly rounded corners.
- The color bands change at Rnd 20/Row 21 and at Rnd 33/34.
- The bottom is fully closed, with no hole.
- Seeds are evenly spaced and stay clear of the rim.
- All 6 leaves have pointed tips and visible veins.
- The loop is sewn through several layers and holds a firm tug.
- All ends are woven in on the WS.
Troubleshooting
The top cups too early or ruffles: Your tension is changing between rounds. Re-check the Rnd 8 diameter and change hook size if it doesn’t match.
The join seam slants: This is normal for joined rounds. Keep the first sc of each round in the same st as the join.
The opening is too loose and tissues fall out: Work an extra round of sl sts in the BLO on the rim, or go down a hook size for the rim only.
The opening is too tight: Rework Rim Rnd 1 with plain sc at the corners instead of sc2tog, which gives 44 sts.
The rim ruffles: Skip 1 row end on each side, so you work 9 sc between the corners on each side.
The leaves curl: Block them flat while damp. Working the vein sl sts more loosely also helps.
The strap stretches over time: Work Row 2 more firmly, or sew a length of matching ribbon along the back.
Care
Hand wash in cool water with mild soap, reshape, and dry flat or hanging. Remove the tissues and keep the piece away from direct heat while it dries.
Final Notes
Each stage builds on the one before. The 18 sc x 20 rounds gauge gives a 3.2 in (8.1 cm) disc at Rnd 8 and a 16 in (40.6 cm) circumference at Rnd 16. Twelve rows of 62 sts leave a 2.2 in x 2.4 in (5.6 cm x 6.1 cm) gap. The 40-st rim finishes it at 1.6 in x 1.8 in (4.1 cm x 4.6 cm). The finished strawberry measures 5 in x 6.75 in (12.7 cm x 17.1 cm) under a 4.5 in (11.4 cm) calyx and a 4 in (10.2 cm) loop. If you check each number as you go, your strawberry will hang neatly from the headrest. Happy crocheting!