

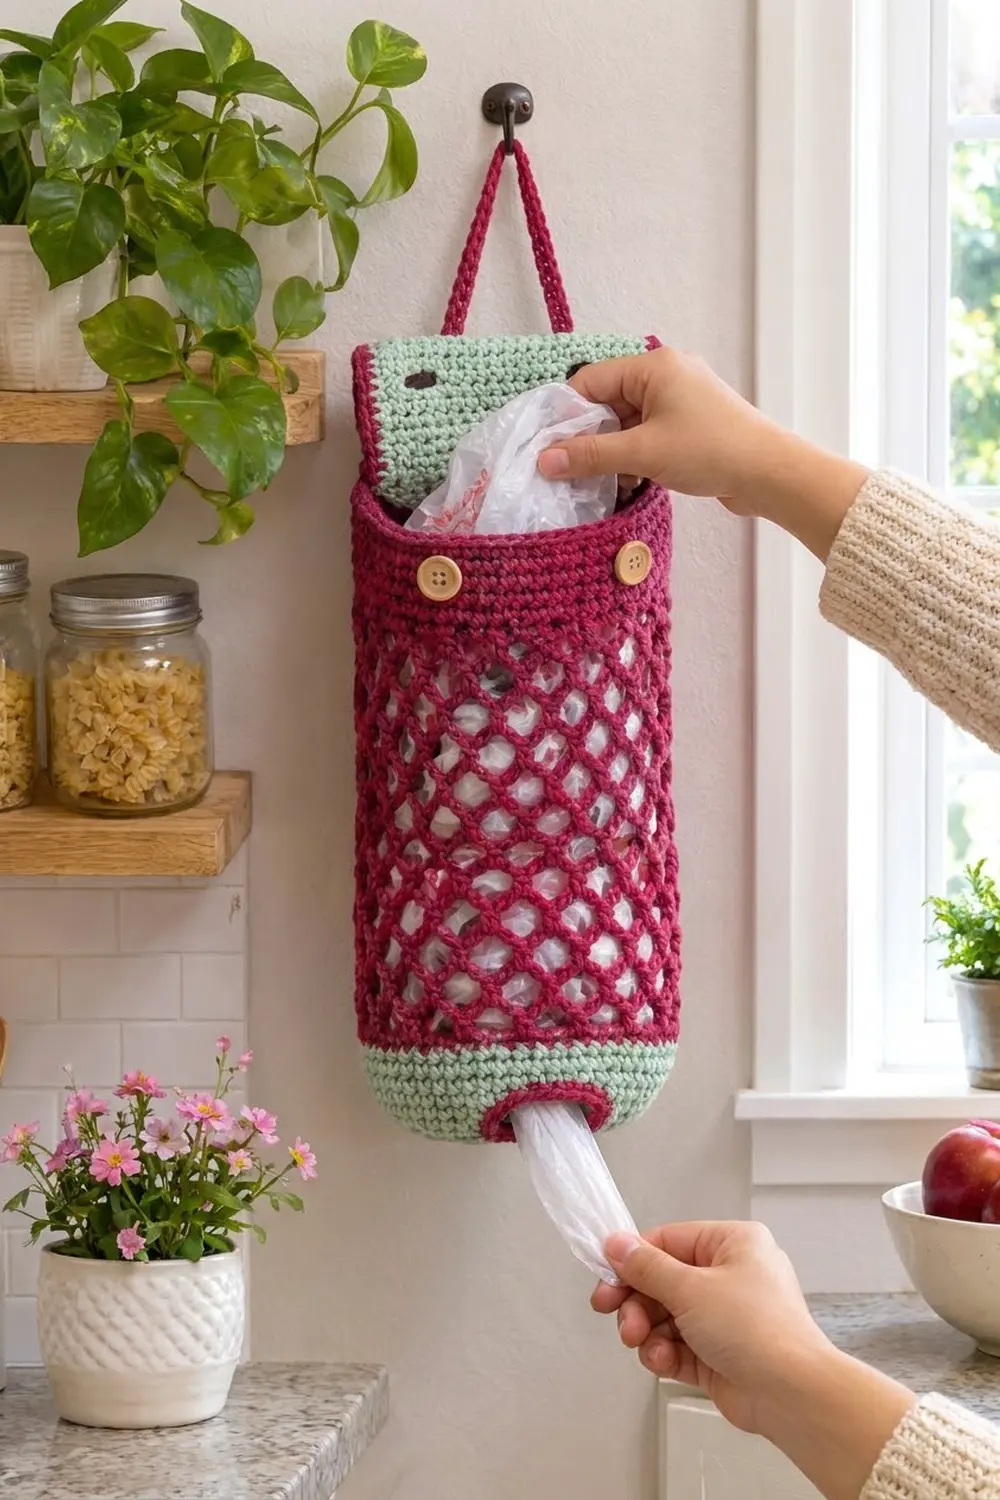
The Berry Lattice Bag Dispenser is a hanging tube that keeps plastic shopping bags in one tidy place. You stuff bags in at the top and pull them out one at a time through a small opening near the bottom. The open diamond mesh lets you see at a glance how many bags are left.
The design uses two colors. Raspberry is used for the mesh body, the solid top band, the hanging strap, and the trim, and soft sage green is used for the oval base, the bottom band, and the button flap. Two light wooden buttons hold the flap closed over the top opening. The look is fresh, simple, and kitchen-friendly.
This pattern uses US crochet terms. The finished dispenser measures about 6.5 in (16.5 cm) wide when flat and 15.25 in (38.7 cm) tall from base to top rim. The strap rises another 3.5 in (8.9 cm), so the total hanging height is about 18.75 in (47.6 cm).
Construction is straightforward. You work the body as one continuous piece from the bottom up: a sage oval base, a sage band with the dispensing opening, a raspberry chain mesh, and a solid raspberry top band. Then you make the flap and strap separately, edge the flap, and sew both on.
Finished Size and Construction
- Finished size: 6.5 in (16.5 cm) wide flat × 15.25 in (38.7 cm) tall body; 18.75 in (47.6 cm) including the strap
- Skill level: Easy / advanced beginner
- Terminology: US crochet terms
- Yarn weight: Worsted (#4), cotton or cotton blend
- Hook: 5.0 mm (H-8)
- Number of pieces: 3 crocheted components (body, flap, strap), assembled into one finished item
- Layout: Vertical tube; flap sewn to the back rim, strap sewn inside the side folds
- Piece sizes: body circumference 13 in (33.0 cm); flap 6 × 4 in (15.2 × 10.2 cm); strap 1 × 12 in (2.5 × 30.5 cm)
- Flap size before border: 6 × 4 in (15.2 × 10.2 cm)
- Flap size after border: 6.5 × 4.5 in (16.5 × 11.4 cm)
- Border depth: about 0.25 in (0.6 cm) per side
Materials
Choose a smooth worsted cotton. Cotton holds its shape, does not stretch much under a full load of bags, and stands up to washing. Acrylic will also work, but the mesh may sag more over time. If you change the colors, pick a darker color for the mesh so the bags behind it don’t wash it out.
- Raspberry (Color A): about 70 g / 112 m
- Sage green (Color B): about 50 g / 80 m
These quantities assume a typical cotton of about 50 g per 80 m. They include a margin of about 15–20%, so there is already enough extra for swatching and sewing.
Tools:
- 5.0 mm (H-8) crochet hook
- 2 wooden buttons, 5/8 in (1.6 cm) diameter
- Locking stitch markers (at least 3)
- Tapestry needle
- Scissors
- Measuring tape
- Rust-proof pins and a blocking surface
Abbreviations (US Terms)
- ch – chain
- sc – single crochet
- sc2tog – single crochet 2 together
- sl st – slip stitch
- sk – skip
- st(s) – stitch(es)
- sp – space
- BLO – back loop only
- rnd(s) – round(s)
- inc – 2 sc in the same stitch
Special stitch – sc2tog: Insert hook in the next st, yarn over, pull up a loop. Insert hook in the following st, yarn over, pull up a loop. Yarn over and pull through all 3 loops on the hook.
Round notes: Join every body round with a sl st to the first sc. The ch 1 at the start of a round does not count as a stitch.
Gauge and Checkpoints
Gauge: 16 sc and 18 rows = 4 in (10.2 cm) in sc. In the mesh, 1 mesh round is about 0.75 in (1.9 cm) tall.
Instead of making a separate swatch, test your gauge on the base. The base works up quickly and gives a reliable first reading. If you prefer a flat swatch, chain 21 and work 20 rows of sc, then measure the center 4 in (10.2 cm).
Checkpoints:
- After Rnd 7 (base): 52 sts; the oval measures about 4.5 × 3 in (11.4 × 7.6 cm) and 13 in (33.0 cm) around the edge.
- After Rnd 17 (sage band): the tube lies flat at 6.5 in (16.5 cm) wide, and the band is about 2.25 in (5.7 cm) tall.
- After Rnd 31 (mesh): the mesh section is about 10.5 in (26.7 cm) tall when lightly stretched.
- After Rnd 42 (top band): the body is about 15.25 in (38.7 cm) tall.
If your base is too big, go down to a 4.5 mm hook. If it is too small, go up to a 5.5 mm hook. Change the hook, not the stitch counts, because the flap and strap are sized to fit a 52-st body at this gauge.
Body
Oval Base (Color B, sage)
Ch 8.
Rnd 1: Sc in 2nd ch from hook, sc in next 5 ch, 3 sc in last ch. Working along the opposite side of the foundation chain, sc in next 5 ch, 2 sc in last ch (the same ch as the first sc). Join. (16 sts)
Rnd 2: Ch 1, 2 sc in first st, sc in next 5, [2 sc in next st] 3 times, sc in next 5, [2 sc in next st] 2 times. Join. (22 sts)
Rnd 3: Ch 1, 2 sc in first st, sc in next 6, [inc, sc in next st] 3 times, sc in next 5, [inc, sc in next st] 2 times. Join. (28 sts)
Rnd 4: Ch 1, 2 sc in first st, sc in next 7, [inc, sc in next 2] 3 times, sc in next 5, [inc, sc in next 2] 2 times. Join. (34 sts)
Rnd 5: Ch 1, 2 sc in first st, sc in next 8, [inc, sc in next 3] 3 times, sc in next 5, [inc, sc in next 3] 2 times. Join. (40 sts)
Rnd 6: Ch 1, 2 sc in first st, sc in next 9, [inc, sc in next 4] 3 times, sc in next 5, [inc, sc in next 4] 2 times. Join. (46 sts)
Rnd 7: Ch 1, 2 sc in first st, sc in next 10, [inc, sc in next 5] 3 times, sc in next 5, [inc, sc in next 5] 2 times. Join. (52 sts)
Each round adds exactly 6 sts, 3 at each curved end, so the straight sides stay flat and the ends stay smooth. Check Checkpoint 1 now.
Sage Band with Dispensing Opening (Color B)
Rnd 8: Ch 1, sc in BLO of each st around. Join. (52 sts) This makes a crisp fold where the base turns up into the wall.
Rnd 9: Ch 1, sc in each st around. Join. (52 sts)
Fold the tube flat with the base centered. The opening should sit centered on one long face. If it won’t, shift your starting point by working a few sl sts before you begin Rnd 10.
Rnd 10: Ch 1, sc in next 6 sts, ch 12, sk next 12 sts, sc in next 34 sts. Join. (40 sc + 12 ch = 52 sts)
Rnd 11: Ch 1, sc in each sc and in each ch. Join. (52 sts)
Rnds 12–17: Ch 1, sc in each st around. Join. (52 sts)
Fasten off Color B. Check Checkpoint 2.
Diamond Mesh (Color A, raspberry)
Rnd 18: Join Color A with a sl st in the first st. Ch 1, sc in first st, [ch 5, sk 3 sts, sc in next st] 12 times, ch 5, sk last 3 sts, join to first sc. (13 sc, 13 ch-5 loops)
Check: 1 sc + 12 × (3 skipped + 1 sc) + 3 skipped = 52, so every stitch in the band is used.
Rnd 19: Sl st in first 3 ch of the first ch-5 loop. Ch 1, sc in the same loop, [ch 5, sc in next ch-5 loop] 12 times, ch 5, join to first sc. (13 loops)
Rnds 20–31: Repeat Rnd 19. (13 loops each round)
That makes 14 mesh rounds (Rnds 18–31). Each sc sits in the center of a loop from the round below, which forms the diamond lattice.
Tension tip: Keep the chains even and slightly relaxed. Tight chains pull the mesh narrower than the sage band, and the tube will look pinched at the waist. Check Checkpoint 3.
Top Band (Color A)
Rnd 32 (conversion round): Sl st in first 3 ch of the first loop, then ch 1. Work [3 sc in the ch-5 loop, sc in next sc] around, ending with sc in the first sc of the previous round. Join. (13 sc worked 1-per-existing-sc + 39 sc into loops = 52 sts)
Rnds 33–42: Ch 1, sc in each st around. Join. (52 sts)
Do not fasten off. You’ll finish the top rim in the Border section. Check Checkpoint 4.
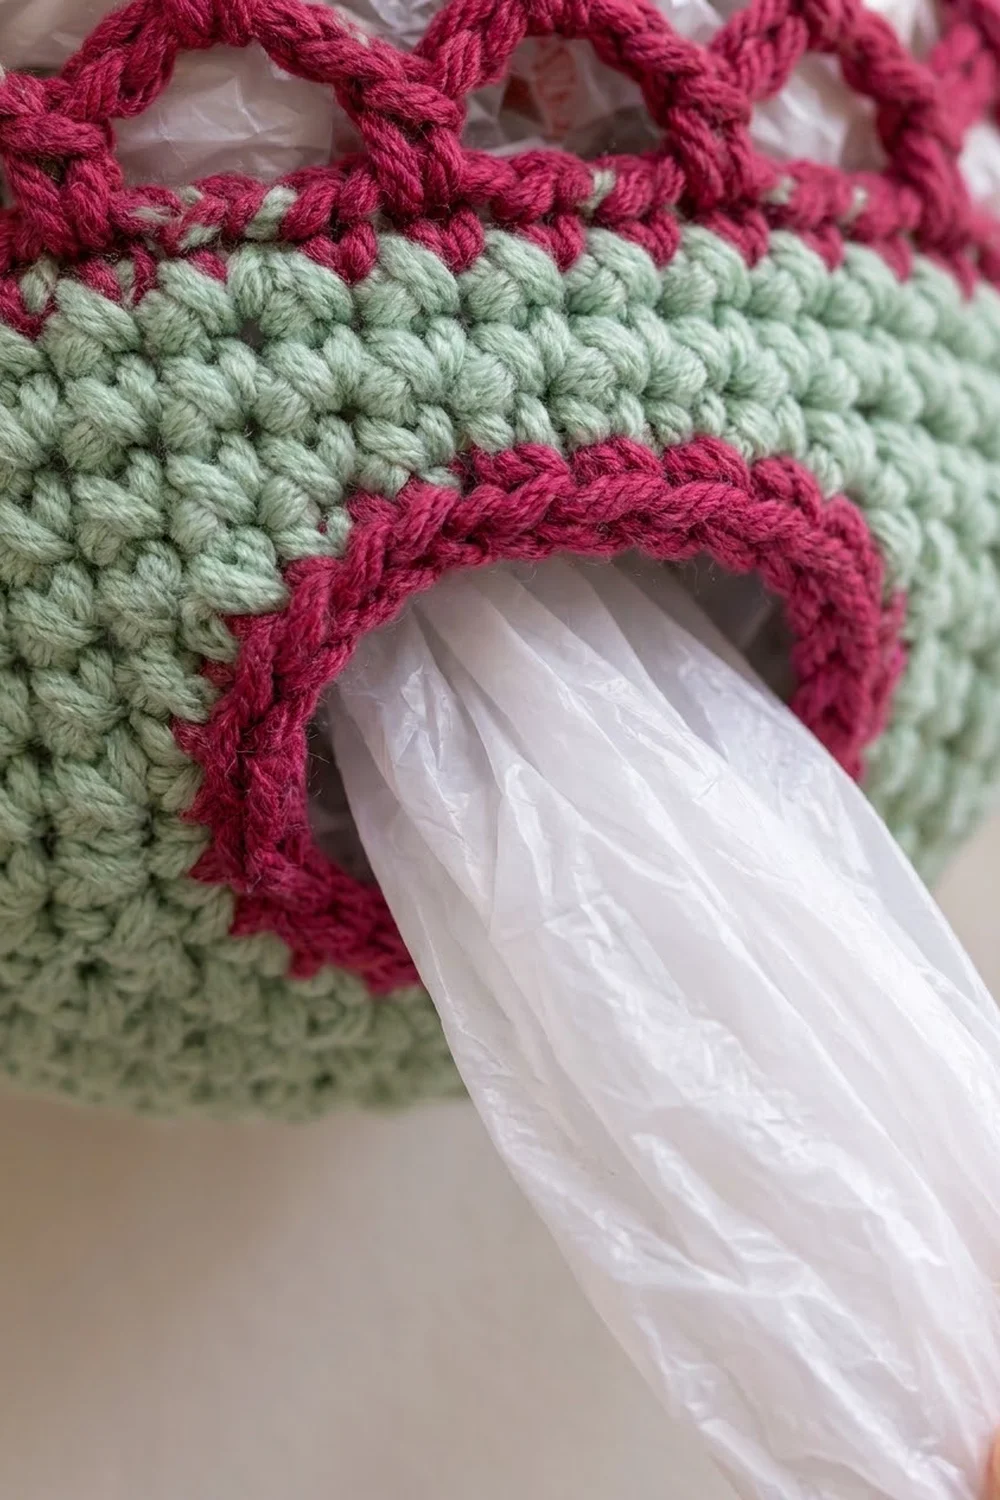
Dispensing Opening Edging (Color A)
Join Color A at one lower corner of the opening.
Rnd 1: Ch 1. Work 12 sc in the 12 free sts of Rnd 9 along the lower edge, 2 sc in the side, 12 sc in the free loops of the Rnd 10 chain along the upper edge, and 2 sc in the other side. Join. (28 sts)
Rnd 2: Sl st in each st around. (28 sl sts + 0 added) Fasten off.
This raspberry ring firms up the opening so it holds its shape as bags are pulled through.
Flap (Color B)
Ch 25.
Row 1: Sc in 2nd ch from hook and in each ch across. Turn. (24 sts)
Rows 2–14: Ch 1, sc in each st across. Turn. (24 sts)
Row 15 (buttonholes): Ch 1, sc in next 4, ch 2, sk 2, sc in next 12, ch 2, sk 2, sc in next 4. Turn. (20 sc + 4 ch = 24 sts)
Row 16: Ch 1, sc in each sc and 2 sc in each ch-2 sp. Turn. (24 sts)
Row 17: Ch 1, sc2tog, sc in next 20, sc2tog. Turn. (22 sts)
Row 18: Ch 1, sc2tog, sc in next 18, sc2tog. (20 sts) Fasten off Color B.
The flap measures 6 × 4 in (15.2 × 10.2 cm) before the border. The decreases in Rows 17–18 round off the two lower corners. The buttonhole centers are 14 sts, or 3.5 in (8.9 cm), apart.
Hanging Strap (Color A)
Ch 5.
Row 1: Sc in 2nd ch from hook and in each ch across. Turn. (4 sts)
Rows 2–54: Ch 1, sc in each st across. Turn. (4 sts)
Fasten off, leaving a 12 in (30.5 cm) tail for sewing. The strap measures 1 × 12 in (2.5 × 30.5 cm).
Border
Border gauge: 16 sc = 4 in (10.2 cm), the same as the main fabric. Space the edge stitches to match this gauge so the edges lie flat.
Flap Border
With the right side facing, join Color A in the first st of Row 18. In this border, the per-side counts do not include the corners. The 4 corner stitches are counted separately.
Rnd 1: Ch 1.
– Bottom edge (Row 18): sc in each of 20 sts, with 1 extra sc in the last st (corner).
– First side: 16 sc across the 18 row ends (sc in each row end, skipping every 9th row end).
– Top edge (foundation): 1 extra sc in the first ch (corner), then sc in each of 24 ch, with 1 extra sc in the last ch (corner).
– Second side: 16 sc across the 18 row ends, worked the same way.
– Final corner: 1 extra sc in the first st of Row 18.
Join. (20 + 16 + 24 + 16 = 76 side sts + 4 corner sts = 80 sts)
Rnd 2: Sl st in each st around. (80 sl sts + 0 added) Fasten off.
Why the math works: At 4 sts per inch, each 4 in (10.2 cm) side needs 16 sc, and the 6 in (15.2 cm) top edge needs 24 sc. One sc in every row end would give 18 per side and make the sides ripple. A single extra stitch at each corner is enough to turn neatly without cupping.
Body Top Rim
Rnd 43: With Color A still on the hook from Rnd 42, sl st in each st around. (52 sl sts + 0 added) Fasten off.
This round matches the 52-st body exactly, so the rim stays 13 in (33.0 cm) around and does not flare.
Assembly
- Flatten the body so the dispensing opening is centered on the front.
- Center the flap’s top edge on the back of the body, 1 rnd below the rim, with the wrong side facing outward. Whipstitch it across the full 6.5 in (16.5 cm) width with Color B.
- Fold the flap forward over the opening. Mark where the buttonhole centers fall on the front top band, around Rnd 38. Sew a button at each mark.
- Sew 1.25 in (3.2 cm) of each strap end to the inside of the top band at the side folds. Stitch a box shape through both layers for strength.
The strap carries all the weight of the bags, so use doubled yarn for the box stitching and knot it securely on the inside.
Final Blocking
- Soak the dispenser in cool water for 10 minutes.
- Roll it in a towel to press out the water. Do not wring it.
- Stuff the body loosely with a towel or plastic bags to shape it into a tube.
- Lay it flat and ease it to 6.5 in (16.5 cm) wide and 15.25 in (38.7 cm) tall.
- Open each mesh diamond evenly with your fingers.
- Pin the flap flat at 6.5 × 4.5 in (16.5 × 11.4 cm).
- Let it dry completely, then remove the stuffing.
Final Quality-Control Checklist
- Base has 52 sts and lies flat without cupping
- Opening is centered on the front and fully ringed in raspberry
- Mesh has 13 loops in every round and does not spiral
- Top band has 52 sts, and the rim does not flare
- Flap measures 6.5 × 4.5 in (16.5 × 11.4 cm), with even rounded corners
- Buttons line up with the buttonholes, 3.5 in (8.9 cm) apart
- Strap ends are box-stitched securely
- All yarn ends are woven in through solid sc, not the mesh
Troubleshooting
- Base cups upward: Your increases are too tight. Relax your tension or go up a hook size.
- Base ruffles: You may have added extra increases. Recount each round against the stated totals.
- Mesh spirals or leans: Make sure each new sc goes into the center of the loop below, after exactly 3 sl sts.
- Mesh is narrower than the band: Loosen your chains, or work ch 6 instead of ch 5 in every loop.
- Opening is too tight for bags: Stretch it during blocking, or redo Rnd 10 with ch 14 and sk 14, then sc 32 instead of 34 at the end of the round.
- Opening stretches out: Work edging Rnd 1 more firmly, or add a second sl st round.
- Buttons slip out: Use buttons at least 5/8 in (1.6 cm) across.
- Flap sides ripple: Work 16 sc per side, not 18.
Care
Hand wash, or machine wash on a gentle cycle in cool water. Reshape the dispenser while damp and dry it flat or hanging.
Final Notes
The measurements build on each other. The 52-st base sets a 13 in (33.0 cm) circumference and a 6.5 in (16.5 cm) flat width. The 13-loop mesh uses all 52 sts, and the conversion round turns it back into exactly 52 sts. The 24-st flap plus its border matches the 6.5 in (16.5 cm) width, and the 12 in (30.5 cm) strap gives a 3.5 in (8.9 cm) hanging peak. If your base matches the gauge, every later piece will fit.
Happy crocheting!