

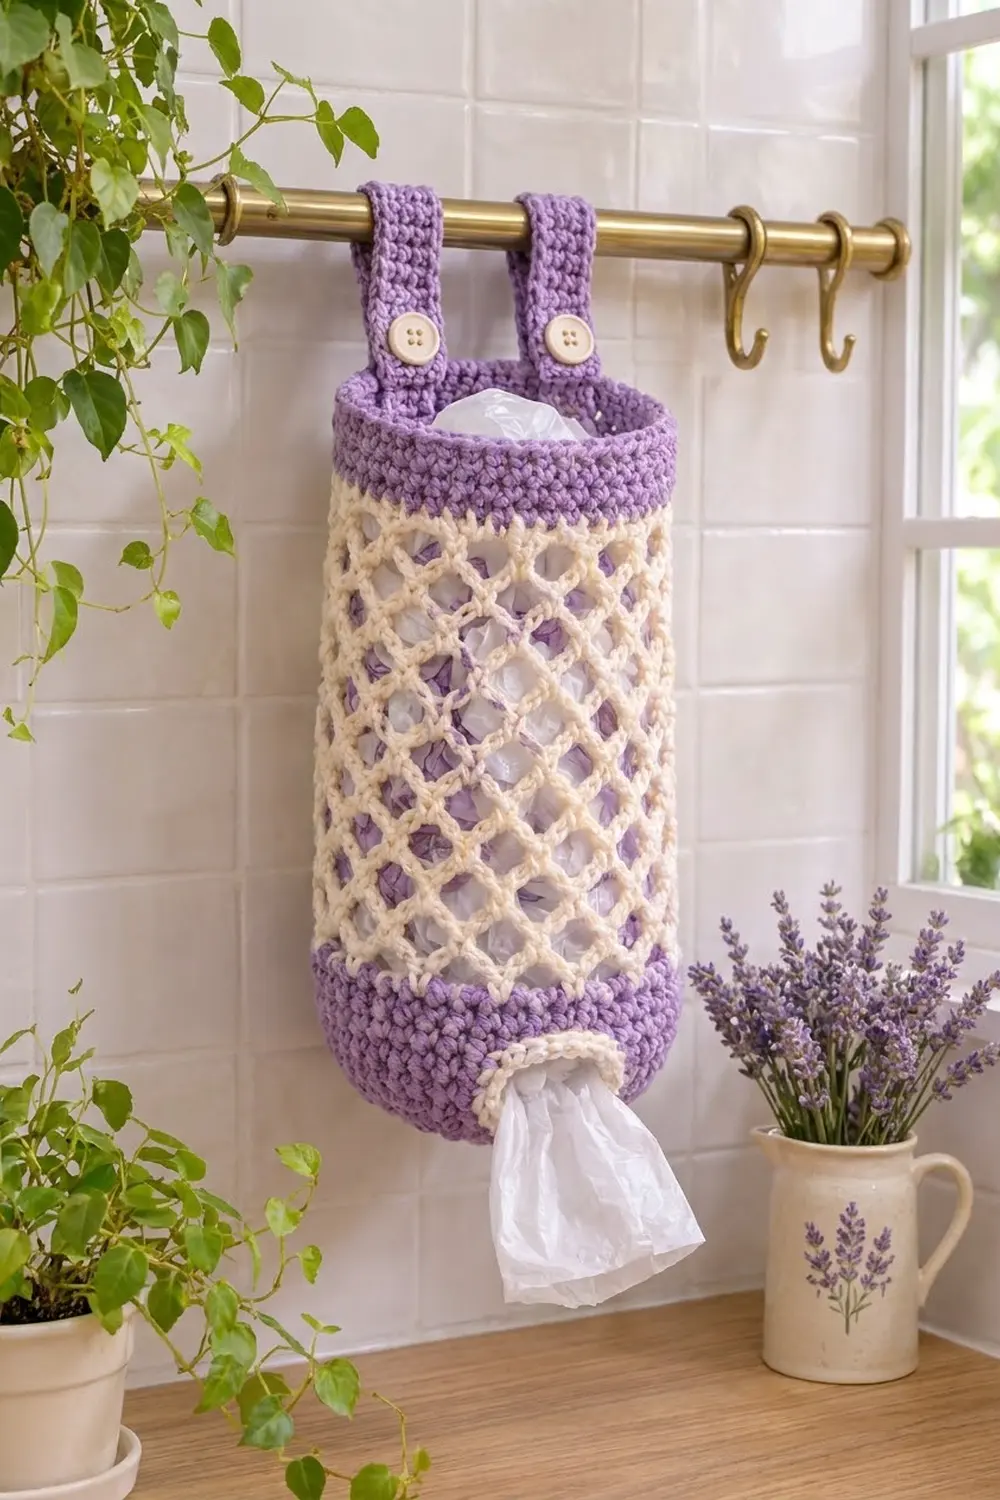
This plastic bag holder keeps grocery bags tidy and still looks nice in the kitchen. It is a simple tube: a solid lavender base with a round opening for pulling bags out, a cream diamond-mesh body, and a solid lavender rim. Two buttoned straps let you hang it from a rail, hook or cabinet bar.
The cream lattice is light and stretchy, and the purple bags inside show through the diamonds as soft color. The solid lavender bands at the top and bottom frame the mesh and make the holder stiff enough to keep its shape.
The pattern uses US crochet terms. The finished body measures 13.7 in (34.8 cm) around, which is 6.9 in (17.5 cm) wide when flattened. It is 13.6 in (34.5 cm) tall from the base to the rim, not counting the straps.
You work the body in one piece from the bottom up. You start at the dispensing opening, increase into a flat ring for the base, and then work straight up through the purple base band, the cream mesh and the purple rim. The two straps are worked flat and sewn on at the end.
Finished Size and Construction
- Finished size: 6.9 in (17.5 cm) wide flat; 13.7 in (34.8 cm) around; 13.6 in (34.5 cm) tall
- Skill level: Easy
- Terminology: US crochet terms
- Yarn weight: Worsted (#4), cotton or cotton blend
- Hook: US H-8 (5.0 mm)
- Number of pieces: 3 (1 body, 2 straps)
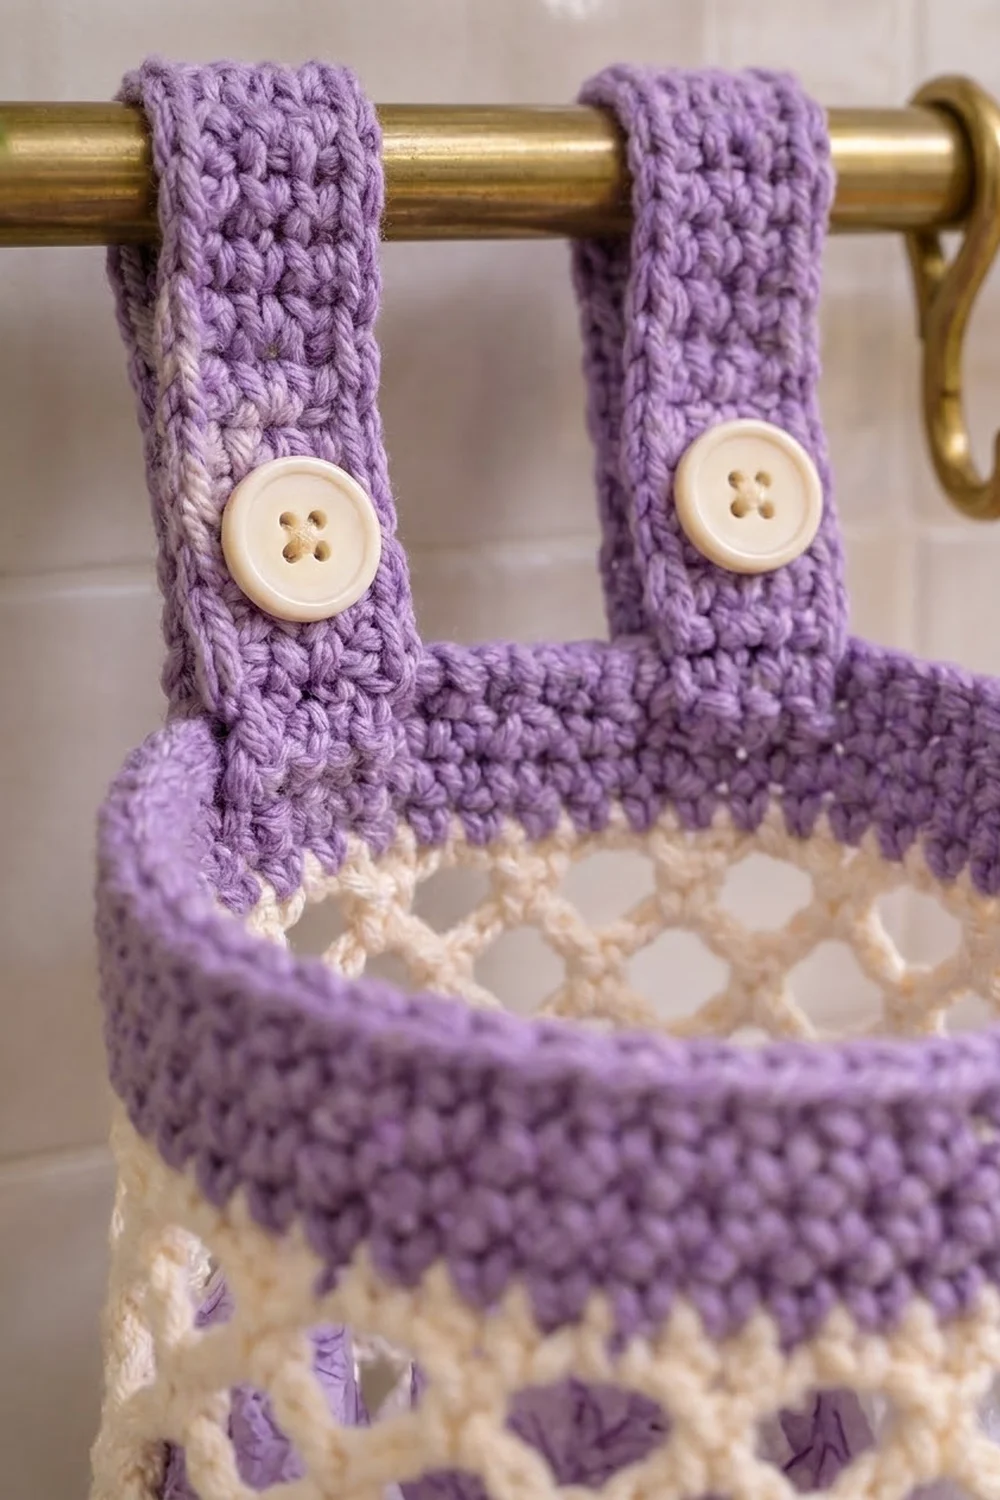
- Layout: straps sewn to the inside back of the rim; they fold over the rail and button to the front of the rim
- Body size: 48 stitches around; bottom opening 1.6 in (4.1 cm) across
- Size before border: 11.6 in (29.5 cm) tall, measured from the base to the top of the mesh
- Border (top rim band) depth: 2 in (5.1 cm)
- Strap size: 1.7 in (4.3 cm) wide × 10 in (25.4 cm) long
Materials
Use a worsted cotton or cotton blend. Cotton holds its shape well, can be washed and does not stretch out much under a full load of bags. Acrylic also works, but the mesh will relax more.
- Color A (lavender purple): 100 g / 170 m (base, base band, rim and straps)
- Color B (cream): 60 g / 100 m (mesh body)
- US H-8 (5.0 mm) crochet hook
- 2 cream buttons, 0.75 in (1.9 cm) across
- Tapestry needle
- Sewing needle and matching thread for the buttons
- 2 stitch markers
- Measuring tape
- Scissors
The yarn amounts include a margin of about 15% for your gauge swatch and small tension differences.
Abbreviations (US Terms)
- ch: chain
- sl st: slip stitch
- sc: single crochet
- inc: 2 sc in the same stitch
- BLO: back loop only
- sp: space
- st(s): stitch(es)
- sk: skip
- rnd: round
Special stitch: mesh loop. A mesh loop is ch 4 followed by 1 sc worked into the next ch-4 sp. Stacked mesh loops make the diamond lattice.
Gauge and Checkpoints
Single crochet gauge: 14 sc and 16 rnds = 4 in (10.2 cm), which works out to 3.5 sts and 4 rnds per inch.
Mesh gauge: 16 mesh loops around; 5 mesh rnds = 3 in (7.6 cm), or 0.6 in (1.5 cm) per rnd, measured without stretching.
Your first piece is your gauge test, so make one strap before you start the body. Each strap is 6 sts wide and should measure 1.7 in (4.3 cm) across. After 8 rows it should be 2 in (5.1 cm) long.
Checkpoints:
- After Rnd 6 the base lies flat and measures about 4.4 in (11.2 cm) across.
- After Rnd 14 the base band rises 2 in (5.1 cm) above the base edge.
- After 5 mesh rnds the mesh section is 3 in (7.6 cm) tall.
- After 10 mesh rnds it is 6 in (15.2 cm) tall.
- After 16 mesh rnds the body is 11.6 in (29.5 cm) tall.
If your work is too big (strap wider than 1.7 in / 4.3 cm), switch to a 4.5 mm hook. If it is too small, switch to a 5.5 mm hook. If the mesh is too short but your sc gauge is correct, work 1 extra mesh rnd. Each mesh rnd adds 0.6 in (1.5 cm).
Base (Color A)
The base starts as a chain ring. That ring becomes the dispensing opening.
Rnd 1: With A, ch 18. Sl st into the first ch to form a ring, making sure the chain is not twisted. Ch 1, then work 1 sc in each ch around and join with a sl st to the first sc. (18 sc)
Place a marker in the first st of every rnd and move it up as you go.
Rnd 2: Ch 1, sc in the next 2 sts, inc in the next st. Repeat from * 6 times and join. (24 sc)
Rnd 3: Ch 1, sc in the next 3 sts, inc. Repeat from * 6 times and join. (30 sc)
Rnd 4: Ch 1, sc in the next 4 sts, inc. Repeat from * 6 times and join. (36 sc)
Rnd 5: Ch 1, sc in the next 5 sts, inc. Repeat from * 6 times and join. (42 sc)
Rnd 6: Ch 1, sc in the next 6 sts, inc. Repeat from * 6 times and join. (48 sc)
Checkpoint: The base is a flat ring about 4.4 in (11.2 cm) across, with an opening 1.6 in (4.1 cm) across in the center. If it ruffles, your increases are too tight for your tension, so go up one hook size. If it cups, go down one hook size.
Base Band (Color A)
Rnd 7: Ch 1, then work sc BLO in each st around and join. (48 sc)
Working this rnd in the back loops makes a ridge that turns the flat base into the sides of the tube. This gives you the rounded bottom edge shown in the photo.
Rnds 8–14: Ch 1, sc in each st around and join. (48 sc each rnd)
Checkpoint: The base band is 8 rnds, which is 2 in (5.1 cm) tall. The tube measures 13.7 in (34.8 cm) around. Fasten off A.
Mesh Body (Color B)
Mesh Rnd 1 (conversion rnd): Join B with a sl st in any sc. Ch 1 and sc in the same st. Then ch 4, sk 2 sts, sc in the next st. Repeat from * 15 times. Finish with ch 4, sk 2 sts, and join with a sl st to the first sc.
This rnd turns 48 sc into 16 sc and 16 ch-4 sps. Each repeat uses 3 sts (1 sc plus 2 skipped), and 16 × 3 = 48.
Mesh Rnd 2: Sl st in the next 2 ch to reach the center of the first ch-4 sp. Ch 1, then sc in the same sp. Work ch 4, sc in the next ch-4 sp. Repeat from * 14 times. Ch 4 and join with a sl st to the first sc. (16 sc and 16 ch-4 sps)
Each sc sits at the center of a loop from the round below. This offset is what makes the diamonds.
Mesh Rnds 3–16: Repeat Mesh Rnd 2. (16 sc and 16 ch-4 sps each rnd)
The diamonds will spiral slightly because each round starts at a new spot. This is normal, and blocking will even it out.
Checkpoint: After 16 mesh rnds, the mesh is 9.6 in (24.4 cm) tall. The body is now 11.6 in (29.5 cm) tall. Fasten off B.
Straps (Make 2, Color A)
Row 1: Ch 7. Sc in the 2nd ch from the hook and in each remaining ch. (6 sc)
Rows 2–36: Ch 1, turn, and sc in each st. (6 sc)
Row 37 (buttonhole row): Ch 1, turn, sc in the next 2 sts, ch 2, sk 2 sts, sc in the last 2 sts. (4 sc and 1 ch-2 sp)
Row 38: Ch 1, turn, sc in the next 2 sts, 2 sc in the ch-2 sp, sc in the last 2 sts. (6 sc)
Rows 39–40: Ch 1, turn, and sc in each st. (6 sc)
Fasten off and leave a 12 in (30.5 cm) tail.
Checkpoint: Each strap is 40 rows long, which is 10 in (25.4 cm), and 1.7 in (4.3 cm) wide. The buttonhole is 0.6 in (1.5 cm) wide, so a 0.75 in (1.9 cm) button passes through snugly.
Make All Pieces
| Piece | Color | Quantity |
|---|---|---|
| Body (base, base band, mesh) | A + B | 1 |
| Strap | A | 2 |
The top rim band is the border. It is worked onto the body after the mesh.
Layout, seen from above with the 48 rim sts split into a 24-st front and a 24-st back:
BACK  (sts 25–48):  [3 sts][STRAP 1: 6][6 sts][STRAP 2: 6][3 sts]
FRONT (sts 1–24):   [3 sts][BUTTON 1: 6][6 sts][BUTTON 2: 6][3 sts]
Each strap’s buttonhole end lines up with a button directly opposite it on the front.
Joining the Straps
You attach the straps after the rim band is finished and blocked.
- Lay the body flat with the front facing you, then turn it over. Count 3 sts in from the side fold and pin Strap 1’s Row 1 end over the next 6 sts. Leave a gap of 6 sts, then pin Strap 2 over the next 6 sts. 3 sts remain to the other fold, which gives 3 + 6 + 6 + 6 + 3 = 24.
- Each strap should overlap the inside of the rim by 1.5 in (3.8 cm), which is 6 strap rows.
- Use the tail to whipstitch each strap stitch to the rim stitch behind it, sewing all around the overlapped rectangle. Keep the stitches firm but not puckered, because these seams carry the weight of the bags.
- Sew the buttons to the front band, 1 in (2.5 cm) below the top edge, each one centered on the 6 sts opposite its strap.
Checkpoint: 8.5 in (21.6 cm) of each strap stays free. That is long enough to loop over a rail or bar up to about 1.5 in (3.8 cm) thick and button at the front.
Border (Top Rim Band, Color A)
Border gauge: 14 sc = 4 in (10.2 cm), the same as the base band. Each side (front and back) has 24 sts, which is 6.9 in (17.5 cm).
Rnd 1 (conversion rnd): Join A with a sl st in any sc of Mesh Rnd 16. Ch 1 and sc in the same st. Work 2 sc in the next ch-4 sp, then sc in the next sc, 2 sc in the next ch-4 sp. Repeat from * 15 times and join.
Count: 16 sc (1 in each existing sc) + 32 sc (2 in each of the 16 sps) = 48 sc, or 24 per side.
Rnds 2–8: Ch 1, sc in each st around and join. (48 sc each rnd, 24 per side)
Rnd 9 (finishing rnd): Ch 1, sl st loosely in each st around and join. (48 sl st) Fasten off.
This rnd firms up the rim edge and adds almost no height. The 8 sc rnds make the band 2 in (5.1 cm) deep.
Opening edge: With A, join to any free loop of the foundation chain at the opening. Sl st in each of the 18 free loops and join. (18 sl st) Fasten off.
Why the math works: The base band, the mesh and the rim all use the same 48-st count. The mesh uses 3 sts per loop (16 × 3 = 48), and the rim gives back exactly 3 sts per loop (1 sc + 2 sc in the sp). Because the count matches at both ends of the mesh, the tube stays straight and does not flare or pull in. The total height is 2 in + 9.6 in + 2 in = 13.6 in (34.5 cm).
Final Blocking
- Weave in all ends before blocking. Leave the strap tails if you haven’t sewn the straps on yet.
- Soak the body and straps in cool water for 10 minutes, then gently squeeze out the water. Do not wring.
- Roll each piece in a towel and press to remove extra water.
- Slide the body over a form about 13.7 in (34.8 cm) around, such as a rolled towel or a 4.4 in (11.2 cm) wide jar or bottle.
- Line up the mesh diamonds so the columns run straight up. Ease the mesh until it is 9.6 in (24.4 cm) tall.
- Lay the straps flat, pin them to 1.7 × 10 in (4.3 × 25.4 cm), and let them dry.
- Let everything dry completely before sewing the straps on and adding the buttons.
Final Quality-Control Checklist
- Base is a flat ring with an opening 1.6 in (4.1 cm) across
- BLO ridge sits evenly at the bottom edge
- Base band: 48 sc, 2 in (5.1 cm) tall
- Mesh: 16 loops in every rnd, 16 rnds, 9.6 in (24.4 cm) tall
- Rim: 48 sc (24 per side), 2 in (5.1 cm) deep
- Straps: 6 sc wide, 40 rows, buttonhole at Row 37
- Straps sewn 1.5 in (3.8 cm) inside the back with 6 sts between them
- Buttons sit 1 in (2.5 cm) below the rim, opposite the straps
- Body is 13.6 in (34.5 cm) tall and 6.9 in (17.5 cm) wide flat
Troubleshooting
Base ruffles or cups: Check that you have 6 increases per rnd. If the count is right, change your hook size as described in the gauge section.
Mesh loop count drifts: You may have skipped a sp or worked twice into one. Count 16 sc at the end of each mesh rnd.
Rim flares out: You have more than 48 sts. Rework Rnd 1 with exactly 2 sc in each sp.
Rim pulls in: Your conversion rnd is too tight. Rework it loosely, or work it with a 5.5 mm hook.
Button slips out: Sew a small stitch across one end of the buttonhole to make it narrower.
Bags fall through the opening too easily: Work the opening edge in sc instead of sl st, with 18 sc.
Care
Machine wash cool on a gentle cycle in a mesh bag and lay flat to dry. Reshape the tube while it is damp.
Final Notes
Everything in this holder depends on one number: 48. The base grows from 18 to 48 sts. The base band holds 48 sts for 2 in (5.1 cm). The mesh turns 48 sts into 16 loops for 9.6 in (24.4 cm). The rim turns those loops back into exactly 48 sts for another 2 in (5.1 cm). That gives a straight tube 13.6 in (34.5 cm) tall and 6.9 in (17.5 cm) wide. Check your gauge on the first strap, count the stitches at each checkpoint, and the holder will come out the right size.
Happy crocheting!