

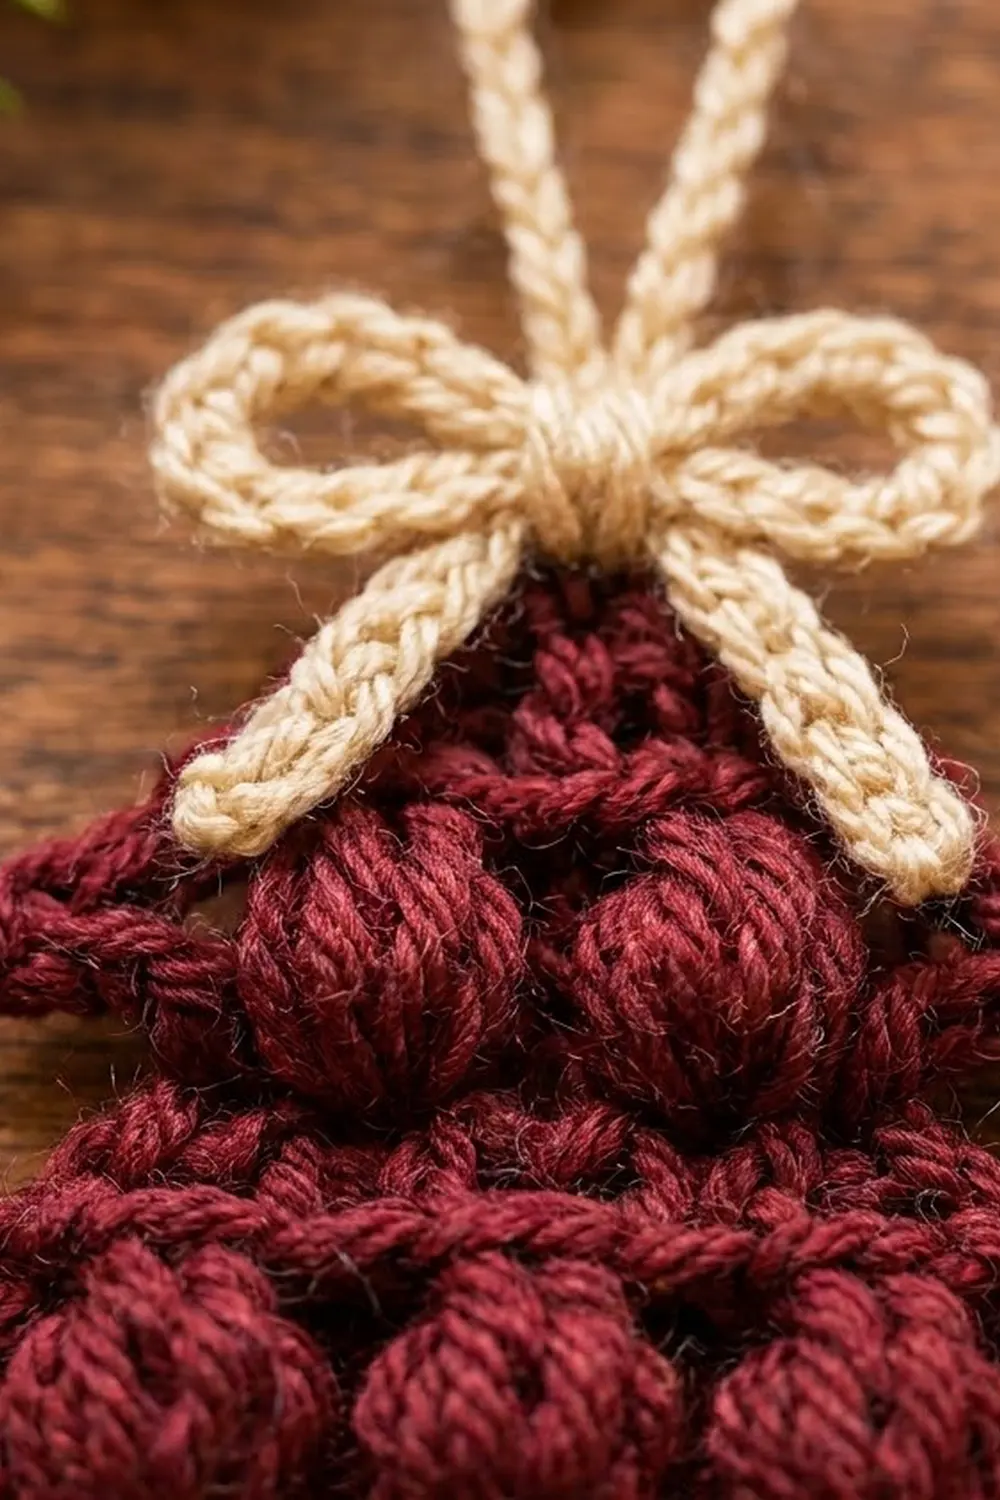
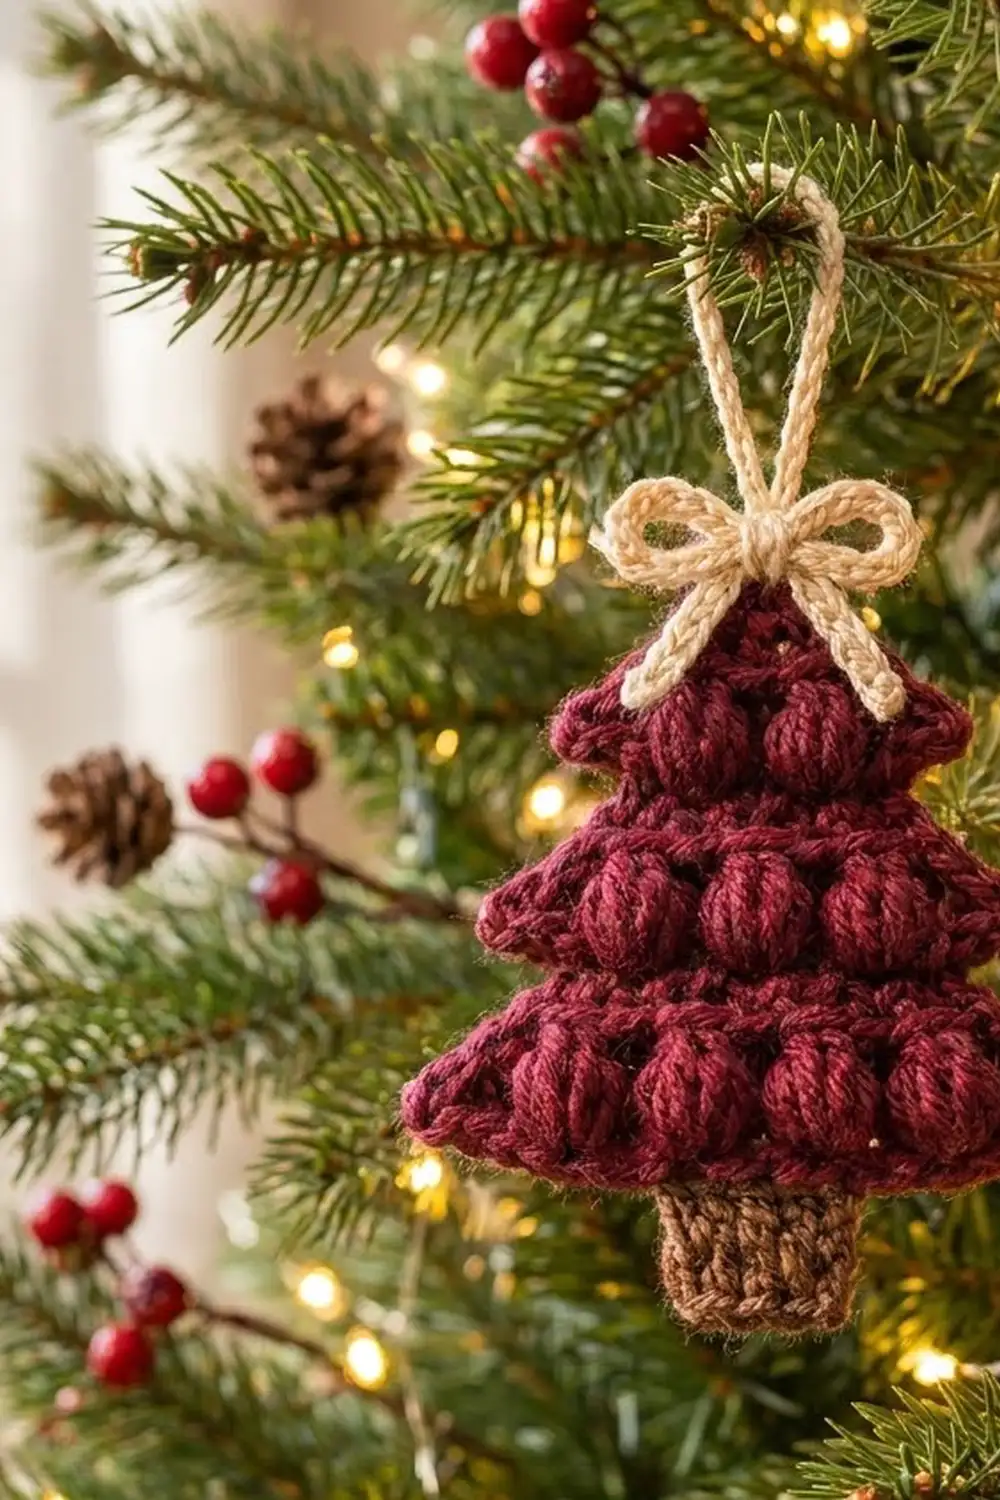
This little tree ornament is made of chunky puff stitches in a warm burgundy. It is stacked into three neat tiers and finished with a short brown trunk and a cream chain bow. It looks cozy and a little rustic. It is quick enough to make a whole set in one evening.
The palette has three colors. Burgundy is used for the tree, mid-brown for the trunk and cream for the bow and hanging loop. Each tier has its own row of puffs, five on the bottom, three in the middle and two at the top. A single crochet outline gives every tier a crisp rim with a small pointed tip.
This pattern uses US crochet terms. The finished ornament is 4.2 in (10.7 cm) wide and 4.9 in (12.4 cm) tall without the loop.
Construction overview: You work the tree body flat, in rows, from the bottom up. Then you work one round of single crochet border around the whole body. The trunk is worked straight down from the center of the bottom border. Last, you tie a chain bow at the peak and attach a chain hanging loop.
Finished Size and Construction
- Finished size: 4.2 in (10.7 cm) wide x 4.9 in (12.4 cm) tall, not counting the loop
- Skill level: Easy
- Terminology: US crochet terms
- Yarn weight: Worsted (#4)
- Hook: 4.0 mm (G-6)
- Number of pieces: 1 crocheted tree (body, border and trunk in one piece), plus a chain bow and chain loop
- Layout: Single ornament, no joining
- Body size before border: 3.8 in (9.7 cm) wide x 3.5 in (8.9 cm) tall
- Border depth: 1 round of sc, about 0.2 in (0.5 cm) on each edge
- Trunk: 1.1 in (2.8 cm) wide x 1.0 in (2.5 cm) tall
Materials
Use a smooth worsted-weight yarn so the puffs look rounded and clear. Acrylic or a wool blend both work well. A yarn with about 200 m per 100 g is ideal.
- Burgundy (Color A): 10 g / 20 m, for the tree body and border
- Mid-brown (Color B): 3 g / 6 m, for the trunk
- Cream (Color C): 3 g / 6 m, for the bow and hanging loop
Tools:
– 4.0 mm (G-6) crochet hook
– Tapestry needle
– Scissors
– 2 stitch markers
– Ruler or tape measure
– Pins and a blocking surface
These quantities include a margin, so you have room for a test piece and weaving in ends.
Abbreviations (US Terms)
- ch – chain
- sc – single crochet
- sc2tog – single crochet 2 together
- sc3tog – single crochet 3 together
- sl st – slip stitch
- st(s) – stitch(es)
- sp – space
- RS / WS – right side / wrong side
Special stitch – Puff stitch (puff): Yarn over, insert the hook in the stitch and pull up a loop to about hdc height. Repeat this 3 more times in the same stitch, so you have 9 loops on the hook. Yarn over and pull through all 9 loops. Then ch 1 to close the puff.
The closing ch 1 does not count as a stitch. Each puff counts as 1 stitch. On the next row, work into the top of the puff, not into the closing chain.
Gauge and Checkpoints
Gauge: 18 sc and 20 sc rows = 4 in (10.2 cm). One sc row is about 0.2 in (0.5 cm) tall. One puff row is about 0.3 in (0.8 cm) tall.
Make one tree body as a test piece before you commit to a set. Use these checkpoints as you go:
- After Row 1: 17 sts = 3.8 in (9.7 cm) wide.
- After Row 4: 13 sts = 2.9 in (7.4 cm) wide. The body is 0.9 in (2.3 cm) tall.
- After Row 8: The body is 1.8 in (4.6 cm) tall.
- After Row 16: The body is 3.5 in (8.9 cm) tall and 3.8 in (9.7 cm) wide at the base.
- After the border: 4.2 in (10.7 cm) wide x 3.9 in (9.9 cm) tall.
- After the trunk: 4.9 in (12.4 cm) total height.
If your piece is too big: go down to a 3.75 mm hook. If it is too small: go up to a 4.5 mm hook. For an ornament, a slightly firm fabric is better than a loose one, because it holds the tier shape.
Tree Body
Use Color A. You will work in rows from the bottom up. On odd rows the WS faces you, and on even rows the RS faces you, so every puff row is worked from the RS.
Tier 1 (bottom tier, 5 puffs)
Foundation: Ch 18.
Row 1 (WS): Sc in the 2nd ch from the hook and in each ch across. Turn. (17 sc)
Row 2 (RS): Ch 1. Sc in the first 2 sts, then puff in the next st, sc in the next 2 sts. Repeat from * to * 4 more times. Turn. (17 sts: 5 puffs + 12 sc)
Row 3 (WS): Ch 1. Sc2tog, sc in the next 13 sts, sc2tog. Turn. (15 sc)
Row 4 (RS): Ch 1. Sc2tog, sc in the next 11 sts, sc2tog. Turn. (13 sc)
Tier 2 (middle tier, 3 puffs)
Row 5 (WS, flare row): Ch 1. Work 2 sc in the first st, sc in the next 11 sts, then 2 sc in the last st. Turn. (15 sc)
This row makes the new tier stick out 1 stitch beyond the top of Tier 1 on each side. That step is what creates the ledge.
Row 6 (RS): Ch 1. Sc in the first 3 sts, then puff in the next st, sc in the next 3 sts. Repeat from * to * 2 more times. Turn. (15 sts: 3 puffs + 12 sc)
Row 7 (WS): Ch 1. Sc2tog, sc in the next 11 sts, sc2tog. Turn. (13 sc)
Row 8 (RS): Ch 1. Sc2tog, sc in the next 9 sts, sc2tog. Turn. (11 sc)
Tier 3 (top tier, 2 puffs)
Row 9 (WS, flare row): Ch 1. Work 2 sc in the first st, sc in the next 9 sts, then 2 sc in the last st. Turn. (13 sc)
Row 10 (RS): Ch 1. Sc in the first 4 sts, puff in the next st, sc in the next 3 sts, puff in the next st, sc in the last 4 sts. Turn. (13 sts: 2 puffs + 11 sc)
Row 11 (WS): Ch 1. Sc2tog, sc in the next 9 sts, sc2tog. Turn. (11 sc)
Row 12 (RS): Ch 1. Sc2tog, sc in the next 7 sts, sc2tog. Turn. (9 sc)
Row 13 (WS): Ch 1. Sc2tog, sc in the next 5 sts, sc2tog. Turn. (7 sc)
Row 14 (RS): Ch 1. Sc2tog, sc in the next 3 sts, sc2tog. Turn. (5 sc)
Row 15 (WS): Ch 1. Sc2tog, sc in the next st, sc2tog. Turn. (3 sc)
Row 16 (RS): Ch 1. Sc3tog. (1 st, the peak) Do not fasten off.
Check that the body measures 3.5 in (8.9 cm) tall and 3.8 in (9.7 cm) wide at the base.
Border
Border gauge: Work 1 sc in each stitch along the bottom edge and 1 sc in each row end along the sides. The sc border round is 0.2 in (0.5 cm) deep.
Before you start, place a marker in the row end of Row 5 and in the row end of Row 9 on each side. These are the tier tips.
Border Round (RS): Keep working with Color A, with the RS facing you.
- Peak: Ch 1. Work (sc, ch 2, sc) in the Row 16 stitch. (2 sc + 1 ch-2 sp)
- First side: Work down the side, along the row ends of Rows 15 through 2. That is 14 row ends. Work 1 sc in each row end, except at the two marked row ends (Row 9 and Row 5). In each of those, work (sc, ch 2, sc). (16 sc + 2 ch-2 sps)
- First bottom corner: Work (sc, ch 2, sc) in the first foundation ch.
- Bottom edge: Sc in the next 15 foundation ch.
- Second bottom corner: Work (sc, ch 2, sc) in the last foundation ch. The full bottom edge is 19 sc + 2 ch-2 sps: 2 corner sc on each end and 15 sc between them.
- Second side: Work up the row ends of Rows 2 through 15 the same way, with (sc, ch 2, sc) in the marked row ends of Rows 5 and 9. (16 sc + 2 ch-2 sps)
- Sl st to the first sc. Fasten off.
Round total: 2 + 16 + 19 + 16 = 53 sc + 7 ch-2 sps
Why the math works: At this gauge, an sc row is about 0.2 in (0.5 cm) tall, and a single sc is about 0.22 in (0.6 cm) wide. They are nearly the same size, so 1 sc per row end lies flat. Puff rows are a bit taller, but the 14 row ends per side also include the shorter decrease rows. Over the whole side, the difference evens out.
The ch-2 tips at Rows 5 and 9 sit right where each new tier flares out, so they sharpen the step into a visible ledge. The bottom corners use the same (sc, ch 2, sc) as the tier tips, so all three tiers match.
Checkpoint: The body with its border is 4.2 in (10.7 cm) wide x 3.9 in (9.9 cm) tall.
Trunk
Use Color B. Hold the tree upside down with the RS facing you.
The bottom border has 17 sc between the two corner ch-2 spaces (corner sc, 15 sc, corner sc). Skip the first 6 of these sc after a corner ch-2 sp. Join Color B in the 7th sc.
Row 1 (RS): Ch 1. Sc in the same st and in the next 4 sts. Turn. (5 sc) That leaves 6 sc unworked on each side, because 6 + 5 + 6 = 17.
Rows 2–5: Ch 1, then sc in each st across. Turn. (5 sc)
Fasten off. The trunk measures 1.1 in (2.8 cm) wide x 1.0 in (2.5 cm) tall.
Checkpoint: The total height is 3.9 in + 1.0 in = 4.9 in (12.4 cm).
Bow and Hanging Loop
Bow: With Color C, ch 50, which is about 10 in (25.4 cm). Fasten off and leave 6 in (15.2 cm) tails at both ends.
Thread one tail through the peak stitch from front to back. Center the chain behind the peak. Tie it into a bow with two loops about 0.75 in (1.9 cm) long, so the bow is about 1.5 in (3.8 cm) wide. Trim the bow tails to about 0.75 in (1.9 cm). Let them hang at an angle over the top tier.
Hanging loop: With Color C, ch 25, which is about 5 in (12.7 cm). Fasten off and leave 6 in (15.2 cm) tails.
Fold the chain in half to form a 2.5 in (6.4 cm) loop. Sew both ends securely behind the bow knot, at the back of the peak. Add a few stitches through the bow knot so the bow can’t slip.
Final Blocking
- Weave in all the ends along stitches of matching color, on the WS.
- Lightly mist the ornament with water, or steam it from above without touching the yarn. Don’t press the puffs flat.
- Pin the piece RS up to 4.2 in (10.7 cm) wide x 4.9 in (12.4 cm) tall.
- Pin each ch-2 tip outward a little so the tier ledges are sharp.
- Pin the trunk straight and square.
- Use your fingertips to shape each puff back into a round shape.
- Let it dry completely before you unpin it.
- Fluff the bow loops into shape.
Final Quality-Control Checklist
- The puff rows have 5, 3 and 2 puffs, from bottom to top.
- All puffs face the RS and are evenly spaced.
- The border has 53 sc and 7 ch-2 spaces.
- The tier tips line up at Rows 5 and 9 on both sides.
- The trunk is centered, with 6 unworked sc on each side.
- The size is 4.2 in (10.7 cm) x 4.9 in (12.4 cm).
- The bow is centered and secure, and the loop is sewn firmly.
- No ends are visible on the RS.
Troubleshooting
- The puffs look flat: Pull each loop up to a full hdc height, and keep all 9 loops even before you close the puff.
- The puffs push to the back: Make sure you work the puff rows with the RS facing you (the even rows).
- The edges are wavy: The border has too many stitches, or your tension is loose. Work exactly 1 sc per row end.
- The edges are cupped: Your border is too tight. Go up a hook size for the border round only.
- The tier ledges don’t show: Check that you worked 2 sc in the first and last st on Rows 5 and 9, and that you put the ch-2 tips in those row ends.
- The trunk is off-center: Count the bottom stitches again. There should be 6 unworked sc, then 5 trunk sts, then 6 unworked sc.
- The ornament leans: Block it flat and pin it symmetrically. Check that the decreases are worked at both ends of each row.
Care
Hand wash in cool water. Press out the water gently in a towel, and reshape the ornament while it dries flat. Store flat or hanging, so the puffs don’t get crushed.
Final Notes
Here is the measurement chain:
- 17 foundation sts give 3.8 in (9.7 cm) at the base.
- 16 rows build a body 3.5 in (8.9 cm) tall.
- The 53-sc border brings the size to 4.2 in (10.7 cm) x 3.9 in (9.9 cm).
- A 5-row trunk adds 1.0 in (2.5 cm), for 4.9 in (12.4 cm) in total.
If you check these numbers at each stage, every tree in your set will match.
Happy crocheting!