
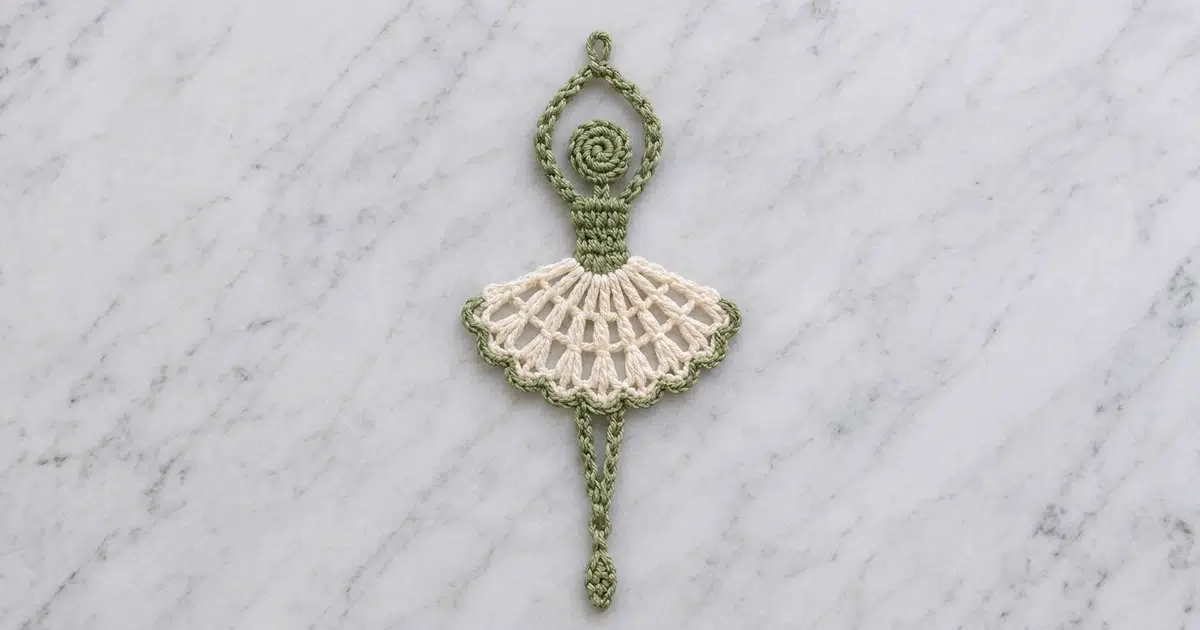
This little dancer is a single crochet motif with a sage green body and a cream tutu. Her head is a tight spiral, and her arms form a teardrop loop over her head. Her bodice is a small block of single crochet. Below it a lacy fan tutu opens out, finished with a twisted green crab-stitch edge. Two slim chain legs end in one pointed foot.
The look is soft and vintage, like a music-box ballerina made of lace. Only two colors are used, sage green and cream, so the shape does most of the work. A small hanging loop at the top of the arms makes her easy to hang as an ornament, a bag charm, or a window decoration.
This pattern uses US crochet terms. The finished motif measures about 5.0 in (12.7 cm) wide across the tutu and 9.9 in (25.1 cm) tall from the hanging loop to the tip of the foot.
She is worked as one piece in six parts: bodice, arms loop, head, tutu, tutu border, and legs. Each part is worked directly into the one before it, so there are no separate pieces to sew together. You only need to weave in yarn tails.
Finished Size and Construction
- Finished size: 5.0 in (12.7 cm) wide x 9.9 in (25.1 cm) tall
- Skill level: Easy (advanced beginner)
- Terminology: US crochet terms
- Yarn weight: DK (#3), cotton or cotton blend
- Hook: 3.5 mm (E-4)
- Number of pieces: 1 motif, worked in one piece
- Layout: a single upright figure that hangs from the top loop
- Part sizes: bodice 1.2 in (3.0 cm) wide x 1.1 in (2.8 cm) tall; head 1.1 in (2.8 cm) across
- Tutu size before border: 4.2 in (10.7 cm) wide x 1.9 in (4.8 cm) deep
- Border depth: 0.4 in (1.0 cm), two rows
Materials
Choose a smooth, tightly plied cotton in DK weight. Cotton holds the lace open and shows the spiral head and crab-stitch edge clearly. Avoid fuzzy or very soft acrylic, which blurs the openwork.
- Color A, sage green: 10 g, about 24 m (26 yd)
- Color B, cream: 6 g, about 14 m (15 yd)
Both amounts include a margin of about 25% for your gauge check and yarn tails.
Tools:
- 3.5 mm (E-4) crochet hook
- Tapestry needle
- Scissors
- Stitch marker
- Rustproof pins and a blocking mat or folded towel
- Spray bottle with water
- Ruler or tape measure
Abbreviations (US Terms)
- ch – chain
- sl st – slip stitch
- sc – single crochet
- hdc – half double crochet
- dc – double crochet
- reverse sc – reverse single crochet (crab stitch)
- sp – space
- st(s) – stitch(es)
- MR – magic ring
- RS – right side
Reverse single crochet (crab stitch): Don’t turn your work. Work from left to right (if you’re right-handed). Insert the hook into the next stitch to the right, yarn over, and pull up a loop. Yarn over again and pull through both loops. This makes a twisted, rope-like edge.
Gauge and Checkpoints
Gauge: 20 sc and 22 rows = 4 in (10.2 cm) in sc. Chain gauge: 6 ch = 1 in (2.5 cm).
You don’t need a large swatch. The bodice is your test piece: make it, then measure it before you go on.
Checkpoints:
- Bodice: 1.2 in (3.0 cm) wide x 1.1 in (2.8 cm) tall.
- Arms loop: about 2.75 in (7.0 cm) tall and 1.75 in (4.4 cm) wide when shaped into a teardrop.
- Head: 1.1 in (2.8 cm) across.
- Tutu before border: 4.2 in (10.7 cm) wide x 1.9 in (4.8 cm) deep, measured from the bottom of the bodice.
- Tutu after border: 5.0 in (12.7 cm) wide x 2.3 in (5.8 cm) deep.
- Whole motif: 9.9 in (25.1 cm) tall after blocking.
If your bodice is too big, switch to a 3.25 mm (D-3) hook. If it is too small, switch to a 3.75 mm (F-5) hook. Change hooks now, not halfway through, because every later part is sized against the bodice.
Bodice
With Color A, ch 7.
Row 1 (RS): Sc in 2nd ch from hook and in each ch across, turn. (6 sc)
Rows 2–6: Ch 1 (does not count as a st), sc in each st across, turn. (6 sc per row)
Don’t fasten off. You now have a block 6 sts wide and 6 rows tall.
Checkpoint: 1.2 in (3.0 cm) wide x 1.1 in (2.8 cm) tall.
Arms Loop
The arms rise from the two top corners of the bodice and meet above the head.
Foundation: Ch 40, then sl st into the first sc of Row 6 (the opposite top corner). The chain now forms a loop.
Round 1: Ch 1, then sc in each of the next 20 ch. Ch 6 and sl st into the last sc made to form the hanging loop. Sc in each of the remaining 20 ch, then sl st into the last sc of Row 6. Fasten off. (40 sc plus one ch-6 hanging loop)
The sc round thickens the chain into a firm, braided-looking arm. Placing the hanging loop after exactly 20 sc keeps it centered at the top.
Checkpoint: The loop measures about 6.7 in (17.0 cm) around. Pinched into a teardrop, it stands about 2.75 in (7.0 cm) tall.
Head
With Color A, leave an 8 in (20.3 cm) tail.
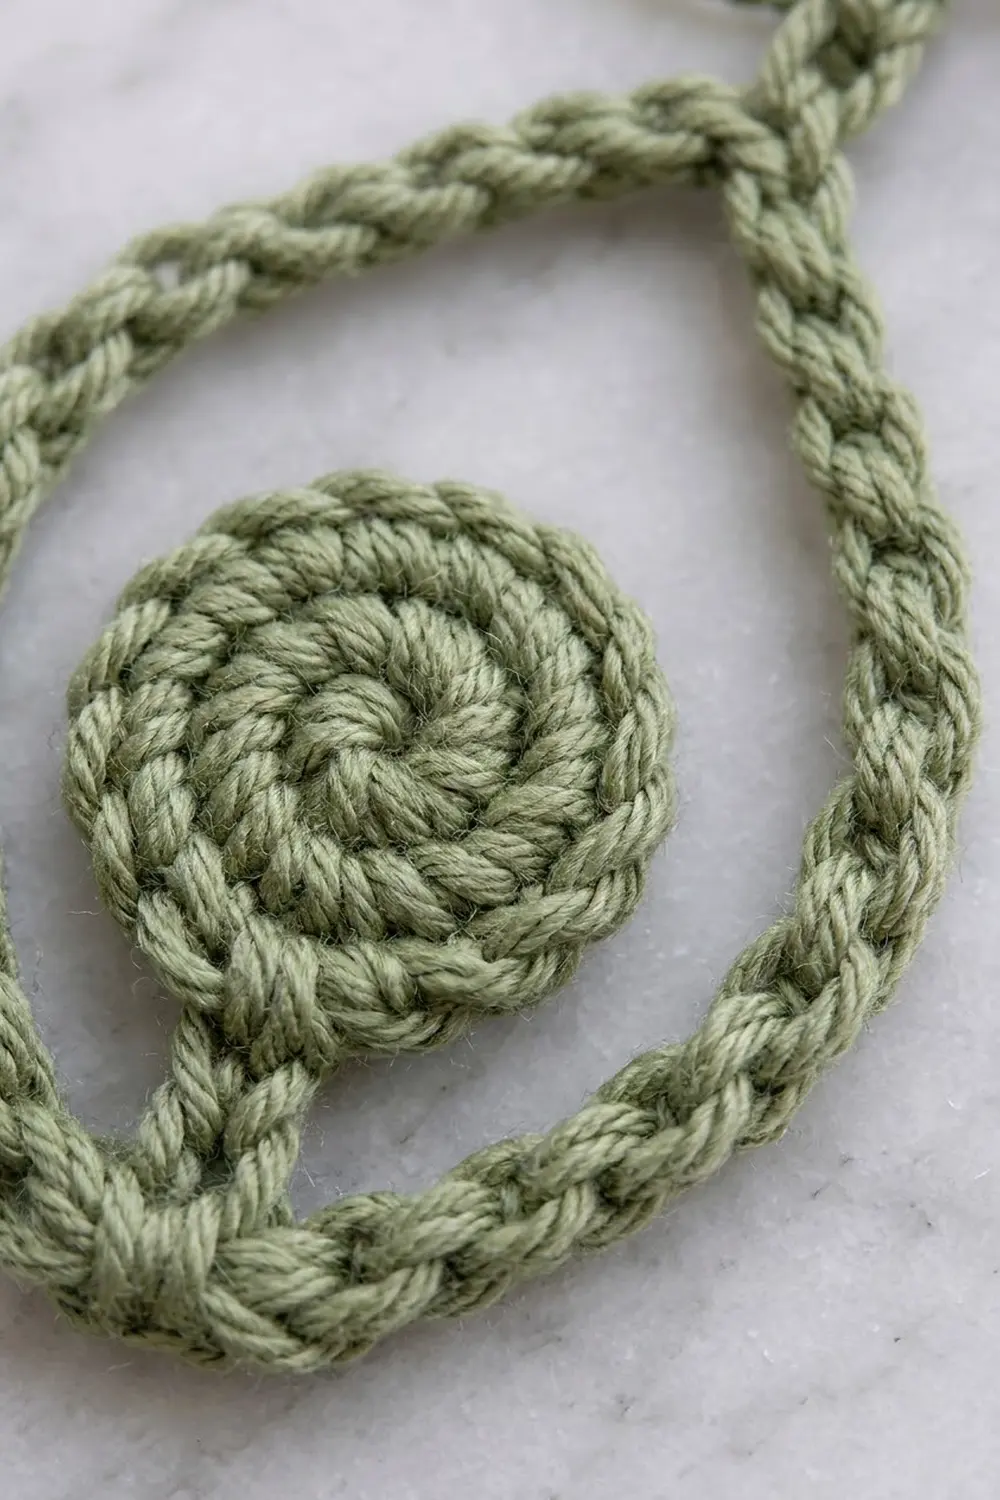
Round 1: Make a MR and work 6 sc into the ring. Pull the ring closed. Don’t join; work in a continuous spiral. Place a marker in the first st and move it up each round. (6 sc)
Round 2: 2 sc in each st around. (12 sc)
Round 3: (Sc in next st, 2 sc in next st) 6 times. (18 sc)
Finish the spiral: Sl st in the next st. This tapers the last round so the spiral ridge stays visible on the front.
Neck: Ch 2. Lay the head inside the arms loop, centered over the bodice. Sl st between the 3rd and 4th sts of Row 6 of the bodice. Fasten off.
The head floats inside the arms loop and is attached only by the short neck. Use the starting tail to pull the ring tight, then weave it in on the back.
Checkpoint: The head is 1.1 in (2.8 cm) across. If it cups, you are working too tightly, so loosen your tension on Round 3.
Tutu
The tutu is worked into the free loops on the other side of the bodice’s starting chain, so it fans out downward from the bodice.
Turn the motif upside down so the starting chain is at the top. With RS facing, join Color B in the first free loop.
Row 1: Ch 3 (counts as dc), dc in the same loop. Work 2 dc in each of the next 5 loops, turn. (12 dc)
Row 2: Ch 4 (counts as dc and ch 1). (Dc in next dc, ch 1) 10 times, dc in top of the turning ch, turn. (12 dc and 11 ch-1 sps = 23 sts)
Row 3: Ch 5 (counts as dc and ch 2). (Dc in next dc, ch 2) 10 times, dc in 3rd ch of the turning ch, turn. (12 dc and 11 ch-2 sps = 34 sts)
Row 4 (scallops): Ch 1, sc in first dc. (5 dc in next ch-2 sp, sc in next dc) 11 times; the last sc goes in the 3rd ch of the turning ch. Fasten off. (12 sc + 55 dc = 67 sts, 11 scallops)
The dc stitches form the straight spokes of the tutu. The spaces get wider each row, from ch 1 to ch 2, so the fan opens into a half circle. The scallops then form the curved hem.
Checkpoint: 4.2 in (10.7 cm) wide x 1.9 in (4.8 cm) deep from the bodice. If it ruffles, change Row 3 to ch-1 spaces and check your gauge. If it cups, work Row 3 with ch-3 spaces.
Tutu Border
The green border runs up one side edge, along the scalloped hem, and up the other side edge. It doesn’t cross the bodice.
Border gauge: 2 sc per dc row end, 1 sc per sc row end, and 1 sc per stitch along the hem.
With RS facing, join Color A at the top of the right side edge, where Row 1 meets the bodice.
Border Row 1:
- First side edge: 2 sc around the post at the end of each of Rows 1, 2, and 3 (6 sc), then 1 sc in the end of Row 4. (7 sc)
- Hem: Work 1 sc in each of the 67 sts of Row 4, but work 2 sc in the 3rd (center) dc of each scallop. (67 sts worked one per stitch + 11 extra sc = 78 sc)
- Second side edge: 1 sc in the end of Row 4, then 2 sc around the post at the end of each of Rows 3, 2, and 1. (7 sc)
Total: 7 + 78 + 7 = 92 sc.
Border Row 2: Don’t turn. Ch 1, then reverse sc in each st back across. (7 + 78 + 7 = 92 reverse sc) Fasten off.
Why the math works: A dc row end is about as tall as two sc, so 2 sc per row end lies flat along the sides. Along the hem, the outer edge of each scallop is longer than its base. The extra sc at each scallop’s peak (11 in all) adds that length, so the border follows the curve without pulling. Reverse sc is worked one per stitch, so it keeps the count at 92 and simply twists the edge.
Checkpoint: 5.0 in (12.7 cm) wide x 2.3 in (5.8 cm) deep. The border adds 0.4 in (1.0 cm) on each side.
Legs and Foot
Count the 92 border stitches from right to left. The center of the hem falls between stitches 46 and 47, at the peak of the 6th scallop.
Leg 1: Join Color A in st 45. Ch 20, then sl st in the 5th ch from hook to form a small ring. (15 leg ch + foot ring)
Foot: Into the ring work (2 sc, hdc, dc, ch 2, dc, hdc, 2 sc). Sl st in the first sc to close. (8 sts and one ch-2 point)
Turn the foot so the ch-2 point faces straight down, away from the tutu.
Leg 2: Ch 15, sl st in st 48 of the border, turn.
Reinforcing row: Sl st in the back bump of each of the 15 ch of Leg 2. Sl st in the top of the foot ring. Sl st in the back bump of each of the 15 ch of Leg 1, then sl st in st 45. Fasten off. (15 + 1 + 15 = 31 sl st)
The two legs start 2 sts apart (sts 46 and 47 lie between them), so they form a slim, narrow loop that meets at the foot. The sl st row firms each chain into a rope that matches the arms.
Checkpoint: Each leg is 2.5 in (6.4 cm) long, and the foot is 0.75 in (1.9 cm) long.
Final Blocking
- Weave in all tails on the back, hiding each one in stitches of the same color. If the head needs a little tightening, leave its tail until after blocking.
- Spray the motif until it is damp but not soaked. Or dip it in cool water and roll it in a towel to remove the extra water.
- Lay it face up on the mat. Pin the bodice square at 1.2 in (3.0 cm) wide.
- Shape the arms into an even teardrop 2.75 in (7.0 cm) tall with the hanging loop centered. Pin the hanging loop open.
- Open the tutu into a fan 5.0 in (12.7 cm) wide. Pin each scallop peak and each spoke so the spaces sit evenly.
- Pin the legs straight down so they meet at the foot, and pin the foot point.
- Check the full height: 9.9 in (25.1 cm). Let it dry completely before unpinning.
For a stiffer ornament, spray it lightly with fabric stiffener while it is still pinned.
Final Quality-Control Checklist
- Bodice is 6 sts x 6 rows and sits square.
- Arms loop has 40 sc with the hanging loop exactly at the center.
- Head has 18 sts, lies flat, and is attached only at the bodice center.
- Tutu has 12 spokes and 11 even scallops.
- Border has 92 sts with the twisted crab-stitch finish all the way along.
- Legs start at sts 45 and 48 and are the same length.
- Foot point faces straight down.
- Overall size is 5.0 in (12.7 cm) x 9.9 in (25.1 cm).
- All tails are hidden and secure.
Troubleshooting
Head is cupped or wavy. Cupping means your stitches are too tight; waves mean they are too loose. Redo Round 3 with adjusted tension, or change hook size by 0.25 mm.
Arms loop is lopsided. The hanging loop is off-center. Recount: it must sit right after the 20th sc.
Tutu curls up. Your chains are too tight. Work the ch spaces in Rows 2 and 3 a little looser.
Tutu ripples. Your chains are too loose. Use a smaller hook for the tutu only.
Border pulls in. You probably skipped the extra sc at the scallop peaks. Check that you have 78 sc along the hem.
Border flares. You have too many stitches along the side edges. Keep exactly 7 sc per side.
Legs are uneven. Count both chains. Each leg needs 15 ch before the foot.
Crab stitch looks messy. Keep your loops loose and work into every stitch without skipping any.
Care
Hand wash in cool water with mild soap. Press the water out in a towel and dry flat, pinned back into shape; don’t tumble dry.
Final Notes
Each part is sized against the one before it. The 6-st bodice, 1.2 in (3.0 cm) wide, sets the base for the 12 tutu spokes. The spokes make 11 scallops and 67 hem stitches. The border turns those into 92 stitches: 7 per side and 78 along the hem, which brings the tutu to 5.0 in (12.7 cm) wide. The 40-ch arms, 18-st head, and 15-ch legs complete the figure at 9.9 in (25.1 cm) tall. If each checkpoint matches, the finished dancer will match too.
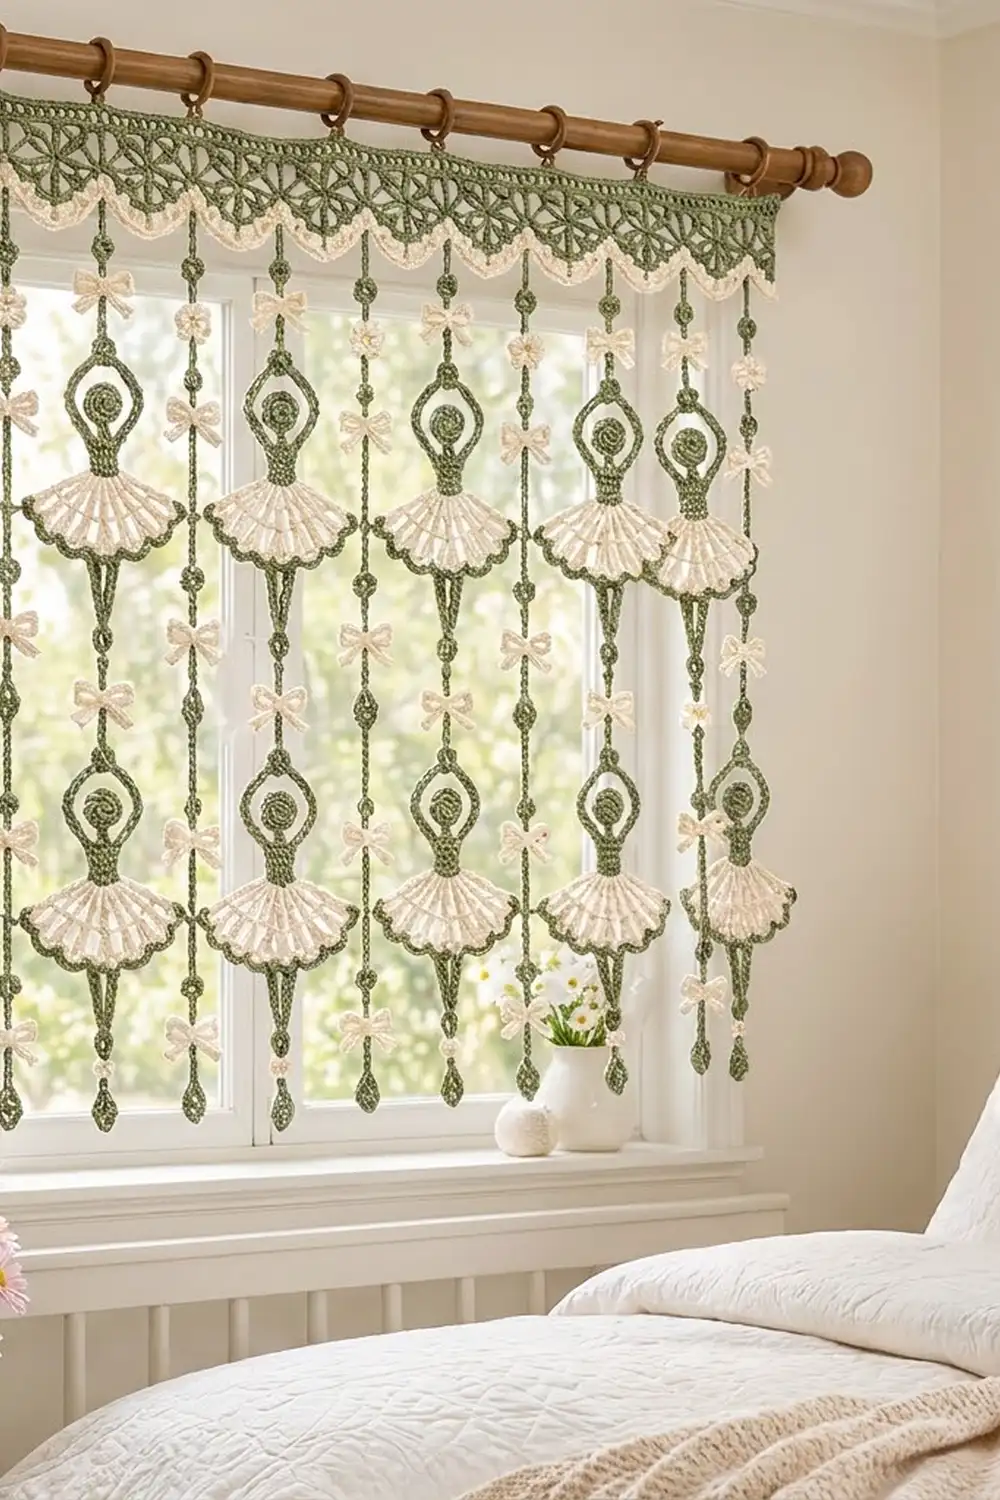
You can make several and string them on a cord as a garland or curtain, but this pattern covers one finished motif.
Happy crocheting!