

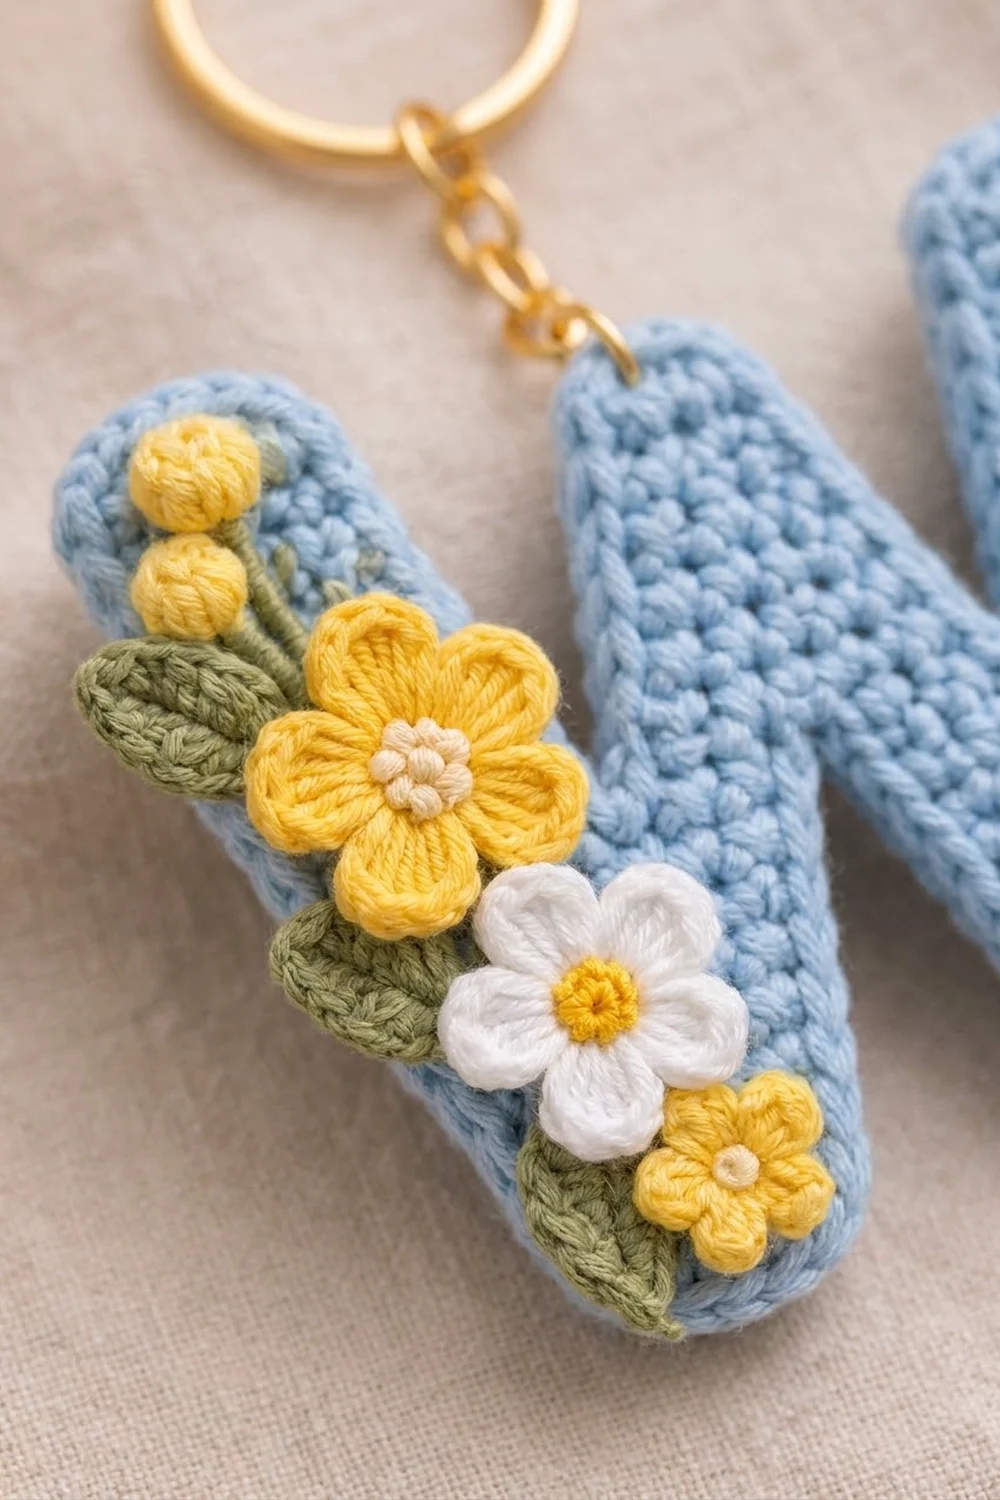
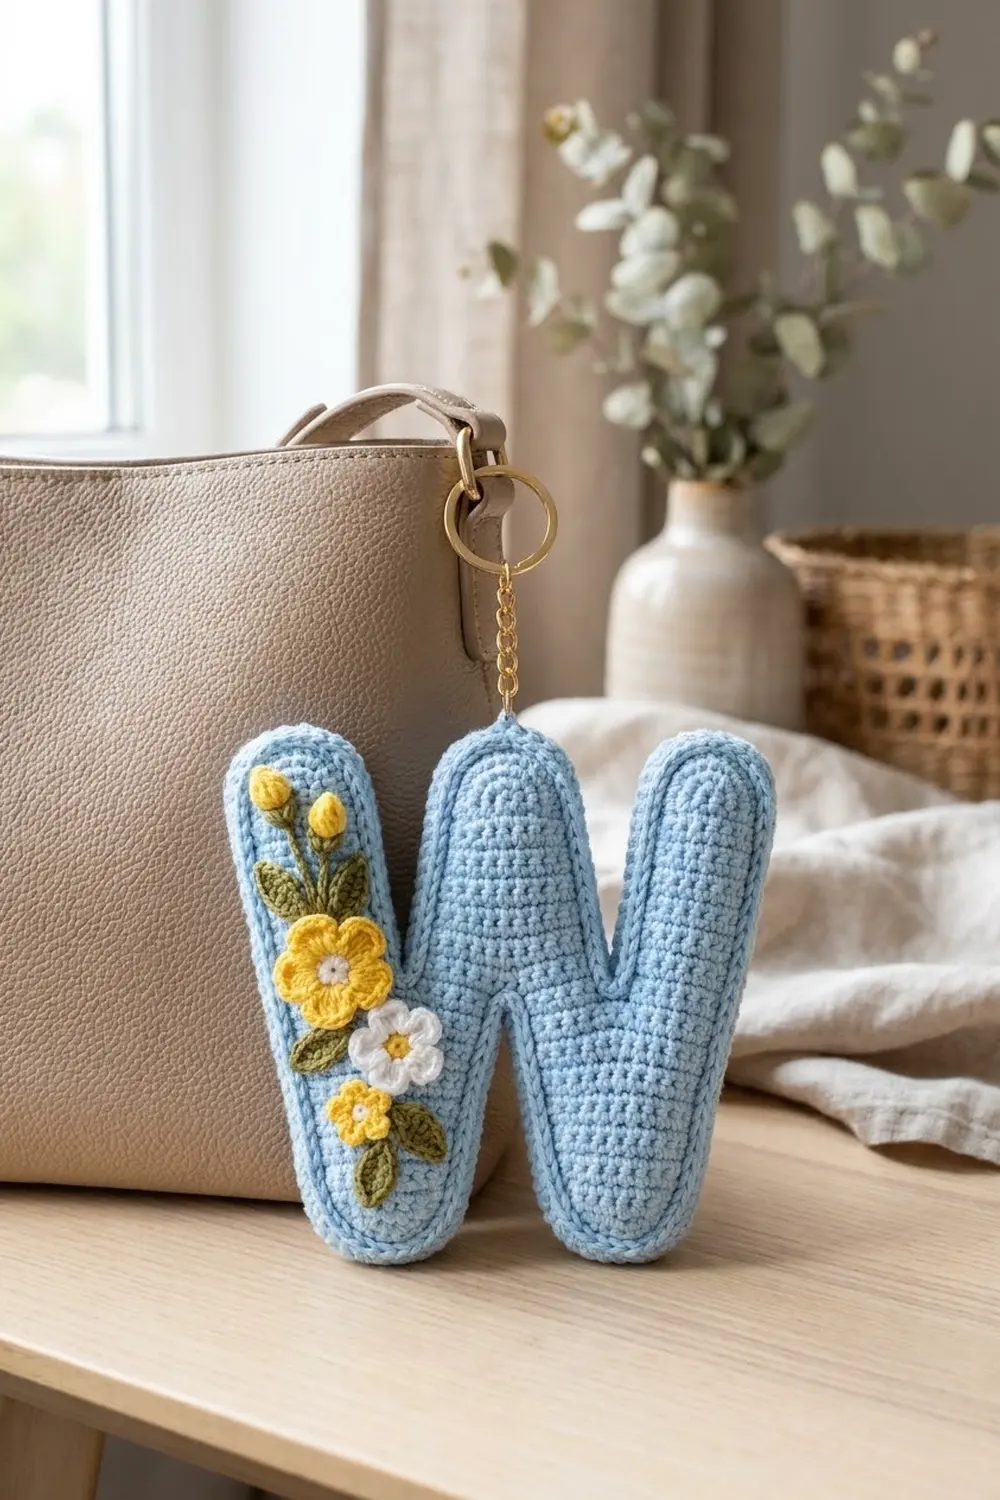
This Blossom Initial W is a flat, chunky letter keychain with a small spring bouquet along its first stroke. The letter is soft sky blue. The flowers are buttery yellow and crisp white with olive-green leaves, and a gold split ring finishes it.
The look is clean and modern. The fabric is dense single crochet, the strokes are thick with rounded ends, and a slip-stitch outline frames the shape like a piped edge. It makes a good personalized gift, bag charm, or zipper pull.
All terms are US crochet terms. The finished letter measures about 5.6 in (14.2 cm) wide and 4.4 in (11.2 cm) tall, including the border.
You crochet the letter as one piece. You work two “V” sections from the bottom up in rows, with simple shift rows that make the strokes lean. A joining row then links the two V sections and forms the middle peak. One round of single crochet and one round of slip stitch outline the whole letter. Finally, you make the flowers, buds, and leaves separately and sew them onto the left stroke.
Finished Size and Construction
- Finished size: 5.6 in × 4.4 in (14.2 cm × 11.2 cm)
- Skill level: Easy-intermediate
- Terminology: US
- Yarn weight: DK / light (#3), cotton or cotton blend
- Hook: 3.5 mm (E-4)
- Number of pieces: 1 letter, plus 9 small appliqués sewn on
- Layout: single motif, no assembly grid
- Stroke width: 5 sts = 1 in (2.5 cm)
- Size before border: 5.2 in × 4 in (13.2 cm × 10.2 cm)
- Border depth: about 0.2 in (0.5 cm) on every edge
Materials
Use a smooth, mercerized or matte cotton in DK weight. Cotton holds the letter’s crisp shape and keeps the stitches clearly defined. Avoid fuzzy yarns, which blur the narrow notches.
- Light blue (main color): 15 g, about 36 m
- Yellow: 5 g, about 12 m (large flower, small flower, buds, knots)
- White: 3 g, about 7 m (white flower petals)
- Cream: 2 g, about 5 m (large flower center, small flower knot)
- Olive green: 3 g, about 7 m (leaves)
Tools:
- 3.5 mm (E-4) hook
- Tapestry needle and a sharp embroidery needle
- 1 in (2.5 cm) gold split ring with a short chain (about 4 links) and a jump ring
- Two pairs of small pliers
- Stitch markers
- Blocking mat and rustproof pins
- Spray bottle
All quantities include a margin of roughly 20% for swatching and tails.
Abbreviations (US Terms)
- ch – chain
- sl st – slip stitch
- sc – single crochet
- hdc – half double crochet
- dc – double crochet
- sc2tog – single crochet 2 together
- BLO – back loop only
- MR – magic ring
- st(s) – stitch(es)
- RS / WS – right side / wrong side
Special stitch – shift row: On a 5-stitch stroke, you work 2 sc in the edge stitch on the side the stroke leans toward, and sc2tog over the 2 stitches at the opposite edge. The count stays at 5 and the whole stroke moves over by 1 stitch, which is 0.2 in (0.5 cm).
Gauge and Checkpoints
Gauge: 20 sc × 24 rows = 4 in (10.2 cm) square. That works out to 5 sc and 6 rows per 1 in (2.5 cm).
Test with the first V section before you commit. Gauge decides the final size, so check it at each stage:
- After Row 4: the base is 10 sts wide at 2 in (5.1 cm) and 0.67 in (1.7 cm) tall.
- After the inner stroke (Row 14): 2.33 in (5.9 cm) from the bottom.
- After the outer stroke (Row 24): 4 in (10.2 cm) from the bottom.
- After the peak (Row 17): 2.83 in (7.2 cm) tall at the center.
- Before the border: 5.2 in (13.2 cm) across.
If your piece is too big by more than 0.25 in (0.6 cm), go down to a 3.25 mm hook. If it’s too small, go up to 3.75 mm. Keep the fabric firm: the letter needs to stand flat without flopping.
Pattern
Unless stated otherwise, start each row with ch 1 and turn. The ch 1 does not count as a stitch. Odd rows are RS rows.
Left V Section
With blue:
Row 1 (RS): Ch 7, sc in 2nd ch from hook and in each ch across. (6 sts)
Row 2: 2 sc in first st, sc 4, 2 sc in last st. (8 sts)
Row 3: 2 sc in first st, sc 6, 2 sc in last st. (10 sts)
Row 4: Sc across. (10 sts)
The rounded bottom is now done. Check that it measures 2 in (5.1 cm) wide.
Inner stroke (right half):
Row 5: Sc in first 5 sts. Leave the remaining 5 sts unworked. (5 sts)
Rows 6–8: Sc across. (5 sts)
Row 9 (shift toward center): 2 sc in first st, sc 2, sc2tog. (5 sts)
Rows 10–14: Sc across. (5 sts)
Fasten off. The stroke now leans 1 stitch toward the center of the letter.
Outer stroke (left half):
Row 5: With RS facing, join blue in the first unworked st of Row 4, next to the inner stroke. Ch 1, sc in same st and in the next 4 sts. (5 sts)
Rows 6–8: Sc across. (5 sts)
Row 9 (shift outward): Sc2tog, sc 2, 2 sc in last st. (5 sts)
Rows 10–16: Sc across. (5 sts)
Row 17: Repeat Row 9. (5 sts)
Rows 18–23: Sc across. (5 sts)
Row 24: Sc2tog, sc 1, sc2tog. (3 sts)
Fasten off. The outer stroke now leans 2 stitches outward, which is 0.4 in (1.0 cm). It stands 4 in (10.2 cm) tall.
Right V Section
Work Rows 1–4 exactly as for the left V. (10 sts)
Outer stroke (right half):
Row 5: Sc in first 5 sts, leaving the rest unworked. (5 sts)
Rows 6–8: Sc across.
Row 9: 2 sc in first st, sc 2, sc2tog. (5 sts)
Rows 10–16: Sc across.
Row 17: Repeat Row 9.
Rows 18–23: Sc across.
Row 24: Sc2tog, sc 1, sc2tog. (3 sts)
Fasten off.
Inner stroke (left half):
Row 5: With RS facing, join in the first unworked st of Row 4. Ch 1, sc in same st and the next 4 sts. (5 sts)
Rows 6–8: Sc across.
Row 9: Sc2tog, sc 2, 2 sc in last st. (5 sts)
Rows 10–14: Sc across.
Don’t fasten off.
Middle Peak (Joining Row)
Lay both V sections RS up. The left V goes on the left and the right V on the right, with the two inner strokes side by side.
Row 15 (RS): Ch 1, turn. Sc across the 5 sts of the right V inner stroke. Then go straight on into the top of the left V inner stroke: starting at its center-facing stitch, sc in each of its 5 sts. (10 sts)
Row 16: Sc across. (10 sts)
Row 17: Sc2tog, sc 6, sc2tog. (8 sts)
Fasten off.
The peak is 2 in (5.1 cm) wide at Row 15 and 2.83 in (7.2 cm) tall. Below it, the gap between the two V bases is 2 sts, about 0.4 in (1.0 cm). This gap creates the lower notch.
Border
Border gauge: You work 1 sc into each stitch along tops and bottoms and 1 sc into each row end along the sides. Corners get 2 sc, and each notch point gets one sc2tog.
Round 1 (RS): Join blue in the rightmost stitch of Row 24 on the right V outer stroke. Ch 1, then work counterclockwise around the letter:
- Right outer top: 2 sc in first st, sc 1, 2 sc in last st. (5)
- Upper right notch and peak side: 1 sc in each row end down the outer stroke, Rows 24–6 (19). Sc2tog over the Row 5 ends of both strokes. 1 sc in each row end up the inner stroke, Rows 6–14 (9), then up the peak, Rows 15–17 (3). (32)
- Peak top: 2 sc in first st, sc 6, 2 sc in last st. (10)
- Upper left notch: 3 sc down the peak, 9 sc down the inner stroke, sc2tog at the Row 5 notch, 19 sc up the outer stroke. (32)
- Left outer top: 2 sc, sc 1, 2 sc. (5)
- Left side: 1 sc in each row end, Rows 24–1. (24)
- Left V bottom: 2 sc in first foundation st, sc 4, 2 sc in last. (8)
- Lower notch: 13 sc up Rows 1–13, sc2tog over both Row 14 ends, 13 sc down Rows 13–1. (27)
- Right V bottom: 2 sc, sc 4, 2 sc. (8)
- Right side: 1 sc in each row end, Rows 1–24. (24)
Sl st to the first sc. Total: 175 sts.
Round 2: Sl st in BLO of each st around. (175 sl sts) Fasten off and weave in the ends.
Why the math works: Every edge gets one stitch per stitch or row, so the outline follows the shape. The two side counts each equal the 24 rows of the stroke, and the tops and bottoms equal their stitch counts plus 2 corner increases. The row ends are slightly denser (6 per in) than the stitches (5 per in), so the outline pulls in very slightly. That keeps the edge firm and corded instead of wavy.
The three sc2togs keep the notches sharp. The slip-stitch round in back loops leaves a raised ridge, the piped outline you see in the photo. The border adds about 0.2 in (0.5 cm) on every edge. That takes the letter from 5.2 × 4 in (13.2 × 10.2 cm) to 5.6 × 4.4 in (14.2 × 11.2 cm).
Flowers, Buds, and Leaves
Large yellow flower (make 1), about 1.25 in (3.2 cm):
- Rnd 1: With cream, MR, 10 sc. Sl st to join. (10 sts) Fasten off cream.
- Rnd 2: Join yellow. (Hdc, 3 dc, hdc) in next st, sl st in next st, repeat 5 times. (5 petals, 30 sts)
- Embroider 3 tiny yellow French knots on the cream center.
White flower (make 1), about 1 in (2.5 cm):
- Rnd 1: With yellow, MR, 5 sc. Join. (5 sts)
- Rnd 2: Join white. (Sl st, ch 2, 2 dc, ch 2, sl st) in next st, repeat 5 times. (5 petals)
Small yellow flower (make 1), about 0.75 in (1.9 cm):
- With yellow, MR. Ch 2, dc, ch 2, sl st into ring, repeat 5 times. Pull the ring closed.
- Add 1 cream French knot at the center.
Buds (make 2), about 0.4 in (1.0 cm):
- With yellow, MR, ch 2, 4 dc into ring. Sl st to the top of the ch-2 and pull tight to form a ball.
Leaves (make 4), about 1 in (2.5 cm):
- With green, ch 7. Sl st in 2nd ch from hook, then sc, hdc, dc, hdc, sc. Ch 1 and rotate. Working along the other side of the chain: sc, hdc, dc, hdc, sc, sl st. (12 sts)
Placement: Pin the pieces along the left outer stroke, from top to bottom:
- The 2 buds near the top
- A leaf angled out to the left
- The large yellow flower
- A second leaf peeking out on the left
- The white flower, slightly overlapping the large flower
- A third leaf
- The small yellow flower at the bottom, with the fourth leaf tucked behind it
Let the flowers overhang the left edge by about 0.2 in (0.5 cm). Sew each piece down with matching yarn through the center and petal tips. Keep your stitches invisible from the front.
Ring: Open the jump ring, pass it through both border rounds at the top of the left outer stroke near its inner corner, and hook on the chain and split ring. Then close the jump ring.
Final Blocking
- Pin the letter RS up on the mat. Use the 5.6 × 4.4 in (14.2 × 11.2 cm) outline as your guide.
- Put one pin at each rounded top and bottom. Add one at the peak and one in each notch point.
- Straighten each stroke so it is 1.4 in (3.6 cm) wide including the border.
- Mist until the piece is damp, not soaked.
- Let it dry completely, about 6–8 hours.
- Unpin it and press the flowers gently with your fingers to shape the petals.
Final Quality-Control Checklist
- Letter measures 5.6 × 4.4 in (14.2 × 11.2 cm).
- All four strokes are 5 sts wide before the border.
- Middle peak is lower than the outer strokes.
- Border count is 175 in each round.
- Notches are crisp and the outline lies flat.
- Appliqués are secure, with no stitches showing on the back.
- Jump ring is fully closed.
- All ends are woven in.
Troubleshooting
- Strokes lean the wrong way: Check the shift row. The 2 sc must go on the side the stroke leans toward.
- Peak twists: One section was WS up during Row 15. Rip back and redo that row with both sections RS up.
- Border ruffles: You added extra sc at the row ends. Keep it to 1 per row.
- Border cups: Your tension is too tight. Go up a hook size for the border only.
- Floppy letter: Use a smaller hook, or add a felt backing cut 0.1 in (0.3 cm) inside the outline.
Care
Hand wash in cool water, press out the water in a towel, and dry flat with the piece pinned to shape. Don’t tumble dry.
Final Notes
Here is the measurement chain:
- Gauge: 5 sc × 6 rows per inch (2.5 cm)
- 10-stitch bases: 2 in (5.1 cm)
- 24-row outer strokes: 4 in (10.2 cm)
- Joined body: 5.2 × 4 in (13.2 × 10.2 cm)
- Bordered letter: 5.6 × 4.4 in (14.2 × 11.2 cm)
If each checkpoint matches, the finished W will too.
Happy crocheting!