

This keychain is a single filet-mesh letter K in soft cream cotton. A smooth corded edge frames the open grid. A small spray of flowers is sewn down the stem: two mauve bobble buds, a five-petal mauve flower, a five-petal pale pink flower and three sage-green leaves. The flowers hang slightly past the left edge of the stem, so the bouquet looks like it is climbing the letter.
The style is romantic but light. The open grid keeps the letter flat and nearly weightless, so it suits a bag handle, a zipper pull or a set of keys. The pattern uses US crochet terms.
The finished letter measures 3.5 in wide x 4.25 in tall (8.9 x 10.8 cm), not counting the hardware. You crochet it in one piece, in rows of ch-1 filet mesh, in this order:
- the lower leg
- the lower stem
- Row 6, which joins the stem and leg
- the junction rows
- the upper arm and upper stem, which split off and are finished separately
Two border rounds then run around the whole outline, and the appliqués are sewn on last.
Finished Size and Construction
- Finished size: 3.5 x 4.25 in (8.9 x 10.8 cm)
- Skill level: Intermediate (filet shaping, crab stitch)
- Terminology: US
- Yarn weight: Sport / #2 cotton
- Hook: 2.75 mm (C-2)
- Number of pieces: 1 letter, worked in one piece, plus 7 small sewn-on appliqués
- Layout: One letter K: a 3-mesh stem, plus a 4-mesh arm and a 4-mesh leg that step out diagonally
- Mesh grid: 12 mesh wide x 15 rows tall
- Size before border: 3 x 3.75 in (7.6 x 9.5 cm)
- Border depth: 0.25 in (0.6 cm) on every edge, from 2 rounds
Materials
Use a smooth mercerized cotton or cotton blend in sport weight, about 150 m per 50 g. Fuzzy yarns hide the mesh holes, and splitty yarns make the crab-stitch edge messy.
- Cream: 8 g, about 24 m (letter, border and flower centers)
- Mauve: 3 g, about 9 m (large flower and 2 buds)
- Pale pink: 2 g, about 6 m (small flower)
- Sage green: 2 g, about 6 m (3 leaves and bud calyxes)
Tools:
– 2.75 mm (C-2) crochet hook
– Tapestry needle and a sharp embroidery needle
– 1 in (2.5 cm) gold split key ring with a 0.75 in (1.9 cm) chain
– One 6 mm gold jump ring and 2 flat-nose pliers
– Rustproof pins, a blocking board and a spray bottle
All yarn quantities include a margin of about 30% for swatching and sewing tails.
Abbreviations (US Terms)
- ch: chain
- sl st: slip stitch
- sc: single crochet
- hdc: half double crochet
- dc: double crochet
- rev sc: reverse single crochet (crab stitch), worked from left to right
- tch: turning chain
- beg: beginning
- st(s): stitch(es)
- RS: right side
Special terms:
- Mesh: one open square, made of a dc post plus a ch-1. A row of X mesh has X + 1 posts.
- Turning chain: ch 4 at the start of a row. It counts as a dc plus a ch-1 space. On the next row, the last dc goes into the 3rd ch of this ch-4.
- Inc 2 mesh at beg: ch 7, dc in 6th ch from hook, ch 1, skip next ch. Then dc in the last dc of the previous row (the dc at the base of the chain). This makes 2 new mesh. The next row ends in the 6th ch of this ch-7, which is the top of its post.
- Dec 2 mesh at end: stop when 2 mesh of the previous row are left, ending with a dc. Turn, leaving those 2 mesh unworked.
- 5-dc bobble: (yo, insert hook, pull up a loop, yo, pull through 2 loops) 5 times in the same stitch, then yo and pull through all 6 loops.
Gauge and Checkpoints
Gauge: 8 mesh x 8 rows = 2 x 2 in (5.1 x 5.1 cm) in filet mesh. Each mesh is a 0.25 in (0.6 cm) square.
The lower stem is your gauge test. Rows 1–5 should measure 0.75 in wide x 1.25 in tall (1.9 x 3.2 cm).
- Too big: switch to a 2.5 mm hook.
- Too small: switch to a 3 mm hook.
- Width correct but rows too tall: pull up shorter loops on your dc instead of changing hooks.
Square mesh matters because the arm and leg move 2 mesh across for every 2 rows up. If the mesh is not square, the diagonals come out too steep or too flat.
Measure at each checkpoint:
– Leg after Row 5: 2 in wide overall x 1.25 in tall (5.1 x 3.2 cm)
– After Row 10: 2.5 in (6.4 cm) tall
– Letter before border: 3 x 3.75 in (7.6 x 9.5 cm)
– After Border Round 1: 3.25 x 4 in (8.3 x 10.2 cm)
– After Border Round 2: 3.5 x 4.25 in (8.9 x 10.8 cm)
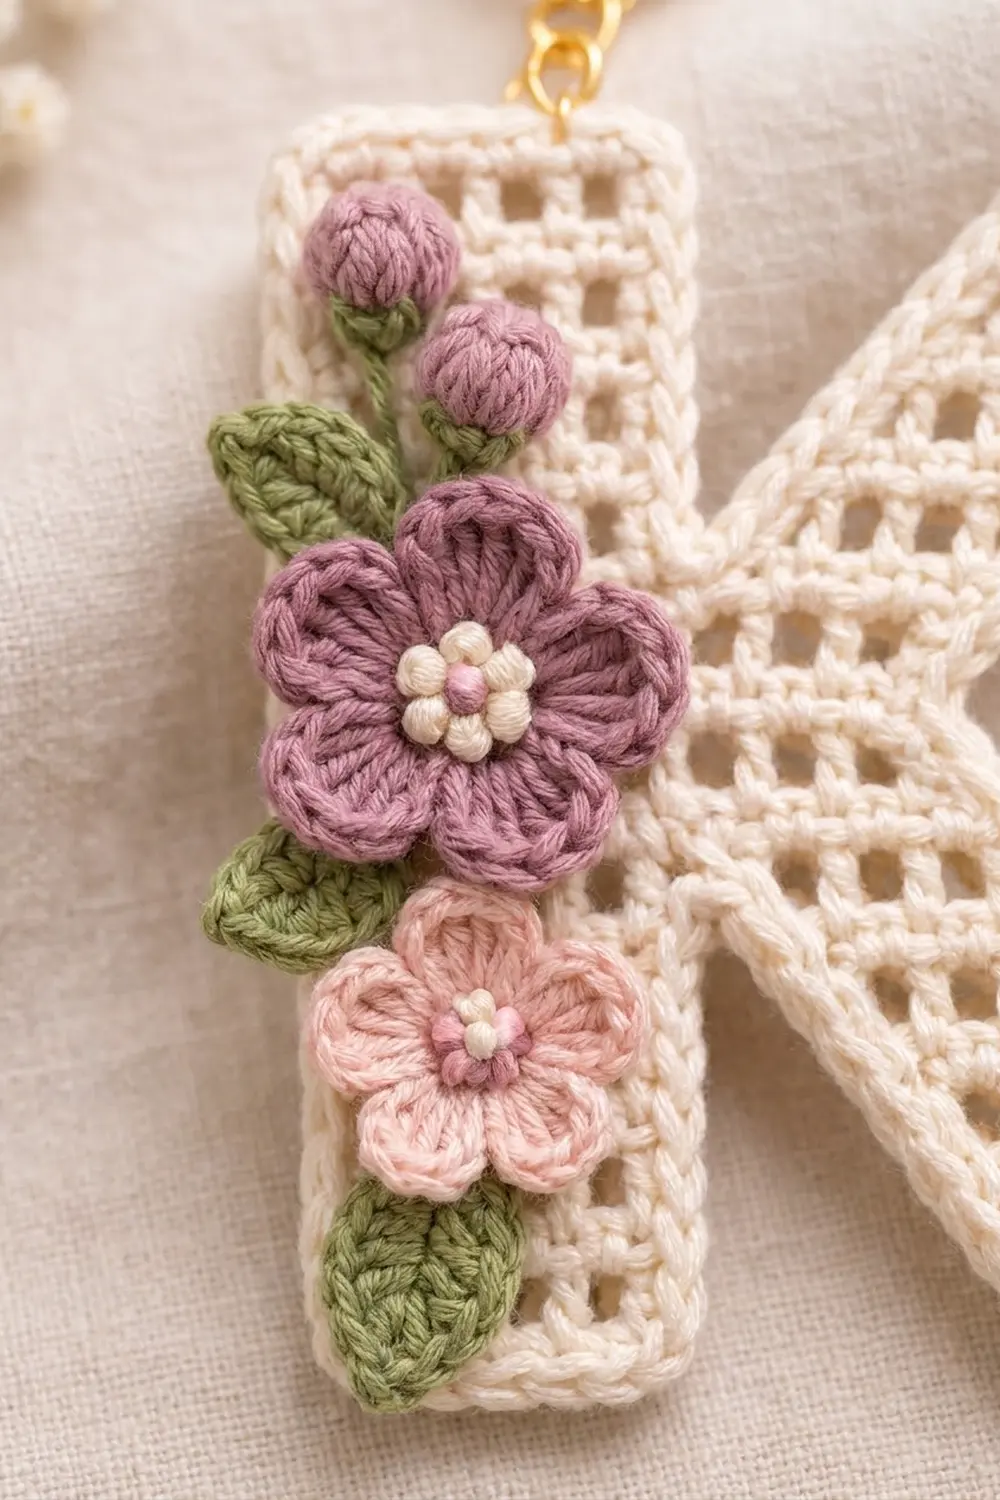
Letter K
Use cream for the whole letter. Odd-numbered rows are RS rows.
Lower Leg (4 mesh)
Row 1 (RS): Ch 12, dc in 6th ch from hook, [ch 1, skip 1 ch, dc in next ch] 3 times. Turn. (4 mesh)
Row 2: Inc 2 mesh at beg, [ch 1, dc in next dc] 2 times. Turn. (4 mesh. The row shifts 2 mesh toward the stem, and 2 mesh are left unworked at the end.)
Row 3: Ch 4, [dc in next dc, ch 1] 3 times, dc in 6th ch of beg ch-7. Turn. (4 mesh)
Rows 4–5: Repeat Rows 2–3. (4 mesh each)
Fasten off. The leg now forms a staircase 2 in (5.1 cm) across.
Lower Stem (3 mesh)
Row 1 (RS): Ch 10, dc in 6th ch from hook, [ch 1, skip 1 ch, dc in next ch] 2 times. Turn. (3 mesh)
Rows 2–5: Ch 4, [dc in next dc, ch 1] 2 times, dc in top of tch. Turn. (3 mesh)
Do not fasten off.
Junction (Rows 6–10)
Row 6:
1. Ch 4, [dc in next dc, ch 1] 2 times, dc in top of tch. This completes the 3 stem mesh.
2. Place the leg to the right of the stem, RS facing you, with the bottom edges level.
3. Ch 1, then dc in the last dc of leg Row 5, which is the leg’s left edge. This bridge mesh closes the gap.
4. [Ch 1, dc in next dc] 2 times. Turn, leaving 2 leg mesh unworked. (6 mesh)
Row 7: Ch 4, [dc in next dc, ch 1] 5 times, dc in top of tch. Turn. (6 mesh)
Row 8: Ch 4, [dc in next dc, ch 1] 3 times, dc in next dc. Turn. (4 mesh, dec 2 at end. This row is the inner point of the V.)
Row 9: Inc 2 mesh at beg, [ch 1, dc in next dc] 3 times, ch 1, dc in top of tch. Turn. (6 mesh)
Row 10: Ch 4, [dc in next dc, ch 1] 5 times, dc in 6th ch of beg ch-7. Turn. (6 mesh)
Upper Arm (4 mesh)
Row 11 (RS): Inc 2 mesh at beg, [ch 1, dc in next dc] 2 times. Turn, leaving 4 mesh of Row 10 unworked. (4 mesh)
Row 12: Ch 4, [dc in next dc, ch 1] 3 times, dc in 6th ch of beg ch-7. Turn. (4 mesh)
Rows 13–14: Repeat Rows 11–12. Row 13 leaves 2 mesh unworked. (4 mesh each)
Row 15: Repeat Row 11. Fasten off. (4 mesh)
Upper Stem (3 mesh)
Row 11 (RS): With RS facing, join cream with a sl st in the 4th post of Row 10, counting the tch as post 1. Ch 4, dc in next dc, ch 1, dc in next dc, ch 1, dc in top of tch. Turn. (3 mesh)
Rows 12–15: Work as for lower stem Rows 2–5. (3 mesh)
Fasten off. Weave in the ends along the dc posts.
Checkpoint: the letter is a grid of 12 mesh x 15 rows and measures 3 x 3.75 in (7.6 x 9.5 cm).
Appliqués
Leave an 8 in (20.3 cm) tail on each appliqué for sewing.
Large Flower (mauve, make 1)
– Round 1: Magic ring, ch 1, 10 sc in ring. Pull the ring closed and sl st to the first sc. (10 sts)
– Round 2: (Sc, hdc, 2 dc) in next st, (2 dc, hdc, sc) in next st; repeat from * 4 more times. Sl st to the first sc. (40 sts, 5 petals)
– Size:* 1.1 in (2.8 cm) across
Small Flower (pale pink, make 1)
– Round 1: Work as Large Flower Round 1. (10 sts)
– Round 2: (Sc, hdc, dc) in next st, (dc, hdc, sc) in next st; repeat from * 4 more times. Sl st to the first sc. (30 sts, 5 petals)
– Size:* 0.9 in (2.3 cm) across
Buds (mauve, make 2)
– Ch 3, 5-dc bobble in 3rd ch from hook, sl st in the same ch. Fasten off.
– Size: 0.3 in (0.8 cm)
Leaves (sage green, make 3)
– Ch 7. Sl st in 2nd ch from hook, then work sc, hdc, dc, hdc, sc across the next 5 chs.
– Ch 1 for the tip.
– Working along the other side of the chain: sc, hdc, dc, hdc, sc, sl st. (12 sts plus the tip ch)
– Size: 0.7 in (1.8 cm) long
Centers and Assembly
- Flower centers: With cream, make a 3-wrap French knot in the center of each flower. Surround it with 1-wrap knots: 6 on the mauve flower and 5 on the pink flower.
- Bud calyxes: With green, make 2 lazy-daisy stitches at the base of each bud.
- Placement on the stem, measured down from the top of the bordered letter:
- buds: 0.5–0.9 in (1.3–2.3 cm)
- mauve flower: centered at 1.9 in (4.8 cm)
- pink flower: centered at 3 in (7.6 cm)
- Overhang: shift both flowers left so their petals extend 0.2 in (0.5 cm) past the stem’s left border.
- Leaves: tuck one beside the buds, one under the mauve flower and one under the lower left of the pink flower.
- Sewing: sew the leaves first, then the buds, then the flowers. Catch only the mesh posts behind them, so the stitches stay hidden.
Border
Border gauge: 2 sc per mesh on horizontal edges and 2 sc per row-end on vertical edges, which is 8 sc per inch (2.5 cm) in both directions.
Corner rules:
– Outer corners (20): work 1 extra sc into the corner itself.
– Inner corners (16): add nothing. Move straight to the next edge and keep the stitches snug.
Round 1 (cream): With RS facing, join with a sl st at the top-right corner of the stem and ch 1. Work counterclockwise. The counts below do not include the corner sc.
– Stem, outer edges: top 6 + left side 30 + bottom 6 = 42 sc
– Stem, inner edges: right side of Rows 1–5 = 10, underside of the bridge mesh = 2, top of the Row 10 gap mesh = 2, right side of Rows 11–15 = 10 → 24 sc
– Leg, outer stepped edge: 4 + 4 + 4 + 4 + 2 = 18 sc
– Leg foot: bottom 8 + right end 2 = 10 sc
– Inner V, from leg tip to arm tip: 14 steps of 4 sc, plus 2 at the end of Row 8 = 58 sc
– Arm tip: right end 2 + top 8 + left end 2 = 12 sc
– Arm, outer stepped edge: 4 + 4 + 4 + 4 = 16 sc
Edges total 180 sc. With the 20 corner sc, the round has 200 sc. Sl st to the first sc.
Round 2: Ch 1, rev sc in each sc around. Sl st to join and fasten off. (200 sts)
Why the math works:
– Each mesh is 2 stitches wide (1 dc + 1 ch), and each dc row is about as tall as 2 sc. Working 2 sc per unit matches the edge exactly, so the letter neither ripples nor cups.
– In a shape made only of right angles, there are always 4 more outer corners than inner ones (20 − 16 = 4). Outer corners need 1 extra sc to turn flat, and inner corners need none.
– Crab stitch uses 1 stitch per sc, so the count stays at 200.
– The border stitches fill the narrow slits at the bottom and top of the stem, which makes sharp V points.
Hardware: Open the jump ring with the pliers. Thread it through the top border between the 3rd and 4th of the 6 top sc. Add the chain and split ring, then close the jump ring flush.
Final Blocking
- Remove the key ring.
- Pin the letter RS up on a gridded board to 3.5 x 4.25 in (8.9 x 10.8 cm).
- Pin the 4 stem corners first, then the arm and leg tips, then the remaining outer corners.
- Line up the mesh with the grid lines. Use a pin tip to square any skewed holes.
- Mist until damp. Keep the flowers dry, or block before sewing them on.
- Let it dry for at least 4 hours, then unpin and reattach the hardware.
Final Quality-Control Checklist
- The stem is 1.25 in (3.2 cm) wide after the border.
- The letter measures 3.5 x 4.25 in (8.9 x 10.8 cm).
- Every mesh is open and square.
- Border Round 1 has 200 sc and lies flat.
- Both crotches come to clean V points.
- The flowers overhang the left edge evenly, and no stitches show on the back.
- The jump ring is fully closed.
Troubleshooting
- Diagonals too steep: your rows are taller than your mesh is wide. Work tighter dc or use a 2.5 mm hook.
- Increase rows too long: use exactly ch 7, and put the dc in the 6th ch from hook.
- Row 6 bridge puckers: the bridge is only ch 1. Don’t add an extra chain.
- Border ruffles: you added sc at inner corners. Recount each edge against the totals above.
- Border cups: corner sc are missing. Check that there are 20.
- Flat crab stitch: loosen your tension and twist the hook slightly as you pull through.
Care
Hand wash in cool water with mild soap, roll in a towel to press out the water, and dry flat. Take the metal ring off before washing.
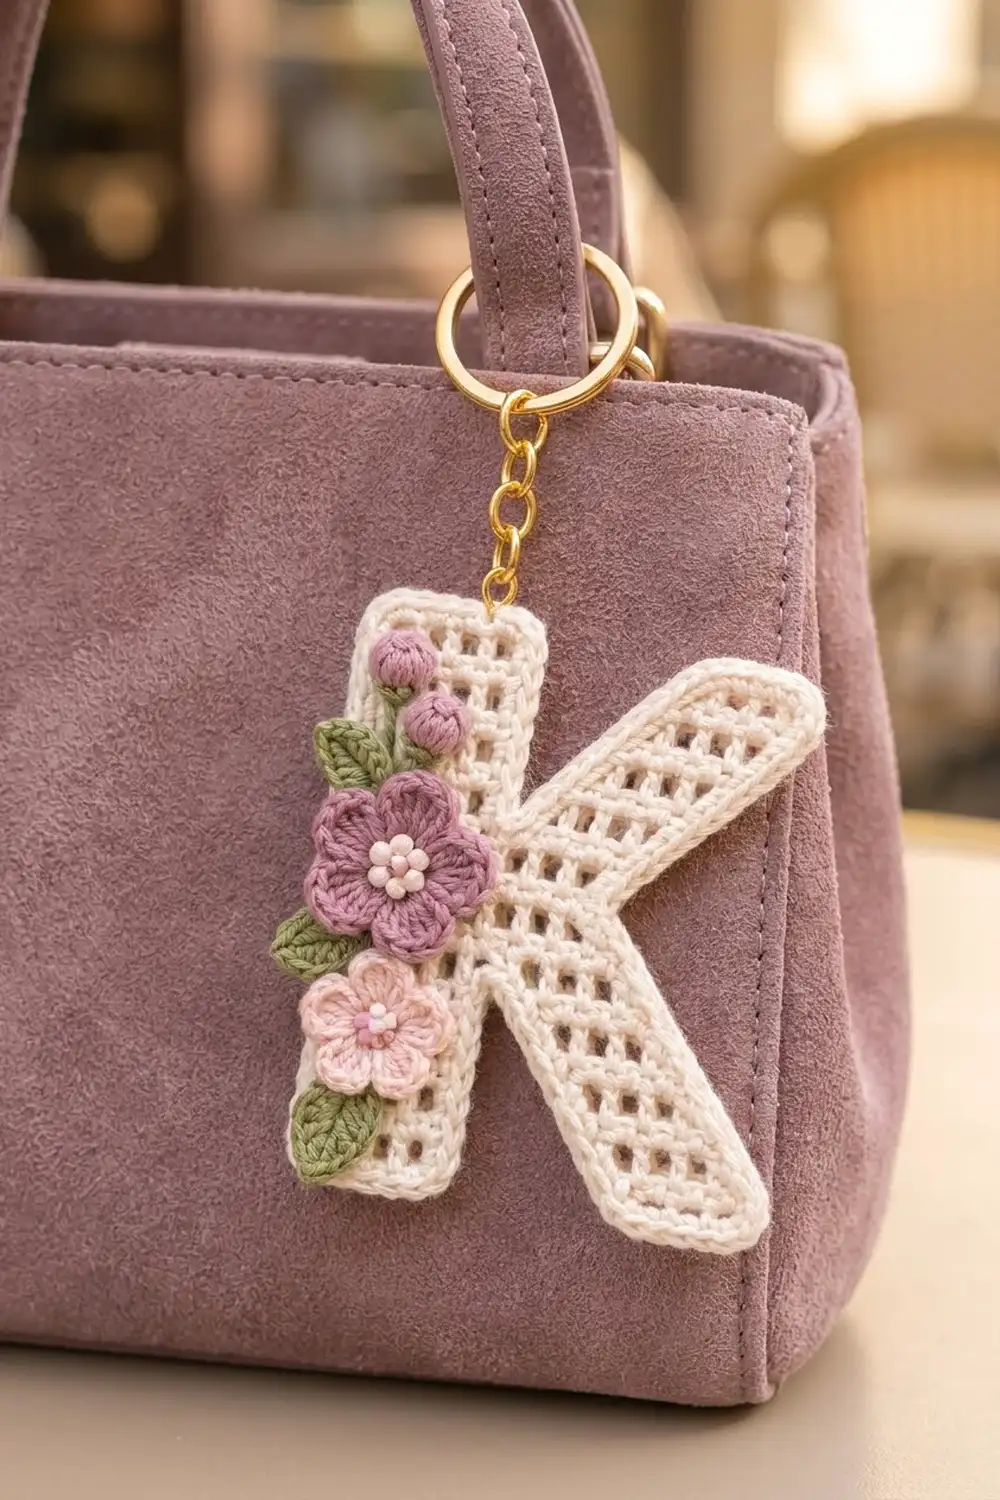
Final Notes
Every measurement depends on getting the mesh right first:
– 0.25 in (0.6 cm) square mesh gives a lower stem of 0.75 x 1.25 in (1.9 x 3.2 cm).
– The 12 x 15 grid gives a letter of 3 x 3.75 in (7.6 x 9.5 cm).
– The two-round, 200-stitch border brings it to 3.5 x 4.25 in (8.9 x 10.8 cm).
Check each measurement as you go. Then sew on the flowers, and your monogram is ready for a favorite bag.
Happy crocheting!