

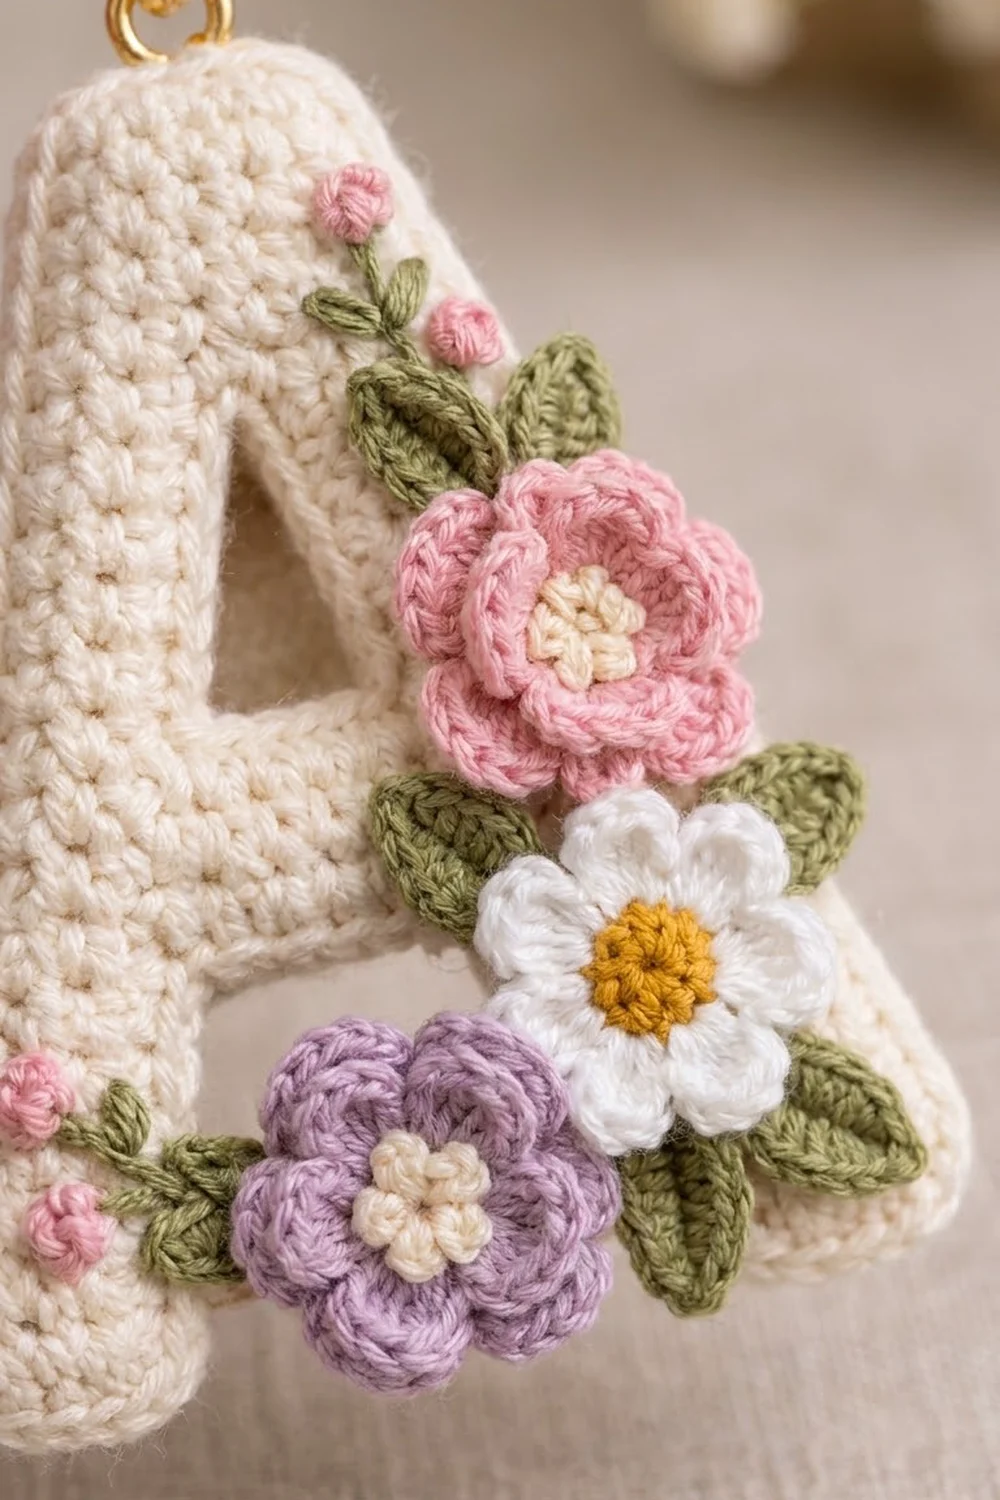
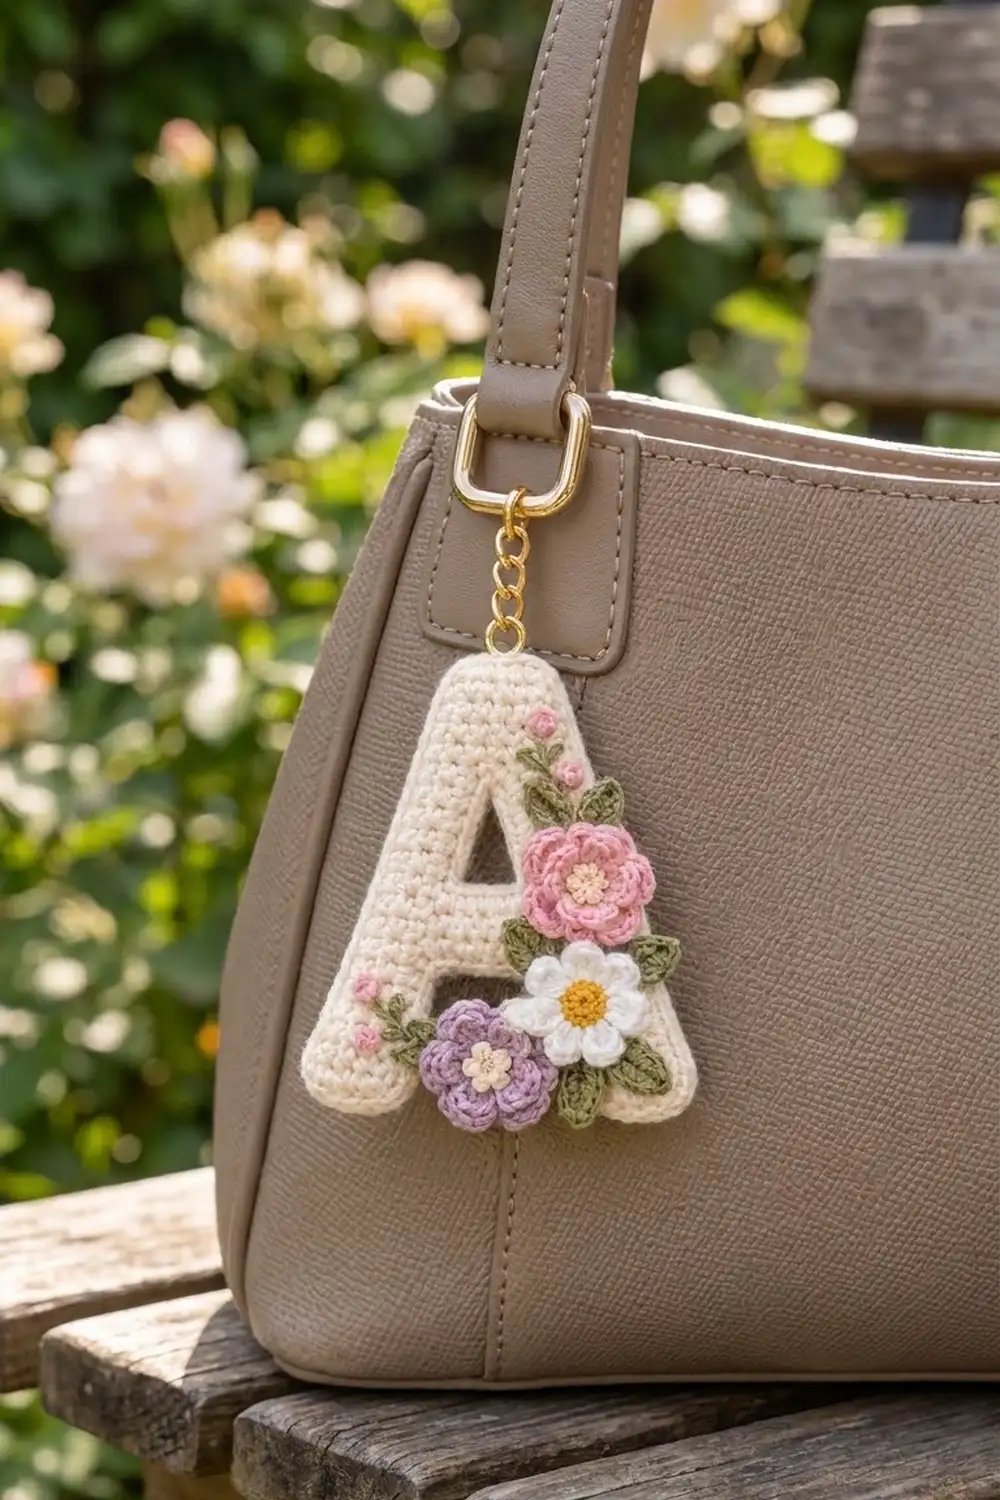
This keychain is a padded capital letter A in soft cream cotton, with a small cluster of crochet flowers on its right side. A layered pink flower sits beside the triangular window. Below it is a white daisy with a mustard-yellow center, and a layered lilac flower with a cream center sits low on the crossbar. Sage-green leaves tuck in behind the flowers, and two embroidered sprigs with pink buds complete the design.
The style is cottage-garden sweet: smooth single crochet, rounded edges, and a gold split ring on a short gold chain. It makes a good personal gift or bag charm.
This pattern uses US crochet terms. The finished keychain is about 3.5 in (8.9 cm) wide and 4.3 in (10.9 cm) tall, not counting the hardware.
Construction overview: you make two identical flat letter panels in rows of single crochet. The slanted legs and the triangular window are shaped as you go. Then you join the panels with one round of single crochet, stuff them lightly, and add three crochet flowers, six crochet leaves, and simple embroidery.
Finished Size and Construction
- Finished size: 3.5 in (8.9 cm) wide x 4.3 in (10.9 cm) tall
- Skill level: Easy-intermediate
- Terminology: US crochet terms
- Yarn weight: DK (weight 3) cotton
- Hooks: 3.25 mm (D) for the letter, 2.75 mm (C) for the flowers and leaves
- Number of pieces: one finished keychain, made from 2 letter panels, 3 flowers, and 6 leaves
- Layout: a single letter, with the flowers grouped on the right side and the crossbar
- Panel size: 3.2 in (8.1 cm) wide x 4 in (10.2 cm) tall
- Size before edging: 3.2 x 4 in (8.1 x 10.2 cm), with the panels stacked
- Edging depth: about 0.15 in (0.4 cm) on every edge
Materials
Choose a smooth mercerized or combed DK cotton. Cotton shows each stitch clearly, keeps its shape when stuffed, and holds up on a bag strap. Avoid fuzzy yarns, which blur the letter outline.
- Cream: 12 g / 28 m (letter panels, flower centers)
- Pink: 3 g / 7 m (layered flower, buds)
- Lilac: 3 g / 7 m (layered flower)
- White: 2 g / 5 m (daisy petals)
- Mustard yellow: 1 g / 2 m (daisy center)
- Sage green: 3 g / 7 m (leaves, embroidery)
Tools:
- 3.25 mm (D) and 2.75 mm (C) crochet hooks
- Tapestry needle and sharp embroidery needle
- About 3 g polyester fiberfill
- Gold split keyring, 1 in (2.5 cm) across, with a 1 in (2.5 cm) gold chain
- One 8 mm gold jump ring and two pairs of flat-nose pliers
- Stitch markers, scissors, pins
All quantities include a margin of about 20 percent for tails and swatching.
Abbreviations (US Terms)
- ch – chain
- sl st – slip stitch
- sc – single crochet
- hdc – half double crochet
- dc – double crochet
- sc2tog – single crochet 2 together
- MR – magic ring
- FLO / BLO – front loop only / back loop only
- st(s) – stitch(es)
Special stitch – shift row: work sc2tog at the outer edge and 2 sc in the stitch at the inner edge. The stitch count stays the same, but the piece moves 1 stitch inward. This is what slants the legs of the A.
The turning ch 1 never counts as a stitch.
Gauge and Checkpoints
With the 3.25 mm hook, 10 sc and 12 rows = 2 in (5.1 cm). That is 5 sc and 6 rows per 1 in (2.5 cm).
Finish one panel and check it before you make the second. Measure at these points:
- After leg Row 8: each leg is 1 in (2.5 cm) wide and 1.3 in (3.3 cm) tall.
- After Row 9: the joined row is 2.4 in (6.1 cm) wide.
- After Row 12: the panel is 2 in (5.1 cm) tall.
- After Row 24: the panel is 4 in (10.2 cm) tall and 3.2 in (8.1 cm) wide at the base.
If the panel is too big, use a hook a half size smaller. If it is too small, use a hook a half size larger. Keep the fabric firm so the stuffing doesn’t show between stitches.
Letter Panel (make 2)
Use cream and the 3.25 mm hook. Work in rows, back and forth.
Left Leg
Row 1: Ch 6, sc in 2nd ch from hook and in each ch across. (5 sc) Row 1 ends at the outer (left) edge.
Rows 2–3: Ch 1, turn, sc in each st. (5 sc)
Row 4 (shift row, begins at outer edge): Ch 1, turn, sc2tog, sc in next 2 sts, 2 sc in last st. (5 sc)
Rows 5–7: Ch 1, turn, sc in each st. (5 sc)
Row 8 (shift row): Repeat Row 4. (5 sc) Row 8 ends at the inner edge. Fasten off and weave in the tail.
Right Leg
Row 1: Ch 6, sc in 2nd ch from hook and in each ch across. (5 sc) Row 1 ends at the inner edge.
Rows 2–3: Ch 1, turn, sc in each st. (5 sc)
Row 4 (shift row, begins at inner edge): Ch 1, turn, 2 sc in first st, sc in next 2 sts, sc2tog. (5 sc)
Rows 5–7: Ch 1, turn, sc in each st. (5 sc)
Row 8 (shift row): Repeat Row 4. (5 sc) Row 8 ends at the outer edge. Do not fasten off.
Lay both legs flat with the same side facing up. The gap between them is 6 sts at the base and 2 sts at Row 8.
Crossbar
Row 9 (joining row): Ch 1, turn, sc in each of 5 sts of the right leg, ch 2, then sc in each of 5 sts of the left leg, starting at its inner edge. (10 sc + 2 ch = 12 sts)
Row 10: Ch 1, turn, sc in each sc and each ch. (12 sc)
Row 11: Ch 1, turn, sc in each st. (12 sc)
Row 12: Ch 1, turn, sc2tog, sc in next 8 sts, sc2tog. (10 sc)
Upper Sides and Triangular Window
First side. Row 13: Ch 1, turn, sc in next 4 sts. Leave the other 6 sts unworked. (4 sc)
Rows 14–15: Ch 1, turn, sc in each st. (4 sc)
Row 16 (shift row, begins at inner edge): Ch 1, turn, 2 sc in first st, sc in next 2 sts, sc2tog. (4 sc) Take the hook out and put the live loop on a stitch marker.
Second side. Skip the next 2 unworked sts of Row 12; these form the base of the window. Join new cream yarn in the next st, working in the same direction as Row 13.
Row 13: Ch 1, sc in same st and in next 3 sts. (4 sc)
Rows 14–15: Ch 1, turn, sc in each st. (4 sc)
Row 16 (shift row, begins at outer edge): Ch 1, turn, sc2tog, sc in next 2 sts, 2 sc in last st. (4 sc) Fasten off.
The window is 2 sts wide at the base and closes to a point at Row 16. It is about 0.4 in (1.0 cm) wide and 0.7 in (1.8 cm) tall.
Top
Put the live loop of the first side back on the hook.
Row 17: Ch 1, turn, sc in 4 sts of the first side, then sc in 4 sts of the second side. (8 sc)
Rows 18–19: Ch 1, turn, sc in each st. (8 sc)
Row 20: Ch 1, turn, sc2tog, sc in next 4 sts, sc2tog. (6 sc)
Rows 21–22: Ch 1, turn, sc in each st. (6 sc)
Row 23: Ch 1, turn, sc2tog, sc in next 2 sts, sc2tog. (4 sc)
Row 24: Ch 1, turn, sc in each st. (4 sc) Fasten off.
Check the outer edges: each side moves in by 1 st at Rows 4, 8, 12, 16, 20, and 23. That is 6 per side, which narrows the 16-st base span to the 4-st top. Weave in all ends, then make the second panel the same way.
Flowers and Leaves
Use the 2.75 mm hook.
Layered Flower (make 1 pink, 1 lilac)
Rnd 1 (cream): MR, 10 sc in ring, sl st to first sc. (10 sc) Fasten off cream.
Rnd 2 (pink or lilac), working in FLO: Join in any st. [(sc, hdc, dc) in next st, (dc, hdc, sc) in next st] 5 times, sl st to first sc. (30 sts, 5 small inner petals)
Rnd 3: With the same color, work in the BLO of Rnd 1, behind Rnd 2. [(sc, hdc, 2 dc) in next st, (2 dc, hdc, sc) in next st] 5 times, sl st to first sc. (40 sts, 5 larger outer petals)
Fasten off, leaving a 10 in (25.4 cm) tail. Each flower is about 1.25 in (3.2 cm) across.
Daisy (make 1)
Rnd 1 (mustard): MR, 6 sc in ring, sl st to first sc. (6 sc)
Rnd 2: Ch 1, 2 sc in each st, sl st to first sc. (12 sc) Fasten off mustard.
Rnd 3 (white): Join in any st. [(hdc, 2 dc, hdc) in next st, sl st in next st] 6 times. (30 sts, 6 rounded petals)
Fasten off, leaving a 10 in (25.4 cm) tail. The daisy is about 1.1 in (2.8 cm) across.
Leaf (make 6 in sage green)
Ch 6. Sc in 2nd ch from hook, hdc in next ch, dc in next ch, hdc in next ch, then (sc, ch 1, sc) in last ch for the tip. Working along the other side of the chain: hdc in next ch, dc in next ch, hdc in next ch, sc in next ch, sl st in the skipped ch. (10 sts + ch-1 tip)
Fasten off, leaving a tail for sewing. Each leaf is about 0.75 in (1.9 cm) long.
Joining Edging
This edging joins the two panels and also works as the border.
Edging gauge: work 1 sc per row-end along the side edges and 1 sc per stitch along the top and bottom edges, through both layers, with the 3.25 mm hook.
Place the panels wrong sides together with every row lined up, and pin them.
Window round: Join cream at the base of the window. Working through both layers: sc in each of the 2 skipped sts at the base, sc in each of 4 row-ends up one side, sc in each of 4 row-ends down the other side, sl st to first sc. (10 sc) Fasten off.
Outer round: Join cream at the bottom outer corner of the left leg. Working through both layers:
- Left leg bottom: 3 sc in first st, sc in next 3 sts, 3 sc in last st. (9 sc)
- Left leg inner edge: 1 sc in each of 8 row-ends. (8 sc)
- Crotch: 1 sc in each of the 2 ch of Row 9. (2 sc)
- Right leg inner edge: 1 sc in each of 8 row-ends. (8 sc)
- Right leg bottom: 3 sc in first st, sc in next 3 sts, 3 sc in last st. (9 sc)
- Right outer edge: 1 sc in each of 24 row-ends. (24 sc)
- Top: 3 sc in first st, sc in next 2 sts, 3 sc in last st. (8 sc)
- Left outer edge: 1 sc in each of 24 row-ends. (24 sc)
After the first 12 sc of the left outer edge, stuff the letter lightly. Use a chopstick to push fiberfill into the legs and top. Work the last 12 sc, then sl st to the first sc. (92 sc total) Fasten off and hide the tail inside.
Why the math works: the edge stitches add up to 5 + 8 + 2 + 8 + 5 + 24 + 4 + 24 = 80. There are six outward-pointing corners: 2 outer leg corners, 2 inner leg corners, and 2 top corners. Each one gets 2 extra sc, which adds 12, so 80 + 12 = 92. The two inward corners where the crossbar meets the legs get no extra stitches, so they stay crisp. The edging adds about 0.15 in (0.4 cm) on each edge. That takes the 3.2 x 4 in (8.1 x 10.2 cm) panels to 3.5 x 4.3 in (8.9 x 10.9 cm).
Decoration and Hardware
- Lilac flower: Sew it to the crossbar, just left of center, so its lower petals overlap the left leg.
- Daisy: Sew it right of the lilac flower, on the right leg near the crossbar.
- Pink flower: Sew it above the daisy, beside the window on the right upper side.
- Leaves: Tuck 2 leaves under the left side of the pink flower and 1 under its right side. Place 1 to the right of the daisy and 2 below the daisy and lilac flower. Sew each leaf down at its base.
- Upper sprig: Above the pink flower, backstitch a 0.6 in (1.5 cm) green stem. Add 3 lazy-daisy leaves and 2 pink French knots.
- Lower sprig: On the left leg, left of the lilac flower, work 2 pink French knots and 2 lazy-daisy leaves.
- Hardware: Open the jump ring and pass it through the top edging, between the two middle stitches. Add the chain and close the ring. Attach the split ring to the other end of the chain.
Final Blocking
- Mist the letter lightly with cool water. Do not soak a stuffed piece.
- Shape it with your fingers so the legs sit straight and the edges roll smoothly.
- Pin it to a foam mat at 3.5 in (8.9 cm) wide by 4.3 in (10.9 cm) tall, keeping the pins out of the flowers.
- Fluff the petals so the layers separate.
- Let it dry completely before you attach it to keys or a bag.
Final Quality-Control Checklist
- Both panels have 24 rows and the same outline.
- The outer edging has 92 sc, with no gaps at the corners.
- The window is open, edged with 10 sc, and sits above the crossbar.
- The stuffing is light and even.
- All flowers and leaves are sewn on securely.
- The jump ring is fully closed and passes through both layers.
- All ends are hidden inside.
Troubleshooting
- Legs slant the wrong way: on shift rows, the sc2tog belongs on the outer edge.
- Edges ruffle: the edging is too loose. Use a smaller hook for the edging only.
- Edges pucker: row-ends were skipped. Recount 24 per outer side.
- Window closes up: check that you skipped exactly 2 sts of Row 12.
- Flowers cup forward: block them flat before sewing.
- Stuffing shows: use a smaller hook for the panels.
Care
Remove the keyring hardware first. Hand wash in cool water with mild soap, press out the water in a towel, and dry flat.
Final Notes
The measurement chain is short. At 5 sc and 6 rows per 1 in (2.5 cm), the legs are 1 in (2.5 cm) wide at Row 8 and the panel is 3.2 x 4 in (8.1 x 10.2 cm) at Row 24. The 92-stitch edging joins the panels and brings the letter to 3.5 x 4.3 in (8.9 x 10.9 cm). Check each stage and the letter will keep its shape.
Happy crocheting!