

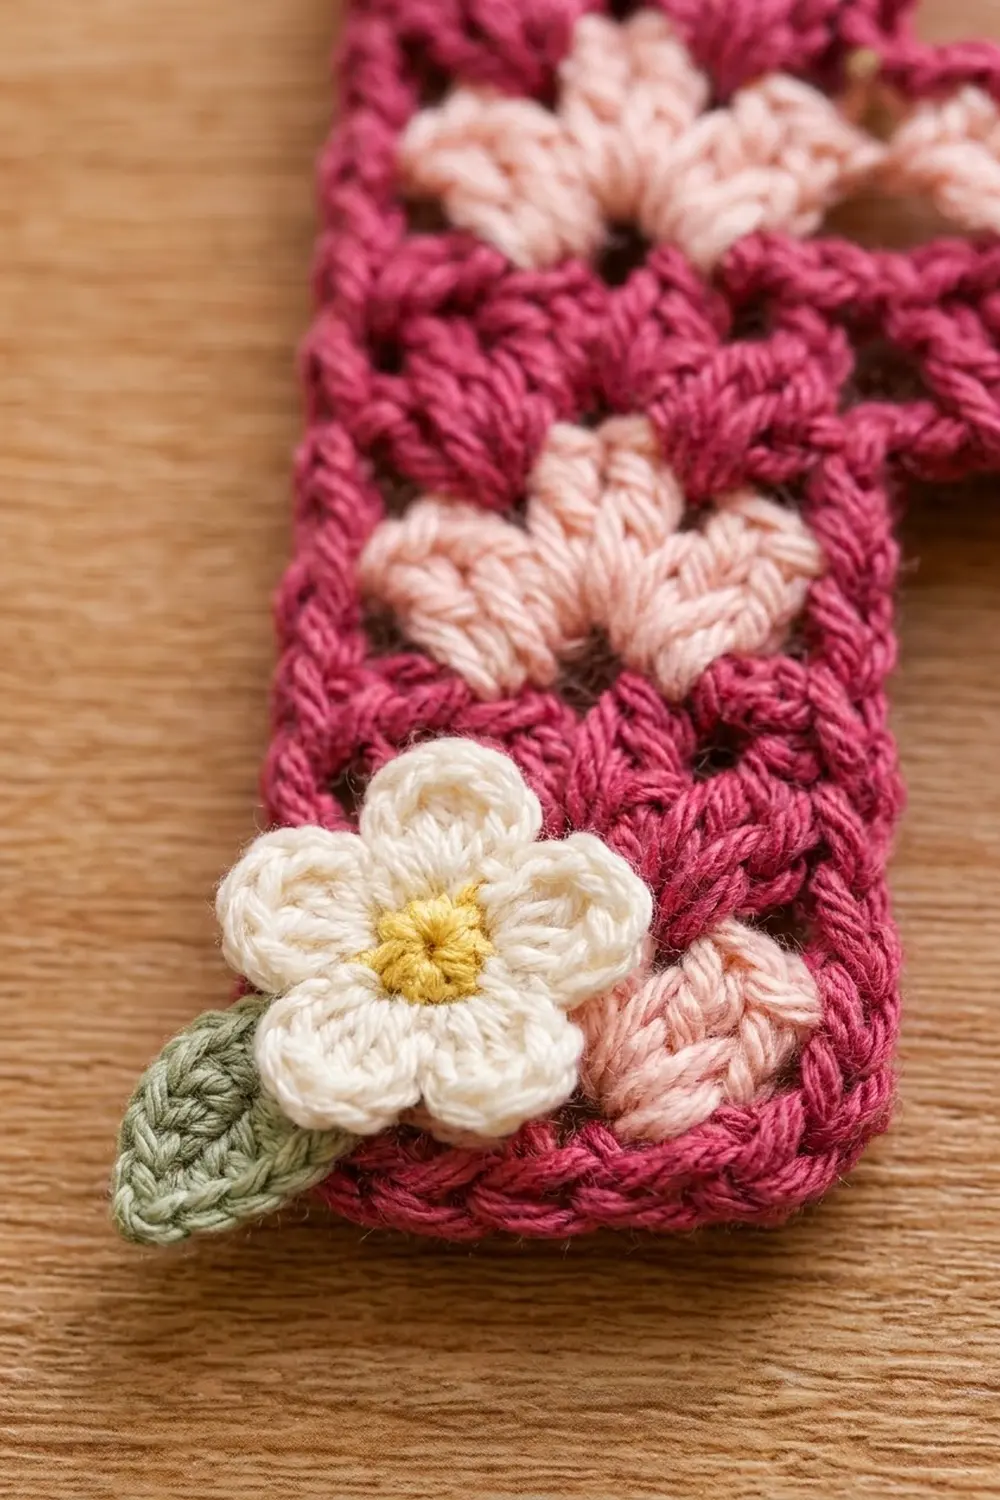
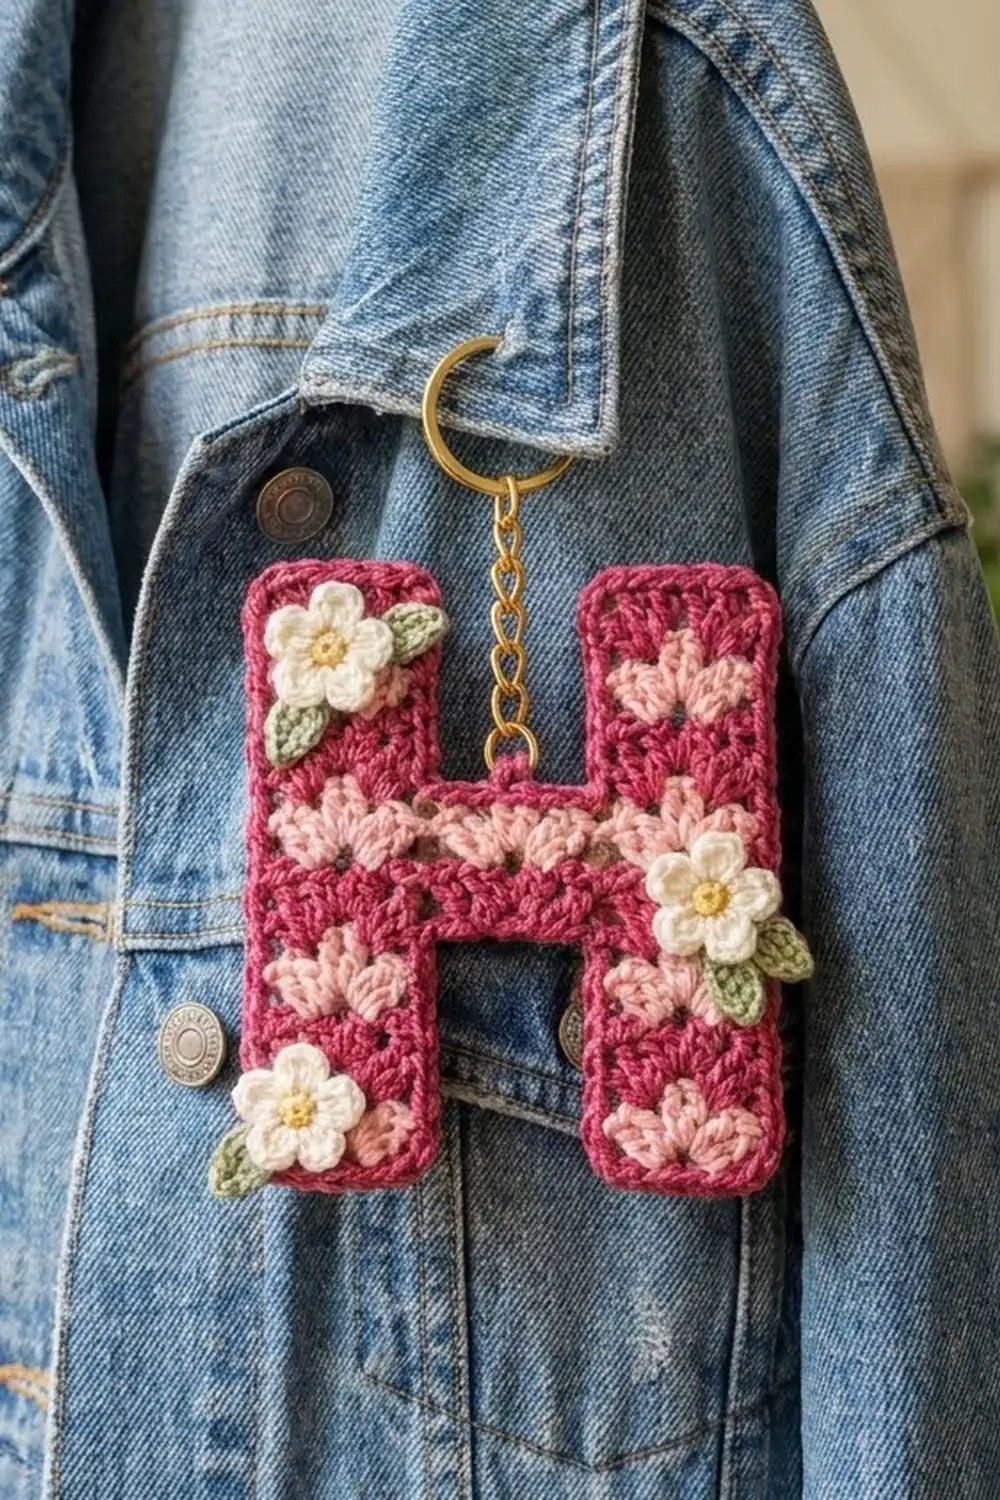
This letter H keychain is worked in rows of small 3-dc shells. Deep raspberry and soft blush pink alternate row by row, and the shells stack into neat columns of pale fans running up each leg.
A single round of raspberry single crochet frames the letter and gives it crisp edges. Three tiny cream flowers with yellow centers and sage-green leaves are sewn onto the front, and a gold key ring finishes it as a bag charm or keychain.
The pattern uses US crochet terms. The finished H measures 3.75 in (9.5 cm) wide by 4.25 in (10.8 cm) tall.
You work the H flat in rows from the bottom up. You make the two lower legs separately, join them with a chain to form the crossbar, and then work each upper leg on its own. After that you add the border, the flowers and the key ring hardware.
Finished Size and Construction
- Finished size: 3.75 in (9.5 cm) wide × 4.25 in (10.8 cm) tall
- Skill level: Easy+
- Terminology: US crochet terms
- Yarn weight: DK (light worsted, #3), cotton or cotton blend
- Hook: 3.5 mm (E-4)
- Number of pieces: 1 letter body, plus 3 flower and 4 leaf appliqués
- Layout: one letter H, worked flat in rows
- Leg width: 8 sts = 1.25 in (3.2 cm)
- Size before border: 3.5 in (8.9 cm) wide × 4 in (10.2 cm) tall
- Border depth: 1 round of sc, about 0.125 in (0.3 cm) on every side
Materials
Choose a smooth, mercerized cotton or cotton blend. It shows the shell texture clearly and holds its shape on a keychain. Avoid fuzzy or very stretchy yarns.
- Color A, Raspberry: 8 g, about 19 m
- Color B, Blush Pink: 5 g, about 12 m
- Color C, Cream: 3 g, about 7 m
- Color D, Yellow: 1 g, about 2 m
- Color E, Sage Green: 2 g, about 5 m
These quantities include a margin for swatching and weaving in ends.
Tools:
– 3.5 mm (E-4) crochet hook
– Tapestry needle
– Gold key ring with a short chain, 1 in (2.5 cm) ring
– One 8 mm gold jump ring
– 2 pairs of small flat-nose pliers
– Scissors, rustproof pins and a blocking mat
– Spray bottle with water
Abbreviations (US Terms)
- ch: chain
- sl st: slip stitch
- sc: single crochet
- hdc: half double crochet
- dc: double crochet
- sk: skip
- st(s): stitch(es)
- sc2tog: single crochet 2 together
- RS / WS: right side / wrong side
Special stitch: Shell. Work 3 dc in the same stitch.
Shell Row (worked over 3k + 2 sts): Ch 3 (counts as dc), [sk 1, shell in next st, sk 1] to the last st, dc in the last st. The stitch count stays the same as the row below. Each shell sits in the center dc of the shell below it, so the shells stack in straight columns.
Gauge and Checkpoints
Make the right leg first as your test piece (Rows 1–4 below). Use these checkpoints:
- Gauge: 8 sts = 1.25 in (3.2 cm). One dc row = 0.4 in (1.0 cm). One sc row = 0.2 in (0.5 cm).
- Checkpoint 1 (one leg after Row 4): 1.25 in (3.2 cm) wide × 1.4 in (3.6 cm) tall.
- Checkpoint 2 (after Row 7): 3.5 in (8.9 cm) wide × 2.6 in (6.6 cm) tall.
- Checkpoint 3 (after Row 11): 3.5 in (8.9 cm) wide × 4 in (10.2 cm) tall.
- Checkpoint 4 (after the border): 3.75 in (9.5 cm) × 4.25 in (10.8 cm).
If your leg is too wide (over 1.25 in / 3.2 cm), go down to a 3.25 mm hook. If it is too narrow, go up to a 3.75 mm hook. Even 0.125 in (0.3 cm) of extra width per leg adds up across the crossbar, so check before you continue.
Color Changes
Each row uses one color: Color A on odd rows and Color B on even rows. The color you need next is always at the opposite edge, so cut the yarn at the end of each row and leave a 3 in (7.6 cm) tail. Join the next color at the start of the next row. Lay the tails along the side edges, because the border will enclose them.
Pattern: Lower Legs
Left Leg
Row 1 (RS, Color A): Ch 9. Sc in the 2nd ch from the hook and in each ch across. Cut A. (8 sc)
Row 2 (WS, Color B): Ch 3 (counts as dc). Sk 1, shell in next st, sk 2, shell in next st, sk 1, dc in last st. This is the Shell Row with the bracket worked twice. Cut B. (8 sts: 2 dc + 2 shells)
Row 3 (RS, Color A): Work the Shell Row, placing each shell in the center dc of the shell below. Cut A. (8 sts)
Row 4 (WS, Color B): Work the Shell Row. Cut B and fasten off. (8 sts)
Right Leg
Work Rows 1–4 exactly as for the left leg. Cut B, but keep the right leg on your work surface. Lay both legs RS up, side by side, with the bottom edges level. Measure against Checkpoint 1.
Pattern: Crossbar
Row 5 (RS, Color A, joining row): Join A at the outer (right) edge of the right leg.
– Work the Shell Row across all 8 sts of the right leg, ending with dc in its last st.
– Ch 7 for the crossbar base.
– Make sure the chain is not twisted. Dc in the first st at the inner edge of the left leg’s Row 4, then [sk 1, shell in next st, sk 1] twice and dc in the last st.
Cut A. (23 sts: 8 sts + 7 ch + 8 sts)
The 7-ch base spans the 1 in (2.5 cm) gap between the legs. This forms the opening below the crossbar, which is 1.8 in (4.6 cm) tall.
Row 6 (WS, Color B): Ch 3 (counts as dc), [sk 1, shell in next st, sk 1] 7 times, dc in last st. Cut B. (23 sts: 2 dc + 7 shells)
Shells 1–2 and 6–7 land in the centers of the leg shells, so the columns continue unbroken. Shells 3, 4 and 5 go into the 1st, 4th and 7th chains of the crossbar base (counting from where Row 6 enters the chain). Work them around the chain so the small open gaps form.
Row 7 (RS, Color A): Work the Shell Row across all 23 sts. Cut A. (23 sts)
Checkpoint 2: 3.5 in (8.9 cm) wide × 2.6 in (6.6 cm) tall. The crossbar (Rows 6–7) should measure 0.8 in (2.0 cm) tall.
Pattern: Upper Legs
Left Upper Leg
Row 8 (WS, Color B): Join B in the first st of Row 7 at the left edge (as seen from the RS). Work the Shell Row over the first 8 sts only, and leave the remaining 15 sts unworked. Cut B. (8 sts)
Row 9 (RS, Color A): Work the Shell Row. (8 sts)
Row 10 (WS, Color B): Work the Shell Row. (8 sts)
Row 11 (RS, Color A): Ch 1, sc in each st across. Fasten off. (8 sc)
Right Upper Leg
Row 8 (WS, Color B): With the WS facing, count 8 sts in from the other end of Row 7 and join B in that st. Work the Shell Row over these last 8 sts. (8 sts)
Seven sts of Row 7 stay unworked between the legs and form the top of the crossbar.
Rows 9–11: Work as for the left upper leg. (8 sts each; Row 11 = 8 sc)
Checkpoint 3: 3.5 in (8.9 cm) × 4 in (10.2 cm). The opening above the crossbar should be 1.4 in (3.6 cm) tall.
Border
Border gauge: 6 sc = 1 in (2.5 cm) along the top and bottom edges. Along the row-ends, work 2 sc per dc row-end and 1 sc per sc row-end.
Work 3 sc in each outer corner stitch. These groups are counted separately from the side counts below. Each corner group also covers the row-end of Row 1 or Row 11 at that corner.
Border Round (RS, Color A): Join A in the bottom-left corner st of the left leg (Row 1, first st, worked into the foundation loops). Work counterclockwise.
- Left leg, bottom: 3 sc in the corner st, then sc in each of the next 6 sts, then 3 sc in the corner st.
- Left leg, inner lower side: 2 sc in each row-end of Rows 2–4 (6 sc), then 1 sc in the Row 5 row-end. (7 sc)
- Inner corner: Sc2tog, with the first leg in the same Row 5 row-end and the second leg in the first crossbar ch.
- Crossbar, bottom edge: Sc in each of the next 5 ch.
- Inner corner: Sc2tog over the last ch and the Row 5 row-end of the right leg.
- Right leg, inner lower side: 1 sc in the same Row 5 row-end, then 2 sc in each row-end of Rows 4–2. (7 sc)
- Right leg, bottom: 3 sc in the corner st, then sc in each of the next 6 sts, then 3 sc in the corner st.
- Right leg, outer side: 2 sc in each row-end of Rows 2–10. (18 sc)
- Right leg, top: 3 sc in the corner st, then sc in each of the next 6 sts, then 3 sc in the corner st.
- Right leg, inner upper side: 2 sc in each row-end of Rows 10 and 9, then 1 sc in the Row 8 row-end. (5 sc)
- Inner corner: Sc2tog over the Row 8 row-end and the first unworked st of Row 7.
- Crossbar, top edge: Sc in each of the next 5 sts.
- Inner corner: Sc2tog over the last unworked st of Row 7 and the Row 8 row-end.
- Left leg, inner upper side: 1 sc in the same Row 8 row-end, then 2 sc in each row-end of Rows 9–10. (5 sc)
- Left leg, top: 3 sc in the corner st, then sc in each of the next 6 sts, then 3 sc in the corner st.
- Left leg, outer side: 2 sc in each row-end of Rows 10–2. (18 sc)
Join with a sl st to the first sc and fasten off.
Border total: 122 sts
– 8 outer corners × 3 sc = 24
– 4 leg ends × 6 sc = 24
– 2 outer sides × 18 sc = 36
– 2 inner lower sides × 7 sc = 14
– 2 inner upper sides × 5 sc = 10
– Crossbar top and bottom: 5 + 5 = 10
– 4 inner-corner sc2tog = 4
Why the math works:
– One dc row is 0.4 in (1.0 cm) tall, so 2 sc per row-end gives 5 sc per inch. That is slightly looser than the 6-per-inch sc gauge, which stops the long sides from rippling.
– The 3-sc groups turn each outer corner without cupping.
– Each sc2tog absorbs fullness at an inner corner so the openings stay square.
– Each 8-st leg end takes 6 sc plus the 2 corner groups, and every stitch is used exactly once.
Flowers (make 3)
Center (Color D): Make a magic ring, ch 1, and work 5 sc in the ring. Pull the ring tight and join with a sl st to the first sc. Fasten off. (5 sc)
Petals (Color C): Join C in any sc. In each sc around, work (ch 2, 2 dc, ch 2, sl st) in the same st, then move to the next sc. Join and fasten off, leaving a 6 in (15.2 cm) tail. (5 petals) Each flower measures about 0.8 in (2.0 cm) across.
Leaves (make 4)
Color E: Ch 6.
– First side: Sl st in the 2nd ch from the hook, then sc, hdc, sc and sl st in the next 4 ch. (5 sts)
– Second side: Ch 1, rotate the work, and work along the other side of the foundation chain: sl st, sc, hdc, sc, sl st. (5 sts)
Join with a sl st to the tip and fasten off, leaving a 6 in (15.2 cm) tail. (10 sts) Each leaf measures about 0.6 in (1.5 cm) long.
Assembly of Appliqués and Hardware
- Top-left flower: Pin it over the top-left corner of the left leg. Tuck 1 leaf under its lower-right edge.
- Right-leg flower: Pin it on the right leg, level with the crossbar. Tuck 1 leaf under its lower-left edge and 1 under its lower-right edge.
- Bottom flower: Pin it over the bottom-left corner of the left leg. Tuck 1 leaf under its lower-left edge.
- Stitch down: Using the tails, whipstitch around each flower center and between the petals. Tack each leaf at its base and tip.
- Hardware: With pliers, open the jump ring. Pass it through the 3rd (center) sc of the crossbar top border and the Row 7 st beneath it. Add the end link of the key ring chain and close the ring fully.
Final Blocking
- Weave in all remaining ends on the WS, through the border stitches.
- Lay the H face down on the blocking mat and remove the hardware or keep it off to the side.
- Pin it to 3.75 in (9.5 cm) × 4.25 in (10.8 cm), with pins at all 8 outer corners first.
- Pin the inner corners so the openings are square. The lower opening should be 1 in (2.5 cm) wide and the upper opening the same.
- Mist the piece until it is damp, but do not soak it.
- Let it dry completely, at least 4 hours, before unpinning.
- Steam the flowers lightly from above. Do not flatten them.
Final Quality-Control Checklist
- [ ] Each leg is 8 sts wide, and Rows 6–7 are 23 sts.
- [ ] The shells stack in straight columns with no drift.
- [ ] The rows alternate raspberry and blush with no repeated colors.
- [ ] The border totals 122 sts.
- [ ] All 4 inner corners are crisp, not puckered.
- [ ] The finished size is 3.75 in (9.5 cm) × 4.25 in (10.8 cm).
- [ ] The flowers are secured on every petal, and the leaves are tacked at both ends.
- [ ] The jump ring is fully closed and anchored through 2 layers of stitches.
Troubleshooting
- Shells lean or drift sideways: You placed a shell beside the center dc instead of into it. Undo the row and re-count.
- Crossbar sags: The 7-ch base is too loose. Redo it with a tighter tension or a hook 0.25 mm smaller.
- Crossbar pulls the legs inward: The chain is too tight. Work the chain with a hook one size larger.
- Sides ruffle in the border: Work 1 sc in some dc row-ends instead of 2. Keep both sides matching.
- Inner corners gape: Check that you worked an sc2tog at every inner corner, not 2 separate sc.
- Tails poke through: Hold them along the edge and crochet over them tightly while working the border.
Care
Hand wash in cool water with mild soap, and press out the water in a towel. Reshape the piece and dry it flat. Do not machine wash it with the metal hardware attached.
Final Notes
Everything depends on the measurement chain:
– 8 sts = 1.25 in (3.2 cm) per leg.
– Legs + 7-ch gap = 3.5 in (8.9 cm) wide.
– 1 sc row + 9 dc rows + 1 sc row = 4 in (10.2 cm) tall.
– A 122-st border brings the finished letter to 3.75 in (9.5 cm) × 4.25 in (10.8 cm).
Check each stage against its checkpoint, and the little blossom H will come out square, flat and ready to clip onto any bag or jacket.
Happy crocheting!