

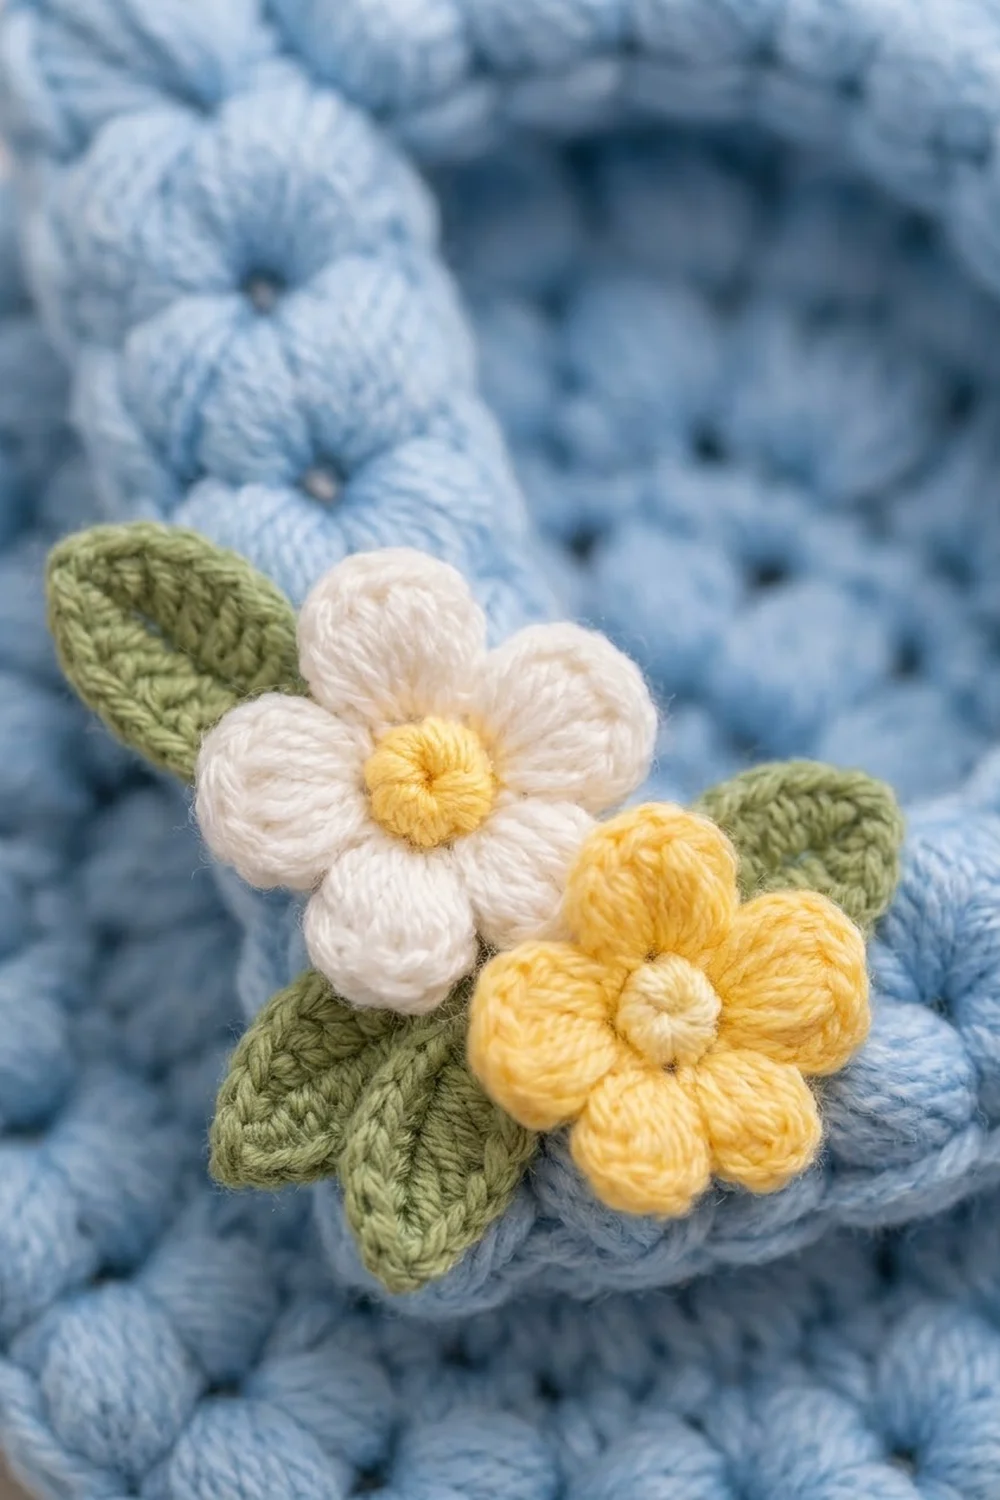
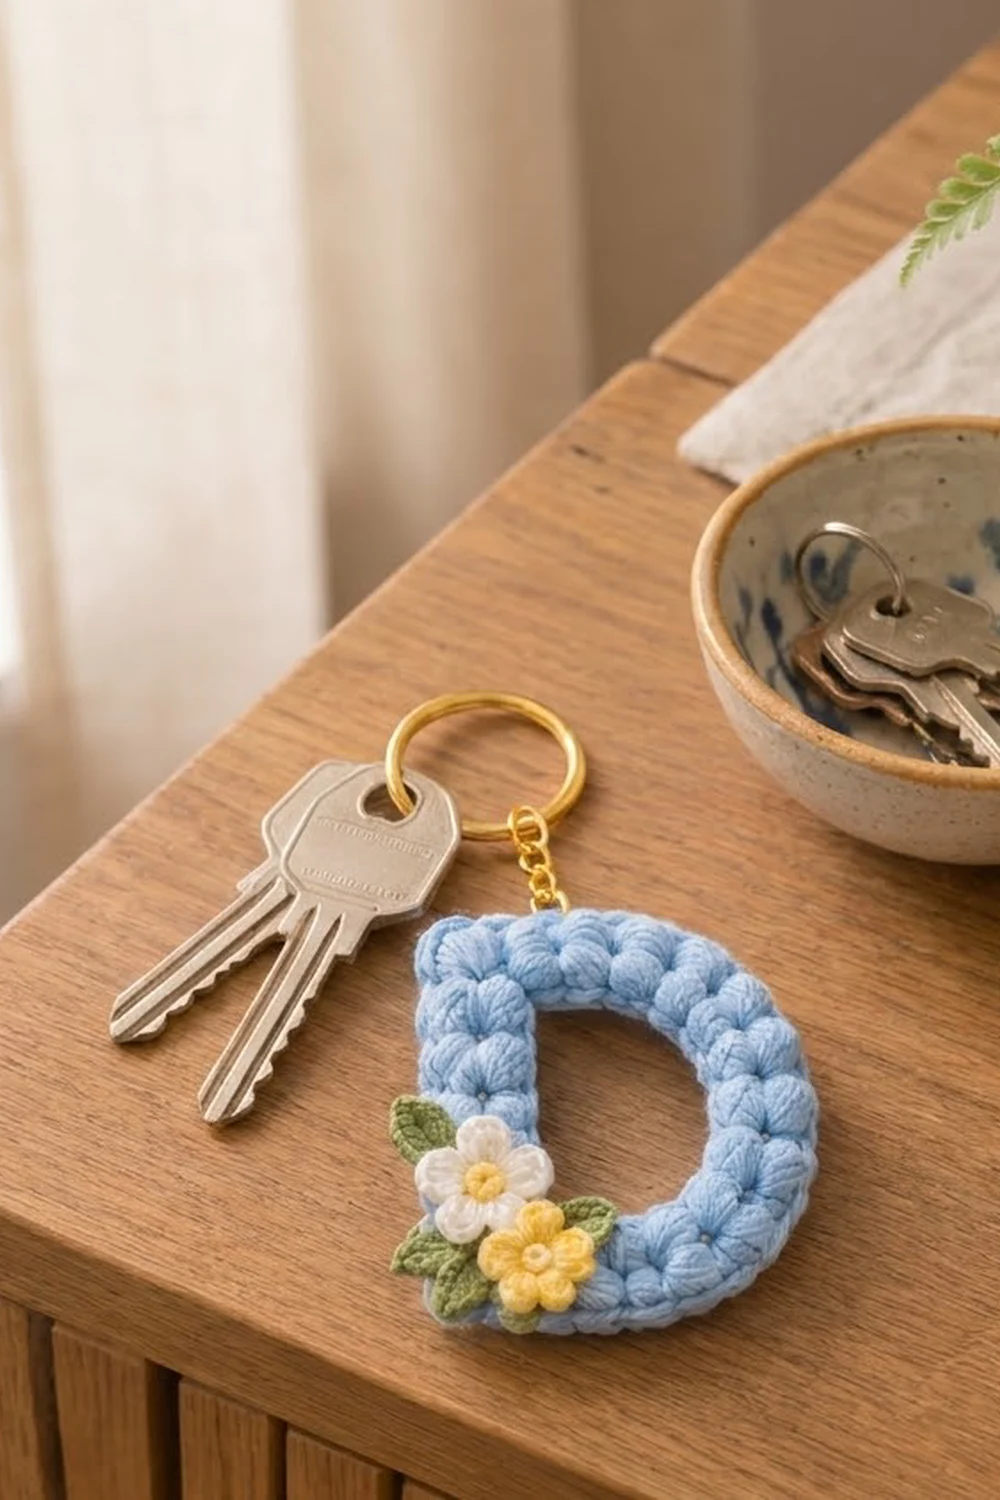
The Blue Blossom Letter D Keychain is a small, puffy initial charm. A band of baby-blue puff stitches forms a capital “D”, and a tiny bouquet of two flowers and three leaves sits at the bottom-left corner.
The colors are light blue for the letter, white and buttery yellow for the flowers, and sage green for the leaves. Cotton yarn keeps the stitches crisp, so each puff stands out clearly.
This pattern uses US crochet terms. The finished letter is 3.5 in (8.9 cm) tall and 2.75 in (7.0 cm) wide, not counting the hardware.
You start with a chain ring that forms the D-shaped opening and work outward in rounds. First comes one single crochet round, then two staggered puff rounds with planned increases, then a two-round border. Last, you sew on the flowers and leaves and add the key ring.
Finished Size and Construction
- Finished size: 3.5 in (8.9 cm) tall x 2.75 in (7.0 cm) wide
- Skill level: Advanced beginner
- Terminology: US terms
- Yarn weight: DK / light worsted (#3) cotton or milk cotton
- Hook: 3.5 mm (E-4)
- Number of pieces: 1 letter body plus 5 small appliqués (2 flowers, 3 leaves), sewn into one keychain
- Layout: A single letter with the appliqués grouped at the bottom-left corner
- Opening: about 1.75 in (4.4 cm) tall x 1 in (2.5 cm) wide
- Size before border: 3.25 in (8.3 cm) x 2.5 in (6.4 cm)
- Border depth: about 0.125 in (0.3 cm) per edge
- Flowers: about 0.75 in (1.9 cm) across
- Leaves: about 0.6 in (1.5 cm) long
Materials
Use a smooth DK cotton or cotton blend with good stitch definition. Fuzzy yarns hide the puff texture.
- Light blue (letter): 10 g, about 23 m
- Yellow (white flower’s center and the whole yellow flower): 3 g, about 7 m
- White (white flower’s petals): 2 g, about 5 m
- Sage green (leaves): 2 g, about 5 m
Tools:
- 3.5 mm (E-4) crochet hook
- Tapestry needle
- 2 locking stitch markers
- Gold split key ring, 1 in (2.5 cm)
- 8 mm gold jump ring and a short gold chain of 3 links
- 2 pairs of flat-nose pliers
- Blocking mat, rust-proof pins, and a spray bottle
These quantities include a small margin for sewing tails.
Abbreviations (US Terms)
- ch: chain
- sl st: slip stitch
- sc: single crochet
- hdc: half double crochet
- dc: double crochet
- sp: space
- st(s): stitch(es)
- sk: skip
- yo: yarn over
- MR: magic ring
- BLO: back loop only
Puff stitch (puff): [Yo, insert hook in the indicated st or sp, yo and pull up a loop to about 0.25 in (0.6 cm)] 3 times. You now have 7 loops on the hook. Yo and draw through all 7 loops.
The ch 1 worked after each puff locks it closed. It forms a separate ch-1 sp and is not part of the puff.
Gauge and Checkpoints
Gauge: 10 sc = 2 in (5.1 cm) with a 3.5 mm hook.
The piece is small, so the letter itself is your test piece. Work Rounds 1–3, then measure it flat without stretching:
- After Round 1: 2 in (5.1 cm) tall x 1.25 in (3.2 cm) wide
- After Round 2: 2.6 in (6.6 cm) tall x 1.9 in (4.8 cm) wide
- After Round 3: 3.25 in (8.3 cm) tall x 2.5 in (6.4 cm) wide
- After the border: 3.5 in (8.9 cm) tall x 2.75 in (7.0 cm) wide
If the piece is more than 0.25 in (0.6 cm) too large after Round 3, restart with a 3.25 mm hook. If it is that much too small, use a 3.75 mm hook. If the size is right but the puffs look flat, pull the loops up a little taller.
Letter Body
Orientation: Right-handed crocheters work counterclockwise. With the right side facing you and the stem on the left, the first stitches run down the stem. Left-handed crocheters can use the same counts. The D is symmetrical from top to bottom, so the only difference is that the top and bottom sections swap places.
With light blue, ch 30. Join with a sl st to the first ch to form a ring. Make sure the chain isn’t twisted.
Round 1 (inner edge)
Ch 1 (does not count as a st). Sc in each ch around. Join with a sl st to the first sc. (30 sc)
Divide the round into sections:
- Sts 1–8: stem
- St 9: bottom-left corner (place a marker)
- Sts 10–13: bottom
- Sts 14–25: curve
- Sts 26–29: top
- St 30: top-left corner (place a marker)
Check: 8 + 1 + 4 + 12 + 4 + 1 = 30. Gently shape the ring into a D, with a straight stem on the left and a rounded right side.
Round 2 (first puff round)
Ch 2 (does not count as a st).
- Stem: [Puff in next st, ch 1, sk next st] 4 times. (4 puffs)
- Bottom-left corner: (Puff, ch 1, puff, ch 1) in marked st. (2 puffs)
- Bottom: [Puff in next st, ch 1, sk next st] 2 times. (2 puffs)
- Curve: [(Puff, ch 1) in each of next 2 sts, sk next st] 4 times. (8 puffs)
- Top: [Puff in next st, ch 1, sk next st] 2 times. (2 puffs)
- Top-left corner: (Puff, ch 1, puff, ch 1) in marked st. (2 puffs)
Join with a sl st to the top of the first puff. (20 puffs, 20 ch-1 sps)
Move each marker up to the ch-1 sp between its two corner puffs. The curve has 8 puffs over 12 sts, while the straight sections have 1 puff for every 2 sts. That extra fullness is what rounds out the bowl of the D.
Round 3 (second puff round, staggered)
In this round, every puff goes into a ch-1 sp, so each new puff sits between two puffs of the round below.
Sl st into the next ch-1 sp. Ch 2 (does not count as a st).
- Stem: (Puff, ch 1) in each of the next 4 sps. (4 puffs)
- Bottom-left corner: (Puff, ch 1, puff, ch 1) in the marked sp. (2 puffs)
- Bottom: (Puff, ch 1) in each of the next 2 sps. (2 puffs)
- Curve, over the next 9 sps: [(Puff, ch 1) in next sp, (puff, ch 1, puff, ch 1) in next sp] 4 times, then (puff, ch 1) in next sp. (13 puffs)
- Top: (Puff, ch 1) in each of the next 2 sps. (2 puffs)
- Top-left corner: (Puff, ch 1, puff, ch 1) in the marked sp. (2 puffs)
- Stem finish: (Puff, ch 1) in the last sp. (1 puff)
Join with a sl st to the top of the first puff. (26 puffs, 26 ch-1 sps)
Check: 4 + 2 + 2 + 13 + 2 + 2 + 1 = 26. That is the 20 puffs from Round 2, plus 1 extra at each corner and 4 extra on the curve. The stem now has 5 puffs. Move the markers up to the two corner sps.
Checkpoint: The piece should measure 3.25 in (8.3 cm) x 2.5 in (6.4 cm). The puff band should be about 0.75 in (1.9 cm) wide.
Border
Border gauge: 5 sc per 1 in (2.5 cm), the same as the main gauge.
Round 4 (single crochet outline)
This round turns each puff and each ch-1 sp into 1 sc and adds extra stitches at the two corners.
Ch 1. Sc in the top of each puff and in each ch-1 sp around, but work 3 sc in each marked corner sp. Join with a sl st to the first sc.
Count: 52 sc worked one into each existing puff or sp (26 + 26), plus 4 extra sc (2 at each corner) = 56 sc.
Sc per section:
- Stem, from the top-left corner group down to the bottom-left corner group: 11 sc
- Bottom-left corner group (puff, 3 sc in sp, puff): 5 sc, with the middle sc as the corner st
- Bottom: 5 sc
- Curve: 25 sc
- Top: 5 sc
- Top-left corner group: 5 sc, with the middle sc as the corner st
Check: 11 + 5 + 5 + 25 + 5 + 5 = 56. Each corner st is counted once, inside its corner group.
Round 5 (slip stitch finish)
Working in the BLO, loosely sl st in each sc around. (56 sl st) Fasten off and weave in the ends.
Why the math works: At 5 sc per inch, 56 sc covers 11.2 in (28.4 cm). That matches the outline of a D that is 3.5 in x 2.75 in (8.9 cm x 7.0 cm).
- The 11 stem sts measure 2.2 in (5.6 cm). The corner groups add the rest of the 3.5 in (8.9 cm) height.
- The top and bottom sections are 1 in (2.5 cm) each, which keeps the letter symmetrical.
- The 25 curve sts measure 5 in (12.7 cm), the length of the rounded bowl.
Flowers and Leaves
White Flower (make 1)
Round 1: With yellow, make a MR. Ch 1, work 5 sc into the ring, and pull the ring closed. Join with a sl st to the first sc. (5 sc) Fasten off.
Round 2: Join white in any sc. [(Sl st, ch 2, 2 dc, ch 2, sl st) in next sc] 5 times. (5 petals) Fasten off, leaving a 6 in (15.2 cm) tail.
Yellow Flower (make 1)
Work it like the White Flower, but use yellow for both rounds and don’t fasten off between them. Each flower should measure 0.75 in (1.9 cm) across.
Leaf (make 3)
With sage green, ch 6.
- Starting in the 2nd ch from the hook, work sc, hdc, dc, and hdc in the next 4 ch.
- Work (sc, ch 1, sc) in the last ch.
- Working along the other side of the chain, work hdc, dc, hdc, and sc in the next 4 ch.
- Sl st to the first sc. (10 sts, 1 ch-1 tip)
Fasten off, leaving a 6 in (15.2 cm) tail. Each leaf should be 0.6 in (1.5 cm) long and pointed at both ends.
Attaching the Appliqués
- Lay the letter right side up with the stem on the left.
- Center the white flower on the lower stem, 0.75 in (1.9 cm) above the bottom-left corner.
- Place the yellow flower below the white flower and slightly to the right, overlapping the corner.
- Tuck one leaf behind the upper left of the white flower, one between the two flowers, and one behind the lower left of the yellow flower. Point the leaf tips outward.
- Pin everything in place. Sew the leaves on first, then the yellow flower, then the white flower. Use small stitches and catch only the front loops of the puffs.
Hardware
Use the pliers to twist the jump ring open sideways. Pass it under both loops of the corner sc in the top-left corner group, then through the end link of the chain. Close the jump ring fully. Attach the split ring to the other end of the chain.
Final Blocking
- Pin the letter right side up to 3.5 in (8.9 cm) x 2.75 in (7.0 cm).
- Put one pin at each squared corner and three pins evenly spaced around the curve.
- Keep the stem straight. Check that the opening measures 1.75 in (4.4 cm) x 1 in (2.5 cm).
- Mist lightly with water. Don’t press the puffs flat.
- Fluff each puff with your fingertip.
- Let it dry completely, then unpin it and lift the petal and leaf tips slightly.
Final Quality-Control Checklist
- Round 1: 30 sc, and the opening is a clear D shape
- Round 2: 20 puffs; Round 3: 26 puffs
- Round 4: 56 sc, with 3 sc in each corner sp
- The stem is straight, the corners are square, and the curve lies flat
- Finished size: 3.5 in (8.9 cm) x 2.75 in (7.0 cm), within 0.125 in (0.3 cm)
- No sewing stitches show on the front, and all ends are woven in
- The jump ring is fully closed
Troubleshooting
- The curve cups: Recount Round 3. The curve should have 13 puffs.
- The curve ruffles: Your puff loops are too tall. Keep them to 0.25 in (0.6 cm).
- The corners look rounded: Check that you worked 3 sc into each corner sp, and pin the corners sharply when blocking.
- The puffs twist: Even out the loops before the final yo, and keep each ch 1 snug.
- The opening shrinks: Redo the foundation chain with a hook 0.5 mm larger.
- The petals curl: Pin them open while blocking.
Care
Hand wash in cool water with mild soap. Press the water out in a towel and dry flat, reshaping the puffs as it dries.
Final Notes
| Stage | Count | Size |
|---|---|---|
| Foundation ring | 30 ch | 1.75 in x 1 in (4.4 cm x 2.5 cm) opening |
| Round 1 | 30 sc | 2 in x 1.25 in (5.1 cm x 3.2 cm) |
| Round 2 | 20 puffs | 2.6 in x 1.9 in (6.6 cm x 4.8 cm) |
| Round 3 | 26 puffs | 3.25 in x 2.5 in (8.3 cm x 6.4 cm) |
| Rounds 4–5 (border) | 56 sts | 3.5 in x 2.75 in (8.9 cm x 7.0 cm) |
Check your measurements against this table at each stage and the D will keep its shape. Then add the white and yellow blossoms and the three leaves, and your initial charm is ready to carry.
Happy crocheting!