

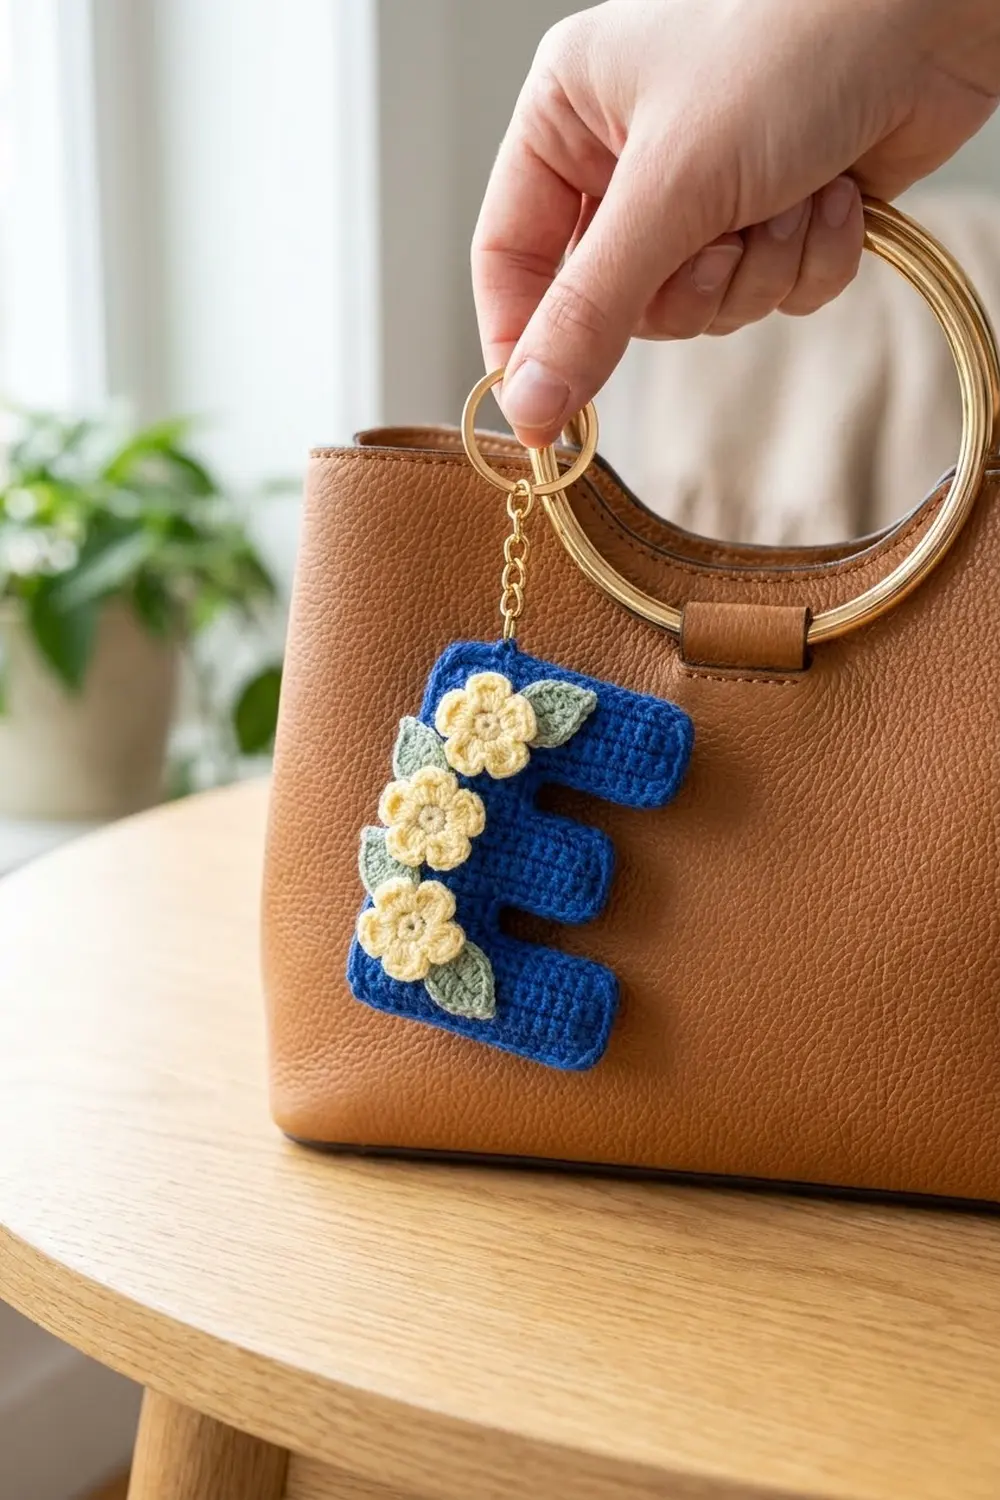
The Bluebell Bloom Letter E Keychain is a small monogram charm. A royal blue letter E carries a column of V-stitches down the center of every stroke and a clean single crochet outline. Three tiny pale-yellow flowers with golden centers and sage-green leaves finish it off. It looks good on a handbag, backpack zipper, or set of keys.
The look is graphic and a little cottage-style. The blue gives a strong, readable letter shape and the soft yellow flowers keep it friendly. The V-stitch texture adds depth without making the letter bulky.
This pattern uses US crochet terms. The finished letter measures 2 3/4 in wide × 3 7/8 in tall (7.0 × 9.8 cm) after the border.
The letter is worked in one continuous piece. You make the spine in three rows, keep going straight into the top arm, then add the middle and bottom arms by joining them to the spine as you go. One round of single crochet outlines the whole E. Last, you crochet three flowers and four leaves, sew them on, and attach the keychain hardware.
Finished Size and Construction
- Finished size: 2 3/4 in × 3 7/8 in (7.0 × 9.8 cm)
- Skill level: Easy+ (join-as-you-go arms)
- Terminology: US
- Yarn weight: Sport / fine (#2) cotton
- Hook: 2.25 mm (US B-1)
- Number of pieces: 1 letter piece, plus 3 flower and 4 leaf appliqués
- Layout: Single letter, no grid
- Size before border: 2 1/2 in × 3 5/8 in (6.4 × 9.2 cm)
- Stroke width before border: 5/8 in (1.6 cm)
- Border depth: 1/8 in (0.3 cm) on every side
Materials
Use a smooth mercerized cotton or cotton blend in sport weight. Cotton holds crisp edges and stands up to keychain wear better than acrylic. These amounts assume about 3 m per gram (roughly 150 m per 50 g).
- Royal blue: 8 g (24 m), for the letter and border
- Pale yellow: 2 g (6 m), for the petals
- Golden yellow: 1 g (3 m), for the flower centers
- Sage green: 2 g (6 m), for the leaves
Tools:
– 2.25 mm (US B-1) crochet hook
– Tapestry needle
– 4 stitch markers
– Scissors
– 1 gold split key ring, 1 in (2.5 cm) diameter
– 1 gold chain, about 1 1/2 in (3.8 cm) long
– 2 gold jump rings, 6 mm
– 2 pairs of flat-nose pliers
– Pins and a foam blocking board
– Optional: fabric stiffener
All quantities include a small safety margin for gauge differences and weaving in ends.
Abbreviations (US Terms)
- ch: chain
- sl st: slip stitch
- sc: single crochet
- hdc: half double crochet
- dc: double crochet
- st(s): stitch(es)
- sk: skip
- sp: space
- MR: magic ring
- RS: right side
Special stitch:
– V-st (V-stitch): (dc, ch 1, dc) all in the same stitch.
Gap: In this pattern, a “gap” is the space between two dc groups in a V-stitch row, sitting over a skipped stitch.
Gauge and Checkpoints
Gauge: 16 sc × 16 sc rows = 2 in (5.1 cm), which is 8 sc and 8 rows per inch (2.5 cm). Each sc stitch or sc row is 1/8 in (0.3 cm). One V-stitch row (a dc row) is 3/8 in (1.0 cm) tall, the same as 3 sc rows.
The whole design is built on a 1/8 in (0.3 cm) grid, so gauge controls everything. Make the spine first and measure before you go on.
Checkpoints:
– Spine Row 1: 29 sc = 3 5/8 in (9.2 cm) long.
– Spine Row 3: width 5/8 in (1.6 cm).
– Top arm: sticks out 1 7/8 in (4.8 cm) from the spine edge and is 5/8 in (1.6 cm) deep.
– Before border: 2 1/2 in × 3 5/8 in (6.4 × 9.2 cm).
– After border: 2 3/4 in × 3 7/8 in (7.0 × 9.8 cm).
If the piece is too big: go down to a 2.0 mm hook.
If the piece is too small: go up to a 2.5 mm hook.
Don’t fix gauge by changing stitch counts. The arm positions depend on the 29-stitch spine.
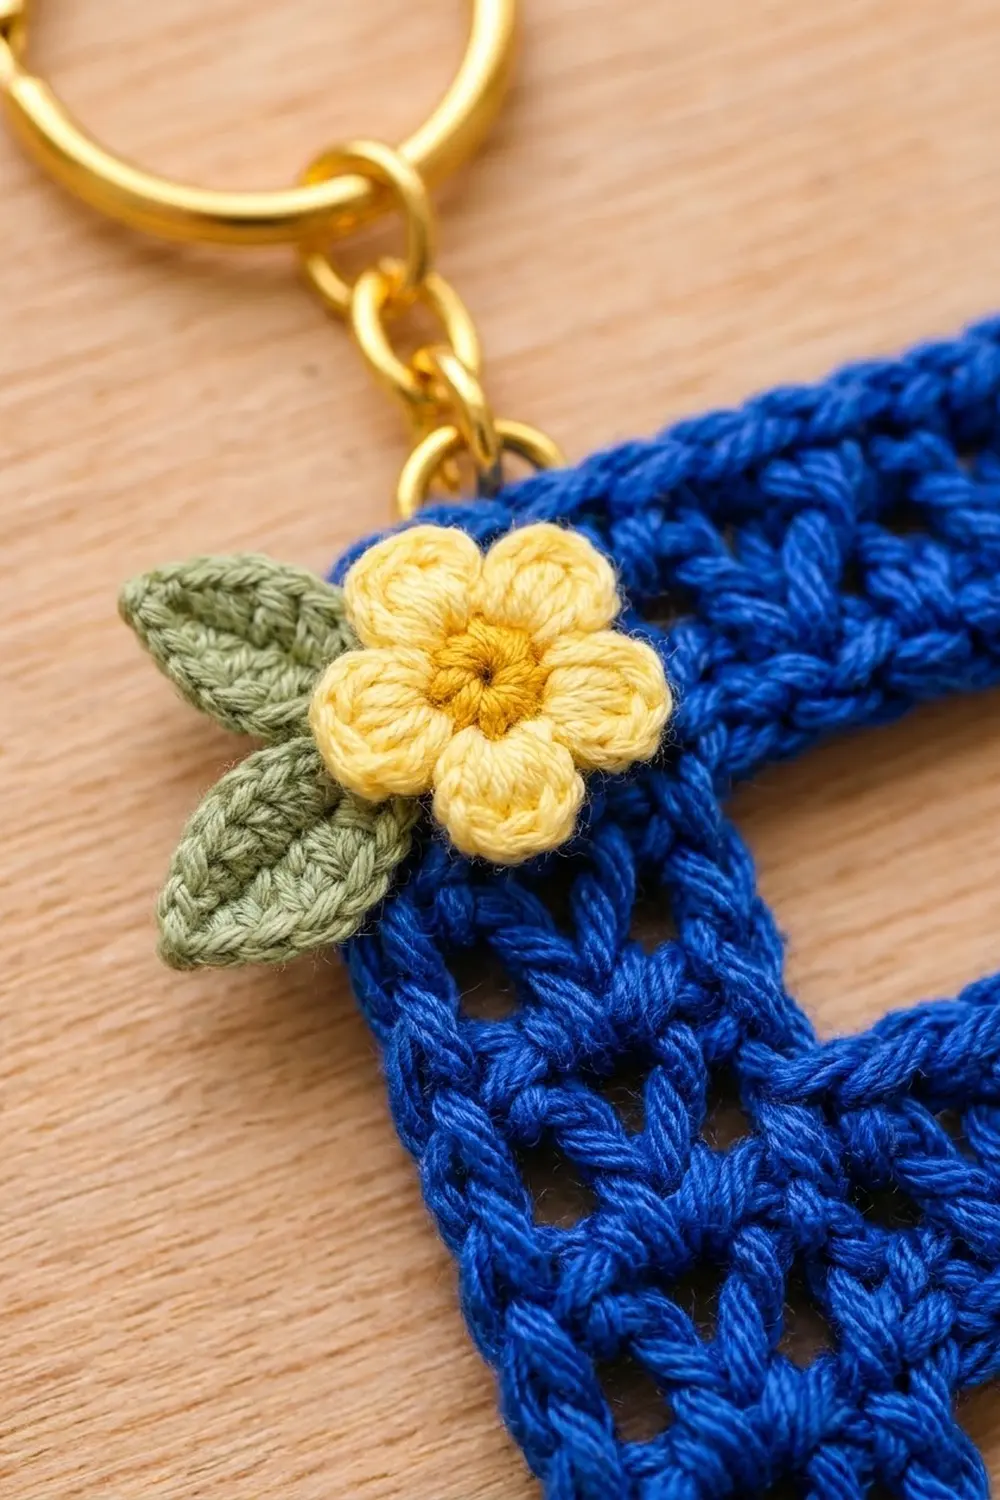
The Letter E
Spine
Use royal blue. Hold the chain vertically. Row 1 runs bottom to top along the left edge of the E.
Row 1: Ch 30. Sc in the 2nd ch from hook and in each ch across. Turn. (29 sc)
Checkpoint: the row should be 3 5/8 in (9.2 cm) long.
Row 2 (V-stitch row):
1. Ch 3 (counts as dc). Sk next st.
2. V-st in next st, sk next st. Repeat from * 12 more times.
3. Dc in last st. Turn.
(13 V-sts + 2 dc)
This row runs top to bottom. The V-sts sit in sts 3, 5, 7 and so on up to st 27, so there are 14 gaps.
Row 3:
1. Ch 1. Sc in first dc.
2. Sc in next gap, sc in ch-1 sp of next V-st. Repeat from * 12 more times.
3. Sc in last gap, sc in top of turning ch-3.
(29 sc: 1 + 26 + 1 + 1)
Row 3 runs bottom to top and forms the right edge of the spine. Don’t fasten off. Your hook is now at the top-right corner.
Checkpoint: spine width is 5/8 in (1.6 cm): sc row 1/8 in + V row 3/8 in + sc row 1/8 in.
Number the Row 3 stitches from the top down, 1 to 29. Place markers in sts 13 and 25. These are where the middle and bottom arms start.
The spine edge is used like this:
– Sts 1–5: top arm
– Sts 6–12: upper gap
– Sts 13–17: middle arm
– Sts 18–24: lower gap
– Sts 25–29: bottom arm
Top Arm
Each arm uses exactly 5 spine stitches. The arm grows downward from its foundation chain, and you sl st its row-ends into the spine as you go.
You are on top of spine st 1.
Row 1:
1. Ch 16. Sc in the 2nd ch from hook and in each ch back toward the spine. (15 sc)
2. Sl st in spine sts 2 and 3. Turn.
Row 2:
1. Ch 3 (counts as dc). Sk next st.
2. V-st in next st, sk next st. Repeat from * 5 more times.
3. Dc in last st. Turn.
(6 V-sts + 2 dc) This row runs from the spine to the tip.
Row 3:
1. Ch 1. Sc in first dc.
2. Sc in next gap, sc in ch-1 sp of next V-st. Repeat from * 5 more times.
3. Sc in last gap, sc in top of ch-3. (15 sc)
4. Sl st in spine sts 4 and 5.
Fasten off.
Checkpoint: the arm sticks out 1 7/8 in (4.8 cm) and is 5/8 in (1.6 cm) deep. Its top edge lines up with the top of the spine. The piece now looks like an upside-down L.
Middle Arm
- With the RS facing, join royal blue with a sl st in marked spine st 13.
Row 1:
1. Ch 14. Sc in the 2nd ch from hook and in each ch across. (13 sc)
2. Sl st in spine sts 14 and 15. Turn.
Row 2:
1. Ch 3. Sk next st.
2. V-st in next st, sk next st. Repeat from * 4 more times.
3. Dc in last st. Turn.
(5 V-sts + 2 dc)
Row 3:
1. Ch 1. Sc in first dc.
2. Sc in next gap, sc in ch-1 sp of next V-st. Repeat from * 4 more times.
3. Sc in last gap, sc in top of ch-3. (13 sc: 1 + 10 + 1 + 1)
4. Sl st in spine sts 16 and 17.
Fasten off.
Checkpoint: the middle arm is 1 5/8 in (4.1 cm) long. The gap above it is 7 sts, or 7/8 in (2.2 cm).
Bottom Arm
- Join royal blue with a sl st in marked spine st 25.
- Work the same as the top arm, Rows 1–3:
- Row 1: ch 16, 15 sc, then sl st in sts 26 and 27.
- Row 2: 6 V-sts + 2 dc.
- Row 3: 15 sc, then sl st in sts 28 and 29.
- Fasten off.
Checkpoint: the bottom edge of the arm lines up with the bottom of the spine. The piece measures 2 1/2 in × 3 5/8 in (6.4 × 9.2 cm). Weave in all ends.
Flowers (Make 3)
Rnd 1: With golden yellow, work 5 sc into a MR. Pull the ring closed and sl st to the first sc. Fasten off. (5 sc)
Rnd 2:
1. Join pale yellow with a sl st in any sc.
2. (Ch 2, 2 dc, ch 2, sl st) in the same sc.
3. (Sl st, ch 2, 2 dc, ch 2, sl st) in next sc. Repeat from * 3 more times.
(5 petals) Fasten off and leave a 6 in (15.2 cm) tail for sewing.
Checkpoint: each flower is about 3/4 in (1.9 cm) across.
Leaves (Make 4)
- With sage green, ch 6.
- Starting in the 2nd ch from hook, work: sc, hdc, dc, hdc, sc.
- Ch 1 at the tip.
- Work along the other side of the chain: sc, hdc, dc, hdc, sc.
- Sl st to the first sc.
(10 sts) Fasten off and leave a 6 in (15.2 cm) tail.
Checkpoint: each leaf is 5/8 in (1.6 cm) long.
Border
Border gauge: one sc for each 1/8 in (0.3 cm) unit of edge. That means:
– 1 sc in each st or foundation chain loop
– 1 sc in the end of each sc row
– 3 sc in the end of each V-stitch (dc) row
Corners:
– Outer corners (8 in total): work ch 1. The corner ch-1 is not counted in the side counts below.
– Inner corners (4 in total): add nothing. Go straight from one side to the next and pull snug.
Rnd 1 (RS): Join royal blue with a standing sc in the Row 1 row-end at the top-left of the spine. Work clockwise:
- Top edge, 20 sc: 1 sc in the Row 1 end, 3 sc in the Row 2 end, 1 sc in the Row 3 end, then 15 sc in the free loops of the top-arm chain. Ch 1.
- Top arm tip, 5 sc: 1 + 3 + 1. Ch 1.
- Under the top arm, 15 sc.
- Upper gap, 7 sc in spine sts 6–12.
- Top of the middle arm, 13 sc in the chain loops. Ch 1.
- Middle arm tip, 5 sc. Ch 1.
- Under the middle arm, 13 sc.
- Lower gap, 7 sc in spine sts 18–24.
- Top of the bottom arm, 15 sc. Ch 1.
- Bottom arm tip, 5 sc. Ch 1.
- Bottom edge, 20 sc: 15 sc along the arm, then 1 + 3 + 1 in the spine row-ends. Ch 1.
- Left edge, 29 sc in the free loops of the spine chain. Ch 1.
- Sl st to the first sc.
(154 sc + 8 corner ch-1 sps)
Total check: 20 + 5 + 15 + 7 + 13 + 5 + 13 + 7 + 15 + 5 + 20 + 29 = 154.
Fasten off and weave in the end.
Why the math works: every edge count equals the number of 1/8 in units along that edge. The top edge is 20 units (5 for the spine plus 15 for the arm), or 2 1/2 in (6.4 cm). The left edge is 29 units, or 3 5/8 in (9.2 cm). The border adds one unit on every side:
– Width: 22 units = 2 3/4 in (7.0 cm)
– Height: 31 units = 3 7/8 in (9.8 cm)
The corner chains let the outer corners turn flat without crowding the side counts. Adding nothing at the inner corners keeps the gaps from rippling. After the border, each gap is 5/8 in (1.6 cm) and each stroke is 7/8 in (2.2 cm) wide.
Final Blocking
- Lightly mist the letter with water until it is damp but not soaked.
- Pin it RS up on a blocking board to 2 3/4 in × 3 7/8 in (7.0 × 9.8 cm).
- Pin each outer corner square. Use a pin at each inner corner to sharpen it.
- Check the arms: top and bottom 2 in (5.1 cm) from the left edge to the tip, middle 1 3/4 in (4.4 cm).
- Block the flowers and leaves flat at the same time, opening each petal with your fingertip.
- Optional: brush a thin coat of fabric stiffener on the back of the letter for a firmer charm.
- Let everything dry completely before you remove the pins.
- Sew on the flowers and leaves:
- Top-left corner: one flower with two leaves tucked under its left side, one pointing up-left and one pointing down-left.
- Middle-arm tip: one flower with one leaf pointing down-right.
- Bottom-left corner: one flower with one leaf pointing down-left.
- Stitch through the centers and the base of each petal so the edges don’t curl.
- Attach the hardware. Open a jump ring with two pliers and pass it through the border at the top of the spine, centered over the 3 sc of the Row 2 end. Hook on the chain and close the ring. Use the second jump ring to connect the chain to the split ring.
Final Quality-Control Checklist
- Spine Row 1 and Row 3 each have 29 sc.
- Each V-stitch row has its full count of V-sts: 13 on the spine, 6 on the top and bottom arms, 5 on the middle arm.
- Each arm takes up exactly 5 spine stitches.
- Both gaps are 7 stitches.
- The border has 154 sc plus 8 corner ch-1 spaces.
- Finished size is 2 3/4 in × 3 7/8 in (7.0 × 9.8 cm).
- Each flower has 5 even petals around a golden center.
- The appliqués sit flat with no tails showing.
- Jump rings are fully closed with no gaps.
Troubleshooting
Arms tilt up or down: you probably used one sl st too many or too few at a row end. Every arm uses exactly 2 + 2 sl sts after the starting chain.
V-stitch row wavy: your ch-1 inside the V-sts is too loose. Keep it snug, or go down a hook size for that row only.
Border ruffles along the row-ends: use 2 sc in each dc row-end instead of 3. Then block firmly to size.
Border cups: check that you didn’t skip any free chain loops along the long left edge.
Inner corners bulge: pull the first sc after the corner extra snug.
Petals flop: make your dc shorter with tighter tension, and tack each petal tip down when sewing.
Care
Hand-wash in cool water with mild soap, press out the water in a towel, and dry flat. Avoid long soaks if you used fabric stiffener, and keep the gold hardware dry so it won’t tarnish.
Final Notes
Everything in this charm follows one measurement chain:
1. 8 sc per inch sets the 1/8 in (0.3 cm) unit.
2. 29 spine stitches give a 3 5/8 in (9.2 cm) spine.
3. Three 5-stitch arms and two 7-stitch gaps fill that spine exactly.
4. 15- and 13-stitch arms bring the width to 2 1/2 in (6.4 cm).
5. One counted border round brings the letter to 2 3/4 in × 3 7/8 in (7.0 × 9.8 cm).
Check each stage against its measurement, and the letter will come out square and crisp. You can adapt the same grid to other initials.
Happy crocheting!