

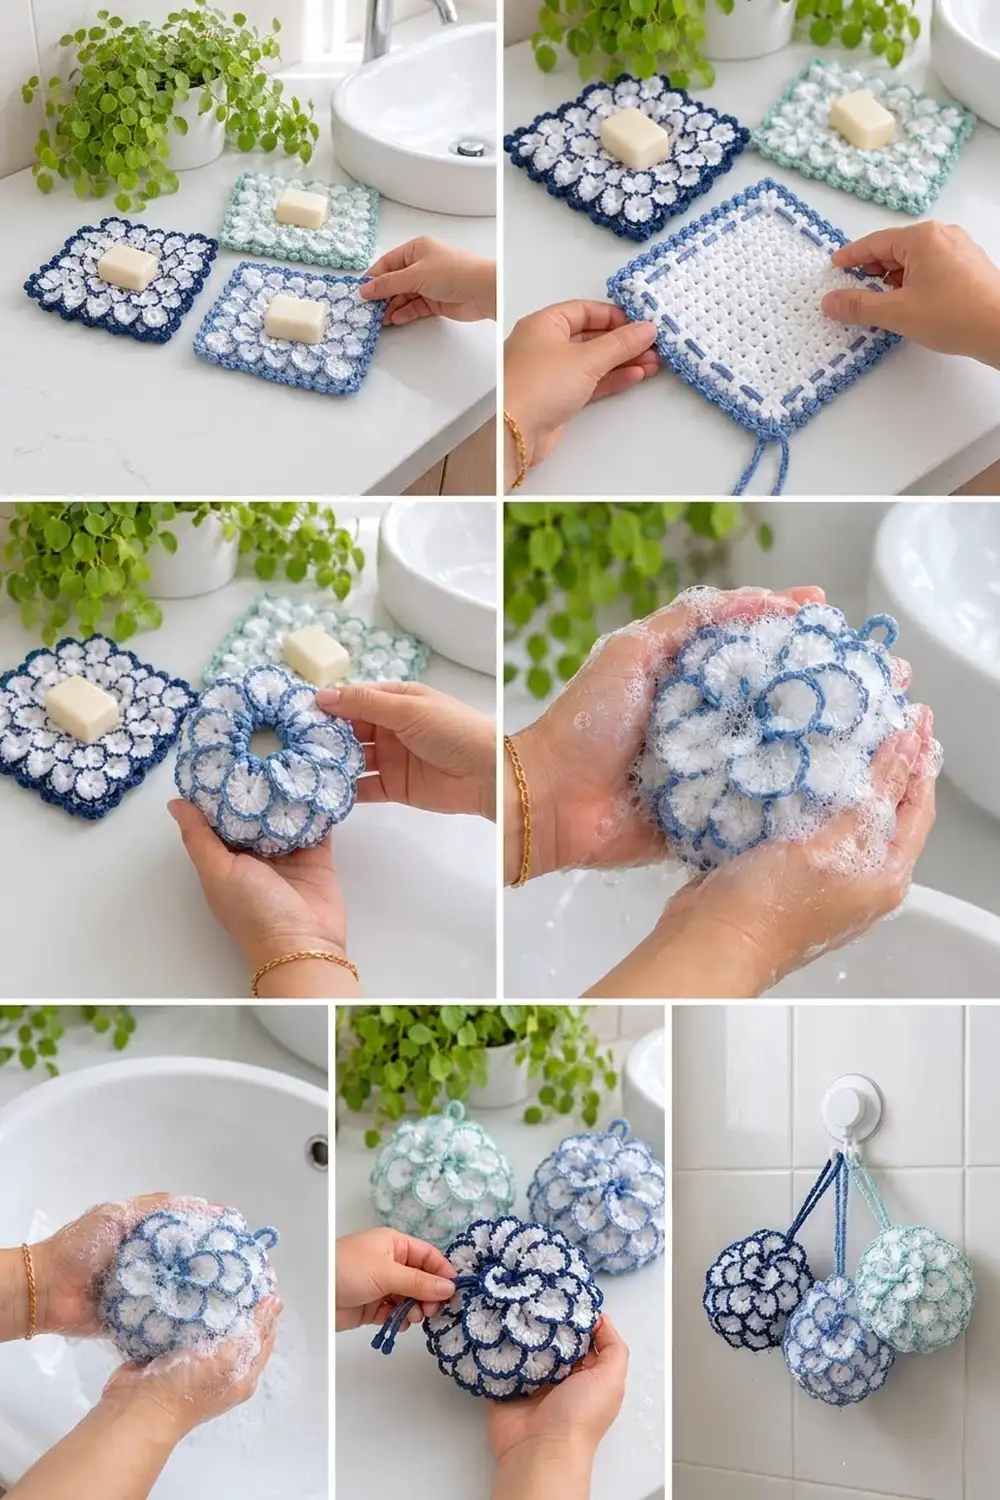
The Bluebell Petal Cinch is a two-in-one bath accessory. Laid flat, it’s a textured soap saver pad that keeps your bar off a wet counter. Pull the drawstring and the same square gathers into a fluffy round scrubby you can lather and hang to dry.
The front is covered in rows of crisp white fan petals, each outlined in a contrast color, and the rows are staggered like fish scales. Navy, medium blue, and aqua all look fresh against the white. The back is a firm single crochet fabric that gives gentle scrubbing texture.
This pattern uses US crochet terms. The finished flat square measures 7¾ in × 7¾ in (19.7 cm × 19.7 cm). Cinched, the ball is about 4 in (10.2 cm) across.
You’ll work a single crochet base square in rows, adding free “petal loops” on certain rows. Then you’ll crochet white fans into those loops and outline each fan in your contrast color. A contrast border with an eyelet round holds two drawstring cords, and a small hanging loop finishes the piece.
Finished Size and Construction
- Finished size (flat): 7¾ in × 7¾ in (19.7 cm × 19.7 cm)
- Finished size (cinched): about 4 in (10.2 cm) diameter
- Skill level: Intermediate
- Terminology: US crochet terms
- Yarn weight: Worsted (#4) 100% cotton
- Hook: 4.5 mm (US 7)
- Number of pieces: 1 single square (plus 2 drawstring cords)
- Layout: One square, 6 rows of petals on the front
- Size before border: 6¼ in × 6¼ in (15.9 cm × 15.9 cm)
- Border depth: ¾ in (1.9 cm) per side
Materials
Use a smooth, mercerized or combed 100% cotton. Cotton holds the petal shape, absorbs water, and stands up to repeated washing. Avoid acrylic, which tends to repel water and squeak against soap.
- White (MC): 40 g / about 63 m
- Contrast (CC), navy, medium blue, or aqua: 30 g / about 47 m
These quantities include a margin of roughly 15% for swatching and tails.
Tools:
– 4.5 mm (US 7) crochet hook
– Tapestry needle
– Scissors
– Stitch markers (4)
– Tape measure
– Rust-proof pins and a blocking mat or folded towel
Abbreviations (US Terms)
- ch: chain
- sl st: slip stitch
- sc: single crochet
- dc: double crochet
- rev sc: reverse single crochet (crab stitch)
- FLO: front loop only
- st(s): stitch(es)
- sk: skip
- sp: space
- RS / WS: right side / wrong side
Special stitch: Petal Fan. Work 7 dc into the same free loop.
Reverse single crochet (rev sc): Working from left to right (right-handers), insert the hook into the next stitch to the right, yarn over, pull up a loop, yarn over, and pull through both loops.
Gauge and Checkpoints
Gauge: 16 sc × 18 rows = 4 in × 4 in (10.2 cm × 10.2 cm) in plain single crochet.
Because this is a single piece, the item is your test. Measure as you go:
- Checkpoint 1 (after Row 1): The 25 sts should measure 6¼ in (15.9 cm) wide.
- Checkpoint 2 (after Row 12): The base should be about 2⅔ in (6.8 cm) tall.
- Checkpoint 3 (after Row 28): The base should be about 6¼ in × 6¼ in (15.9 cm × 15.9 cm).
- Checkpoint 4 (after the border): The square should be 7¾ in × 7¾ in (19.7 cm × 19.7 cm).
If Row 1 measures more than 6½ in (16.5 cm), go down to a 4 mm hook. If it measures less than 6 in (15.2 cm), go up to a 5 mm hook. A tight, firm fabric is better than a loose one here, because firm fabric supports the fans and scrubs better.
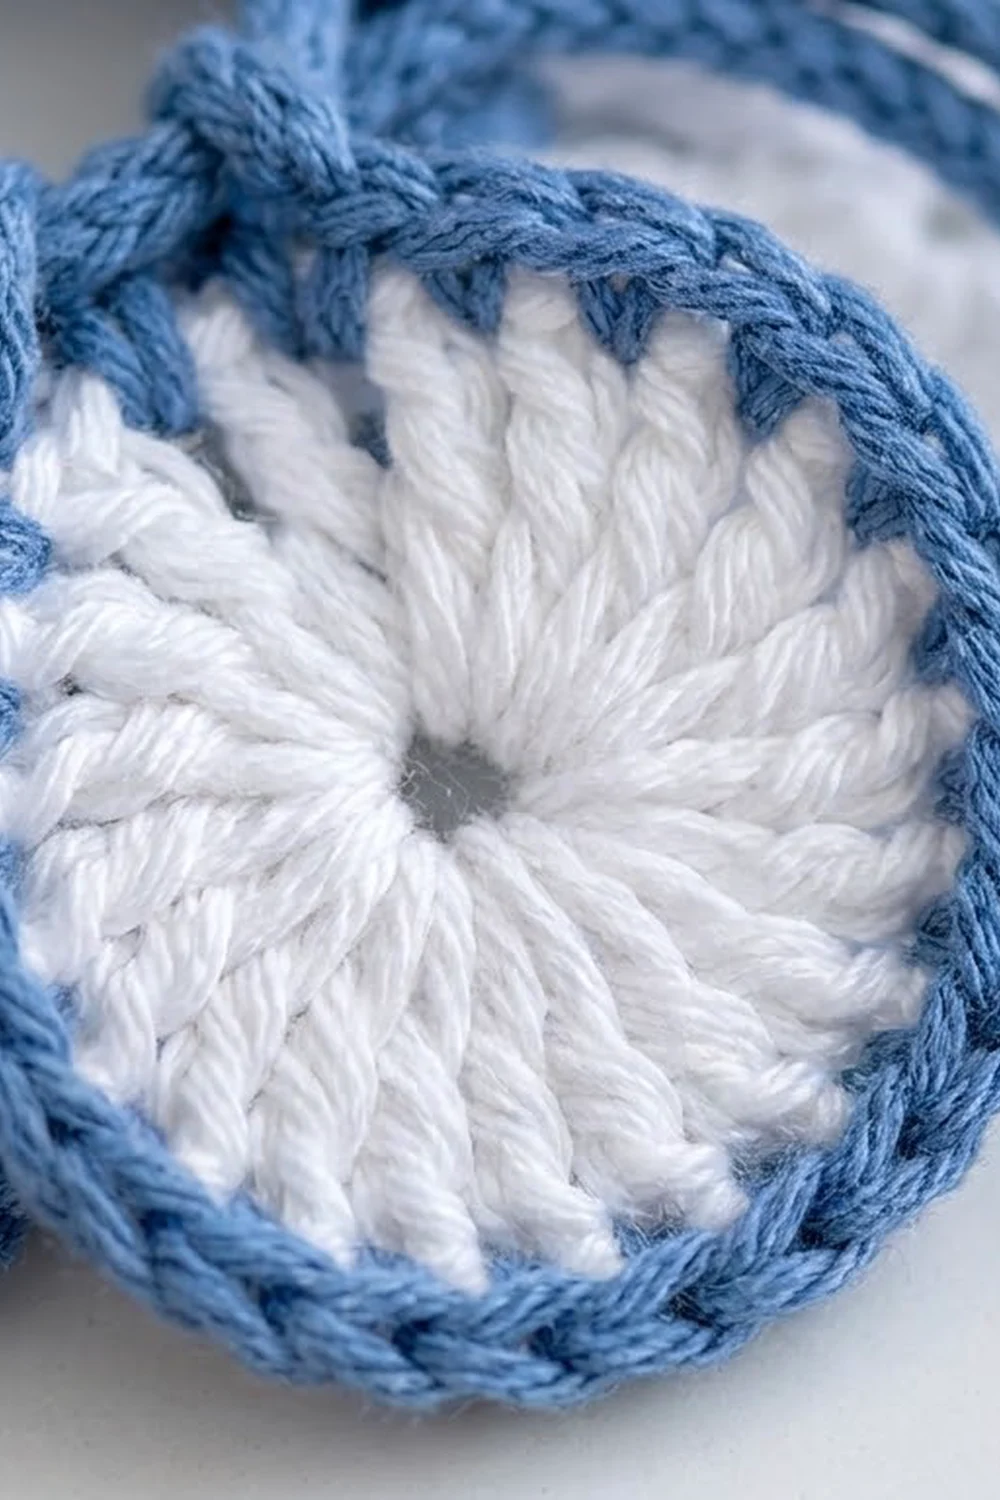
Base Square (MC, White)
The base is worked flat in rows. On Rows 4, 8, 12, 16, 20, and 24 (all WS rows), you’ll work in the front loop only. This leaves the back loops of the previous row free on the RS, and those free loops become the foundation for the petals.
With MC, ch 26.
Row 1 (RS): Sc in 2nd ch from hook and in each ch across, turn. (25 sc)
Rows 2–3: Ch 1, sc in each st across, turn. (25 sc)
Row 4 (WS, petal-loop row): Ch 1, sc in FLO of each st across, turn. (25 sc; 25 free loops of Row 3 now on RS)
Rows 5–7: Ch 1, sc in each st across, turn. (25 sc)
Row 8 (WS, petal-loop row): Repeat Row 4. (25 sc)
Rows 9–24: Continue in this way: 3 plain rows, then 1 FLO row. The FLO rows are Rows 12, 16, 20, and 24. (25 sc every row)
Rows 25–28: Ch 1, sc in each st across, turn. (25 sc)
Fasten off. You now have 6 rows of free loops on the RS, each 25 loops long. Label them Petal Lines 1–6, counting from the bottom (Row 1 edge) up. Check Checkpoint 3 now.
Petals (MC, White)
Petals are worked with the RS facing and the top edge of the square pointing away from you. Work across each Petal Line from right to left so the fans stand up toward the top edge. Work Petal Line 1 first and move upward, so each new row of fans lies over the bases of the row below.
Petal Lines 1, 3, and 5 (Pattern A, 6 full fans):
Join MC with a sl st in the first free loop at the right edge. Sk 1 loop, Petal Fan (7 dc) in next loop, sk 1 loop, sl st in next loop. Repeat from * 5 more times. Fasten off.
(6 fans = 42 dc + 7 sl st; 1 + 6 × 4 = 25 loops used)
Petal Lines 2, 4, and 6 (Pattern B, offset, 5 full fans + 2 half fans):
Join MC in the first free loop at the right edge. Ch 3 (counts as dc), 3 dc in the same loop (half fan made), sk 1 loop, sl st in next loop. Sk 1 loop, Petal Fan in next loop, sk 1 loop, sl st in next loop. Repeat from * 4 more times. Sk 1 loop, 4 dc in last loop (half fan). Fasten off.
(4 + 35 + 4 = 43 dc + 6 sl st; 1 + 1 + 1 + 20 + 1 + 1 = 25 loops used)
The half fans at each end of the B lines square off the edges and create the staggered brick layout.
Petal Outlines (CC)
Outline each Petal Line in CC right after its white fans, or do all six outlines once the fans are finished. Work along the tops of the fans from right to left, with RS facing.
Outline A (for Petal Lines 1, 3, 5):
Join CC with a sl st in the first sl st. Sc in next 3 dc, 3 sc in next dc (center of fan), sc in next 3 dc, sl st in next sl st. Repeat from * 5 more times. Fasten off.
(9 sc per fan × 6 = 54 sc + 7 sl st)
Outline B (for Petal Lines 2, 4, 6):
Join CC in the first dc (top of ch-3). 2 sc in same st, sc in next 3 dc, sl st in next sl st. Sc in next 3 dc, 3 sc in next dc, sc in next 3 dc, sl st in next sl st. Repeat from * 4 more times. Sc in next 3 dc, 2 sc in last dc. Fasten off.
(5 + 45 + 5 = 55 sc + 6 sl st)
The 3 sc at each fan’s center makes the outline curve smoothly over the fan’s widest point instead of pulling it flat. Weave in all ends on the WS, running them through the base fabric, not the fans.
Border (CC)
Border gauge: The border follows the base gauge of 4 sc per inch (4 sc per 2.5 cm). The base’s 25 sts per side at 6¼ in (15.9 cm) give exactly 4 sts per inch. Each border round adds stitches only at the corners, so the straight sides stay matched to the base and the square lies flat.
Rnd 1: With RS facing, join CC in the top-right corner st (last st of Row 28). 3 sc in corner st. Sc in next 23 sts along the top edge, then 3 sc in the last st (corner). Along the left side, work 23 sc evenly across the 26 row ends between the corners, skipping 3 row ends spaced about every 8 or 9 rows. 3 sc in the bottom-left corner st. Along the foundation chain, sc in next 23 sts, then 3 sc in the bottom-right corner st. Work 23 sc evenly along the right side as before. Join with a sl st to the first sc.
(Per side: 23 sc between corner groups; 4 corner groups × 3 sc = 12. Total: 92 + 12 = 104 sc)
Place a marker in the center sc of each corner group.
Rnd 2 (eyelet round): Sl st to the first corner center sc. Ch 6 (counts as dc + ch 3), dc in same st. [Ch 1, sk 1, dc in next st] 12 times, ch 1, sk 1, (dc, ch 3, dc) in corner center st. Repeat from * twice more. [Ch 1, sk 1, dc in next st] 12 times, ch 1, sk 1, join with a sl st to the 3rd ch of the beginning ch-6.
(Per side: 12 dc + 13 ch-1 sps between corners, plus 1 corner dc at each end. Total: 48 side dc + 8 corner dc = 56 dc, 52 ch-1 sps, 4 ch-3 corner sps)
Why the math works: from Rnd 1, there are 25 sts between corner centers (1 corner-group st + 23 side sts + 1 corner-group st). The pattern [sk 1, dc in next] 12 times, plus a final sk 1, uses 12 × 2 + 1 = 25 sts.
Rnd 3: Sl st into the corner ch-3 sp. Ch 1, 3 sc in the same sp. Sc in next dc, [sc in ch-1 sp, sc in next dc] 13 times, 3 sc in corner sp. Repeat from * twice more. Sc in next dc, [sc in ch-1 sp, sc in next dc] 13 times, join to the first sc.
(Per side: 27 sc between corner groups = 14 dc + 13 sps. Total: 4 × 27 + 4 × 3 = 120 sc)
Rnd 4 (rev sc + hanging loop): Ch 1. Work rev sc in each st around until you reach the center sc of the last corner group. Rev sc in that st, ch 12, sl st in the same st (hanging loop made). Join to the first rev sc. Fasten off.
(120 rev sc + 1 ch-12 loop)
Choose your hanging loop corner. The cords will exit there.
The border depth is ¾ in (1.9 cm). That makes the finished size 6¼ in + ¾ in + ¾ in = 7¾ in (19.7 cm). Check Checkpoint 4.
Drawstring Cords (CC, make 2)
Ch 141, leaving a 4 in (10.2 cm) tail. Sl st in the back bump of the 2nd ch from the hook and in each back bump across. Fasten off, leaving a 4 in (10.2 cm) tail. Each cord should measure about 40 in (101.6 cm).
Weaving: Thread Cord 1 onto the tapestry needle. Starting at the hanging-loop corner, weave it over and under through the Rnd 2 ch-1 sps and corner sps all the way around, and bring it out back at the same corner. Repeat with Cord 2, but weave in the opposite direction, starting from the other side of the same corner. All four cord ends now exit at the hanging-loop corner. Tie an overhand knot about ½ in (1.3 cm) from each end and trim the tails to ¼ in (0.6 cm).
To cinch, hold the corner and pull the cord ends. The edges gather toward the back with the petals facing out, forming a ball about 4 in (10.2 cm) across. To use the piece as a flat soap pad, loosen the cords and spread it out.
Final Blocking
- Loosen the drawstrings fully and lay the square flat.
- Soak it in lukewarm water for 10 minutes, then press out the water in a towel. Don’t wring it.
- Pin it to 7¾ in × 7¾ in (19.7 cm × 19.7 cm) on a mat, petals up. Pin at the corners first, then the middle of each side.
- Use your fingertips to fluff each fan upright and curve each CC outline.
- Let it dry completely, at least 24 hours, before cinching.
Final Quality-Control Checklist
- The base is 25 sts wide and 28 rows tall, with 6 Petal Lines.
- Lines 1, 3, and 5 have 6 full fans. Lines 2, 4, and 6 have 5 full fans plus 2 half fans.
- Each full fan’s outline has 9 sc, and the fan centers curve evenly.
- Border Rnd 1 has 104 sc, Rnd 2 has 56 dc, and Rnd 3 has 120 sc.
- The flat square measures 7¾ in (19.7 cm) on every side.
- The cords slide freely, all ends exit at the loop corner, and the knots are secure.
- No yarn ends are visible on the petal side.
Troubleshooting
The fans lie flat or curl under: Your dc may be too loose. Go down half a hook size for the petals only.
The petal lines wave or pucker: Check that you used 25 loops per line, and that you skipped exactly 1 loop on each side of every fan.
The border ruffles: Recount Rnd 1. Each side should have 23 sts between the corner groups, not more.
The corners cup: Make sure each corner has 3 sc in Rnds 1 and 3 and a ch-3 in Rnd 2.
The ball won’t close fully: The cords may be catching in the stitches. Check that they pass only through the ch-1 sps of Rnd 2.
The square is too large: Remake it with a smaller hook. Blocking can’t shrink cotton reliably.
Care
Rinse out the soap after each use, then hang the scrubby by its loop or lay it flat to dry. Machine wash warm in a mesh bag and tumble dry low or air dry, then reshape the petals.
Final Notes
The measurement chain is:
– Base: 25 sts = 6¼ in (15.9 cm), and 28 rows = about 6¼ in (15.9 cm).
– Border: 4 rounds at ¾ in (1.9 cm) per side give a 7¾ in (19.7 cm) flat square.
– Cinched: two 40 in (101.6 cm) cords draw it into a 4 in (10.2 cm) ball.
If you hit each checkpoint, the stitch counts will take care of the rest. Try one in each colorway for a matching bathroom set.
Happy crocheting!