

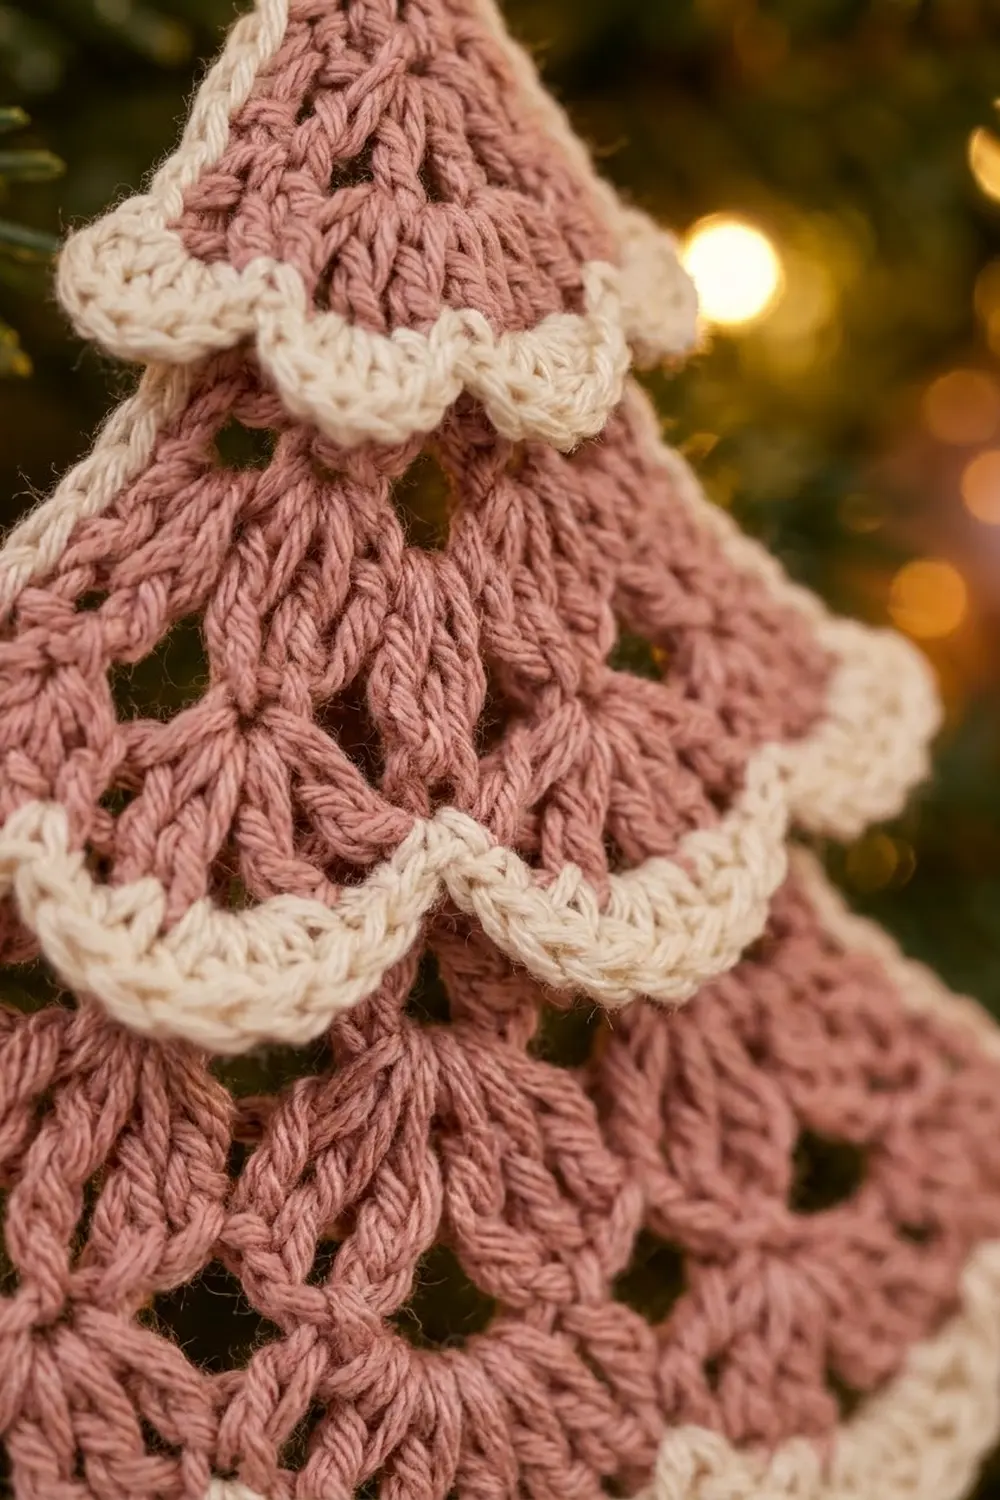
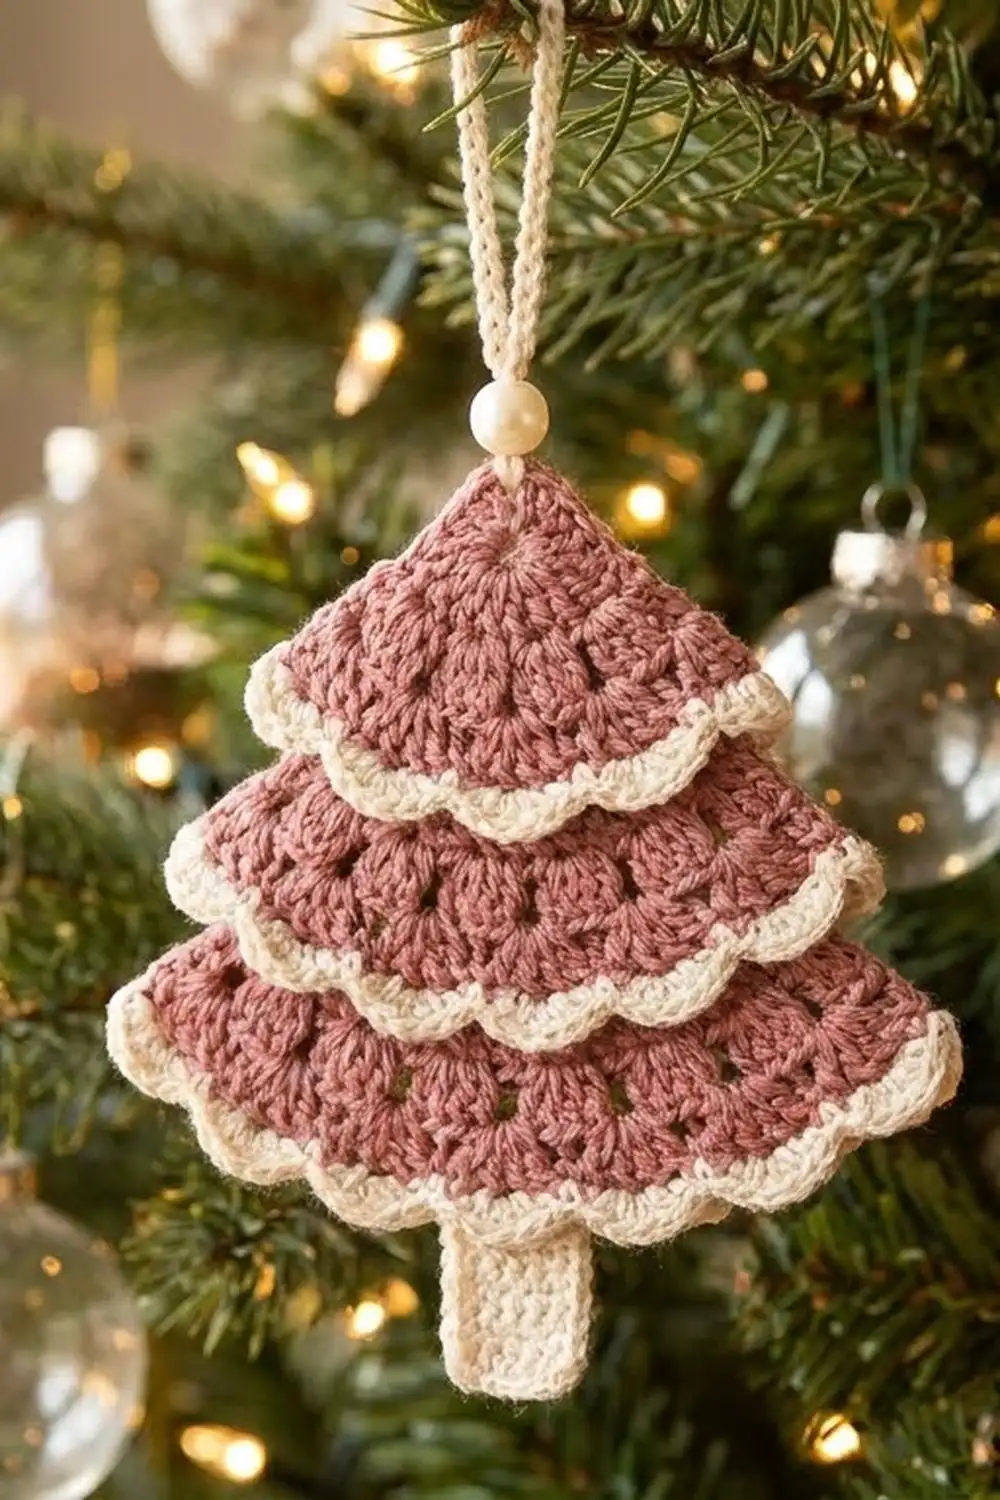
The Blush Cascade Tree is a flat Christmas tree ornament with three tiers and a soft vintage look. Dusty rose fans form the branches. A cream scallop trim finishes the bottom of each tier, and a cream single crochet trunk shows below the lowest trim. A cream hanging loop with a small pearl bead sits at the tip.
The colors are quiet and warm: dusty rose for the tree body, cream for every trim, the trunk, and the loop. Next to gold and blush baubles it looks traditional and a little romantic. It also photographs well against green branches and fairy lights.
This pattern uses US crochet terms. The finished ornament is about 4.5 in (11.4 cm) wide across the bottom tier and about 4.25 in (10.8 cm) tall from tip to trunk, not counting the hanging loop.
The tree is one piece, worked from the top down in rows. Each tier ends with a single crochet row. You work the cream scallop trim into the front loops of that row, then work the next rose tier into the back loops of the same row. That puts each scallop trim in front of the top of the tier below, so you get the layered look without any sewing. The trunk goes into the back loops of the last row, so it sits behind the bottom scallop.
Finished Size and Construction
- Finished size: about 4.5 in (11.4 cm) wide x 4.25 in (10.8 cm) tall, without the loop
- Skill level: Advanced beginner
- Terminology: US crochet terms
- Yarn weight: Sport weight (#2) cotton
- Hook: 2.75 mm (US C-2)
- Number of pieces: 1
- Layout: One flat ornament: three stacked tiers plus a trunk
- Piece size: 27 stitches wide at the last body row
- Size before border: about 4.5 in (11.4 cm) wide x 3.25 in (8.3 cm) tall at the end of Row 16
- Border depth: about 3/8 in (1.0 cm) of scallops along the bottom edge
Materials
Choose a smooth, mercerized sport weight cotton or cotton blend. Cotton keeps the fans crisp and the scallops well defined after blocking. Avoid fuzzy yarns, because they blur the open spaces between the fans.
- Color A, dusty rose: 8 g, about 28 m (31 yd)
- Color B, cream: 5 g, about 17 m (19 yd)
These amounts include about 30 percent extra for your test piece and for weaving in ends.
Tools:
- 2.75 mm (US C-2) crochet hook
- 1 pearl bead, 8 mm, with a hole wide enough for the yarn
- 2 locking stitch markers
- Tapestry needle, plus a fine beading needle if the bead hole is small
- Scissors
- Blocking mat, rust-proof pins, and a spray bottle or steamer
- Optional: light spray starch
Abbreviations (US Terms)
- ch – chain
- sl st – slip stitch
- sc – single crochet
- dc – double crochet
- st(s) – stitch(es)
- sk – skip
- FLO – front loop only
- BLO – back loop only
- RS / WS – right side / wrong side
- rep – repeat
Special stitches:
- Fan: 5 dc in the same stitch.
- Shell: 3 dc in the same stitch (used in the cream scallop trims).
- Standing sc: With a slipknot on the hook, insert the hook into the stitch, yarn over, pull up a loop, yarn over, and pull through both loops.
Gauge and Checkpoints
Gauge: 12 sc and 12 sc rows = 2 in (5.1 cm) with a 2.75 mm hook. One fan row is about 3/8 in (1.0 cm) tall.
This is one small ornament, so your first tree is your real test. Make one, compare it with the checkpoints below, and adjust before you make a batch.
- After Row 6: 13 sts, about 2.2 in (5.6 cm) wide and 1 in (2.5 cm) tall.
- After Row 8: 15 sts, about 2.5 in (6.4 cm) wide. Tier 1 is about 1.5 in (3.8 cm) tall.
- After Row 12: 21 sts, about 3.5 in (8.9 cm) wide. Total height is about 2.4 in (6.1 cm).
- After Row 16: 27 sts, about 4.5 in (11.4 cm) wide. Total height is about 3.25 in (8.3 cm).
- Trunk: 7 sts, about 1.2 in (3.0 cm) wide and 1 in (2.5 cm) long.
Too big? Go down to a 2.5 mm hook. Too small? Go up to a 3 mm hook. If only your fan rows are too tall, pull up a slightly shorter first loop on each dc.
Pattern
Work in rows. The ch 1 at the start of a row does not count as a stitch. Row 1 is a RS row, so every odd-numbered row is a RS row and every even row is a WS row.
Tier 1 (Color A)
Row 1 (RS): Ch 2, 3 sc in 2nd ch from hook. (3 sts)
Row 2 (WS): Ch 1, turn, 2 sc in first st, sc in next st, 2 sc in last st. (5 sts)
Row 3: Ch 1, turn, 2 sc in first st, sc in each st to last st, 2 sc in last st. (7 sts)
Rows 4–6: Rep Row 3. (Row 4: 9 sts; Row 5: 11 sts; Row 6: 13 sts)
Row 7 (RS, fan row): Ch 1, turn, sc in first st, *sk 2, Fan in next st, sk 2, sc in next st; rep from * once more. (2 fans + 3 sc = 13 sts)
The fans go into sts 4 and 10, and the sc go into sts 1, 7, and 13.
Row 8 (WS): Ch 1, turn, 2 sc in first st, sc in each st to last st, 2 sc in last st. (13 sts worked 1 per st + 2 increases = 15 sts)
Do not fasten off. Turn so the RS faces you. Take out the hook and put the Color A loop on a stitch marker.
Scallop Trim 1 (Color B)
With the RS facing, start at the same edge as the Color A loop on the marker. Work into the FLO of Row 8.
Trim Row: Standing sc in FLO of first st, *Shell in FLO of next st, sc in FLO of next st; rep from * 6 more times. (15 sts used: 8 sc + 7 shells of 3 dc = 29 sts, 7 scallops)
Fasten off Color B, leaving a 6 in (15.2 cm) tail. The back loops of Row 8 are now free behind the trim.
Tier 2 (Color A)
Put the Color A loop back on your hook. Keep the RS facing and do not turn.
Row 9 (RS): Ch 1, 2 sc in BLO of first st, sc in BLO of each st to last st, 2 sc in BLO of last st. (15 sts worked 1 per st + 2 increases = 17 sts)
As you work, fold Scallop Trim 1 down toward you so the back loops are easy to see.
Row 10 (WS): Ch 1, turn, 2 sc in first st, sc in each st to last st, 2 sc in last st. (19 sts)
Row 11 (RS, fan row): Ch 1, turn, sc in first st, *sk 2, Fan in next st, sk 2, sc in next st; rep from * 2 more times. (3 fans + 4 sc = 19 sts)
Row 12 (WS): Ch 1, turn, 2 sc in first st, sc in each st to last st, 2 sc in last st. (19 sts worked 1 per st + 2 increases = 21 sts)
Turn so the RS faces you, and put the Color A loop on a marker.
Scallop Trim 2 (Color B)
Trim Row: Standing sc in FLO of first st, *Shell in FLO of next st, sc in FLO of next st; rep from * 9 more times. (21 sts used: 11 sc + 10 shells of 3 dc = 41 sts, 10 scallops)
Fasten off Color B.
Tier 3 (Color A)
Put the Color A loop back on your hook. Keep the RS facing.
Row 13 (RS): Ch 1, 2 sc in BLO of first st, sc in BLO of each st to last st, 2 sc in BLO of last st. (21 sts worked 1 per st + 2 increases = 23 sts)
Row 14 (WS): Ch 1, turn, 2 sc in first st, sc in each st to last st, 2 sc in last st. (25 sts)
Row 15 (RS, fan row): Ch 1, turn, sc in first st, *sk 2, Fan in next st, sk 2, sc in next st; rep from * 3 more times. (4 fans + 5 sc = 25 sts)
Row 16 (WS): Ch 1, turn, 2 sc in first st, sc in each st to last st, 2 sc in last st. (25 sts worked 1 per st + 2 increases = 27 sts)
Fasten off Color A. Measure the body against the Row 16 checkpoint: about 4.5 in (11.4 cm) wide and 3.25 in (8.3 cm) tall.
Trunk (Color B)
You work the trunk into the BLO of Row 16. That leaves the front loops free for the bottom scallop border, which will sit in front of the trunk.
With the RS facing, count from the right edge. The trunk uses the center 7 sts (sts 11–17) and leaves 10 sts free on each side.
Trunk Row 1 (RS): Standing sc in BLO of st 11, sc in BLO of next 6 sts. (7 sts)
Trunk Rows 2–6: Ch 1, turn, sc in each st across. (7 sts)
Fasten off. The trunk is about 1.2 in (3.0 cm) wide and 1 in (2.5 cm) long.
Hanging Loop (Color B)
Thread the pearl bead onto Color B before you start.
- Join Color B with a sl st in the tip of the tree (the unused ch at the top of Row 1).
- Ch 2, slide the bead up to the hook, and ch 1 to lock the bead in place.
- Ch 20, then sl st in the ch just above the bead to close the loop.
- Fasten off, leaving an 8 in (20.3 cm) tail. Thread the tail back down through the bead into the tip and weave it in on the WS.
The finished loop stands about 1.5 in (3.8 cm) above the bead.
Border: Bottom Scallop
The bottom border is the third cream scallop trim. It goes only along the bottom edge. The slanted sides of the tree stay plain rose, the same as Tiers 1 and 2.
Border gauge: Each scallop uses 2 base sts, so 3 scallops span about 1 in (2.5 cm). The scallops are about 3/8 in (1.0 cm) deep.
Border Row (RS): With the RS facing, join Color B with a standing sc in FLO of the first st of Row 16 at the right edge. *Shell in FLO of next st, sc in FLO of next st; rep from * 12 more times. (27 sts used: 14 sc + 13 shells of 3 dc = 53 sts, 13 scallops)
Fasten off. The border crosses in front of the top of the trunk, so the trunk looks like it grows out from under the branches.
Bottom edge: 27 base sts, 13 scallops. Left and right slanted sides: no border sts.
Why the math works: One scallop repeat is 1 shell + 1 sc over 2 sts, and there is one extra sc at the start. So the base row needs an odd count of 2n + 1. Every tier’s base row is odd: 15 = 2 x 7 + 1, 21 = 2 x 10 + 1, and 27 = 2 x 13 + 1. That is why each trim starts and ends with a sc right at the tree edges. The fan rows use the same idea: each fan repeat uses 6 sts, plus 1 st to finish, so 13, 19, and 25 sts give 2, 3, and 4 fans. A fan row always has 6n + 1 sts, which is odd. Adding 2 increases in the base row keeps it odd, so the scallops always fit.
Final Blocking
- Weave in all ends on the WS. Hide cream tails in cream stitches and rose tails in rose stitches.
- Mist the ornament with water until it is damp, or hold a steamer just above it. Never press an iron directly on the stitches.
- Lay it RS up on the mat.
- Pin the bottom border to 4.5 in (11.4 cm) wide. Pin the height from the tip to Row 16 to 3.25 in (8.3 cm).
- Smooth each scallop trim so it lies flat over the top of the tier below. Pin the end scallops of each trim at the tree edges.
- Open the fans with your fingertips so the spaces between them are even.
- Pin the trunk straight, 1.2 in (3.0 cm) wide and centered under the tree.
- Optional: mist lightly with spray starch for a crisper ornament.
- Let it dry completely before you take out the pins, usually 4 to 6 hours.
Final Quality-Control Checklist
- Tier base rows have 15, 21, and 27 sts.
- Fan rows have 2, 3, and 4 fans, each centered between sc.
- Trims have 7, 10, and 13 scallops, and each starts and ends with a sc at the edges.
- Each trim lies in front of the next tier, with no loose back loops showing.
- The trunk is 7 sts wide with 10 free sts on each side.
- Finished size is about 4.5 in (11.4 cm) x 4.25 in (10.8 cm).
- The bead is snug and the loop is secure.
- All ends are woven in and can’t be seen from the RS.
Troubleshooting
Scallops ruffle or flip up. Your shells are too loose. Tighten your dc, or use a hook 0.25 mm smaller for the trims only.
Scallops pull the tier inward. Your trim is too tight. Use a hook 0.25 mm larger for the trim rows.
The next tier shows a ridge of loose loops. You probably worked into both loops. Redo the row in the BLO only.
Fans lean to one side. Recount the skipped sts. Each fan needs exactly 2 skipped sts on each side.
Tree edges look jagged. Check that every increase row has 2 sc in both the first and the last st, and that you are not counting the ch 1 as a stitch.
The trunk is off-center. Count again from both sides. There should be 10 free sts on the left and 10 on the right.
Care
Hand wash in cool water with mild soap. Roll it in a towel to remove the water and dry it flat, then re-block if the scallops lose their shape.
Final Notes
Here is how the measurements build on each other. A gauge of 6 sc per 1 in (2.5 cm) makes Tier 1’s 15 sts 2.5 in (6.4 cm) wide. Tier 2’s 21 sts come to 3.5 in (8.9 cm), and Tier 3’s 27 sts come to 4.5 in (11.4 cm). The body is 3.25 in (8.3 cm) tall and the trunk adds 1 in (2.5 cm) below it, so the finished ornament is about 4.25 in (10.8 cm) tall. Check each stage and every tree in your batch will match.
Happy crocheting!