

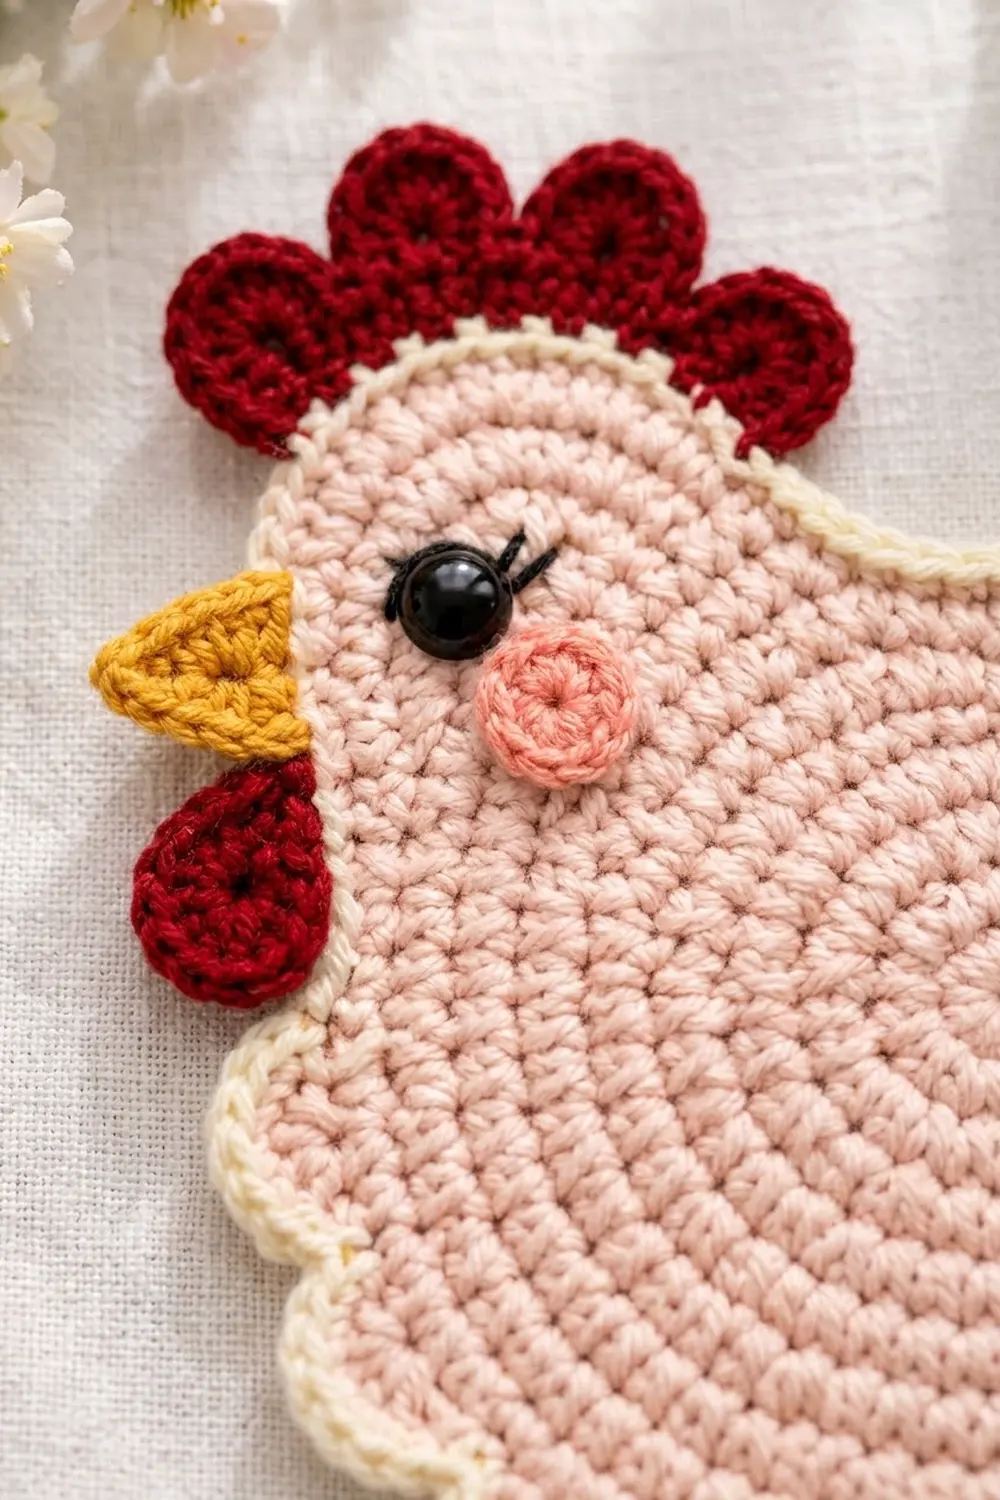
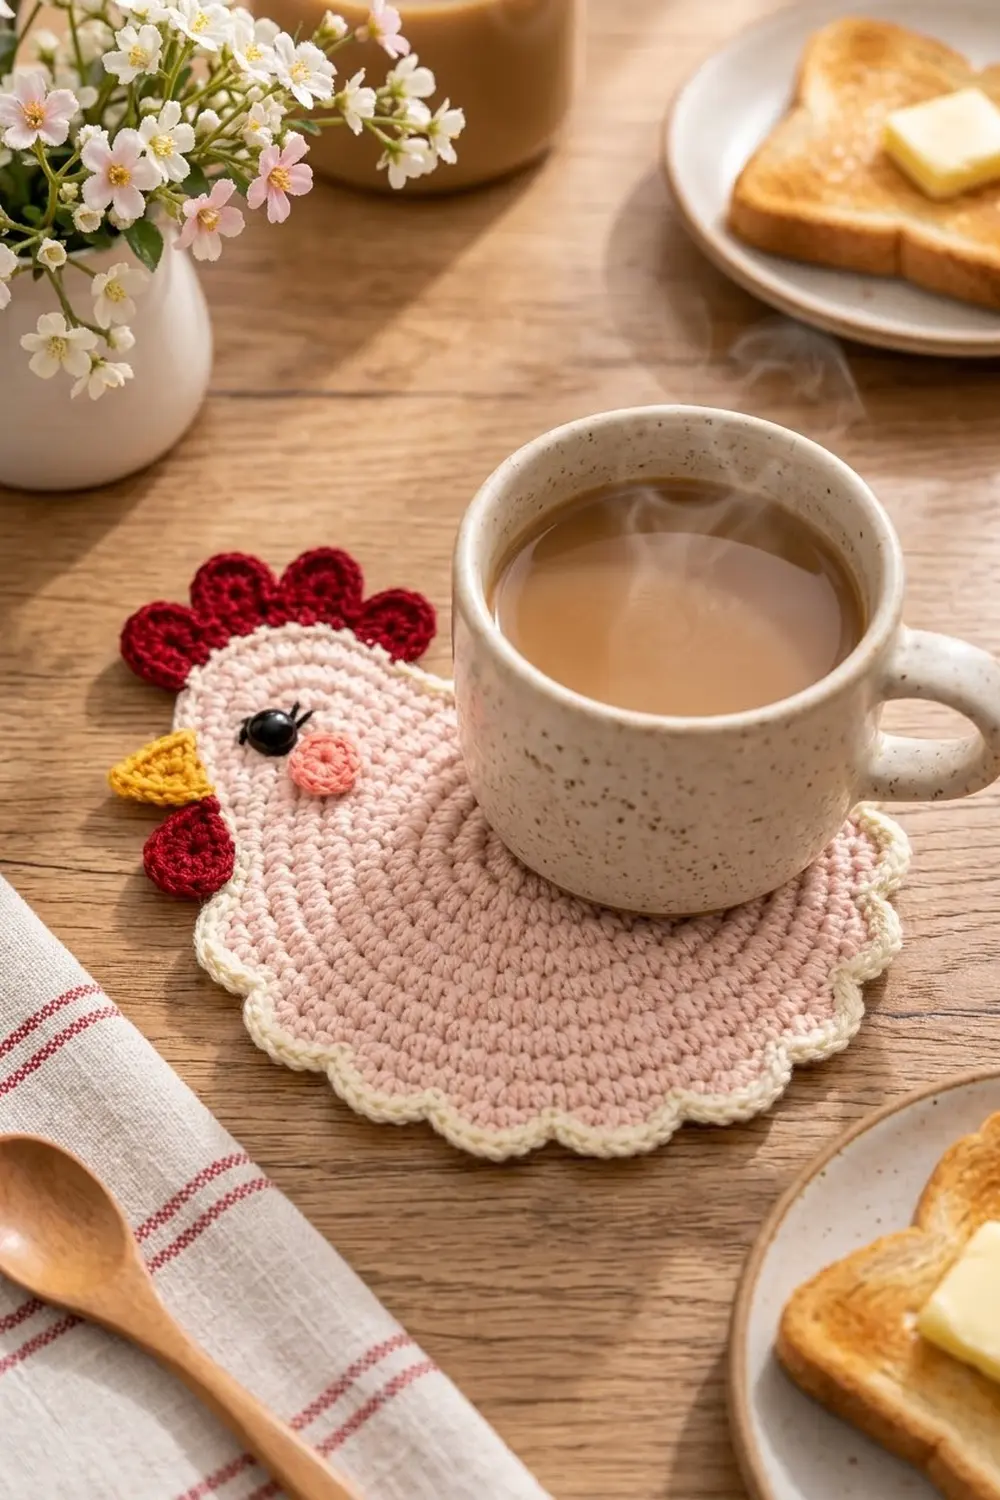
This Blush Hen Mug Rug is a soft, flat little chicken made to sit under your morning cup. The body is a smooth circle of single crochet in blush pink, with a rounded head on one side and a perky tail on the other.
A cream border frames the whole hen. It stays plain across the head and back, then turns into rounded scallops along the chest, bottom and tail that look like fluffy feathers. Small appliqués in deep red, mustard yellow, coral pink and black give her a comb, beak, wattle, cheek and eye.
The pattern uses US crochet terms. The finished body measures about 7 in (17.8 cm) wide by 7.5 in (19.1 cm) tall, or about 8 in (20.3 cm) tall to the top of the comb.
Construction is simple: crochet a flat circle in joined rounds, add short rows for the head and tail, work a two-round cream border, then make and sew on the five small details.
Finished Size and Construction
- Finished size: 7 in (17.8 cm) wide x 7.5 in (19.1 cm) tall body; 8 in (20.3 cm) tall including comb
- Skill level: Easy / advanced beginner
- Terminology: US crochet terms
- Yarn weight: Worsted (#4), cotton
- Hook: 4.0 mm (G-6)
- Number of pieces: 1 main body plus 4 small crocheted appliqués (comb, beak, wattle, cheek)
- Layout: Single hen shape, no joining of multiple pieces
- Circle size: 5.5 in (14.0 cm) diameter after Round 11
- Size before border: about 5.5 in (14.0 cm) wide x 6.25 in (15.9 cm) tall
- Border depth: 0.75 in (1.9 cm) on scalloped edges, 0.5 in (1.3 cm) on plain edges
Materials
Choose a 100% cotton or cotton-blend worsted yarn. Cotton handles warm mugs well, soaks up drips and keeps the stitch texture crisp. Acrylic works but can soften and stretch under heat.
- Blush pink (body): 30 g / about 55 m
- Cream (border): 10 g / about 20 m
- Deep red (comb and wattle): 5 g / about 10 m
- Mustard yellow (beak): 2 g / about 4 m
- Coral pink (cheek): 1 g / about 2 m
- Black embroidery floss or yarn: small length for the lashes
All quantities include a margin of about 15% for swatching and weaving in.
Tools:
- 4.0 mm (G-6) crochet hook
- Tapestry needle
- 4 locking stitch markers
- One 9 mm black safety eye, or a flat black shank button (see Finishing)
- Scissors
- Ruler or tape measure
- Pins and a blocking mat or folded towel
Abbreviations (US Terms)
- ch – chain
- sl st – slip stitch
- sc – single crochet
- hdc – half double crochet
- dc – double crochet
- sc2tog – single crochet 2 together: insert hook in next st, pull up a loop, insert hook in following st, pull up a loop, yarn over and pull through all 3 loops
- MR – magic ring
- st(s) – stitch(es)
- RS / WS – right side / wrong side
Special stitch – Scallop: skip 1 st, 5 dc in next st, skip 1 st, sc in next st. One scallop uses 4 stitches of the previous round.
Gauge and Checkpoints
Gauge: 16 sc and 16 rows = 4 in (10.2 cm). Each round of the circle adds about 0.25 in (0.6 cm) to the radius.
The body circle doubles as your swatch, so make it first. Check these points as you go:
- After Round 4: circle measures 2 in (5.1 cm) across
- After Round 11: circle measures 5.5 in (14.0 cm) across and lies flat
- After head and tail: piece measures 6.25 in (15.9 cm) tall
- After the border: body measures 7 in (17.8 cm) wide x 7.5 in (19.1 cm) tall
If your Round 4 circle is larger than 2 in (5.1 cm), go down to a 3.75 mm hook. If it is smaller, go up to a 4.5 mm hook. If the circle ruffles, your tension is too loose for the increases. If it cups, your tension is too tight. A half-size hook change usually fixes either problem.
Body Circle
Use blush pink. Work in joined rounds with the RS facing throughout. The ch 1 at the start of each round does not count as a stitch.
Round 1: Make a MR, ch 1, 6 sc in ring, sl st to first sc. (6 sts)
Round 2: Ch 1, 2 sc in each st around, sl st to first sc. (12 sts)
Round 3: Ch 1, [sc 1, 2 sc in next] 6 times, sl st to first sc. (18 sts)
Round 4: Ch 1, [sc 2, 2 sc in next] 6 times, sl st to first sc. (24 sts)
Checkpoint: 2 in (5.1 cm) across.
Round 5: Ch 1, [sc 3, 2 sc in next] 6 times, join. (30 sts)
Round 6: Ch 1, [sc 4, 2 sc in next] 6 times, join. (36 sts)
Round 7: Ch 1, [sc 5, 2 sc in next] 6 times, join. (42 sts)
Round 8: Ch 1, [sc 6, 2 sc in next] 6 times, join. (48 sts)
Round 9: Ch 1, [sc 7, 2 sc in next] 6 times, join. (54 sts)
Round 10: Ch 1, [sc 8, 2 sc in next] 6 times, join. (60 sts)
Round 11: Ch 1, [sc 9, 2 sc in next] 6 times, join. (66 sts)
Fasten off. Checkpoint: 5.5 in (14.0 cm) across.
Tip: if you want a rounder circle with less of a hexagon shape, stagger the increases. For example, work the increase first in every other round.
Marking the Circle
Number the stitches of Round 11 from 1 to 66, where st 1 is the first sc after the join. Lay the circle RS up with st 1 at the bottom center (6 o’clock). Counting counterclockwise, st 17 sits near 3 o’clock, st 34 at 12 o’clock and st 50 near 9 o’clock.
Place markers in:
- st 17 and st 30 – tail (14 sts)
- st 31 – start of back dip (sts 31–36, 6 sts)
- st 37 and st 48 – head (12 sts)
The remaining sts 49–66 and 1–16 form the bottom arc: 18 + 16 = 34 sts. Check: 14 + 6 + 12 + 34 = 66.
Tail
Work in rows with blush pink over sts 17–30.
Row 1 (RS): Join yarn in st 17, ch 1, sc in same st and next 13 sts. (14 sts)
Row 2: Ch 1, turn, sc in each st across. (14 sts)
Row 3: Ch 1, turn, sc2tog, sc 10, sc2tog. (12 sts)
Row 4: Ch 1, turn, sc2tog, sc 8, sc2tog. (10 sts)
Row 5: Ch 1, turn, sc2tog, sc 6, sc2tog. (8 sts)
Row 6: Ch 1, turn, sc2tog, sc 4, sc2tog. (6 sts)
Fasten off. The tail rises about 1.5 in (3.8 cm) above the circle edge. Its base is 3.5 in (8.9 cm) wide and it narrows to a 1.5 in (3.8 cm) top.
Head
Work in rows with blush pink over sts 37–48.
Row 1 (RS): Join yarn in st 37, ch 1, sc in same st and next 11 sts. (12 sts)
Row 2: Ch 1, turn, sc2tog, sc 8, sc2tog. (10 sts)
Row 3: Ch 1, turn, sc in each st across. (10 sts)
Row 4: Ch 1, turn, sc2tog, sc 6, sc2tog. (8 sts)
Row 5: Ch 1, turn, sc2tog, sc 4, sc2tog. (6 sts)
Fasten off. The head rises about 1.25 in (3.2 cm) above the circle edge. The 6 sts of the back dip stay unworked between head and tail.
Checkpoint: the piece now measures about 5.5 in (14.0 cm) wide x 6.25 in (15.9 cm) tall. Weave in all pink ends now.
Eye: If you are using a safety eye, insert it now, before the border. Place it between head Rows 1 and 2, about 4 sts in from the front (left) edge of the head. Secure the washer on the WS.
Border
Use cream with the RS facing. Border gauge: 4 sts = 1 in (2.5 cm), so one scallop (4 sts) covers 1 in (2.5 cm) of edge.
Round 1: Join cream in st 31 (first st of the back dip), ch 1. Work as follows:
- Back dip: sc in each of sts 31–36. (6 sts)
- Head: 1 sc in each of the 5 row-ends up the back of the head. On the 6 sts of Row 5, work 3 sc in first st, sc 4, 3 sc in last st (10 sts). Then 1 sc in each of the 5 row-ends down the front. (20 sts)
- Bottom arc (sts 49–66 and 1–16, 34 sts): sc 2, [2 sc in next, sc 5] 5 times, 2 sc in next, sc 1. That is 34 sts worked 1 per stitch plus 6 increases. (40 sts)
- Tail: 1 sc in each of the 6 row-ends up the outer side. On the 6 sts of Row 6, work 3 sc in first st, sc 4, 3 sc in last st (10 sts). Then 1 sc in each of the 6 row-ends down the inner side. (22 sts)
Sl st to first sc. Total: 6 + 20 + 40 + 22 = 88 sts.
The head top and tail top each have 6 sts worked 1 per stitch plus 4 extra from the two corner increases, giving 10.
Round 2: Ch 1, sc in each of the first 28 sts (6 back dip + 20 head + first 2 bottom sts). Then work [Scallop] 15 times, ending the last scallop’s sc in the final tail st. Sl st to first sc. Fasten off.
Count: 28 sc + 15 scallops x (5 dc + 1 sc) = 28 + 90 = 118 sts, with 15 scallops.
Why the math works: each scallop uses exactly 4 sts. The scalloped section covers the remaining 38 bottom sts plus the 22 tail sts, which is 60 sts, and 60 ÷ 4 = 15 scallops with nothing left over. The 2 plain sc on the chest make a clean change from the plain head edge to the first scallop, and 28 + 60 = 88 matches Round 1 exactly. The 6 increases in the bottom arc keep the border flat around the curve.
Checkpoint: the body now measures 7 in (17.8 cm) wide x 7.5 in (19.1 cm) tall.
Appliqués
Comb (deep red): Ch 8.
- Row 1: Sc in 2nd ch from hook and each ch across. (7 sts)
- Row 2: Ch 1, turn, sl st in first st, [7 dc in next st, sl st in next st] 3 times. (3 lobes, 25 sts)
Fasten off, leaving a long tail. The comb is about 1.75 in (4.4 cm) wide and 0.75 in (1.9 cm) tall.
Beak (mustard yellow): Ch 5.
- Row 1: Sc in 2nd ch from hook and next 3 ch. (4 sts)
- Row 2: Ch 1, turn, [sc2tog] twice. (2 sts)
- Row 3: Ch 1, turn, sc2tog. (1 st)
Fasten off, leaving a tail. The beak base is about 1 in (2.5 cm).
Wattle (deep red): Ch 4, 5 dc in 4th ch from hook (the skipped ch count as the first dc, so you have 6 dc), ch 3, sl st in same ch. Fasten off, leaving a tail. This makes a teardrop about 0.75 in (1.9 cm) long.
Cheek (coral pink): MR, ch 2 (does not count), 10 hdc in ring, pull ring closed, sl st to first hdc. (10 sts) Fasten off, leaving a tail. The cheek is about 0.6 in (1.5 cm) across.
Finishing
- Comb: Slide the flat Row 1 edge behind the top of the head so the three lobes stand above the cream border. Whipstitch it on from the WS, through the back of border Round 1.
- Beak: Sew the wide edge to the front of the head at eye level, so the point sticks out past the border to the left.
- Wattle: Sew the narrow end just below the beak, letting the round end hang down over the border.
- Cheek: Sew around the edge, just below and slightly behind the eye.
- Eye: If you skipped the safety eye, sew on a flat button now, or embroider a satin-stitch oval about 0.4 in (1.0 cm) wide. A flat eye lets the mug rug sit level.
- Lashes: With black floss, work 2 or 3 short straight stitches above the back corner of the eye.
Weave in all ends on the WS.
Final Blocking
- Soak the hen in cool water for 10 minutes, then press the water out in a towel. Do not wring it.
- Lay it RS up on a blocking mat or folded towel.
- Pin the circle to 5.5 in (14.0 cm) across, then pin the body to 7 in (17.8 cm) wide x 7.5 in (19.1 cm) tall.
- Pin the tip of each scallop so all 15 sit evenly.
- Shape the comb lobes into rounds with your fingers.
- Let it dry completely. For cotton, you can steam lightly from above instead of wet blocking.
Final Quality-Control Checklist
- Circle has 66 sts and measures 5.5 in (14.0 cm)
- Tail ends with 6 sts and head ends with 6 sts
- Border Round 1 has 88 sts; Round 2 has 15 even scallops
- Plain cream edge covers only the back dip and head
- Body measures 7 in (17.8 cm) x 7.5 in (19.1 cm)
- Comb, beak, wattle, eye and cheek are firmly sewn and lie flat
- No loose ends show on the RS
- Piece sits level under a mug
Troubleshooting
- Circle cups: tension is too tight for the increases. Go up a hook size.
- Circle ruffles: tension is too loose. Go down a hook size.
- Head or tail looks lopsided: recount the sc2tog at both ends of each decrease row.
- Border count is off: recount the row-ends and work exactly 1 sc in each.
- Scallops don’t come out even: check that Round 1 has 88 sts and that the plain run before the first scallop is exactly 28 sc.
- Back dip puckers: work those 6 sc loosely, or use a hook a half size larger for that section.
- Comb flops forward: add a second line of stitches across its base on the WS.
Care
Hand wash in cool water and lay flat to dry. Reshape the scallops while damp.
Final Notes
The measurements build step by step. A 2 in (5.1 cm) Round 4 leads to a 5.5 in (14.0 cm) circle. The head and tail bring the piece to 6.25 in (15.9 cm) tall, and the 88-stitch border finishes the body at 7 in (17.8 cm) x 7.5 in (19.1 cm). Hit each checkpoint and your hen will lie flat with 15 neat scallops and a perky red comb.
Happy crocheting!