

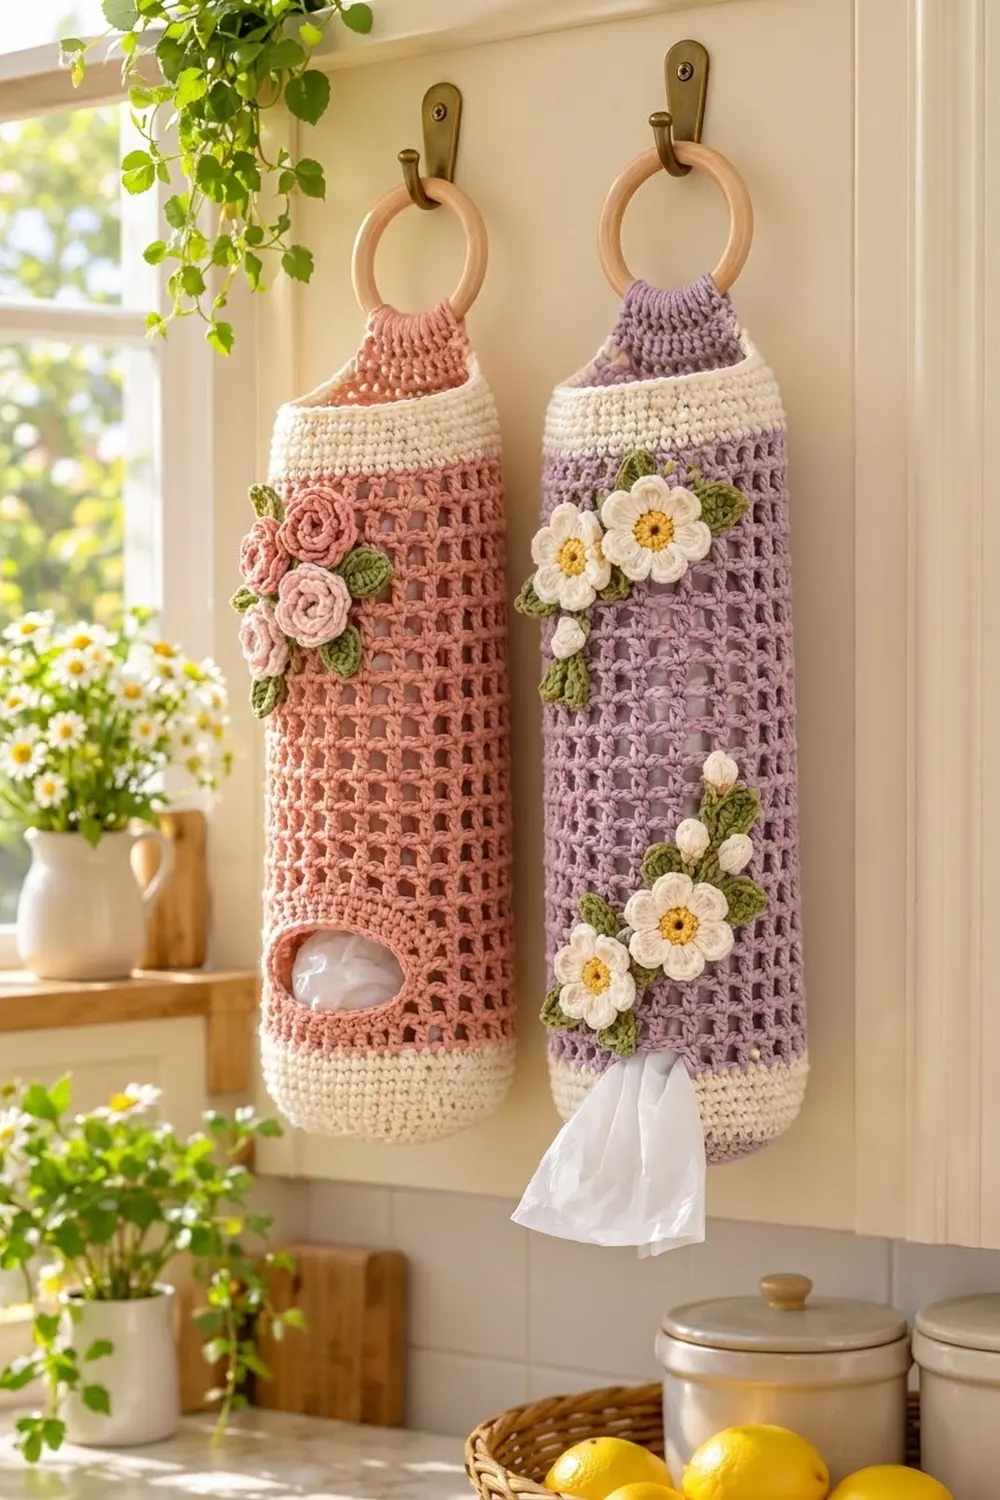
The Cottage Bloom Bag Holder is a tall, airy tube made in square filet mesh. A solid cream band edges the top, a solid cream section forms the bottom, and a small tab wraps around a wooden ring for hanging. It keeps a stash of plastic grocery bags tidy, and you can see how full it is through the mesh.
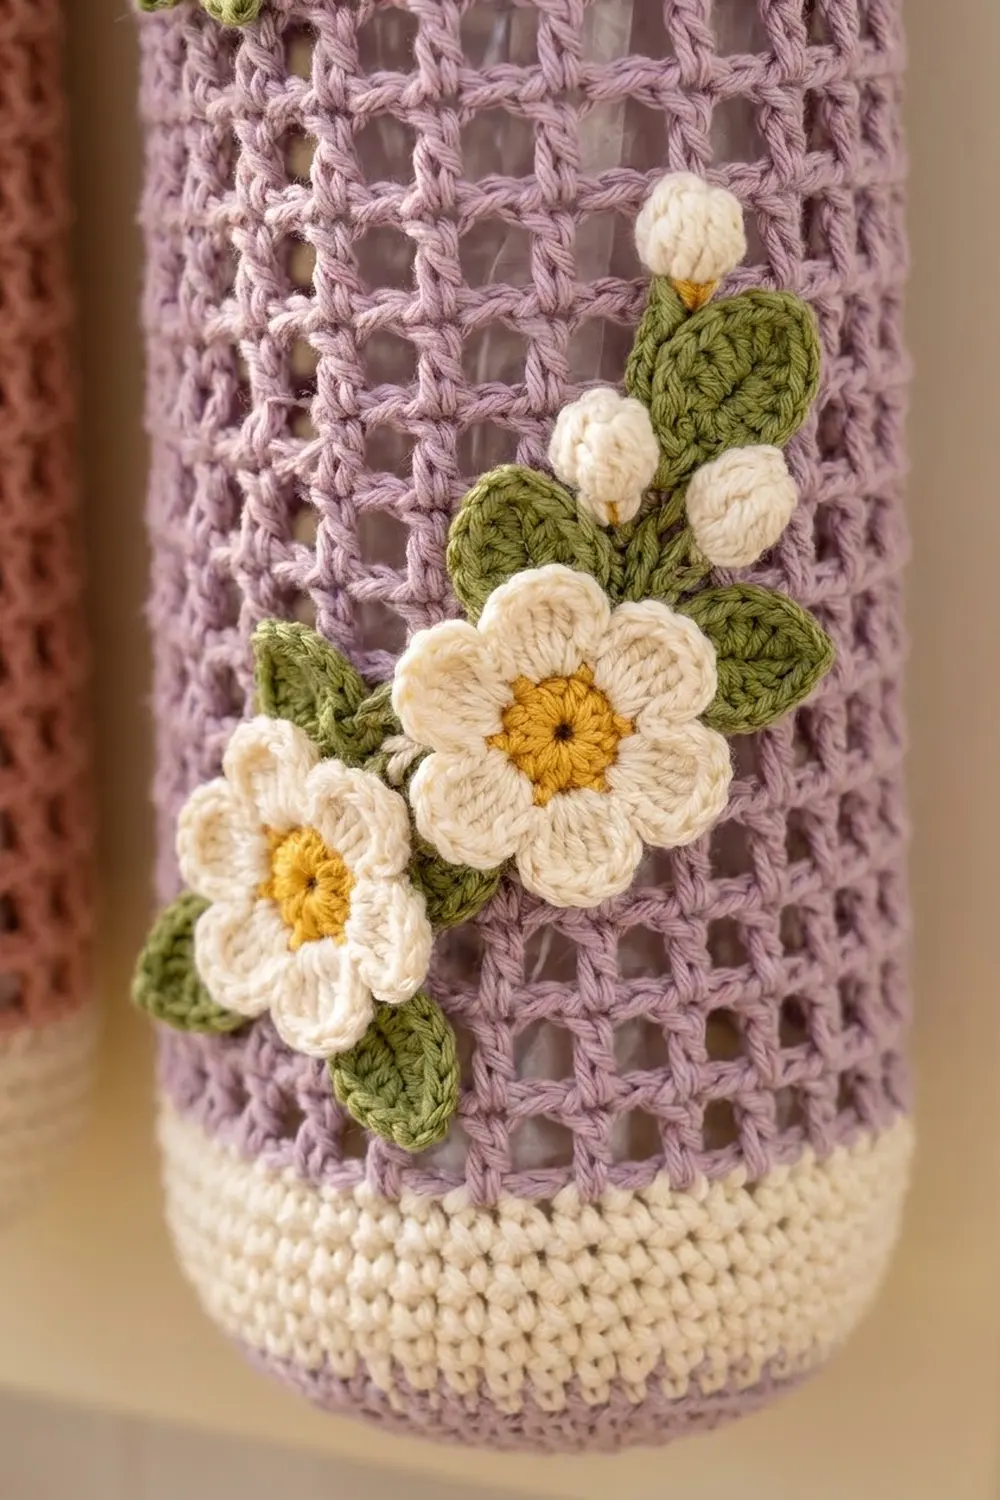
There are two colorways. The Rose version is dusty rose with a cluster of rolled roses in rose and blush and sage leaves. You pull bags out through an oval hole near the bottom. The Daisy version is lavender with cream daisies, golden centers and little bobble buds, and it dispenses through an open bottom.
This pattern uses US crochet terms. Each holder measures about 5 in (12.7 cm) wide when flat and about 17.8 in (45.2 cm) long, not counting the hanging tab and ring.
You work the body in one piece from the bottom up. First comes a cream base, then a body-color mesh section, then a cream top band, and finally a hanging tab worked in rows. The flowers and leaves are made separately and sewn on.
Finished Size and Construction
- Finished size: 5 in (12.7 cm) wide flat × about 17.8 in (45.2 cm) long
- Circumference: 10 in (25.4 cm), 40 stitches
- Skill level: Easy-intermediate
- Terminology: US
- Yarn weight: Worsted (#4) cotton
- Hook: 5 mm (H-8)
- Number of pieces: 1 body per holder, plus sewn-on appliqués
- Layout: Single vertical tube, hung from a 3 in (7.6 cm) ring
- Piece size before the top band: about 16.5 in (41.9 cm) long
- Top band depth: about 1.3 in (3.3 cm), 6 rounds
Materials
Use a smooth, mercerized or combed worsted cotton. It shows the mesh clearly and stays firm in a kitchen. Acrylic also works, but the mesh will stretch more under the weight of the bags.
Rose version
– Dusty rose (body, tab, 2 large roses): 85 g / 145 m
– Cream (base and top band): 40 g / 68 m
– Pale blush (1 large and 1 small rose): 10 g / 17 m
– Sage green (4 leaves): 5 g / 9 m
Daisy version
– Lavender (body and tab): 85 g / 145 m
– Cream (base, top band, petals, buds): 50 g / 85 m
– Golden yellow (daisy centers): 3 g / 5 m
– Sage green (leaves and bud stems): 6 g / 10 m
Tools
– 5 mm (H-8) crochet hook
– One 3 in (7.6 cm) unfinished wooden ring per holder
– Tapestry needle
– 4 stitch markers
– Measuring tape
– Pins
All quantities include roughly a 15% margin.
Abbreviations (US Terms)
- ch: chain
- sl st: slip stitch
- sc: single crochet
- hdc: half double crochet
- dc: double crochet
- sk: skip
- sp: space
- sc2tog: single crochet 2 together
- MR: magic ring
- st(s): stitch(es)
Mesh unit: (dc, ch 1). This covers 2 stitches of the round below.
4-dc bobble: (yarn over, insert hook, pull up a loop, yarn over, pull through 2 loops) 4 times in the same stitch, then yarn over and pull through all 5 loops.
Gauge and Checkpoints
- Sc gauge: 16 sc × 18 rounds = 4 in (10.2 cm)
- Mesh gauge: 8 mesh units (16 sts) × 8 rounds = 4 in × 4.5 in (10.2 cm × 11.4 cm)
Work the cream base first and treat it as your swatch. Check these measurements as you go:
- After Round 5: the base cups slightly and measures about 2.75 in (7.0 cm) across.
- After Round 14: the flattened tube is 5 in (12.7 cm) wide.
- After 8 mesh rounds: the mesh section is 4.5 in (11.4 cm) tall and still 5 in (12.7 cm) wide.
- After Round 45: the body is about 17.8 in (45.2 cm) long.
If your piece is wider than 5 in (12.7 cm), go down one hook size. If it is narrower, go up one size. If only the mesh is too tall, try a shorter dc by pulling the first loop up less. Keep the stitch counts the same. Changing the counts breaks the mesh math.
Body (Rose Version)
Base (cream)
Round 1: In MR, ch 1, work 8 sc. Sl st to the first sc. (8)
Round 2: Ch 1, 2 sc in each st around. Sl st to join. (16)
Round 3: Ch 1, sc 1, 2 sc in next 8 times. Join. (24)
Round 4: Ch 1, sc 2, 2 sc in next 8 times. Join. (32)
Round 5: Ch 1, sc 3, 2 sc in next 8 times. Join. (40)
Eight increases per round make the base cup gently, which gives the rounded bottom.
Rounds 6–14: Ch 1, sc in each st around. Join. (40) The walls are about 2 in (5.1 cm) tall. Fasten off cream.
Round 15 (dusty rose): Join dusty rose in any st. Ch 1, sc in each st around. Join. (40) The joining st is now st 1.
Dispensing hole (worked in turned rows)
Row 16: Ch 4 (counts as dc + ch 1), sk st 2, dc in st 3, ch 1, sk 1, dc in next 14 times. Turn. That gives 16 dc and 15 ch-1 sps over sts 1–31, with sts 32–40 left unworked (9 sts).
Row 17: Ch 4 (counts as dc + ch 1), dc in next dc, ch 1, dc in next dc 13 times, ch 1, dc in 3rd ch of the turning ch. Turn. (16 dc, 15 sps)
Row 18: Repeat Row 17. Do not turn. (16 dc, 15 sps)
Bridge: Ch 9 and sl st to the 3rd ch of the turning ch at the start of Row 18. This closes the hole, which is about 2.25 in (5.7 cm) wide and 1.7 in (4.3 cm) tall.
Mesh rounds
Round 19: Ch 4 (counts as dc + ch 1), dc in next dc, ch 1, dc in next dc 14 times. You now have 16 dc. Then work across the ch-9: ch 1, sk 1 ch, dc in next ch 4 times, ch 1, sk last ch. Sl st to the 3rd ch of the beginning ch-4. Total: 20 dc and 20 sps. Count check: Rows 16–18 cover 31 sts and the ch-9 covers 9, for 40 stitches in all.
Rounds 20–39: Ch 4 (counts as dc + ch 1), dc in next dc, ch 1, dc in next dc 18 times, ch 1. Sl st to the 3rd ch of the beginning ch-4. (20 dc, 20 sps) Do not turn.
Rounds 16–39 make 24 mesh rounds, about 13.5 in (34.3 cm). Fasten off dusty rose.
Hole edging: Join dusty rose at a bottom corner of the hole. Work 9 sc into Round 15 sts 32–40, 6 sc up the side (2 sc around each row-end post), 9 sc into the free loops of the ch-9, and 6 sc down the other side. Join. (30 sc) Fasten off.
Top Band (Cream)
Round 40 (conversion round): Join cream. Ch 1, sc in each dc and in each ch-1 sp around: 20 sc in the dc + 20 sc in the sps = 40. Join. (40)
Rounds 41–45: Ch 1, sc in each st around. Join. (40) Fasten off.
The band is 6 rounds, about 1.3 in (3.3 cm) deep.
Hanging Tab
Flatten the tube so the hole is centered on the front. Place markers in the 12 center back stitches of Round 45. Join dusty rose in the first marked stitch.
Row 1: Ch 1, sc 12. Turn. (12)
Row 2: Ch 1, sc2tog, sc 8, sc2tog. Turn. (10)
Row 3: Ch 1, sc 10. Turn. (10)
Row 4: Ch 1, sc2tog, sc 6, sc2tog. Turn. (8)
Row 5: Ch 1, sc 8. Turn. (8)
Row 6: Ch 1, sc2tog, sc 4, sc2tog. Turn. (6)
Rows 7–20: Ch 1, sc 6. Turn. (6)
The tab is 1.5 in (3.8 cm) wide and about 4.4 in (11.2 cm) long. Fasten off and leave a 12 in (30.5 cm) tail.
Pass the tab through the ring from front to back and fold the last 8 rows, about 1.8 in (4.6 cm), down behind the tab. Whipstitch the edge of Row 20 to Row 12 and close both sides. About 2.7 in (6.9 cm) of tab stays visible above the band.
Rose Appliqués
Large rose (make 2 in dusty rose and 1 in blush)
Ch 25.
Row 1: Sc in 2nd ch from hook and in each ch across. Turn. (24)
Row 2: Ch 1, sk 1, 5 dc in next, sk 1, sl st in next 6 times. (6 petals) Fasten off with a 12 in (30.5 cm) tail.
Roll the strip from the first petal, keeping the sc edge as the base, and stitch through all layers. Each rose measures about 1.75 in (4.4 cm).
Small rose (make 1 in blush)
Ch 17. Work as for the large rose with 16 sc, repeating the petal pattern 4 times. It measures about 1.25 in (3.2 cm).
Leaf (make 4 in sage)
Ch 7. Working along the chain from the 2nd ch from hook: sc, hdc, dc, dc, hdc, then 3 sc in the last ch. Working along the other side of the chain: hdc, dc, dc, hdc, sc. Sl st to the first sc. Each leaf is about 1.5 in (3.8 cm) long.
Placement: Start the cluster 0.5 in (1.3 cm) below the band, to the left of center front. Stack the two dusty rose roses above the large blush rose, add the small blush rose at the outer edge, and tuck leaves between them. Sew through the dc posts only, so the mesh stays open.
Daisy Version Changes
Open base (cream): Ch 24 and sl st to join without twisting.
Round 1: Ch 1, sc in each ch around. Join. (24)
Round 2: Sc 2, 2 sc in next 8 times. Join. (32)
Round 3: Sc 3, 2 sc in next 8 times. Join. (40)
Rounds 4–14: Sc even. (40)
The bottom opening is 6 in (15.2 cm) around, about 1.9 in (4.8 cm) across.
Body: Work Round 15 in lavender. Skip the hole: work Rounds 16–39 all as mesh rounds (20 dc, 20 sps each). Then work the top band and tab as for the Rose version.
Daisy (make 4): With yellow, work 8 sc in MR and join. Fasten off. Join cream. In each sc, work (sl st, ch 2, 2 dc, ch 2, sl st). (8 petals) Each daisy is about 1.75 in (4.4 cm) across.
Bud (make 4): With cream, ch 3 and work a 4-dc bobble in the 3rd ch from hook. Ch 1 and fasten off. Sew a sage straight stitch below each bud for a stem.
Leaves: Make 8 leaves as for the Rose version.
Placement: Sew 2 daisies, 1 bud and 3 leaves just below the band. Sew 2 daisies, 3 buds and 5 leaves about 1 in (2.5 cm) above the cream base.
Final Blocking
- Weave in all ends along the dc posts.
- Soak the holder in cool water for 10 minutes. Press the water out; don’t wring it.
- Slide a rolled towel or a cardboard tube about 5 in (12.7 cm) wide into the tube.
- Square the mesh so the columns run straight and the rounds stay level.
- Shape the base into a smooth dome and press the top band flat.
- Check the size: 5 in (12.7 cm) wide and about 17.8 in (45.2 cm) long.
- Lift each flower slightly with your fingers so the petals stand up.
- Let it dry fully before you hang it.
Final Quality-Control Checklist
- Every mesh round has 20 dc and 20 ch-1 spaces.
- The top band has 40 sc, 20 across the front and 20 across the back.
- The dc columns stack straight up and don’t spiral.
- The Rose hole edging has 30 sc and lies flat.
- The tab is centered on the back and sewn securely around the ring.
- The appliqués are attached through solid stitches and don’t block the opening.
- Width is 5 in (12.7 cm) and length is about 17.8 in (45.2 cm).
Troubleshooting
- Mesh spirals: Always sl st into the 3rd ch of the beginning ch-4. Mark it every round.
- The hole puckers: Your ch-9 is too tight. Redo it with a looser chain or one hook size larger.
- The base ruffles: Your increases are too loose. Go down a hook size for Rounds 1–5.
- The top band flares: Work Round 40 firmly and keep the sc into the ch-1 spaces snug.
- The tab twists: Center it again over the 12 back stitches and keep the fold flat before sewing.
- Bags fall out of the Daisy version: Work Round 1 over 22 ch instead of 24 and add 1 extra increase in each of Rounds 2 and 3, so Round 3 still ends with 40 sts.
Care
Hand wash in cool water and lay flat over a towel roll to dry. Take the wooden ring off before washing.
Final Notes
Here is the full measurement chain. The 40-stitch base sets a 10 in (25.4 cm) circumference, which is 5 in (12.7 cm) flat. In the mesh, 20 dc and 20 spaces keep the same 40-stitch width. Twenty-four mesh rounds add 13.5 in (34.3 cm). The 40-stitch conversion round leads into a 1.3 in (3.3 cm) cream band, and the 6-stitch tab hangs it all from a 3 in (7.6 cm) ring. As long as each stage measures correctly, the finished holder will too.
Happy crocheting!