
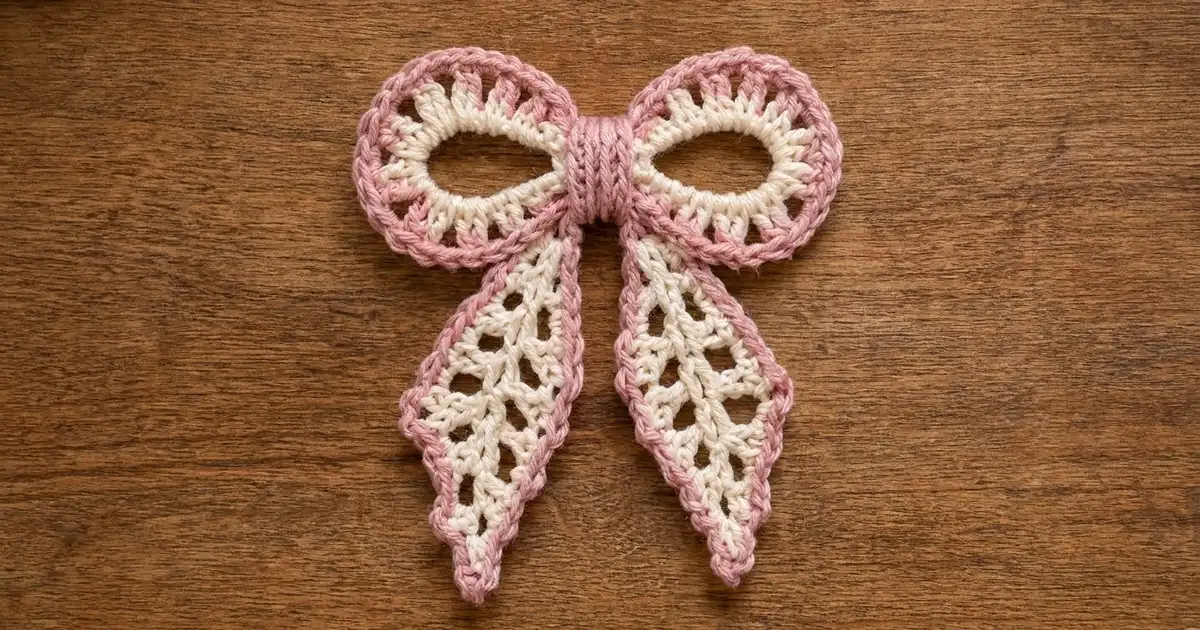
This lace bow is a small motif with a vintage look. Two open oval loops sit at the top and two leaf-shaped tails hang below. A ribbed knot pulls everything together at the center.
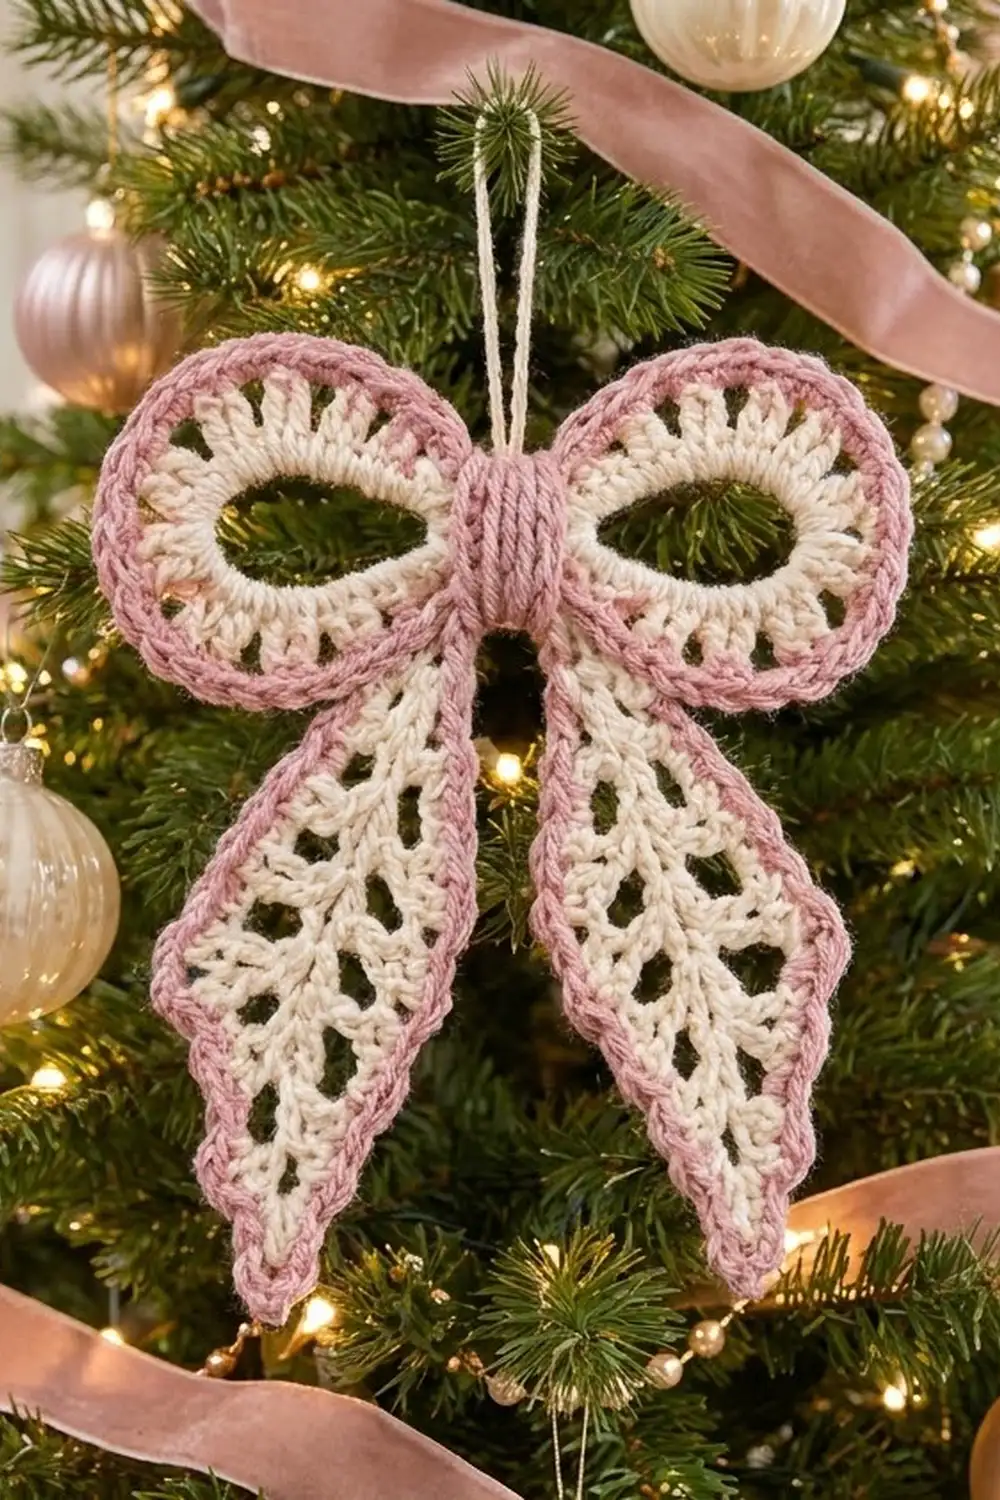
The colors are cream for the lacy body and dusty pink for the edging and the knot. The pink outline gives the bow a clean, finished shape, and the cream openwork keeps it light. It works well as a gift topper, an ornament, a hair accessory, or an appliqué.
The pattern uses US crochet terms. The finished bow measures about 5 in (12.7 cm) wide and 5.25 in (13.3 cm) tall.
You make five small components. The two loops are worked in the round around a chain ring. The two tails are worked around both sides of a foundation chain, and one short ribbed strip makes the knot. You edge the loops and tails in pink, pinch them together, and wrap the strip around the center. Once assembled, it is one finished bow.
Finished Size and Construction
- Finished size: 5 in (12.7 cm) wide x 5.25 in (13.3 cm) tall
- Skill level: Easy-intermediate
- Terminology: US crochet terms
- Yarn weight: Sport weight (#2) cotton
- Hook: 3.0 mm
- Number of pieces: One bow, made from 5 components (2 loops, 2 tails, 1 center wrap)
- Layout: Loops side by side at the top, tails angled down and outward, wrap over the center
- Loop size: 2.6 in (6.6 cm) long x 1.9 in (4.8 cm) tall
- Tail size: 4.75 in (12.1 cm) long x 1.75 in (4.4 cm) at the widest point
- Size before border (pink edging): loop 2.4 in (6.1 cm) x 1.5 in (3.8 cm); tail 4.5 in (11.4 cm) x 1.4 in (3.6 cm)
- Border depth: 1 round of sc, about 0.2 in (0.5 cm)
Materials
Choose a smooth, mercerized sport weight cotton. It shows the openwork clearly and holds the pointed tail tips well. Avoid fuzzy or very soft acrylic yarns, because they blur the small gaps and let the tips droop. If you make several bows, buy both colors from the same dye lot so the pinks match.
- Cream (Color A): 8 g / 25 m (27 yd)
- Dusty pink (Color B): 6 g / 19 m (21 yd)
Quantities include a margin of roughly 30% for your gauge swatch and long sewing tails.
Tools:
- 3.0 mm crochet hook
- Tapestry needle
- Scissors
- Stitch marker
- Rust-proof pins and a blocking mat
- Spray bottle with water
- Optional: hanging cord or a pin back
Abbreviations (US Terms)
- ch = chain
- sl st = slip stitch
- sc = single crochet
- hdc = half double crochet
- dc = double crochet
- sk = skip
- sp = space
- BLO = back loop only
- st(s) = stitch(es)
- rep = repeat
Special technique: working around both sides of a chain. Work along the chain as usual up to the last chain, then work the tip stitches into that last chain. Rotate the piece and work back along the free bottom loops of the same chains. The original chain becomes the center vein of the tail.
Gauge and Checkpoints
Gauge: 12 sc = 2 in (5.1 cm). One dc stands about 0.4 in (1.0 cm) tall.
Gauge matters here because the five components have to fit each other. Make one complete loop, including its pink edging, before you make anything else. Treat that loop as your gauge swatch.
Loop checkpoints (laid flat as an oval, ring join at one end):
- After Round 1: 2 in (5.1 cm) long
- After Round 2: 2.4 in (6.1 cm) x 1.5 in (3.8 cm)
- After Round 3: 2.6 in (6.6 cm) x 1.9 in (4.8 cm)
Tail checkpoints:
- After Round 1: 4.25 in (10.8 cm) x 0.9 in (2.3 cm)
- After Round 2: 4.5 in (11.4 cm) x 1.4 in (3.6 cm)
- After Round 3: 4.75 in (12.1 cm) x 1.75 in (4.4 cm)
Center wrap checkpoint: 1 in (2.5 cm) x 2 in (5.1 cm).
If your loop is too big, go down to a 2.75 mm hook. If it is too small, go up to a 3.25 mm hook. If only the height is wrong, check your dc. A loose yarn-over makes tall dc and a wide, floppy loop. If you change hooks, use the new hook for every component so the tails still fit the loops.
Loops (Make 2)
With Color A, ch 24. Sl st to the first ch to form a ring, taking care not to twist the chain.
Round 1: Ch 1, sc in each ch around. Sl st to the first sc. (24 sc)
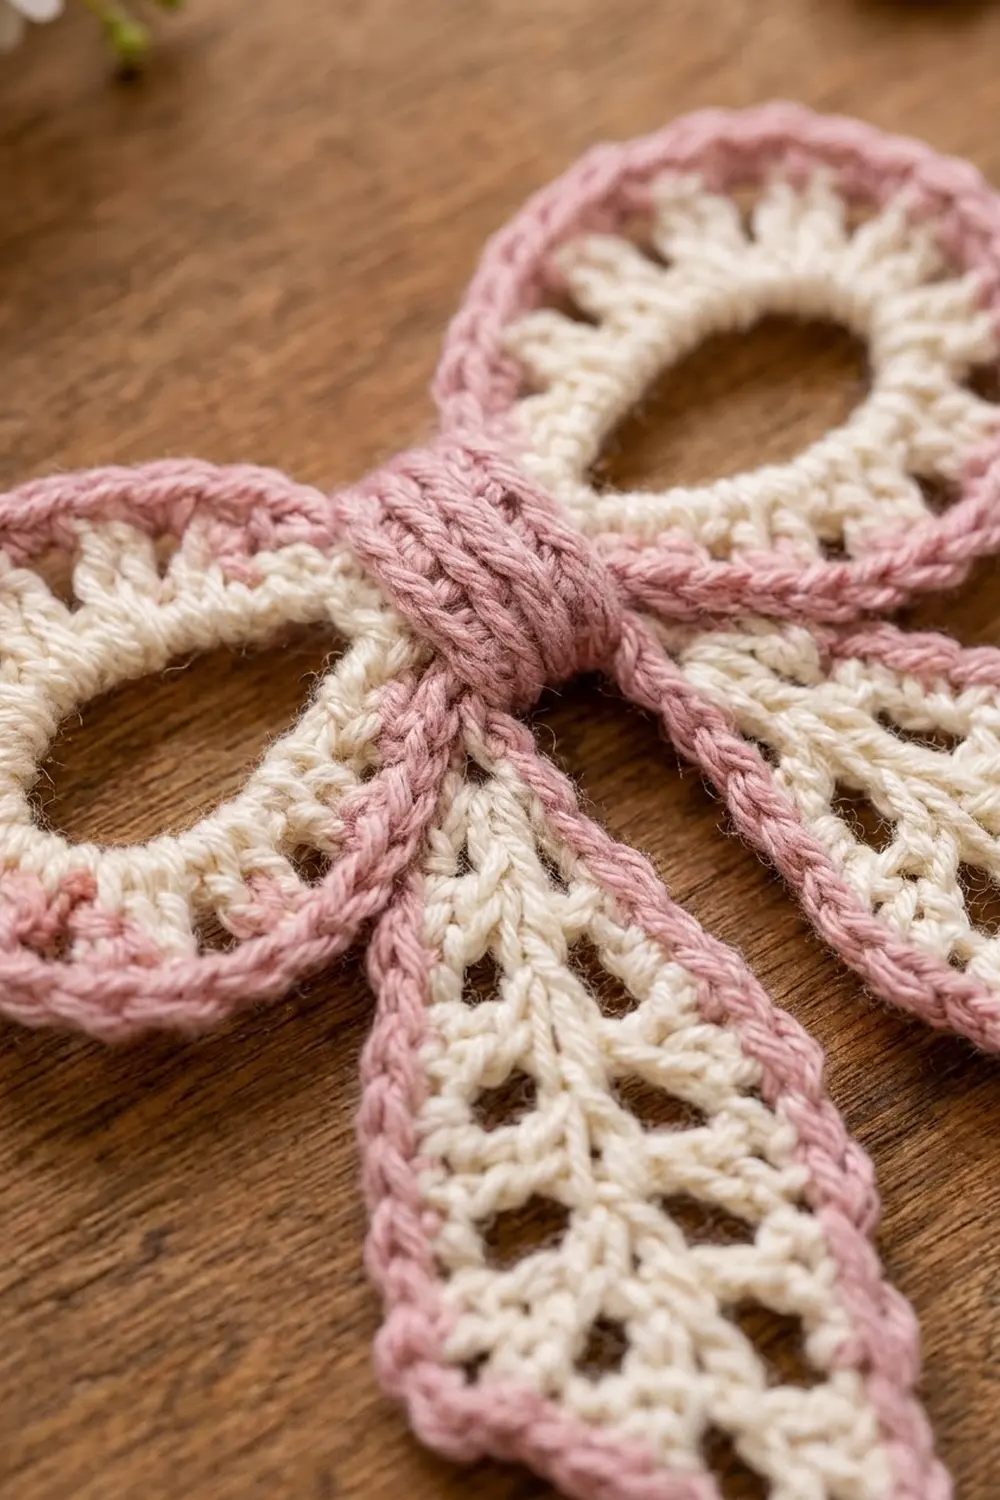
The ring stays open. This large gap becomes the oval opening of the loop.
Round 2: Ch 4 (counts as dc and ch 1) in the same st as the join, dc in next sc, ch 1; rep from * 22 more times. Sl st to the 3rd ch of the beginning ch-4. (24 dc and 24 ch-1 sps)*
These short dc posts with small gaps between them form the spoke-like lace ring. Fasten off Color A and weave in the end.
Lay the loop flat as an oval with the joins at one end. That end becomes the inner end, which is pinched under the knot later. Check the Round 2 measurement now.
Tails (Make 2)
With Color A, ch 26.
Round 1: Sc in 2nd ch from hook, hdc in next ch, dc in next ch, [ch 1, sk 1 ch, dc in next ch] 10 times, hdc in next ch, (sc, ch 3, sc) in last ch for the tip. Rotate and work along the free loops of the foundation: hdc in next ch, dc in next ch, [ch 1, sk 1 ch, dc in next ch] 10 times, hdc in next ch, sc in last ch. Sl st to the first sc. (30 sts: 4 sc, 4 hdc, 22 dc; plus 20 ch-1 sps and 1 ch-3 tip sp)
Each side now has 11 dc separated by 10 ch-1 sps. The skipped chains form the first row of openings, and the foundation chain forms the center vein.
Round 2: Ch 1, sc in first sc, sc in next hdc, hdc in next dc, [ch 1, sk ch-1 sp, hdc in next dc] 10 times, sc in next hdc, sc in next sc, (sc, ch 3, sc) in ch-3 tip sp, sc in next sc, sc in next hdc, hdc in next dc, [ch 1, sk ch-1 sp, hdc in next dc] 10 times, sc in next hdc, sc in last sc. Sl st to the first sc. (32 sts: 10 sc, 22 hdc; plus 20 ch-1 sps and 1 ch-3 tip sp)
Every ch-1 sits over a ch-1 sp, which gives a second row of openings on each side. The short sc at both ends keep the top narrow and let the tail taper to its point. Fasten off Color A.
The end with the ch-3 sp is the pointed tip. The opposite end, where you joined, is the top that tucks under the knot. Keep your tension even along both sides; if one side is tighter, the tail will curve like a banana.
Center Wrap (Make 1)
With Color B, ch 7.
Row 1: Sc in 2nd ch from hook and in each ch across. Turn. (6 sc)
Rows 2–14: Ch 1, sc in BLO of each st across. Turn. (6 sc)
Fasten off, leaving an 8 in (20.3 cm) tail for sewing. Working in the back loops makes ridges. When the strip wraps around the bow, the ridges run vertically, like the ribbed knot on the original.
Border (Pink Edging) and Assembly
Border gauge: 6 sc = 1 in (2.5 cm), worked firmly. Use the same 3.0 mm hook.
Loop Edging
Round 3: Join Color B in any ch-1 sp. Ch 1, sc in ch-1 sp, sc in next dc; rep from * around. Sl st to the first sc. (24 sc worked into the dc + 24 sc worked into the ch-1 sps = 48 sc)*
Why it works: The outer edge of Round 2 measures about 8 in (20.3 cm) around. At 6 sc per inch, 48 sc covers exactly 8 in, so the rim lies flat without ruffling or cupping.
Fasten off, leaving a 6 in (15.2 cm) tail. Repeat on the second loop.
Tail Edging
Round 3: Join Color B in the first sc at the top of the tail. Ch 1, sc in same st, sc in next sc. Along the first side, sc in next hdc, [sc in ch-1 sp, sc in next hdc] 10 times (21 sc on the lace section). Sc in next 2 sc, sc in next sc, (2 sc, ch 2, 2 sc) in ch-3 tip sp, sc in next sc. Along the second side, sc in next 2 sc, sc in next hdc, [sc in ch-1 sp, sc in next hdc] 10 times (21 sc), sc in last 2 sc. Sl st to the first sc. (32 sc worked into the Round 2 sts + 20 sc worked into the ch-1 sps + 4 sc in the tip sp = 56 sc, plus 1 ch-2 tip point)
Why it works: Each long lace section has 11 hdc and 10 sps, so it gets 21 sc. At border gauge that is 3.5 in (8.9 cm) of edge, which matches the straight length of the tail side. The ch-2 at the tip sharpens the point instead of rounding it.
Fasten off, leaving a 6 in (15.2 cm) tail. Repeat on the second tail.
Assembly
- Lay both loops side by side with the joins at the inner ends, touching in the middle.
- Pinch the inner end of each loop into a tight gather about 0.75 in (1.9 cm) tall. Stitch the two inner ends together with a pink tail.
- Place the tails behind the loops with their tops touching at the center and the tips angled down and outward. Tack the tops to the back of the pinched loops.
- Wrap the center strip around the pinched center with the ridges vertical. Overlap the short ends at the back and whipstitch them closed.
- Take two small stitches through the wrap and all layers so nothing slides.
Pull the sewing stitches snug but not tight. Over-tight tacking puckers the loops and makes the openings uneven.
Size checkpoint: The assembled bow should measure 5 in (12.7 cm) across the loops and 5.25 in (13.3 cm) from the top of the loops to the tail tips.
Final Blocking
- Weave in all remaining ends on the back through stitches of the matching color.
- Mist the bow with water until it is damp, not soaked.
- Lay it face up on the blocking mat.
- Pin the loops into even ovals measuring 5 in (12.7 cm) across both loops.
- Open the lace gaps on each tail with your fingertips.
- Pin each tail tip into a sharp point so the bow is 5.25 in (13.3 cm) tall.
- Check that both tails angle outward at the same slope.
- Let it dry completely, then unpin.
Final Quality-Control Checklist
- Each loop has 48 sc in the pink rim
- Each tail has 56 sc plus a ch-2 tip point
- Both loops measure 2.6 in (6.6 cm) x 1.9 in (4.8 cm)
- Both tails measure 4.75 in (12.1 cm) long
- The oval openings in both loops are the same size
- The lace gaps on each tail line up in two neat rows per side
- The center wrap ridges run vertically
- The bow measures 5 in (12.7 cm) x 5.25 in (13.3 cm)
- All ends are hidden on the back
Troubleshooting
The loop rim ruffles. The edging is looser than the lace. Go down half a hook size for Round 3 only.
The loop rim cups. The edging is too tight. Relax your tension or go up half a hook size for Round 3.
The tail curls lengthwise. The foundation chain was too tight. Rework it with a hook one size larger, then switch back.
The tail tip is round, not pointed. Check that Round 3 has (2 sc, ch 2, 2 sc) at the tip, and pin the ch-2 into a point when blocking.
The two tails are different lengths. Recount Round 1. Each side needs exactly 10 repeats of [ch 1, sk 1 ch, dc].
The lace gaps close up. Your ch-1 spaces are too tight. Make each chain a little looser and open the gaps again when blocking.
The knot looks loose. Pinch the loops tighter before wrapping, and add one more tacking stitch through the center.
Care
Hand wash in cool water with mild soap, press the water out in a towel, and dry flat. Re-pin the tail tips if they soften over time.
Final Notes
The measurements build in a short chain:
- Match gauge at 12 sc = 2 in (5.1 cm).
- Make each loop 2.4 in (6.1 cm) x 1.5 in (3.8 cm) before edging and 2.6 in (6.6 cm) x 1.9 in (4.8 cm) after.
- Make each tail 4.5 in (11.4 cm) long before edging and 4.75 in (12.1 cm) after.
- Pinch, stack, and wrap. The finished bow should measure 5 in (12.7 cm) x 5.25 in (13.3 cm).
Check the first loop before you go on. If it matches, the other components will fit.
Happy crocheting!