
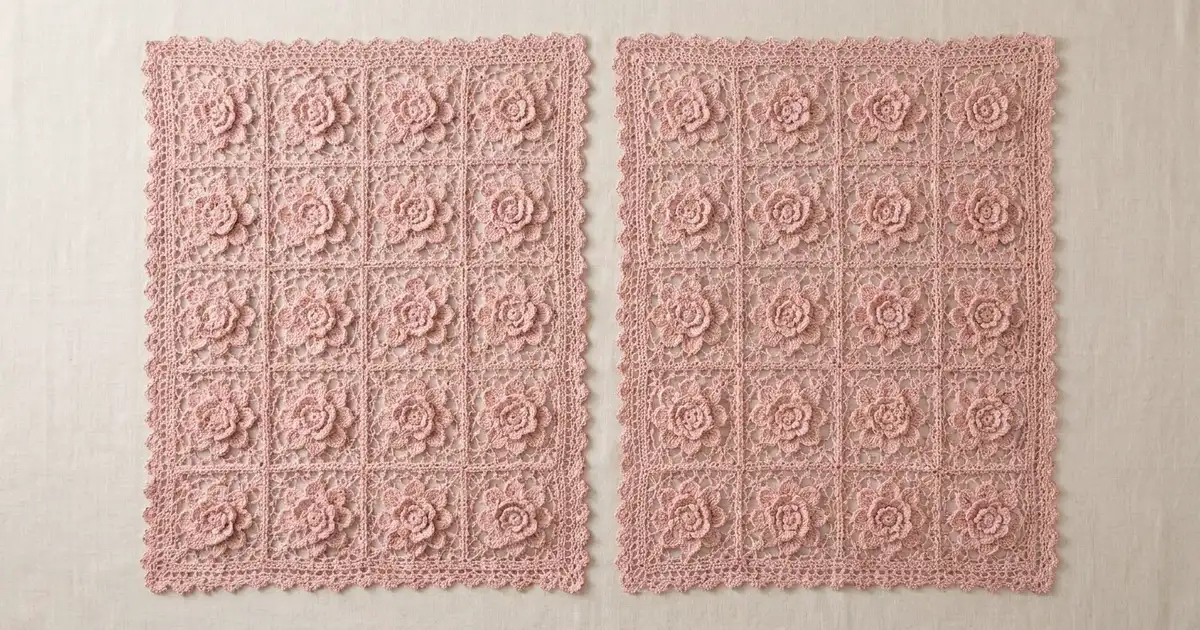
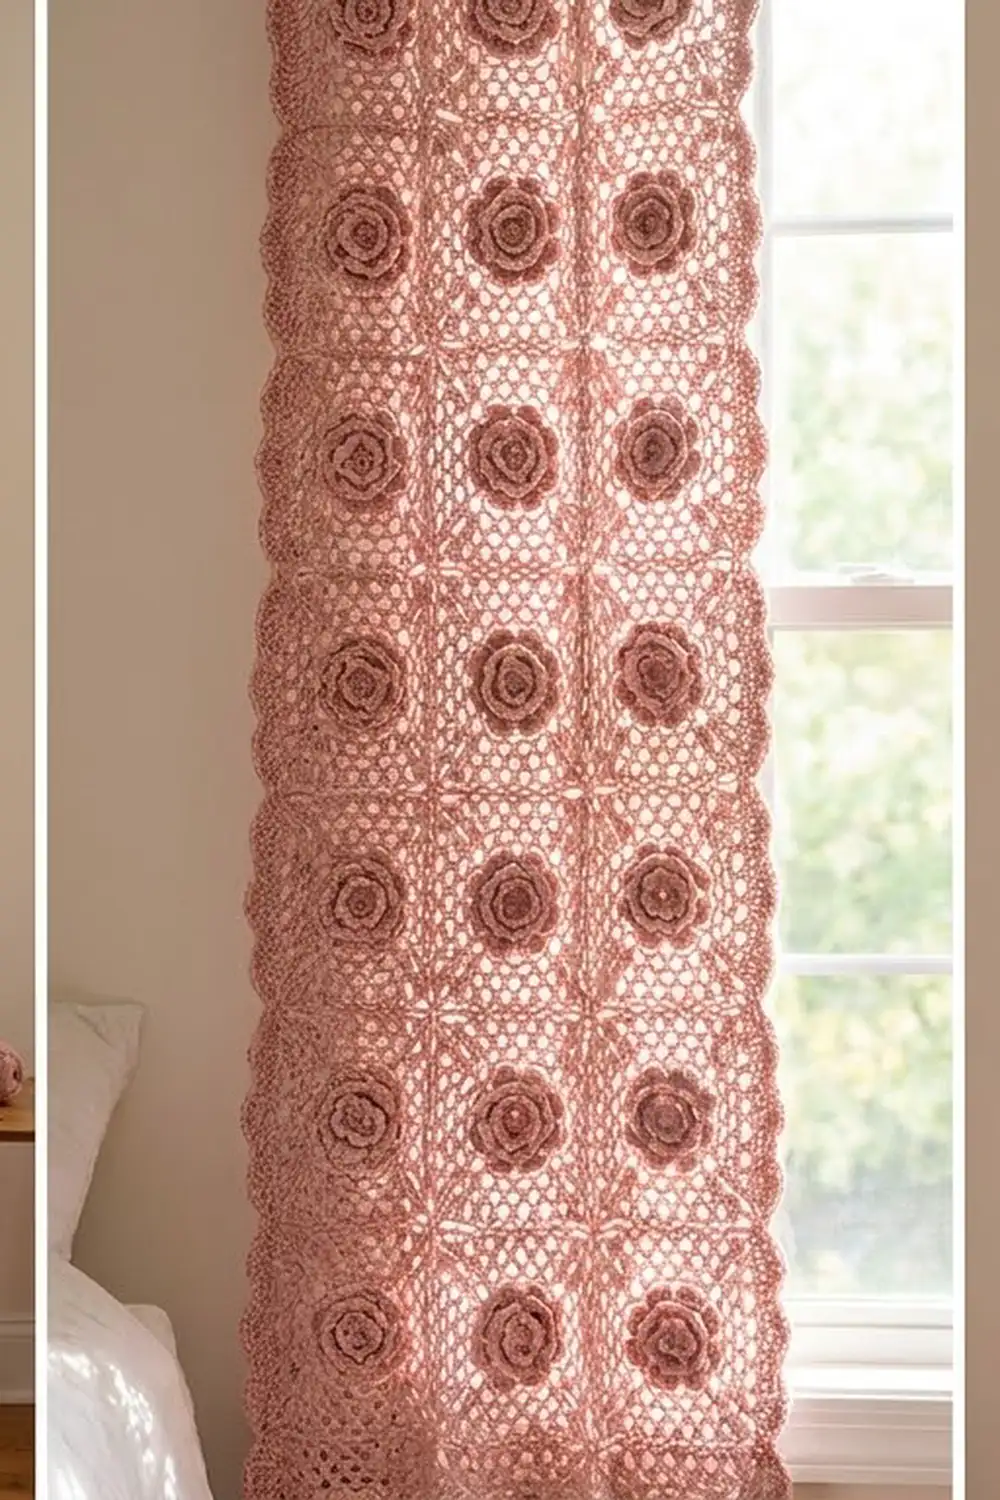
This curtain panel is built from 27 lace squares. Each square has a raised, three-layer rose in the center, so light comes through the open mesh while the roses stand out in relief. Hung in pairs, the panels give a window a soft, romantic, cottage-style look.
The sample uses one dusty blush-pink mercerized cotton. Because there is only one color, the texture does the work: layered petals, chain-loop mesh, and a small scalloped edge. The pattern uses US crochet terms throughout.
One finished panel measures 25.5 x 73.5 in (64.8 x 186.7 cm) after its border. Each square is 8 in (20.3 cm). For a pair like the one in the photo, make two panels.
Here is the order of work: make the rose in the center of each square, change it to a square with chain-mesh rounds, and finish with a solid double crochet round that gives you exact stitch counts. Next, slip-stitch the squares together into a grid 3 squares wide by 9 squares tall. Last, work a two-round scalloped border and block the panel.
Finished Size and Construction
- Finished panel size: 25.5 x 73.5 in (64.8 x 186.7 cm)
- Skill level: Intermediate
- Terminology: US crochet terms
- Yarn weight: Sport weight (2), mercerized cotton
- Hook: 3.5 mm (E-4)
- Number of pieces: 27 squares per panel (54 for a pair)
- Layout: 3 squares wide x 9 squares tall
- Square size: 8 x 8 in (20.3 x 20.3 cm), 39 stitches per side
- Size before border: 24 x 72 in (61.0 x 182.9 cm)
- Border depth: 0.75 in (1.9 cm)
Materials
Yarn: Use a smooth, mercerized sport-weight cotton, about 155 m per 50 g. Cotton holds the petal shapes, stays crisp in sunlight, and blocks well. Don’t use fuzzy or very stretchy yarns, because the lace will sag under its own weight on a long panel.
- Blush pink: 650 g / 2,015 m per panel (13 balls of 50 g)
- For a pair: 1,300 g / 4,030 m (26 balls of 50 g)
These quantities include a margin of about 10% for gauge swatches, joining, and tails.
Tools:
– 3.5 mm (E-4) crochet hook
– Tapestry needle
– Stitch markers
– Rust-proof pins and blocking mats
– Spray bottle
– Measuring tape
– Curtain clip rings or a rod with clips for hanging
Abbreviations (US Terms)
- ch – chain
- sl st – slip stitch
- sc – single crochet
- hdc – half double crochet
- dc – double crochet
- tr – treble crochet
- sp – space
- st(s) – stitch(es)
- RS / WS – right side / wrong side
Special stitch – BPsc (back post single crochet): Insert the hook from the back to the front around the post of the stitch named, then back to the back. Yarn over, pull up a loop, yarn over, and pull through both loops. Working BPsc from behind places each new petal layer behind the one before it.
Gauge and Checkpoints
Gauge: 19.5 dc = 4 in (10.2 cm) along the last round of a square, and one finished square = 8 x 8 in (20.3 x 20.3 cm) before blocking.
Make one full square before you start production and check it at each stage:
- After Round 7 (rose complete): 3.5 in (8.9 cm) across
- After Round 9: 4.5 in (11.4 cm) square
- After Round 10: 5.5 in (14.0 cm)
- After Round 11: 6.5 in (16.5 cm)
- After Round 12: 7.25 in (18.4 cm)
- After Round 13: 8 in (20.3 cm)
If your square is too big: Go down one hook size, or tighten your chain-5 loops. Loose chains are the usual cause.
If your square is too small: Go up one hook size. Make sure you aren’t pulling the dc groups into the loops too tightly.
Your square can be off by up to 0.25 in (0.6 cm), as long as every square matches. Stitch counts matter more than exact size, because the joining and border math depend on 39 stitches per side.
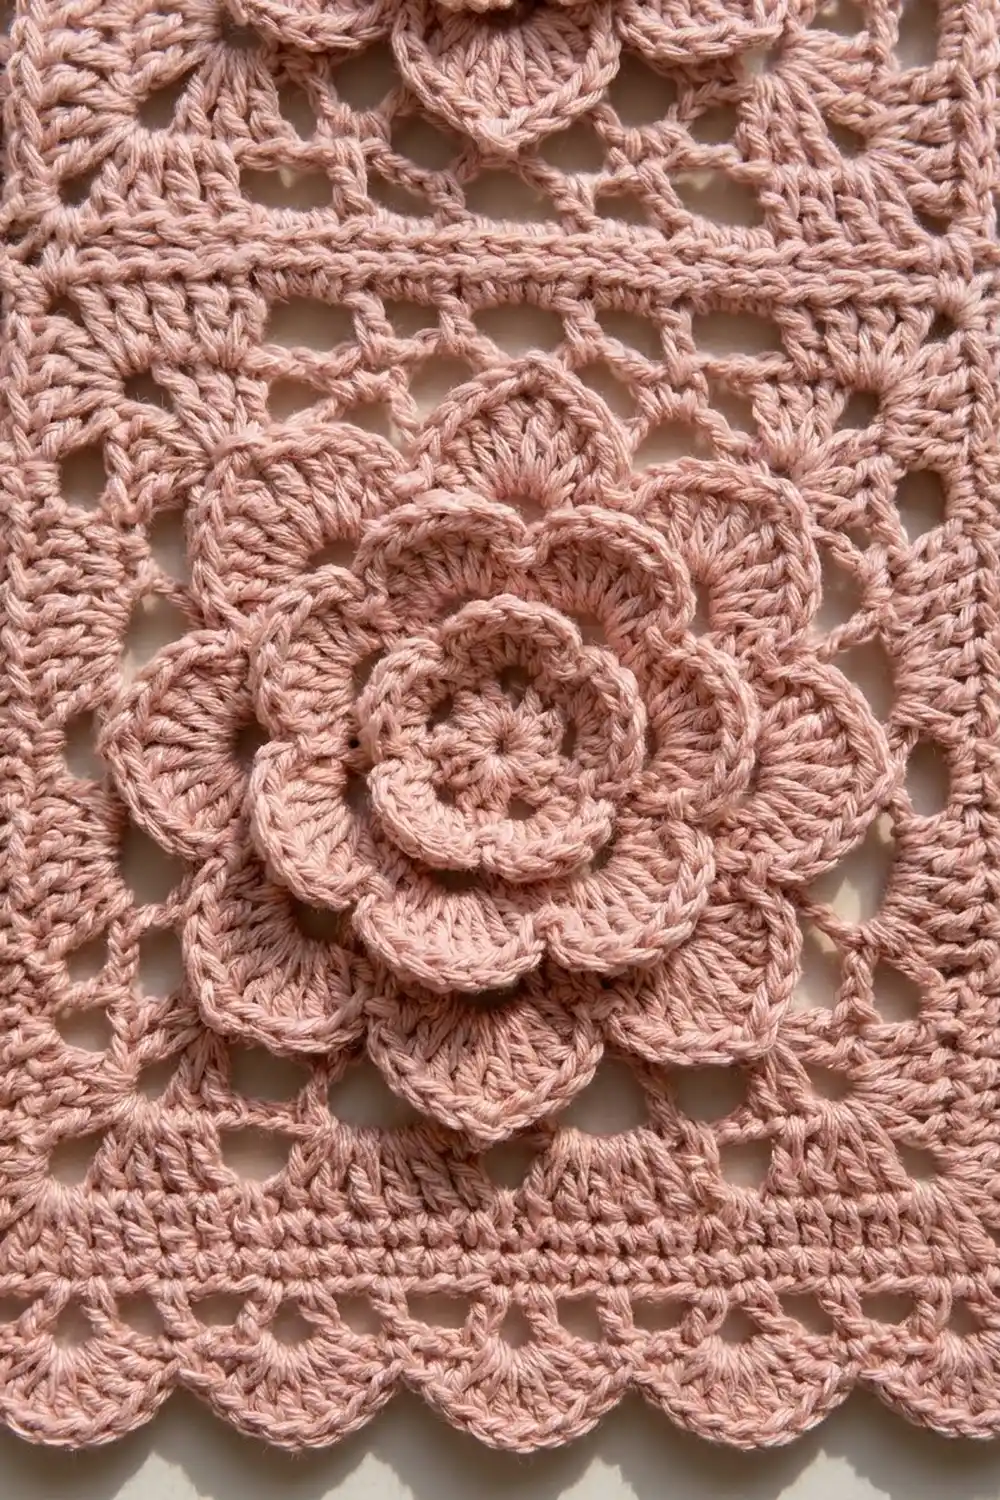
Rose Lace Square (Make 27 per Panel)
The Layered Rose
Round 1: Make a magic ring. Ch 1, then work 12 sc into the ring. Join with a sl st to the first sc. (12 sc)
Round 2: Ch 1. Sc in next st, ch 3, skip next st; repeat from * 5 more times. Join with a sl st to the first sc. (6 sc, 6 ch-3 sps)
Round 3 (inner petals): Work (sc, hdc, 3 dc, hdc, sc) in each ch-3 sp around. Join with a sl st to the first sc. (6 petals, 42 sts)
Round 4: Fold the petals forward so you are working behind them. Ch 1. BPsc around the next Round 2 sc, ch 5; repeat from * 5 more times. Join with a sl st to the first BPsc. (6 BPsc, 6 ch-5 loops)
Round 5 (middle petals): Work (sc, hdc, 5 dc, hdc, sc) in each ch-5 loop around. Join. (6 petals, 54 sts)
Round 6: Working behind the Round 5 petals, ch 1. BPsc around the next Round 4 BPsc, ch 7; repeat from * 5 more times. Join. (6 BPsc, 6 ch-7 loops)
Round 7 (outer petals): Work (sc, hdc, 2 dc, tr, ch 1, tr, 2 dc, hdc, sc) in each ch-7 loop around. Join. (6 petals, 60 sts + 6 ch-1 tips)
The ch-1 between the two tr gives each outer petal its slightly pointed tip. The rose should now cup upward in three distinct layers and measure 3.5 in (8.9 cm) across.
The Lace Ground
Round 8: Working behind the outer petals, ch 1. BPsc around the next Round 6 BPsc, ch 5. Reach behind the next petal and sc into its ch-1 tip, ch 5; repeat from * 5 more times. Join to the first BPsc. (12 sc, 12 ch-5 loops)
Catching the petal tips holds the outer layer flat against the lace ground.
Round 9 (squaring round): Sl st to the center of the next ch-5 loop. Ch 3 (counts as dc), then work (2 dc, ch 3, 3 dc) in the same loop for the first corner. [Ch 5, sc in next loop] twice, ch 5, then work (3 dc, ch 3, 3 dc) in the next loop. Repeat from * 3 more times, ending the last repeat at . Join to the top of the beginning ch-3.
(4 corner groups = 24 dc; 8 sc; 12 ch-5 loops. Per side: 3 ch-5 loops and 2 sc between corners)*
Round 10: Sl st in the next 2 dc and into the corner ch-3 sp. Ch 3, then work (2 dc, ch 3, 3 dc) in the same sp. [Ch 5, sc in next ch-5 loop] 3 times, ch 5, then work (3 dc, ch 3, 3 dc) in the next corner sp. Repeat from * around, ending the last repeat at . Join.
(Per side: 4 ch-5 loops, 3 sc. Total: 16 loops, 12 sc, 24 dc)*
Round 11: Work as Round 10, but repeat the bracketed section 4 times per side.
(Per side: 5 ch-5 loops, 4 sc. Total: 20 loops, 16 sc, 24 dc)
Round 12: Work as Round 10, but repeat the bracketed section 5 times per side.
(Per side: 6 ch-5 loops, 5 sc. Total: 24 loops, 20 sc, 24 dc)
Round 13 (solid edge, conversion round): Sl st in the next 2 dc and into the corner sp. Ch 3 (counts as dc), then work (dc, ch 2, 2 dc) in the same sp. Dc in each of the next 3 dc, [4 dc in next ch-5 loop, dc in next sc] 5 times, 4 dc in next ch-5 loop, dc in each of the next 3 dc, then work (2 dc, ch 2, 2 dc) in the next corner sp. Repeat from * around, ending at *. Join and fasten off. Weave in the ends.
Count per side: 11 dc worked 1-per-existing-stitch (3 + 5 + 3), plus 24 dc in the loops, plus 4 corner dc (2 at each end) = 39 dc per side, including the corner dc at each end. The ch-2 corner sps are not counted. Square total: 156 dc and 4 ch-2 corner sps.
Make All Pieces
Make 27 squares in blush pink for one panel, or 54 squares for a pair. Check every square after Round 13: it should have 39 dc per side and measure 8 in (20.3 cm). Set aside any square that is noticeably off.
Layout grid (one panel, 3 wide x 9 tall):
Row 1:  [R] [R] [R]   <- top edge
Row 2:  [R] [R] [R]
Row 3:  [R] [R] [R]
Row 4:  [R] [R] [R]
Row 5:  [R] [R] [R]
Row 6:  [R] [R] [R]
Row 7:  [R] [R] [R]
Row 8:  [R] [R] [R]
Row 9:  [R] [R] [R]   <- bottom edge
R = Rose Lace Square
Joining
Method: Flat slip-stitch join, worked on the WS.
Hold two squares with their right sides together and the edges lined up. Insert the hook through both corner ch-2 sps and sl st. Then sl st through the inside loops of each pair of matching dc, which is 39 sl sts, one for each dc pair. Finish by sl stitching through the next pair of corner ch-2 sps.
Stitch-to-stitch logic: Each seam joins 39 dc to 39 dc, so it adds no stitches to the panel’s edge count. Since every square has the same count, the dc columns and roses line up across the whole panel.
Order: Join the squares into 9 horizontal strips of 3 squares each. Then join the strips along their long edges, sl stitching through all four corner sps where they meet.
Tension: Keep your sl sts as loose as the dc they join. Tight seams will pucker a lace panel this long. If needed, go up to a 4.0 mm hook for joining only.
Size checkpoint: The joined panel should measure 24 x 72 in (61.0 x 182.9 cm). The short edge has 3 x 39 = 117 dc, and the long edge has 9 x 39 = 351 dc.
Border
Border gauge: Round 1 is worked at 1 sc per dc, so it keeps the panel’s width. The full border adds 0.75 in (1.9 cm) to each edge.
Round 1 (trim round): With the RS facing, join the yarn in any outer corner ch-2 sp. Ch 1, then work (sc, ch 2, sc) in the same sp. Sc in each dc along the side. At each seam, work no stitch into the joined corner sps; the sc on either side close the gap. Work (sc, ch 2, sc) in each outer corner sp. Join.
– Short sides: 117 sc worked 1-per-existing-dc + 2 corner sc = 119 sc
– Long sides: 351 sc worked 1-per-existing-dc + 2 corner sc = 353 sc
Round 2 (scallops): Sl st into the corner ch-2 sp. Ch 1, sc in the same sp. Along each side, work skip 2 sc, 5 dc in next sc, skip 2 sc, then [sc in next sc, skip 2 sc, 5 dc in next sc, skip 2 sc] across to the corner. Sc in the corner sp. Repeat on every side, then join and fasten off.
– Short sides: 1 opening shell + 19 repeats = 20 shells
– Long sides: 1 opening shell + 58 repeats = 59 shells
Why the math works: Each side opens with a 5-stitch unit (skip 2, shell, skip 2), followed by 6-stitch repeats. That means each side needs 5 + (6 x n) stitches. Short sides: 5 + (6 x 19) = 119. Long sides: 5 + (6 x 58) = 353. The first and last stitches of each side are the Round 1 corner sc, which get skipped, so the shells meet neatly at each corner sc.
Final Blocking
- Weave in all remaining ends along the dc columns, where they won’t show against the light.
- Lay the panel flat on blocking mats, with the WS up so the roses keep their shape.
- Spray it evenly until it is damp but not dripping.
- Pin the four corners to 25.5 x 73.5 in (64.8 x 186.7 cm).
- Pin along each seam line every 4 in (10.2 cm) so the rows and columns run straight.
- Pin out the tip of every border shell.
- Turn the panel RS up and gently lift each rose layer with your fingertips.
- Let it dry completely, which usually takes 24 hours, before you unpin it.
Final Quality-Control Checklist
- Every square has 39 dc per side and measures 8 in (20.3 cm).
- All roses show three separate layers of petals, and the outer tips are caught down.
- Seams are flat and the same tension as the dc.
- The roses line up in straight rows and columns.
- Border Round 1 has 119 sc on the short sides and 353 sc on the long sides.
- The shell count is 20 on each short side and 59 on each long side.
- The panel measures 25.5 x 73.5 in (64.8 x 186.7 cm).
- All ends are secured and trimmed.
Troubleshooting
Roses flatten or flop forward: You may be working into the front of the stitches. Work every BPsc from behind so each layer sits behind the one before.
Square cups or ruffles: Your ch-5 loops are too long or too short. Make one test square and adjust your chain tension before changing hooks.
Square edges don’t count 39: Check Round 13. Each side needs exactly 4 dc in each of its 6 loops and 1 dc in each of its 5 sc.
Panel leans into a parallelogram: Pin it square during blocking, and check that every seam started in a corner sp.
Border waves: Round 1 has too many stitches. Count again, and make sure you added nothing at the seams.
Shells don’t meet at corners: Recount Round 1. Each side must equal 5 + (6 x n).
Care
Hand wash in cool water with a mild detergent, then roll the panel in a towel to remove water. Lay it flat to dry and re-pin it if needed. Long sun exposure may slowly fade the pink, so turn or swap panels each season.
Final Notes
The whole panel depends on one number: 39 dc per side. With a gauge of 19.5 dc = 4 in (10.2 cm), each square is 8 in (20.3 cm). Join them 3 wide by 9 tall to get 117 by 351 dc and 24 x 72 in (61.0 x 182.9 cm). Border Round 1 adds 2 corner sc per side, for 119 and 353 sc. Both counts fit the 5 + (6 x n) shell repeat, and the finished panel measures 25.5 x 73.5 in (64.8 x 186.7 cm). If you check your first square at every checkpoint, the rest of the panel will follow.
Happy crocheting!