

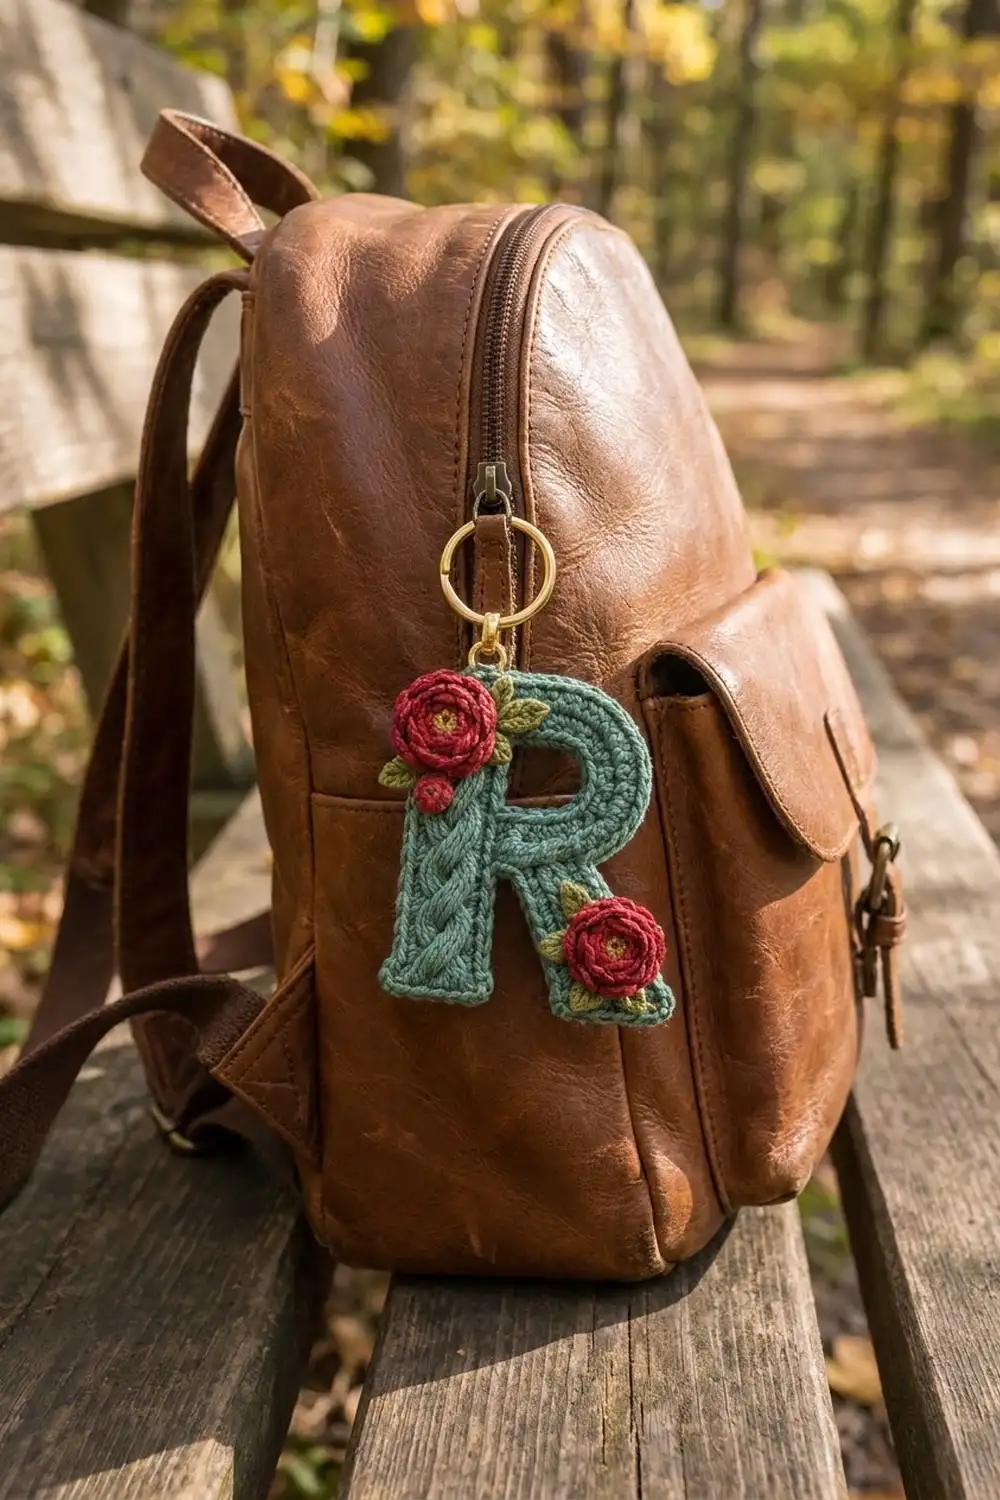
This is a single-piece letter R keychain in soft sage-teal green. A twisted rope cable runs up the stem, and a raised slip-stitch outline frames the whole letter. Two deep red layered roses with yellow-green centers, a small red berry, and olive green leaves are sewn on top. A gold jump ring and key ring finish it as a charm.
The style is vintage and romantic, with a little cottage-garden feeling. It works as a bag charm, a monogram gift, or a keychain. The pattern uses US crochet terms throughout.
The finished letter measures 4.5 in (11.4 cm) tall and 3.5 in (8.9 cm) wide, not counting the hardware.
The construction is simple to follow. You work the stem in rows from the bottom up, with front-post cables. The bowl of the R is a chain arc anchored to the stem and built out in two rows. You work the leg down from the bowl and slant it with paired shaping. One border round and one slip-stitch round outline the letter. Last, you make the roses, berry, and leaves separately and sew them on.
Finished Size and Construction
- Finished size: 4.5 in (11.4 cm) tall x 3.5 in (8.9 cm) wide
- Skill level: Intermediate (post stitches, working into row-ends)
- Terminology: US crochet terms
- Yarn weight: DK / light worsted (#3) cotton
- Hook: 3.25 mm (US D/3)
- Number of pieces: 1 letter, plus 2 roses, 1 berry and 6 leaves as appliqués
- Layout: One letter R; one rose at the upper left, a berry below it, and one rose on the lower leg
- Piece size before border: 4.0 in (10.2 cm) tall x 3.0 in (7.6 cm) wide
- Border depth: 0.25 in (0.6 cm) on every edge
Materials
Use a smooth mercerized cotton or cotton blend in DK weight. Cotton gives clear cable definition and holds a crisp edge on a keychain. Avoid fuzzy yarns, which blur the cable.
- Sage-teal green (main color, MC): 12 g, about 28 m
- Deep red (roses and berry): 5 g, about 12 m
- Olive green (leaves): 2 g, about 5 m
- Yellow-green (rose centers): 1 g, about 2 m
These quantities include a margin for gauge testing and sewing tails.
Tools:
- 3.25 mm (US D/3) crochet hook
- Tapestry needle
- Gold jump ring, 8 mm
- Gold split key ring, 1 in (2.5 cm)
- Two pairs of flat-nose pliers
- Rust-proof pins and a blocking mat
- Small scraps of yarn or fiberfill for the berry
Abbreviations (US Terms)
- ch – chain
- sl st – slip stitch
- sc – single crochet
- hdc – half double crochet
- dc – double crochet
- st(s) – stitch(es)
- BLO / FLO – back loop only / front loop only
- hdc2tog – (yarn over, insert hook in next st, pull up a loop) twice, yarn over, pull through all 5 loops
- sc2tog – (insert hook in next st, pull up a loop) twice, yarn over, pull through all 3 loops
- fpdc – front post double crochet: work a dc around the post of the st, inserting the hook from the front
- fptr – front post treble crochet: yarn over twice, then work around the post from the front
Special stitch, Cable Cross (CC): Skip the next 2 post sts. Work 1 fptr around each of the next 2 post sts. Then, working in front of the 2 sts you just made, work 1 fptr around each of the 2 skipped post sts. (4 sts)
Post stitch rule: On RS rows after Row 2, work every post st around the post st 2 rows below. Skip the WS hdc behind each post st, so the stitch count stays the same.
Gauge and Checkpoints
- Hdc gauge: 20 sts x 16 rows = 4 in (10.2 cm), which is 5 sts and 4 rows per inch
- Border gauge: 6 sc per 1 in (2.5 cm)
Test one piece first. Work the stem alone (Rows 1–16) and measure it before you add the bowl. The stem is your gauge swatch.
Checkpoints:
- After stem Row 8: 2.0 in (5.1 cm) tall.
- After stem Row 16: 4.0 in (10.2 cm) tall x 1.6 in (4.1 cm) wide.
- After the bowl: 3.0 in (7.6 cm) total width.
- After the leg: 4.0 in (10.2 cm) tall x 3.0 in (7.6 cm) wide.
- After the border: 4.5 in (11.4 cm) x 3.5 in (8.9 cm).
If your stem comes out too big, go down 0.25 mm in hook size. If it is too small, go up 0.25 mm. Height errors matter most, because the bowl and leg are anchored to specific stem rows.
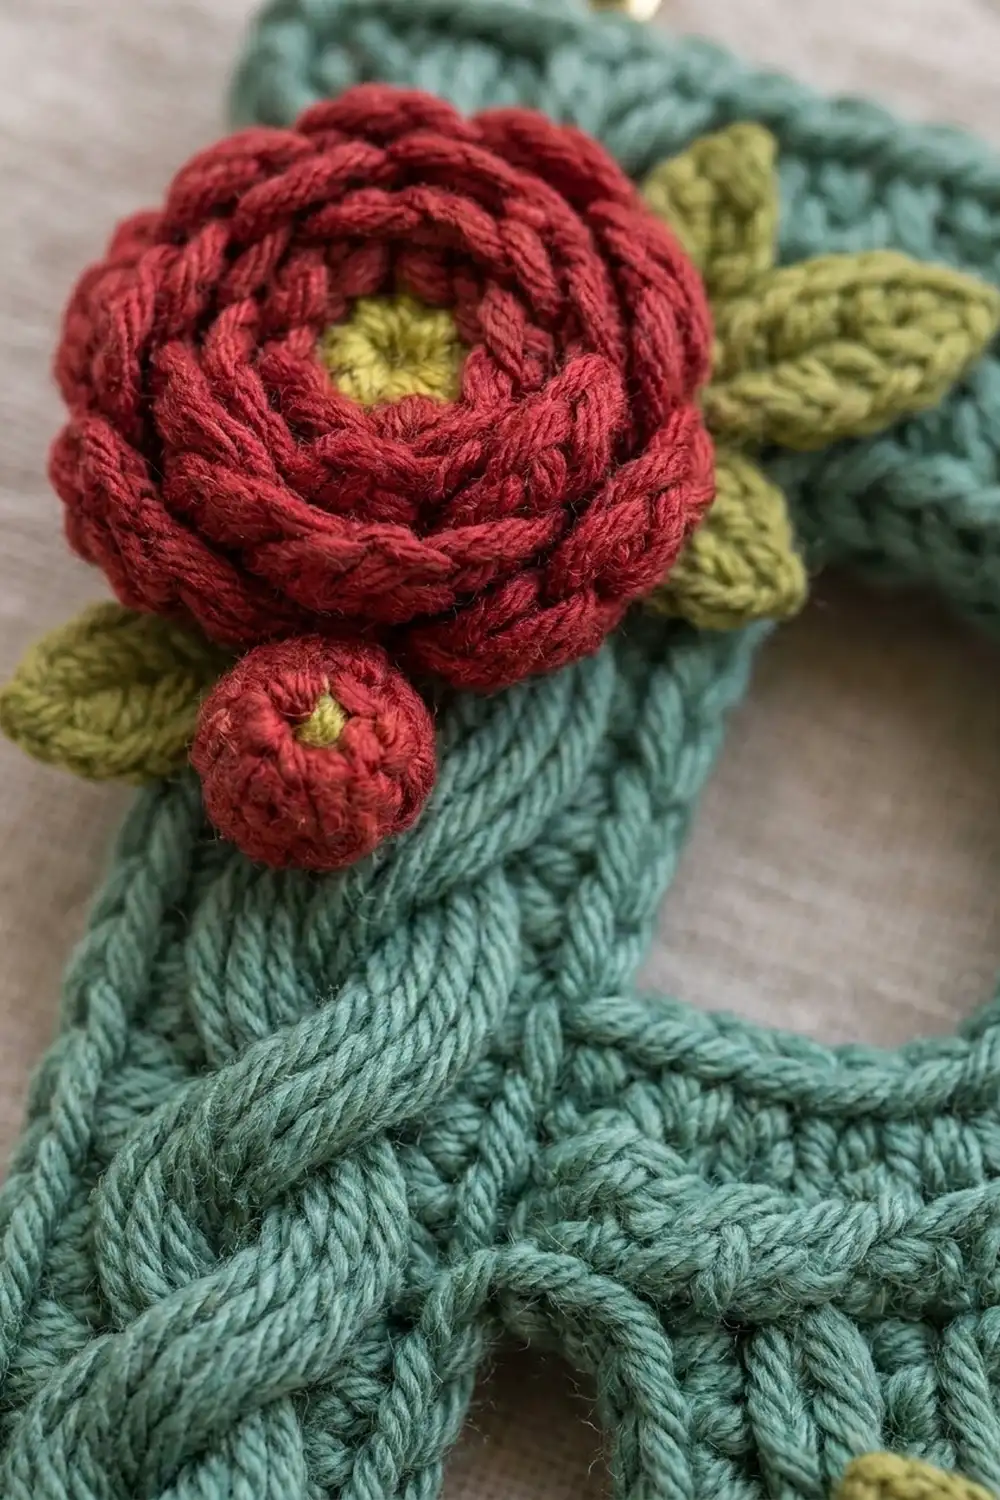
Stem (Cable Column)
With MC, ch 10.
Row 1 (WS): Hdc in 3rd ch from hook and in each ch across. The beginning ch-2 does not count. (8 hdc) Ch 1, turn. The turning ch-1 does not count on any row.
Row 2 (RS): Hdc in first 2 sts, fpdc around each of next 4 sts, hdc in last 2 sts. (8 sts)
Row 3 and all WS rows: Hdc in each st across. (8 sts)
Row 4 (RS): Hdc in first 2 sts, CC over next 4 post sts, hdc in last 2 sts. (8 sts)
Row 6 (RS): Hdc in first 2 sts, fpdc around each of next 4 post sts, hdc in last 2 sts. (8 sts)
Row 8 (RS): Repeat Row 4. (8 sts)
Rows 9–16: Repeat Rows 5–8 twice. The crosses fall on Rows 4, 8, 12 and 16. (8 sts every row)
Fasten off. The stem is 4.0 in (10.2 cm) tall and 1.6 in (4.1 cm) wide. The rope cable sits in the center 4 sts, with 2 plain hdc on each side.
Bowl
Hold the stem with the RS facing you and the foundation edge at the bottom. All bowl and leg work happens along the right edge.
Foundation: Join MC with a sl st in the right row-end of Row 14. Ch 12. Sl st in the right row-end of Row 10. The chain forms an arc of about 2.2 in (5.6 cm). Sl st in the right row-end of Row 9, ch 1, turn.
Row 1: Working into the chain arc, hdc in each of first 3 ch, 2 hdc in each of next 6 ch, hdc in each of last 3 ch. (18 hdc) Sl st in the right row-end of Row 15, then in the right row-end of Row 16. Ch 1, turn.
Row 2: Hdc in first 3 sts, (2 hdc in next st, hdc in next 2 sts) 4 times, hdc in last 3 sts. (22 hdc) Sl st in the right row-end of Row 8. Fasten off.
The counter (the hole of the R) is 1.0 in (2.5 cm) tall, between stem Rows 10 and 14. The bowl band is 0.5 in (1.3 cm) deep. The bowl reaches 1.4 in (3.6 cm) past the stem, so the total width is 3.0 in (7.6 cm). The top of the bowl is level with the top of the stem, and the bottom of the bowl is level with Row 8.
Leg
Number the sts of Bowl Row 2 backward from its last st (the one beside the stem), so that last st is st 1.
Row 1: With the RS facing, join MC in st 8. Ch 1, then hdc in sts 8, 7, 6, 5 and 4. (5 hdc) Sts 1–3 stay free and form the notch between the stem and the leg. Ch 1, turn.
Row 2 (inner edge to outer edge): Hdc2tog, hdc in next 2 sts, 2 hdc in last st. (5 sts)
Row 3: Hdc in each st. (5 sts)
Rows 4–8: Repeat Rows 2–3 twice, then work Row 2 once more. (5 sts every row)
Fasten off. The leg is 1.0 in (2.5 cm) wide and 8 rows, or 2.0 in (5.1 cm), long. The four shaping rows move it 0.8 in (2.0 cm) outward, so it slants to the lower right. Its bottom edge is level with the bottom of the stem, and its outer edge lines up with the right edge of the bowl.
Checkpoint: 4.0 in (10.2 cm) tall x 3.0 in (7.6 cm) wide.
Border
Border gauge: 6 sc per inch. Hdc row-ends are 4 per inch, so working 3 sc for every 2 row-ends gives 6 per inch. On row-end edges, alternate 1 sc in one row-end and 2 sc in the next, starting and ending with 1 sc. On stitch edges, work 1 sc in each st. Work 3 sc at each outer corner, and add nothing at inner corners.
Round 1: With the RS facing, join MC at the bottom-left corner of the stem. Work counterclockwise:
| Segment | Edge | Sc count |
|---|---|---|
| 1 | Stem bottom (8 sts): 3 sc in first, sc in next 6, 3 sc in last | 12 |
| 2 | Stem right edge, Rows 1–7 (7 row-ends: 1, 2, 1, 2, 1, 2, 1) | 10 |
| 3 | Bowl Row 2, free sts 3–1 (inner notch) | 3 |
| 4 | Leg inner edge (8 row-ends) | 12 |
| 5 | Leg bottom (5 sts): 3 sc in first, sc in next 3, 3 sc in last | 9 |
| 6 | Leg outer edge (8 row-ends) | 12 |
| 7 | Bowl Row 2, free sts 9–22 | 14 |
| 8 | Stem top (8 sts): sc in first 7, 3 sc in last | 10 |
| 9 | Stem left edge (16 row-ends) | 24 |
Total: 12 + 10 + 3 + 12 + 9 + 12 + 14 + 10 + 24 = 106 sc. Sl st to first sc.
Round 2: Sl st in BLO of each sc around. (106 sl sts) Fasten off. This round makes the raised rolled outline.
Counter edging: Join MC inside the hole. Sc in the underside of each of the 12 arc ch, then work 2 sc in Row 11, 1 sc in Row 12 and 2 sc in Row 13. (17 sc) Sl st to first sc. Next round: sl st in BLO of each sc around. (17 sl sts) Fasten off.
Why the math works: The stem’s left edge gets 24 sc over 4.0 in (10.2 cm), exactly 6 per inch. Each segment count already includes its own corner sts, and each corner is counted only once. The 2 rounds add 0.25 in (0.6 cm) on every side. That gives 4.0 + 0.5 = 4.5 in (11.4 cm) tall and 3.0 + 0.5 = 3.5 in (8.9 cm) wide.
Roses (Make 2)
Rnd 1: With yellow-green, make a magic ring and work 6 sc in the ring. Join and fasten off. (6 sts)
Rnd 2: Join red in any st. 2 sc in each st. (12 sts)
Rnd 3 (petals, FLO): *(Sc, hdc) in next st, (hdc, sc) in next st; repeat from * 6 times. (6 petals, 24 sts)
Rnd 4 (base, BLO of Rnd 2): Fold the petals forward. (Sc in next st, 2 sc in next st) 6 times. (18 sts)
Rnd 5 (petals, FLO): *Sc in next st, (hdc, dc) in next st, (dc, hdc) in next st; repeat from * 6 times. (6 petals, 30 sts)
Rnd 6 (base, BLO of Rnd 4): (Sc in next 2 sts, 2 sc in next st) 6 times. (24 sts)
Rnd 7 (petals, FLO): *Sc in next st, (hdc, dc) in next st, (dc, hdc) in next st, sc in next st; repeat from * 6 times. (6 petals, 36 sts)
Fasten off and leave a 10 in (25.4 cm) tail. Each rose is about 1.1 in (2.8 cm) across, with three cupped layers of petals.
Berry (Make 1)
With red. Rnd 1: Magic ring, 6 sc. Rnd 2: 2 sc in each st. (12) Rnd 3: Sc in each st. (12) Rnd 4: Sc2tog 6 times. (6) Stuff firmly with scraps, close the hole and leave a tail. The berry is 0.5 in (1.3 cm) across.
Leaves (Make 6)
With olive green, ch 6. Sc in 2nd ch from hook, hdc in next ch, dc in next ch, hdc in next ch, sc in last ch. Ch 1. Working along the other side of the chain: sc, hdc, dc, hdc, sc. Sl st to first sc. (10 sts plus the tip ch) Each leaf is 0.8 in (2.0 cm) long.
Assembly of Appliqués
Block the letter first (see below), then sew.
- Top rose: Center it over the top-left corner of the stem so it slightly overlaps the outline. Tuck one leaf under its upper right, one at its left and one at its lower right.
- Berry: Sew it just below the top rose, on the stem cable.
- Lower rose: Center it on the lower half of the leg. Tuck leaves at its upper left, left and lower right.
- Sew through the back loops of the letter only, so no stitches show on the back.
- Open the 8 mm jump ring with two pairs of pliers. Pass it through 2 border sts at the top-left corner of the stem. Add the split key ring and close the jump ring fully.
Final Blocking
- Wet the letter, before adding the appliqués, in cool water. Press out the water with a towel.
- Lay it RS up on a blocking mat.
- Pin the four outer corners of the stem first, to 4.5 in (11.4 cm) tall.
- Pin the bowl curve and the leg tip so the overall width is 3.5 in (8.9 cm).
- Pin the counter so the hole stays open and rounded.
- Gently lift the cable with your fingertips so it stands out.
- Let it dry fully, at least 12 hours. Then sew on the appliqués.
Final Quality-Control Checklist
- The letter measures 4.5 in (11.4 cm) x 3.5 in (8.9 cm).
- All cable crosses lean the same way, at Rows 4, 8, 12 and 16.
- Border Round 1 has 106 sc, and the counter edging has 17 sc.
- The stem bottom and leg bottom sit on one straight line.
- The counter is open and about 1.0 in (2.5 cm) tall.
- The roses are about 1.1 in (2.8 cm) wide, with 3 petal layers.
- The jump ring is fully closed with no gap.
- All tails are woven in and trimmed.
Troubleshooting
- Cable looks flat: Use fptr on cross rows and pull up generous loops.
- Stem leans sideways: You probably worked into the hdc behind a post st. Recheck the 8-st count on every row.
- Bowl ruffles: Your tension on Row 2 is loose. Block it firmly, or go down a hook size for the bowl only.
- Bowl cups: Work the increases a little looser, or add 1 more increase in the middle of Row 2.
- Leg tilts too far: Make sure the shaping falls only on even rows.
- Border waves: Recheck the 1-2-1-2 pattern on the row-ends. Too many sc cause waves.
- Rose petals look flat: Fold each petal layer forward firmly before working the next base round.
Care
Hand wash in cool water and lay flat to dry. Don’t tumble dry, and dry the metal hardware right away to keep the gold finish bright.
Final Notes
The measurement chain is short. The stem sets your gauge at 4.0 in (10.2 cm) tall and 1.6 in (4.1 cm) wide. The bowl adds 1.4 in (3.6 cm), for a width of 3.0 in (7.6 cm). The leg ends level with the stem bottom. The border adds 0.25 in (0.6 cm) all around, bringing the letter to 4.5 in (11.4 cm) x 3.5 in (8.9 cm). If you check each stage, the roses and berry will sit exactly where they should.
Happy crocheting!