

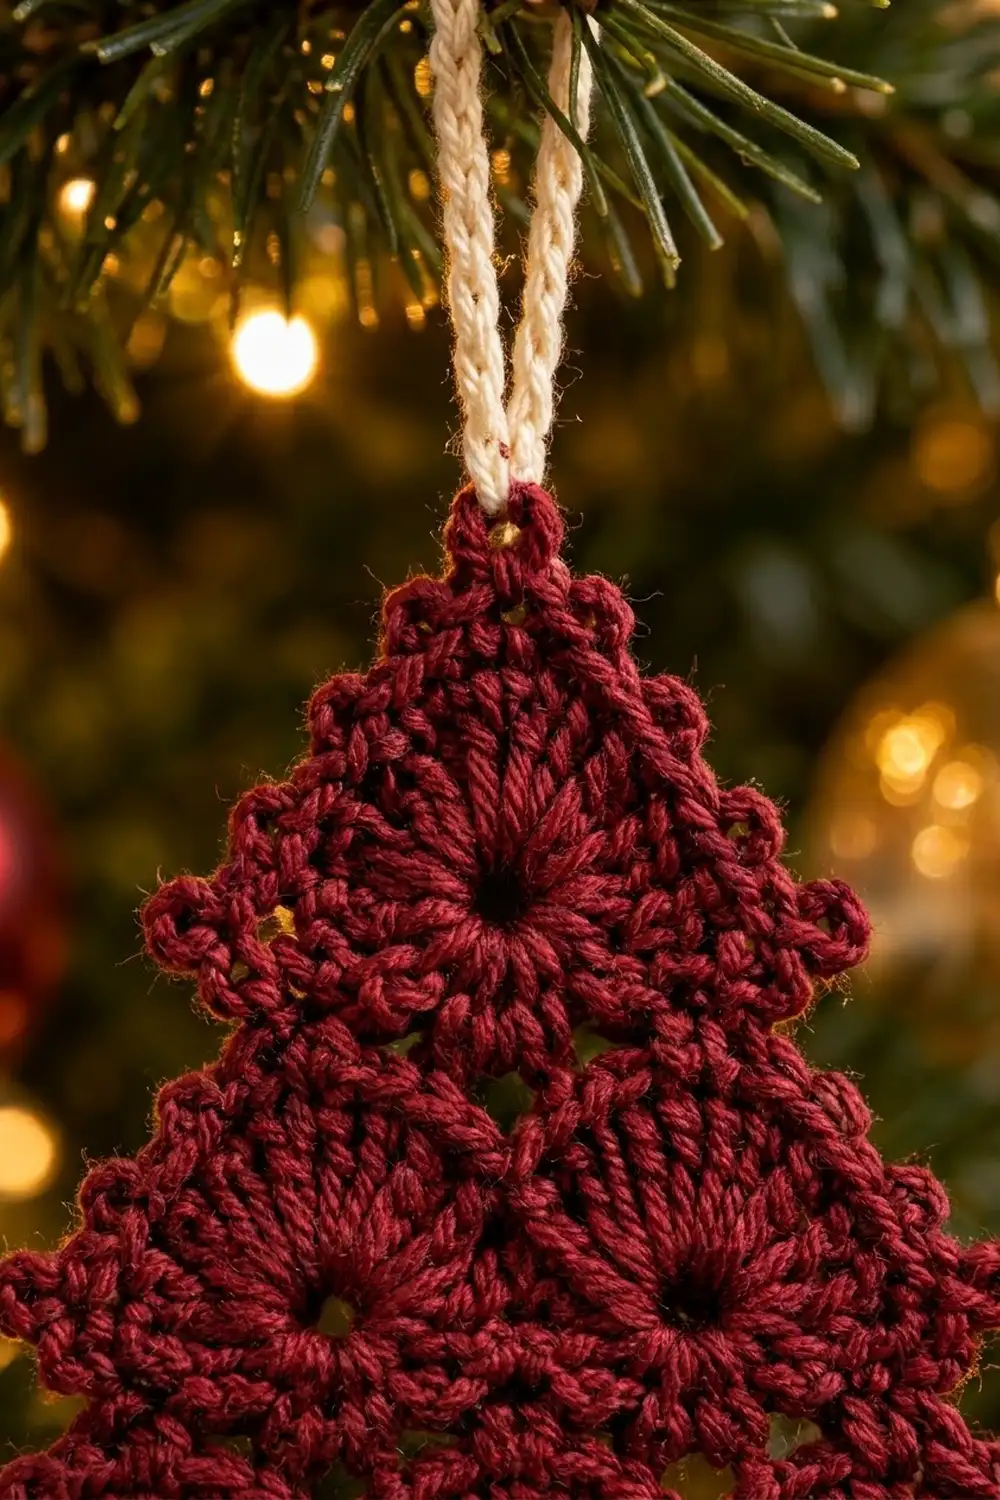
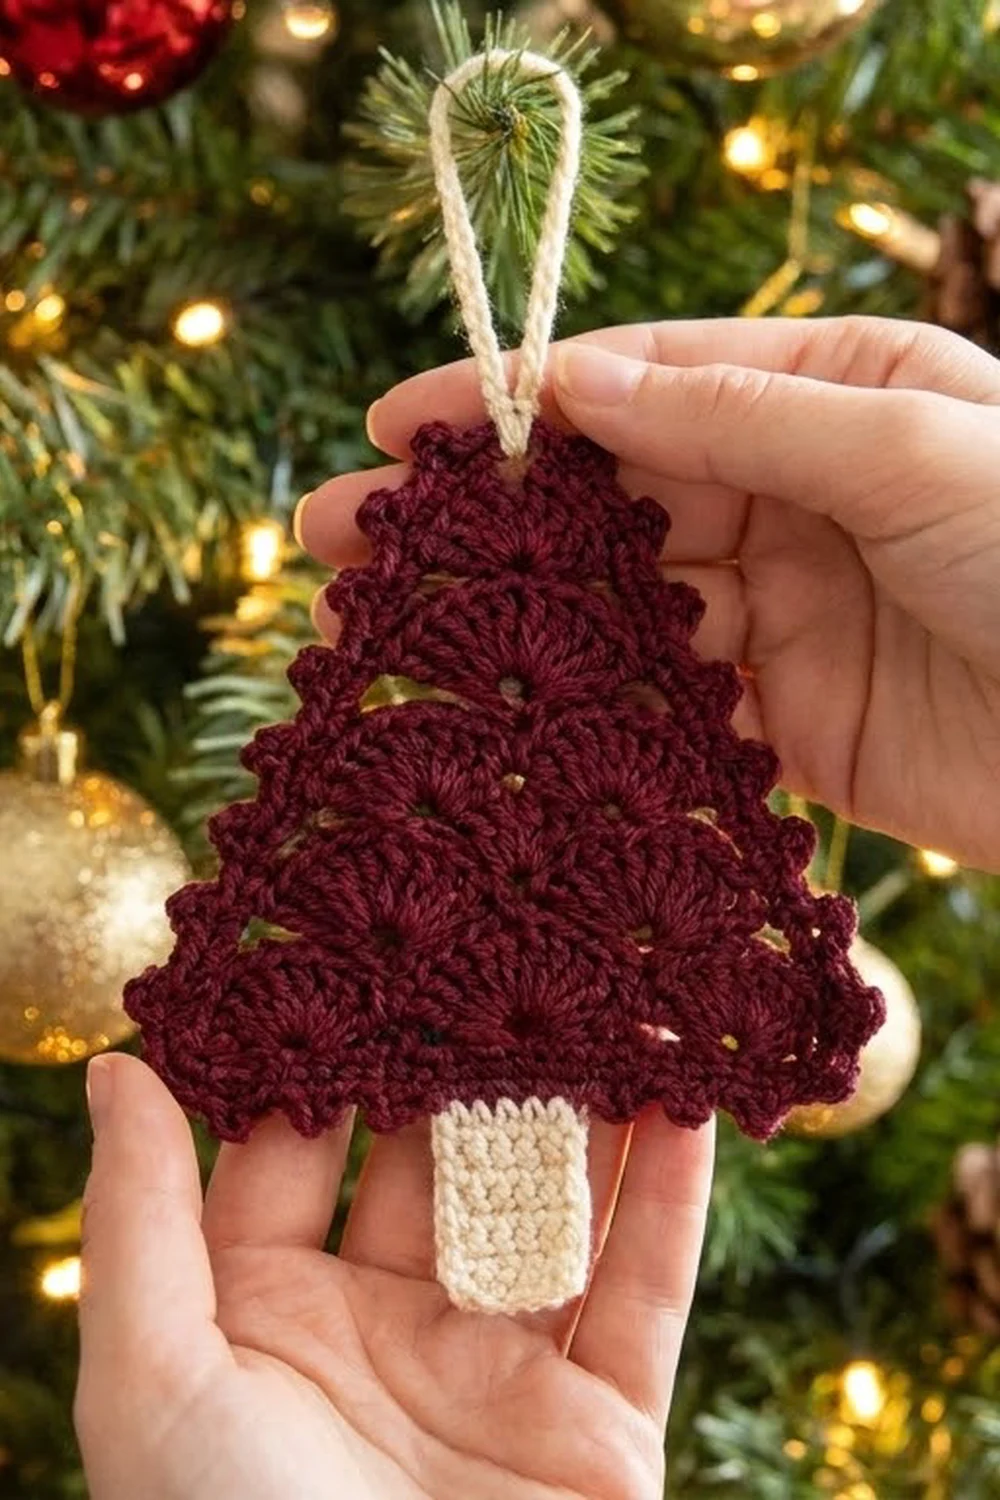
This little tree ornament is made from six sunburst fans stacked into a neat triangle. Three fans sit across the bottom, two nest in the valleys above them, and a single fan finishes the top. A small picot edge outlines the shape, a cream trunk hangs below, and a cream chain loop at the tip lets it hang from a branch.
The palette is classic and cozy: deep burgundy for the tree and soft cream for the trunk and hanging loop. Fingering-weight mercerized cotton gives crisp stitch definition, so each fan shows its spokes and its small eyelet at the base.
The pattern uses US crochet terms. The finished tree body measures 4.0 in (10.2 cm) wide and 3.0 in (7.6 cm) tall. With the trunk, the ornament is 3.8 in (9.7 cm) tall, not counting the 1.6 in (4.1 cm) hanging loop.
The tree is worked flat in rows from the bottom up. Each tier is one fan row followed by one leveling row, and every new tier starts 4 stitches in from each edge to form the slope. A two-round border goes around the triangle. Then the trunk is worked straight down from the bottom edge and the loop is chained at the tip. Everything is one connected piece.
Finished Size and Construction
- Finished size (tree body): 4.0 in wide x 3.0 in tall (10.2 x 7.6 cm)
- Overall height with trunk: 3.8 in (9.7 cm), plus a 1.6 in (4.1 cm) loop
- Skill level: Easy-intermediate
- Terminology: US crochet terms
- Yarn weight: Fingering (#1 super fine) mercerized cotton
- Hook: 2.75 mm (US C-2)
- Number of pieces: 1 (single ornament, no joining)
- Layout: 3 fan tiers (3 fans, 2 fans, 1 fan) plus a pointed tip row
- Piece size before border: 3.6 in wide x 2.6 in tall (9.1 x 6.6 cm)
- Border depth: 0.2 in (0.5 cm) per edge across 2 rounds
- Trunk: 1.0 in wide x 0.9 in tall (2.5 x 2.3 cm)
Materials
Pick a smooth, mercerized cotton of about 170 m (186 yd) per 50 g. Mercerized cotton holds the fan shapes, blocks flat, and doesn’t fuzz on the tree. Avoid fluffy or brushed yarns because they hide the eyelets.
- Burgundy (tree and border): 8 g, about 27 m (30 yd)
- Cream (trunk and loop): 3 g, about 10 m (11 yd)
All yarn quantities already include a safety margin of about 25%.
Tools:
- 2.75 mm (US C-2) crochet hook
- Tapestry needle
- Scissors
- 2 locking stitch markers
- Rust-proof pins and a foam blocking board
- Spray bottle with clean water
- Optional: fabric stiffener for an extra-crisp ornament
Abbreviations (US Terms)
- ch – chain
- sl st – slip stitch
- sc – single crochet
- hdc – half double crochet
- dc – double crochet
- tr – treble crochet
- dtr – double treble crochet: yarn over 3 times, insert hook, pull up a loop, [yarn over, pull through 2 loops] 4 times
- sk – skip
- st(s) – stitch(es)
- sp – space
- FLO / BLO – front loop only / back loop only
- RS / WS – right side / wrong side
Special stitches:
- Fan: 7 dtr worked in the same stitch. The 7 dtr spread the base stitch open into the small eyelet that sits at the bottom of each sunburst.
- Picot: ch 3, sl st in the 3rd ch from the hook.
- Leveling set: worked across the 7 dtr of one fan as tr, dc, hdc, sc, hdc, dc, tr (7 sts). It fills the curve of the fan so the top of the row comes out flat.
Gauge and Checkpoints
Gauge: 14 sc and 16 sc rows = 2 in (5.1 cm) with a 2.75 mm hook.
Make this one ornament as your test piece. It is small enough to check early and adjust. Measure after each stage, laying the piece flat without stretching:
- Row 1: 25 sc = 3.6 in (9.1 cm) wide
- After Row 3: 3.6 in (9.1 cm) wide, 0.8 in (2.0 cm) tall
- After Row 5: top edge 2.4 in (6.1 cm) wide, total height 1.5 in (3.8 cm)
- After Row 7: top edge 1.3 in (3.3 cm) wide, total height 2.2 in (5.6 cm)
- After Row 8: 2.6 in (6.6 cm) tall at the tip
- After Border Round 1: 3.8 in (9.7 cm) wide, 2.8 in (7.1 cm) tall
- After Border Round 2: 4.0 in (10.2 cm) wide, 3.0 in (7.6 cm) tall
If Row 1 measures more than 3.75 in (9.5 cm), go down to a 2.5 mm hook. If it measures less than 3.4 in (8.6 cm), go up to a 3.0 mm hook. Fans that cup or ruffle mean your dtr are too loose compared with your sc. Pull each loop up evenly and keep the yarn-overs snug.
Tree Body
Use Burgundy. Rows are worked flat. Even-numbered rows are RS rows.
Foundation: Ch 26.
Row 1 (WS): Sc in 2nd ch from hook and in each ch across. (25 sc)
Row 2 (RS, tier 1 fans): Ch 1, turn. Sc in first sc, [sk 3 sc, Fan in next sc, sk 3 sc, sc in next sc] 3 times. (4 sc + 21 dtr = 25 sts; 3 fans)
Check: each repeat uses 8 stitches of Row 1 (3 skipped, 1 fan base, 3 skipped, 1 sc), and 1 + (8 x 3) = 25.
Row 3 (WS, leveling): Ch 5 (counts as first dtr), turn. [Leveling set over the next 7 dtr, dtr in next sc] 3 times; the last dtr goes in the last sc. (1 + 3 x 8 = 25 sts)
The dtr stitches fill the valleys between the fans and at the edges. Stitch positions 9 and 17, counted from either edge, are now valley dtr. The next tier is centered on them.
Row 4 (RS, tier 2 fans): Turn. Sl st in each of first 5 sts. Ch 1, sc in same st as last sl st (position 5). [Sk 3 sts, Fan in next st, sk 3 sts, sc in next st] 2 times. Leave the last 4 sts unworked. (3 sc + 14 dtr = 17 sts; 2 fans)
The fans land on positions 9 and 17, right in the valleys of tier 1. That offset is what makes the stacked look.
Row 5 (WS, leveling): Ch 5 (counts as dtr), turn. [Leveling set over next 7 dtr, dtr in next sc] 2 times. (1 + 2 x 8 = 17 sts)
Row 6 (RS, tier 3 fan): Turn. Sl st in each of first 5 sts. Ch 1, sc in same st (position 5). Sk 3 sts, Fan in next st (position 9, the center valley dtr), sk 3 sts, sc in next st. Leave the last 4 sts unworked. (2 sc + 7 dtr = 9 sts; 1 fan)
Row 7 (WS, leveling): Ch 5 (counts as dtr), turn. Leveling set over next 7 dtr, dtr in last sc. (9 sts)
Row 8 (RS, tip): Turn. Sl st in first 2 sts. Ch 1, sc in same st (position 2), hdc in next st, dc in next st, (tr, ch 2, tr) in next st (position 5, the center), dc in next st, hdc in next st, sc in next st (position 8). Leave the last st unworked. (8 sts + 1 ch-2 tip sp)
Fasten off and weave in the ends.
Border
Border gauge: about 7 sc per 1 in (2.5 cm) along every edge, the same as the body gauge. If the edges ripple, you have too many stitches. If they pull in, you have too few.
Round 1 (Burgundy, sc outline)
With RS facing, join Burgundy in the free loop of the first foundation ch at the bottom-right corner.
Bottom: Ch 1, sc in the same ch and in each foundation ch across. (25 sc) Ch 1 for the bottom-left corner.
Left side: Work up the slope, placing sc as follows:
- 1 sc in the end of Row 1
- 1 sc in the end of Row 2
- 4 sc around the Row 3 edge dtr
- 4 sc across the 4 step stitches at the top of Row 3 (work into the sl sts on the side where you slipped across)
- 1 sc in the Row 4 end
- 4 sc around the Row 5 edge dtr
- 4 sc across the Row 5 step
- 1 sc in the Row 6 end
- 4 sc around the Row 7 edge dtr
- 1 sc in the 1 step st at the top of Row 7
- 1 sc in each of the sc, hdc, dc and tr of Row 8 (4 sc)
That is 29 sc. Tip: (sc, ch 2, sc) in the ch-2 tip sp. The first sc of this group ends the left side, so the side has 30 sc.
Right side: The second tip sc starts this side. Mirror the left side going down: 4 sc across Row 8, 1 sc in the step, 4 sc around Row 7, 1 sc in Row 6, 4 sc across the step, 4 sc around Row 5, 1 sc in Row 4, 4 sc across the step, 4 sc around Row 3, 1 sc in Row 2, 1 sc in Row 1. (30 sc) Ch 1 for the bottom-right corner. Sl st to the first sc.
Round 1 total: 25 + 30 + 30 = 85 sc, plus 3 corner spaces (two ch-1 sps and one ch-2 sp). The corner spaces are not counted in the side counts.
Round 2 (Burgundy, picot edge)
Ch 1. Work along the bottom first:
Bottom (25 sts): Sc in next 3 sts, picot, sc in next 3 sts, picot, sc in next 3 sts. Then sc in FLO of next 7 sts (the trunk will go in the back loops of these 7 sts). Then sc in next 3 sts, picot, sc in next 3 sts, picot, sc in next 3 sts. (25 sc, 4 picots)
Bottom-left corner: (sc, picot, sc) in ch-1 sp.
Left side (30 sts): Sc in next 3 sts, [picot, sc in next 3 sts] 9 times. (30 sc, 9 picots)
Tip: (sc, picot, sc) in ch-2 sp.
Right side: Repeat the left side. (30 sc, 9 picots)
Bottom-right corner: (sc, picot, sc) in ch-1 sp. Sl st to the first sc. Fasten off.
Round 2 total: 85 side sc + 6 corner sc = 91 sc and 25 picots.
Why the math works: each side has 30 stitches. Ten groups of 3 sc use all 30, and the 9 picots fall between the groups, so no picot ends up next to a corner picot. The bottom splits as 9 + 7 + 9 = 25. That leaves two groups of 3 with picots on each side of a smooth 7-stitch center, exactly where the 7-stitch trunk attaches.
Trunk
With RS facing and the tree upside down, join Cream in the back loop of the first of the 7 center bottom sts (bottom stitches 10–16).
Row 1: Ch 1, sc in BLO of same st and next 6 sts. (7 sc)
Rows 2–7: Ch 1, turn, sc in each st across. (7 sc)
Fasten off. The trunk measures 1.0 in (2.5 cm) wide and 0.9 in (2.3 cm) long.
Hanging Loop
Join Cream in the Round 1 tip ch-2 sp, working behind the tip picot. Ch 30, then sl st in the same sp to form the loop. Fasten off and weave the tails into the back of the top fan. The loop stands about 1.6 in (4.1 cm) above the tip.
Final Blocking
- Weave in all remaining ends along stitches of the same color.
- Mist the ornament with water until it is evenly damp, but not dripping.
- Lay it RS up on the foam board.
- Pin the three corners first: the bottom edge 4.0 in (10.2 cm) wide and the tip 3.0 in (7.6 cm) above the bottom edge.
- Pin the two slanted sides straight between the corners, then open each picot with one pin.
- Gently press each fan flat with your fingertips so the spokes radiate evenly and each eyelet is open.
- Pin the trunk straight and square, 1.0 x 0.9 in (2.5 x 2.3 cm).
- If you want, brush on fabric stiffener now.
- Let it dry completely before you unpin it.
Final Quality-Control Checklist
- Tree body measures 4.0 x 3.0 in (10.2 x 7.6 cm)
- Six fans: 3, 2, 1, with each upper fan centered over a valley
- Each fan has 7 dtr and a visible eyelet at its base
- Round 1 has 25 / 30 / 30 sc
- Round 2 has 25 picots and they are evenly spaced
- Trunk is 7 sc wide and centered under the tree
- Loop is centered on the tip and securely anchored
- No visible tails on the RS
Troubleshooting
Fans curl into cups: The dtr are too tight at the top. Loosen your yarn-overs slightly, or block firmly.
Tiers are off-center: You miscounted the sl sts at the start of Row 4 or Row 6. It must be exactly 5 sl sts, with the sc in the 5th stitch.
Leveling row is bumpy: Check that the leveling set goes in the correct order, tallest stitch at the outside: tr, dc, hdc, sc, hdc, dc, tr.
Slanted sides ripple: You put more than 30 sc on a side in Round 1. Recount against the list.
Trunk is off-center: Count to the 10th bottom stitch from the corner before you join.
Loop twists: Before you join the loop, check that the chain is not twisted.
Care
Hand wash in cool water with mild soap, press out water in a towel, and reshape flat to dry. Store flat or hang it so it doesn’t get crushed.
Final Notes
The measurement chain is simple. Gauge sets Row 1 at 3.6 in (9.1 cm). Three tiers bring the body to 2.6 in (6.6 cm) tall. Round 1 grows it to 3.8 x 2.8 in (9.7 x 7.1 cm), and Round 2 finishes the tree at 4.0 x 3.0 in (10.2 x 7.6 cm). A 0.9 in (2.3 cm) trunk brings the ornament to 3.8 in (9.7 cm) tall. If each checkpoint matches, the finished ornament will too.
Happy crocheting!