

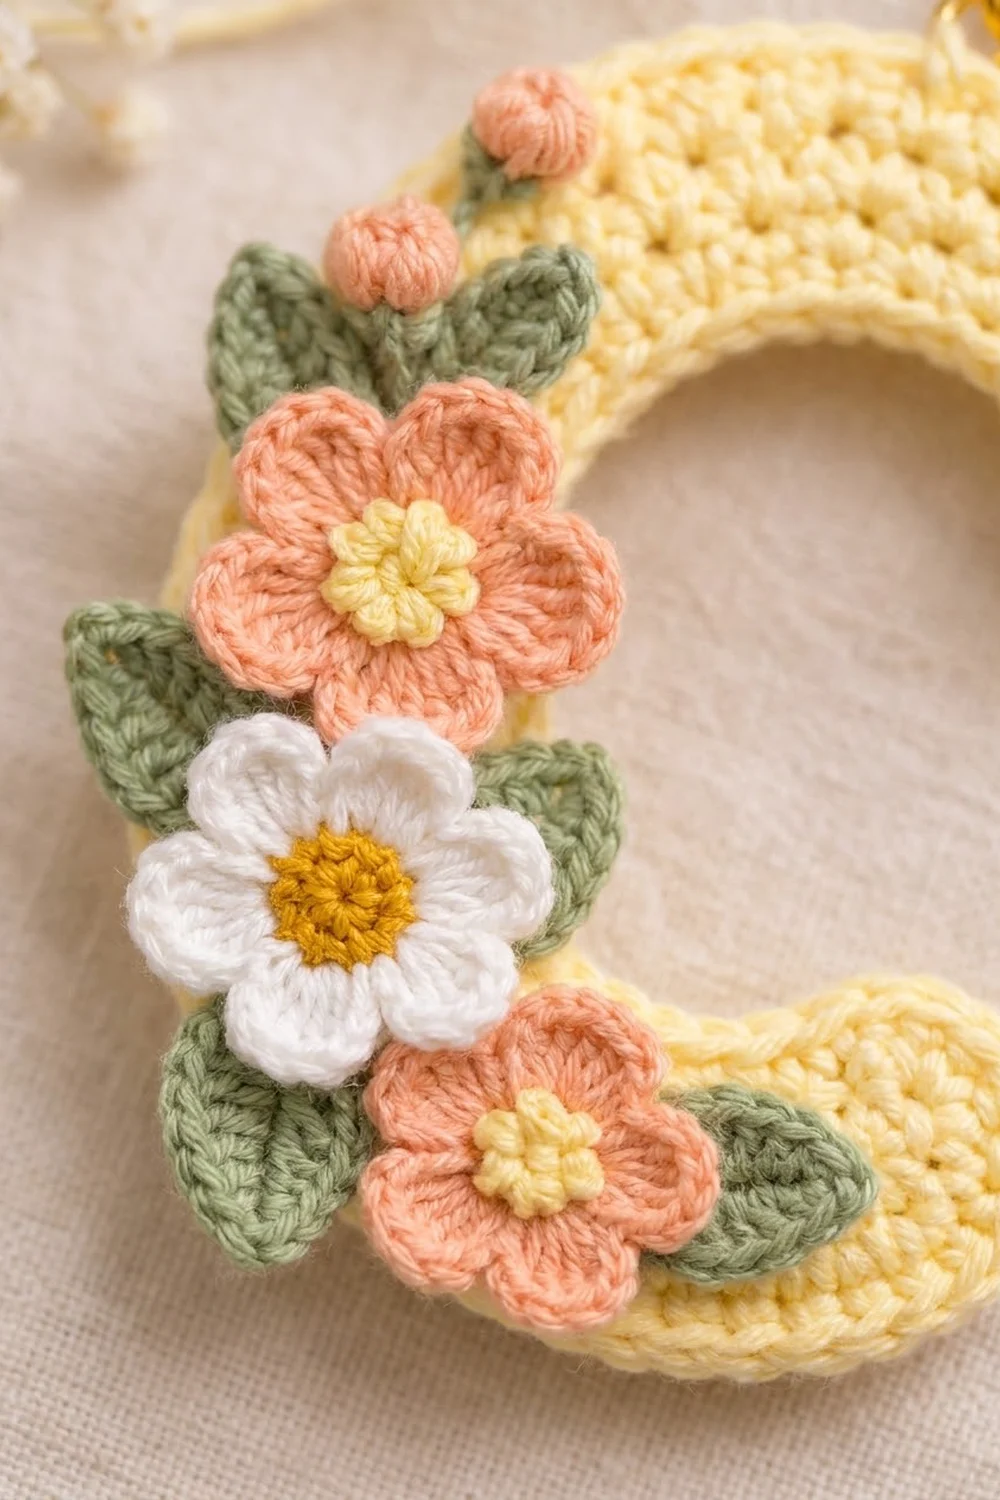
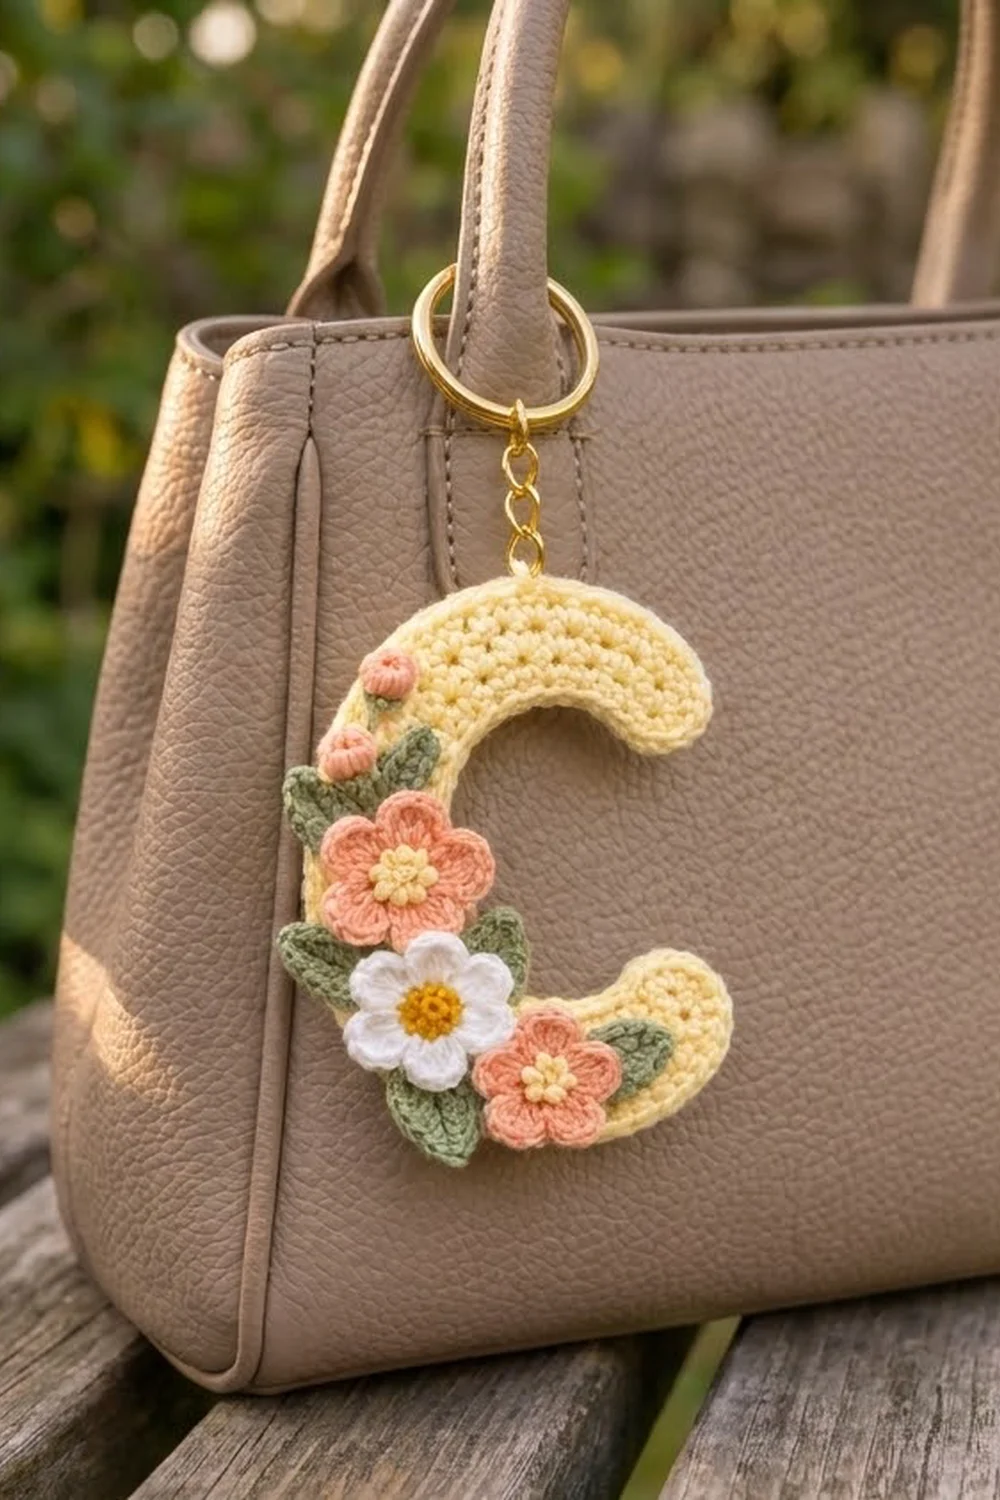
This little letter C keychain is a soft, cheerful way to carry an initial with you. The letter is worked in pale butter yellow and edged with a tidy outline round. A small cluster of flowers in peach, white, and sage green curls along its lower left side.
The style is sweet and cottage-inspired. It works nicely as a bag charm, a gift tag, or a party favor. The pattern uses US crochet terms throughout.
The finished charm measures about 3.5 in (8.9 cm) tall and 3 in (7.6 cm) wide, not counting the hardware. The stroke of the letter is about 1 in (2.5 cm) wide.
Construction is simple. You start with a foundation chain for the inner edge of the C, then work five rows of single crochet. Increases in each row make the strip curve into the letter shape. One outline round finishes the edge and rounds the ends. The buds, flowers, and leaves are made separately and sewn on, and the key ring goes on last.
Finished Size and Construction
- Finished size: about 3.5 in (8.9 cm) tall x 3 in (7.6 cm) wide
- Skill level: Easy / advanced beginner
- Terminology: US crochet terms
- Yarn weight: DK / light worsted (#3) cotton
- Hook: 2.75 mm (US C-2)
- Number of pieces: 1 letter body, plus 10 small appliqués (2 buds, 3 flowers, 5 leaves)
- Layout: single charm, flowers clustered along the lower left curve
- Letter size before border: about 3.25 in (8.3 cm) tall x 2.75 in (7.0 cm) wide, stroke 0.71 in (1.8 cm)
- Border depth: 1 round of sc, about 0.15 in (0.4 cm) on each edge
Materials
Use a smooth, mercerized or combed cotton in DK weight. Cotton holds its shape well and shows stitch definition clearly. Avoid fuzzy or very stretchy yarn, because the letter needs crisp edges.
- Butter yellow (main): 8 g / 18 m
- Peach: 3 g / 7 m
- Sage green: 3 g / 7 m
- White: 2 g / 5 m
- Golden yellow (daisy center): 1 g / 2 m
- The pale yellow centers of the peach flowers use the butter yellow main color.
These quantities include a small margin for gauge swatching and weaving in ends.
Tools:
- 2.75 mm (US C-2) crochet hook
- Tapestry needle
- 1 in (2.5 cm) gold split key ring
- Short gold chain, about 0.75 in (1.9 cm) long
- Gold jump ring, about 0.25 in (0.6 cm)
- 2 pairs of flat-nose pliers
- Stitch markers
- Rust-proof pins and a blocking board
- Spray bottle with water
- Optional: fabric stiffener
Abbreviations (US Terms)
- ch – chain
- sl st – slip stitch
- sc – single crochet
- hdc – half double crochet
- dc – double crochet
- inc – 2 sc in the same stitch
- sc2tog – single crochet 2 together
- MR – magic ring
- st(s) – stitch(es)
- RS – right side
Special stitch – Petal: (hdc, 2 dc, hdc) all in the same stitch. Used on the peach flowers.
Special stitch – Daisy Petal: (hdc, 3 dc, hdc) all in the same stitch. Used on the white daisy for a slightly rounder petal.
Gauge and Checkpoints
Gauge: 12 sc x 14 rows = 2 in (5.1 cm) in sc worked flat. That is 6 sc and 7 rows per 1 in (2.5 cm).
Gauge matters here because the curve of the C comes from the stitch math. If your stitches are larger, the letter will be larger and may look loose. If they are much tighter, the cotton can become stiff and hard to sew through.
Test one letter first before making a batch of initials. Check these points as you go:
- After Row 1: the strip of 20 sc should measure about 3.33 in (8.5 cm) long, held straight.
- After Row 3: the strip should be about 0.43 in (1.1 cm) wide and starting to curve.
- After Row 5: the stroke should be 0.71 in (1.8 cm) wide, and the outer edge should measure about 6 in (15.2 cm) along the curve.
- After the border: the letter should be about 3.5 in (8.9 cm) tall x 3 in (7.6 cm) wide, with a 1 in (2.5 cm) stroke.
If your piece is too big: go down to a 2.5 mm hook, or crochet a little more firmly.
If your piece is too small: go up to a 3 mm hook.
Don’t change the stitch counts to fix the size. The counts control the curve, so change the hook instead.
Letter C Body
Work in butter yellow. The turning ch 1 doesn’t count as a stitch.
Foundation: Ch 21.
Row 1: Sc in 2nd ch from hook and in each ch across, turn. (20 sc)
This row becomes the inner edge of the C. Leave a 6 in (15.2 cm) starting tail to weave in later.
Row 2 (growth row): Ch 1, sc in next 4 sts, inc in next st; repeat from * 3 more times, turn. (24 sc)*
Check: 4 repeats x 5 sts used = 20 sts. 4 repeats x 6 sts made = 24 sts.
Row 3 (growth row): Ch 1, sc in next 5 sts, inc in next st; repeat from * 3 more times, turn. (28 sc)*
Check: 4 x 6 sts used = 24. 4 x 7 sts made = 28.
Row 4 (growth row): Ch 1, sc in next 6 sts, inc in next st; repeat from * 3 more times, turn. (32 sc)*
Check: 4 x 7 sts used = 28. 4 x 8 sts made = 32.
Row 5 (growth row): Ch 1, sc in next 7 sts, inc in next st; repeat from * 3 more times. (36 sc)*
Check: 4 x 8 sts used = 32. 4 x 9 sts made = 36.
Don’t fasten off. Each row adds 4 sts, which makes every row longer than the one before it. This is what bends the strip into a C of about 267 degrees. Row 5 is the outer edge of the letter.
Tip for a smooth curve: place a stitch marker in each increase as you work. The increases should spread evenly along the strip. If two increases sit close together, the curve will kink at that spot.
Border
The border is one round of sc worked around all four edges of the strip: the outer edge, the first end, the inner edge, and the second end. The 3-sc corner groups round off the ends of the letter.
Border gauge: same as the body, 6 sc per 1 in (2.5 cm) along the long edges, and 1 sc per row end along the ends.
Border Round: Don’t turn. Ch 1, then work along the edges as follows:
- Outer edge (along Row 5): 3 sc in first st, sc in next 34 sts, 3 sc in last st. (40 sc) This is 36 sts worked 1 per stitch + 4 extra sts from the two corners.
- First end (along row ends): sc in the side of each of the 5 rows. (5 sc)
- Inner edge (along the foundation chain): working in the free loops of the foundation, 3 sc in first ch, sc in next 18 ch, 3 sc in last ch. (24 sc) This is 20 sts worked 1 per stitch + 4 extra sts from the two corners.
- Second end (along row ends): sc in the side of each of the 5 rows. (5 sc)
Join with sl st to the first sc. (74 sc)
Why the math works: you worked into 36 outer sts + 20 inner sts + 10 row ends = 66 sts, one each. The four corner groups add 2 extra sts each, so 4 x 2 = 8, and 66 + 8 = 74. That matches 40 + 5 + 24 + 5 = 74.
Each corner group is counted only once, inside the edge it belongs to. The ends have only 5 sc because the corner groups already cover the turns.
Fasten off with a 6 in (15.2 cm) tail and weave in all ends on the wrong side. The side facing you during the border round is the RS.
Buds (make 2)
With peach:
Rnd 1: 6 sc in MR, pull ring tight. (6 sc)
Rnd 2: sc2tog 3 times. (3 sc)
Fasten off with an 8 in (20.3 cm) tail. Push the starting tail inside to fill the bud, then use the long tail to gather the last 3 sts closed. Each bud is a tiny ball about 0.3 in (0.8 cm) across.
Peach Flowers (make 2)
Rnd 1: With butter yellow, 10 sc in MR, join with sl st to first sc. (10 sc) Fasten off.
Rnd 2: Join peach in any st. Petal in next st, sl st in next st; repeat from * 4 more times, ending with the last sl st at the join. (5 petals)*
Check: 5 repeats x 2 sts = 10 sts, which uses every st of Rnd 1.
Fasten off with a 10 in (25.4 cm) tail for sewing. Each flower is about 1 in (2.5 cm) across.
White Daisy (make 1)
Rnd 1: With golden yellow, 10 sc in MR, join with sl st to first sc. (10 sc) Fasten off.
Rnd 2: Join white in any st. Daisy Petal in next st, sl st in next st; repeat from * 4 more times. (5 petals)*
Fasten off with a 10 in (25.4 cm) tail. The daisy is about 1.1 in (2.8 cm) across.
Leaves (make 5)
With sage green:
Ch 8. Working in the 2nd ch from the hook: sc, hdc, dc, dc, hdc, sc. You have now used 6 ch. Work 3 sc in the last ch (the first ch you made) to turn the tip. Then work along the other side of the chain: sc, hdc, dc, dc, hdc, sc. Join with sl st to the first sc. (15 sts)
Check: 6 + 3 + 6 = 15. Fasten off with an 8 in (20.3 cm) tail. Each leaf is about 0.9 in (2.3 cm) long, with a pointed tip and a faint center line from the chain.
Assembly
Lay the letter flat, RS up, with the opening of the C facing right. Arrange all the pieces along the lower left curve before you sew anything:
- Place the 2 buds near the top of the left curve, one above the other.
- Tuck 2 leaves behind and beside the buds.
- Place the first peach flower on the middle left of the curve.
- Place the white daisy just below it, overlapping it slightly.
- Place the second peach flower to the lower right of the daisy, on the bottom curve.
- Tuck the last 3 leaves behind the flowers so their tips peek out.
Take a photo of your layout before sewing so you can rebuild it if pieces shift.
Sew the leaves first, using small whipstitches that go only through the back loops of the letter. Then sew the flowers over them, stitching around the center ring and catching the base of each petal. Sew the buds last. Weave all tails into the back.
Hardware: Find the 12th st of the 40-st outer border edge, counting from the corner at the upper end of the C. Open the jump ring sideways with two pliers, slide it through both strands of that border st, add the end link of the chain, and close it. Thread the other end of the chain onto the split key ring.
Final Blocking
- Lightly mist the letter with water until it is damp, not soaked.
- Lay it RS up on the blocking board.
- Gently shape the C so the curve is smooth and the ends are rounded.
- Pin around the outer and inner edges, about every 0.75 in (1.9 cm).
- Check the size: 3.5 in (8.9 cm) tall x 3 in (7.6 cm) wide.
- Let it dry completely, at least 4 hours.
- For a firmer charm, brush fabric stiffener on the back before it dries.
- Block the letter before you sew the flowers on, or keep the flowers dry while misting.
Final Quality-Control Checklist
- Rows 1–5 count 20, 24, 28, 32, and 36 sc.
- The border round counts 74 sc: 40 + 5 + 24 + 5.
- The letter lies flat, with no ruffle on the outer edge and no cupping.
- The stroke is about 1 in (2.5 cm) wide all the way around.
- Both ends are rounded and match each other.
- The 3 flowers, 2 buds, and 5 leaves are sewn on securely, with no stitches showing on the front.
- The jump ring is fully closed and goes through two strands.
- All ends are woven in on the back.
Troubleshooting
The C isn’t curved enough. Some increases may be missing. Recount each row against 24, 28, 32, and 36.
The outer edge ruffles. Your tension is looser on the later rows. Use a smaller hook for Rows 4–5, or block firmly.
The letter cups like a bowl. Your rows are too short for the increases. Check your row gauge, then steam lightly and pin flat.
The ends look square. Make sure you worked 3 sc in each corner st, and shape the ends with pins while blocking.
Gaps show along the ends. Insert the hook under two strands of each row end, not one.
The flowers flop forward. Add a few extra stitches through the base of each petal into the letter.
The ring pulls the border out of shape. Move the jump ring so it passes through two stitches instead of one.
Care
Hand wash in cool water with mild soap, press the water out in a towel, and dry flat. Remove the key ring before washing so the metal doesn’t rust or snag.
Final Notes
Here is how the measurements build up. The 20-sc foundation row gives a 3.33 in (8.5 cm) inner edge. Five growth rows build to 36 sc, with a 6 in (15.2 cm) outer edge and a stroke of 0.71 in (1.8 cm). The 74-sc border brings the stroke to 1 in (2.5 cm) and the letter to 3.5 in (8.9 cm) x 3 in (7.6 cm).
Check your gauge, count each row, and take your time arranging the flowers. On a piece this small, small adjustments make a big difference.
Happy crocheting!